Categories
Uncategorized

MakeShift Nerf (and Air Hockey)

MakeShift

Over at the museum we do these monthly maker nights called MakeShift where we do demos and hands-on, DIY activities in BAMspace, which is our in-museum makerspace. These are adult-only events… that we happen to hold in a children’s museum, at night, with alcohol.

Back in March we did a Nerf Night, and we did things like make our own darts, modified Nerf guns (to make them more powerful) and then had a Nerf War. People seemed to like it, so we decided not to skip doing a MakeShift in July, and instead punted and went with another Nerf War, and this time we just focused on running around like maniacs and shooting each other. It was a blast! (And yes, we will definitely do it again!)

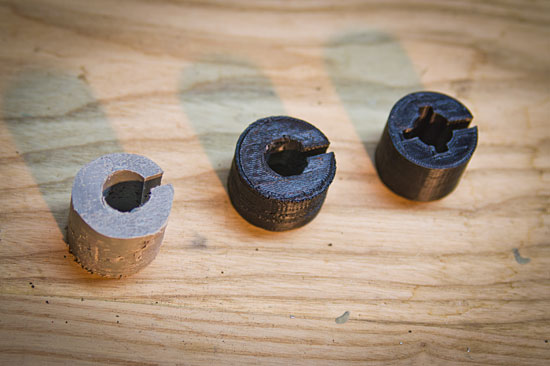
I wasn’t sure everyone would want to play with Nerf guns the entire time, so I 3D printed a few piece so we could play air hockey on one of our exhibits. Word Headquarters features these long skinny tables with jets of air that move tiles, and it seemed like all that was missing were a few paddles and pucks.

Puck

I grabbed a puck from Thingiverse and printed it scaled down just a bit. It moved great on the side that was printed on the glass, but the other side was not smooth enough, so I did a bit of sanding to help things out.

Paddles

I then printed some paddles from Thingiverse to knock the puck around with. Again, they were scaled down to match the size of the table.

Air Hockey

Here’s the pieces. I made a set for each of the two air tables in the exhibit. Below you can see a few visitors taking a break from shooting each other to play a game of air hockey. I’ve left the parts in BAMspace in case you’re ever at the museum and feel like a quick game of air hockey.

Air Hockey

Oh, and if you want to see a ton more photos of the Nerf War action, check out John McGeen’s blog post MakeShift: Nerf Night II.

Categories
Uncategorized

HDPE Brownies

HDPE Brownies

I’m calling these “HDPE Brownies” because I find it slightly amusing. Here’s what’s going on: I’m taking HDPE scrap and putting it in an 8″x8″ glass baking pan (a brownie pan) and popping it in the toaster over at about 270° F for a bit, them smashing it down and repeating the process.

So why am I doing this? Well, at the museum we sometimes mill sheets of HDPE for exhibits, and it creates a lot of chips/sawdust, and I gathered it up remembering that I’ve seem some people heat up HDPE and press it into a mold. Oh, and check out this video for lots more info on melting HDPE.

HDPE Slab

Once I got a full pan I took it out and cut off the sloped sides on the band saw to create a (mostly) squared-off slab. There are some air bubbles and what not, but for a first attempt, it’s pretty good. And what am I going to do with this stuff? I’d like to mill it using a CNC machine, probably a Shapeoko2 to start with. The HDPE cuts well, and shapes well, similar to working with wood. You can sand it, and whittle it too.

HDPE Slab

The white you see is from milk jugs and cat litter jugs, and the yellow and blue are from laundry soap jugs. All the black and pinkish-red are the sawdust bits from the milling of HDPE slabs we purchased. I think the sawdust bits caused more air bubbles than the cut up jugs, but more experimentation is needed.

Besides milling this piece, my plan is to keep collecting HDPE by gathering old jugs and cutting them up and making more blocks. Just making more of these should help me refine the process and work out the bugs, or the bubbles, as it were.

Categories
Uncategorized

Button Guard

Button Guard

While plenty of people tend to print baubles and trinkets with 3D printers, I tend to focus on solving problems by designing and printing usable things. A few weeks ago I designed these Lenovo IdeaCentre Power Brick Mounts and this week I created some button guards.

Button Guard

I was working on an audio player at the museum and Kathy mentioned that it was too easy to lean back and hit your head on a button which would either restart your book, or start another book, so I made this simple guard to put on the buttons before screwing them into place. Luckily we had filament that matched the color of the enclosure, so it looks pretty good.

Button Guard

If you’re using any of these buttons and need a guard, check out Thingiverse or Youmagine. The OpenSCAD code is fairly simple, so it should be possible to modify it for other buttons if needed.

Categories
Uncategorized

Laser Maze Mounts

My plan for Maker Faire Milwaukee’s 2015 Laser Maze got a little sidetracked, but that’s okay, because Vishal ended up writing some of the code I needed for another project and then I decided to just have him take over the some of the build.

Laser Holder

I did get a few more things done in recent weeks, like making these mounts to hold the lasers in place. Adam provided us with these clamp devices meant to hold a flashlight on your bike, but the lasers are a smaller diameter and tended to shift around, which isn’t great when you need to align lasers…

In our first attempt to make something that would go into the flashlight mounts and adapt to the size of the lasers, we ran down to the basement shop at the museum and used a hole saw in the drill press to cut a piece of plastic, and then we drilled another hole, and cut out a piece using the band saw. This was a neat idea, but did not work.

Laser Holder

The hand-fashioned one just wasn’t quite the right size. We didn’t have the exact hole saw or drill bit sizes needed, and the plastic just didn’t flex enough to allow for tightening. I ended up pulling out the calipers to get exact measurements and re-create what we tried to do with 3D printing.

Laser Holder

The 3D printed version sort of worked, but it was tough to slide the laser into place. I could have just kept trying to get the perfect fit, but instead of trying to emulate the limitations of using a drill and saw, I modified the design to have less surface area where the laser was sliding in, and also allow for more flex, and more strength, due to the way 3D printing works.

Laser Holder

These pieces don’t have a lot of infill, and they don’t need them. The shape of the interior section provides extra strength because of the nature of how it’s structured.

Laser Holder

These mount should work well, and the bike flashlight part saves me the trouble of creating an entire mounting system, or modifying previous mount work.

We’ve got less than 90 days until Maker Faire Milwaukee so hopefully we can get a test set-up running within the next 30 days or so.

Categories
Uncategorized

(The Making of) A Life Time of Yeahs!

Yeahs! Pi!

I presented A Life Time of Yeahs! at Bay View Gallery Night but I didn’t really post much about how it was made, so I’ll do that now, as well as talk about the shortcomings. Above you can see the front and the back. The front piece is actually from an IKEA picture frame I found in the trash. It was a nice smooth MDF-like surface, so I figured it would take the vinyl and paint pretty well.

For the illustration of Mr. Rollins I did a few searches and didn’t find anything that was perfect, so I grabbed a few images as reference and traced/drew my own in Inkscape. I then created a stencil by cutting vinyl on the Silhouette Cameo (including the lettering) and stuck it all down to the IKEA board which I had already painted white.

With the vinyl in place I then painted it all flat black. I didn’t leave it all smooth as it sort of looked too polished, so I smeared some paint around with a brush and then with my fingers so it gave it some texture. I’m still not sure that was the right thing to do, but I did it, and there’s no going back.

Once I had the front piece done I found some scrap wood for the frame in my garage and cut it on the table saw. I made sure the wood was wide enough to fit the speakers into. It was, but as I’ll get to in a bit, wider would have been better…

Yeahs!

The back of the piece contains a Raspberry Pi, a set of speakers, and a Teensy 3.0 with a few buttons connected to it. It’s all powered by a power bank from Brown Dog Gadgets.)

The speakers are USB powered so they, along with the Raspberry Pi, connect to the power bank. Turning on the power bank boots up the Pi and starts a script called “rpisounds.pl” which is a Perl script that starts running and waits for keyboard input to do something. That “something” is playing an audio file if you press the red button on the front of the piece. There’s also a small button on the back of the piece that safely shuts down the Pi if you want to turn it all off.

Yeahs! Pi!

It’s been suggested that the Teensy in addition to the Raspberry Pi is overkill, and… it is! I originally had a separate project that used some of this code and hardware and ended up just grabbing what I had lying around because it was quick and easy. Sometimes it works out that way, and that’s fine…

I should have gone with the more powerful speakers I had, because as I learned last time, if you’re doing something with audio in a public space, make it much louder than you think it should be. I had a louder pair of speakers, but they would have required AC power, so I compromised. Oh well. (You can’t tell from the photo, but there are speaker hole drilled in the side of the frame.)

I’ll probably clean up the code and publish it eventually, but essentially it gets kicked off by /etc/rc.local and runs it a continual loop waiting for a key to be pressed. If you press “a” (the button on the front) it randomly selects a WAV file and plays it. If you press the button on the back the script sees a “r” and shuts down. Why an “r” instead of an “s”? I don’t know… There’s another button that was taped up that types a “q” for quit, which quits the script, and is handy for debugging or troubleshooting if you have a monitor and keyboard attached.

That’s the summary of my Raspberry Pi based interactive painting titled “A Life Time of Yeahs!”

I hope you enjoyed it… As always, let me know if you have any questions.