In 2009 we started to do some research into panoramic photography at work. We ended up getting a Nodal Ninja head for pano shooting and it’s been a solid piece of gear. The thing about pano heads is that if you want a nice one, you can either plunk down a good chunk of cash, or you can build your own. I ended up finding a middle ground where I built my own, for really cheap, and it’s not that nice, but it gets the job done.

Nikon D40 on Pano Head
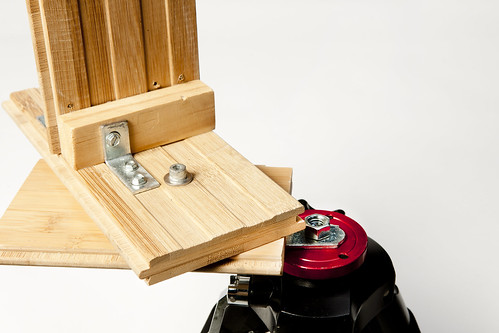
After looking at a lot of home-built rigs, I had the basic idea down, and one Saturday morning I headed down to the basement to see what I could hack together. I don’t think I ended up purchasing anything for this build, but that’s only because I had enough scrap and bits of hardware lying around the workshop.
Here’s a basic list of parts:
- Scrap wood
- Large hinge
- Angle brackets
- Screws
- Nuts
- Bolts
The thing about my panoramic head is that it was built to fit a Nikon D40 with the 18-55mm kit lens set to 18mm. That’s it. The head it not adjustable, so as long as I use that camera with that lens, it works. The whole “not being adjustable” part may seem like a bad thing, but I’ve found with the Nodal Ninja that once you find a camera & lens combo that works, it’s easy to just stick with that. So unless you swap out gear a lot, once you find something that works, you may not need to make any adjustments. If you’re into experimentation, and depending on what type of panos you want to shoot, a fully adjustable rig might make more sense.
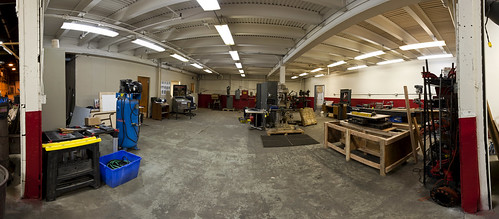
Panorama of Milwaukee Makerspace
When you build your head, you’ll need to determine the no-parallax point. Here’s a nice guide. The whole idea of a panoramic head is that as you rotate the camera, it’s rotating at the point where the image is focused on the lens. I’m simplifying it a bit, but hopefully that makes sense. I ended up finding the point with my D40 by looking at this Entrance Pupil Database, and by experimenting. Most DSLR cameras will have the tripod mount hole centered, so that part is easy. And since I used a simple piece of wood for the camera arm, it was easy to cut a new one, drill new holes, etc. until I got close. Trial and error. (Or, you know, make an adjustable arm and things may be a bit easier. At some point I’ll probably get around to doing that myself.) Building a head is not that hard, and there are a lot of guides out there for doing it, as well as some great examples and discussion on Flickr.
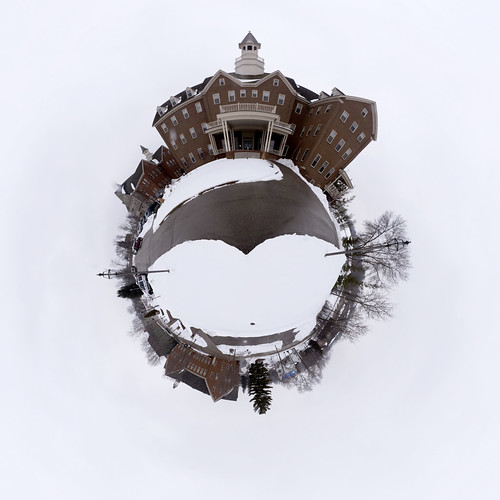
Panorama of The Delafield Hotel
As for the panoramic stitching software, I’ve become a fan of the open source Hugin. I’ve had a few issues with it in the past on OS X, but more recent versions have seem some good improvements. I tend to shoot RAW and then convert to JPG files, then feed them into Hugin, but again, there are plenty of ways to do it. That’s just the one I’ve gotten used to. There’s also a Hugin group on Flickr worth checking out.
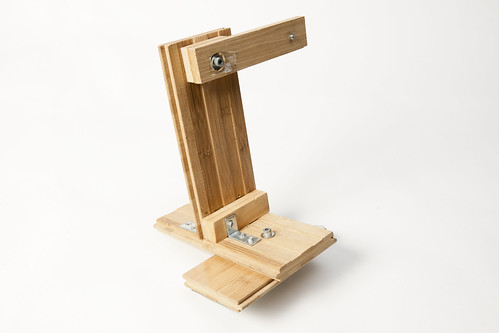
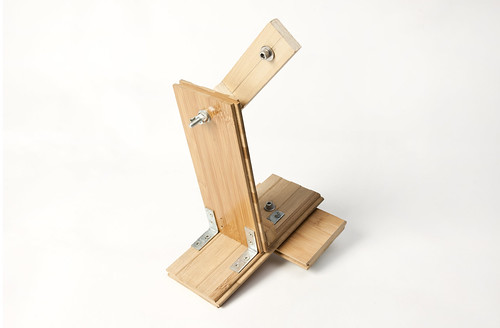
OK, I finally got around to shooting some better shots of the head itself. Here they are, with just a few notes.
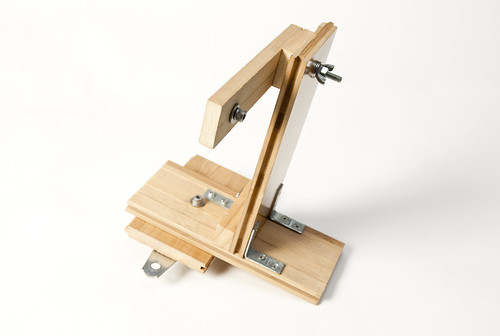
Panoramic Head
Panoramic Head
Arm tilted up
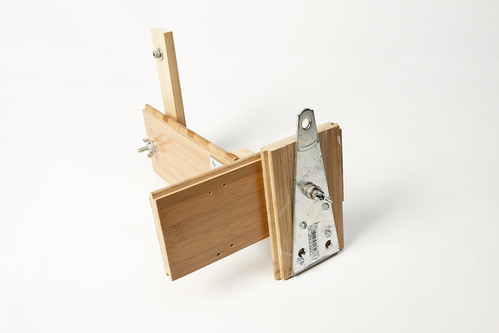
Half of a hinge, used for tripod mount
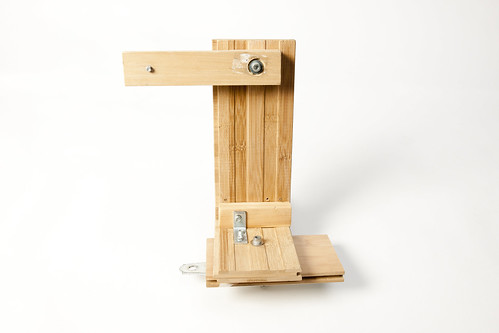
Panoramic Head
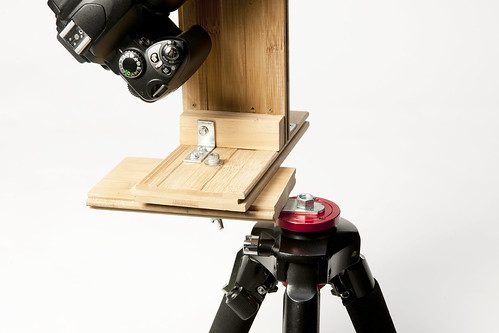
Mounted on tripod
Base rotating
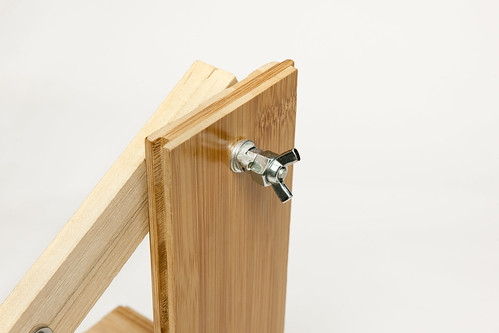
Tripod nut holder
You can see my panorama set on Flickr, though there are also photos in the set were not taken with the head.
Blog posts about this project: