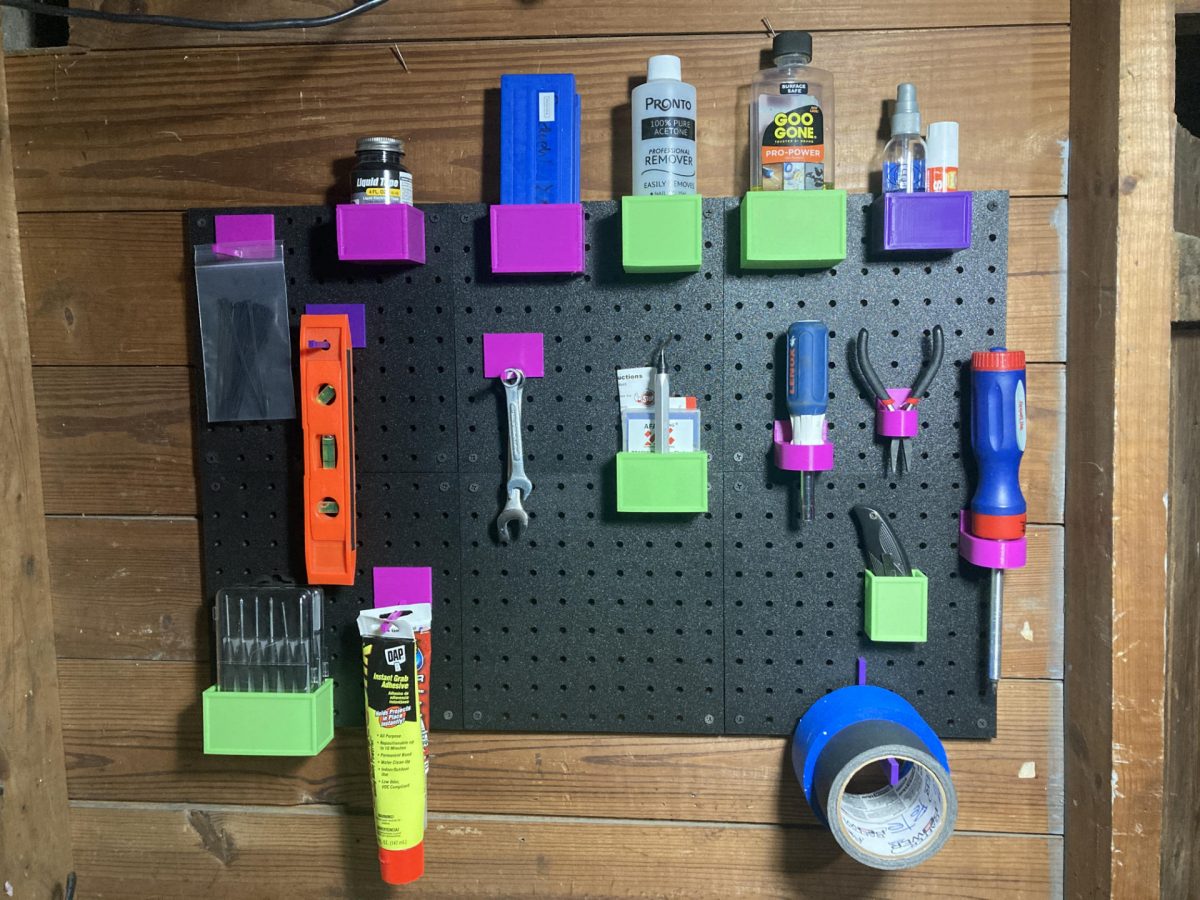

Pegboard! It’s the classic way to hang tools in a workshop. Is it the best way? Probably not. It is easy? Sort of. Are there better ways of doing things? Definitely. Anyway, I decided to move forward on this project for a few reasons.
My basement workshop has two large sections of pegboard and a mess of tools. I am in the process of organizing all of those tools, and along the way Kyle Davis was kind enough to mention something called Pegmixer, an OpenSCAD library he had created. I prefer OpenSCAD for my 3D modeling, and once I dug into the library it was much better than the other (quite old) customizable pegboard hanger things I was looking at.
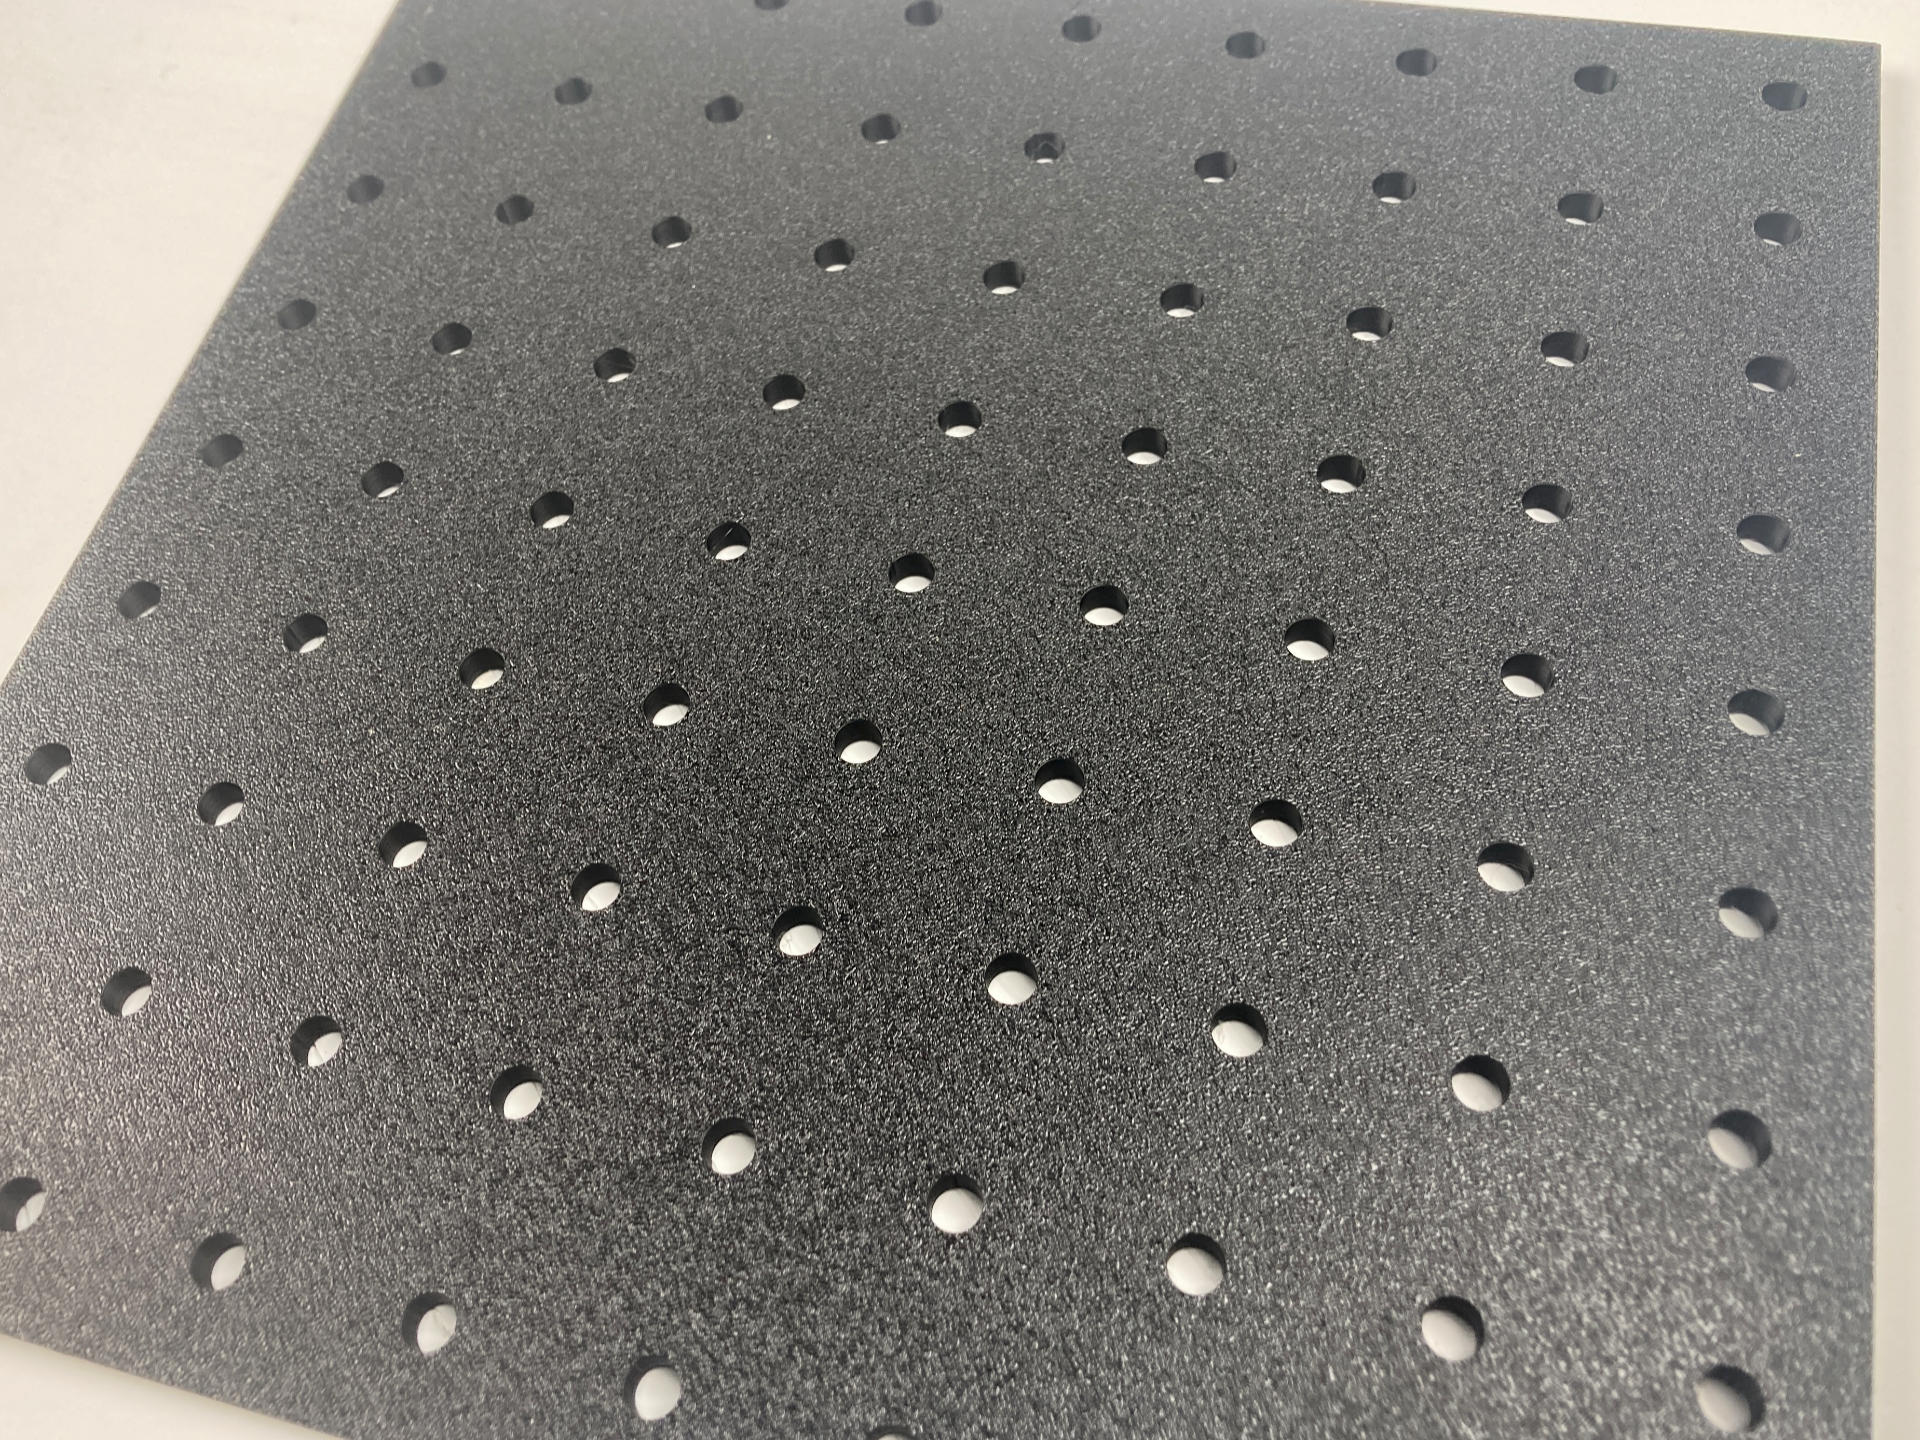
But wait, why the “3D Printed Pegboard” part of this? While you can grab a (nearly) 4 foot by 2 foot pegboard from Lowes for $12 USD, or a nice looking fancy SKÅDIS 30×22″ pegboard from IKEA for more than twice that price, I wanted to try some large prints on the Bambu Lab P1S printer, with a build volume of (almost) 256x256x256mm.
So I grabbed a cheap roll of black Sunlu filament for $14.69 USD and with the help of the openscad-pegboard-peggrid library designed some pegboard.
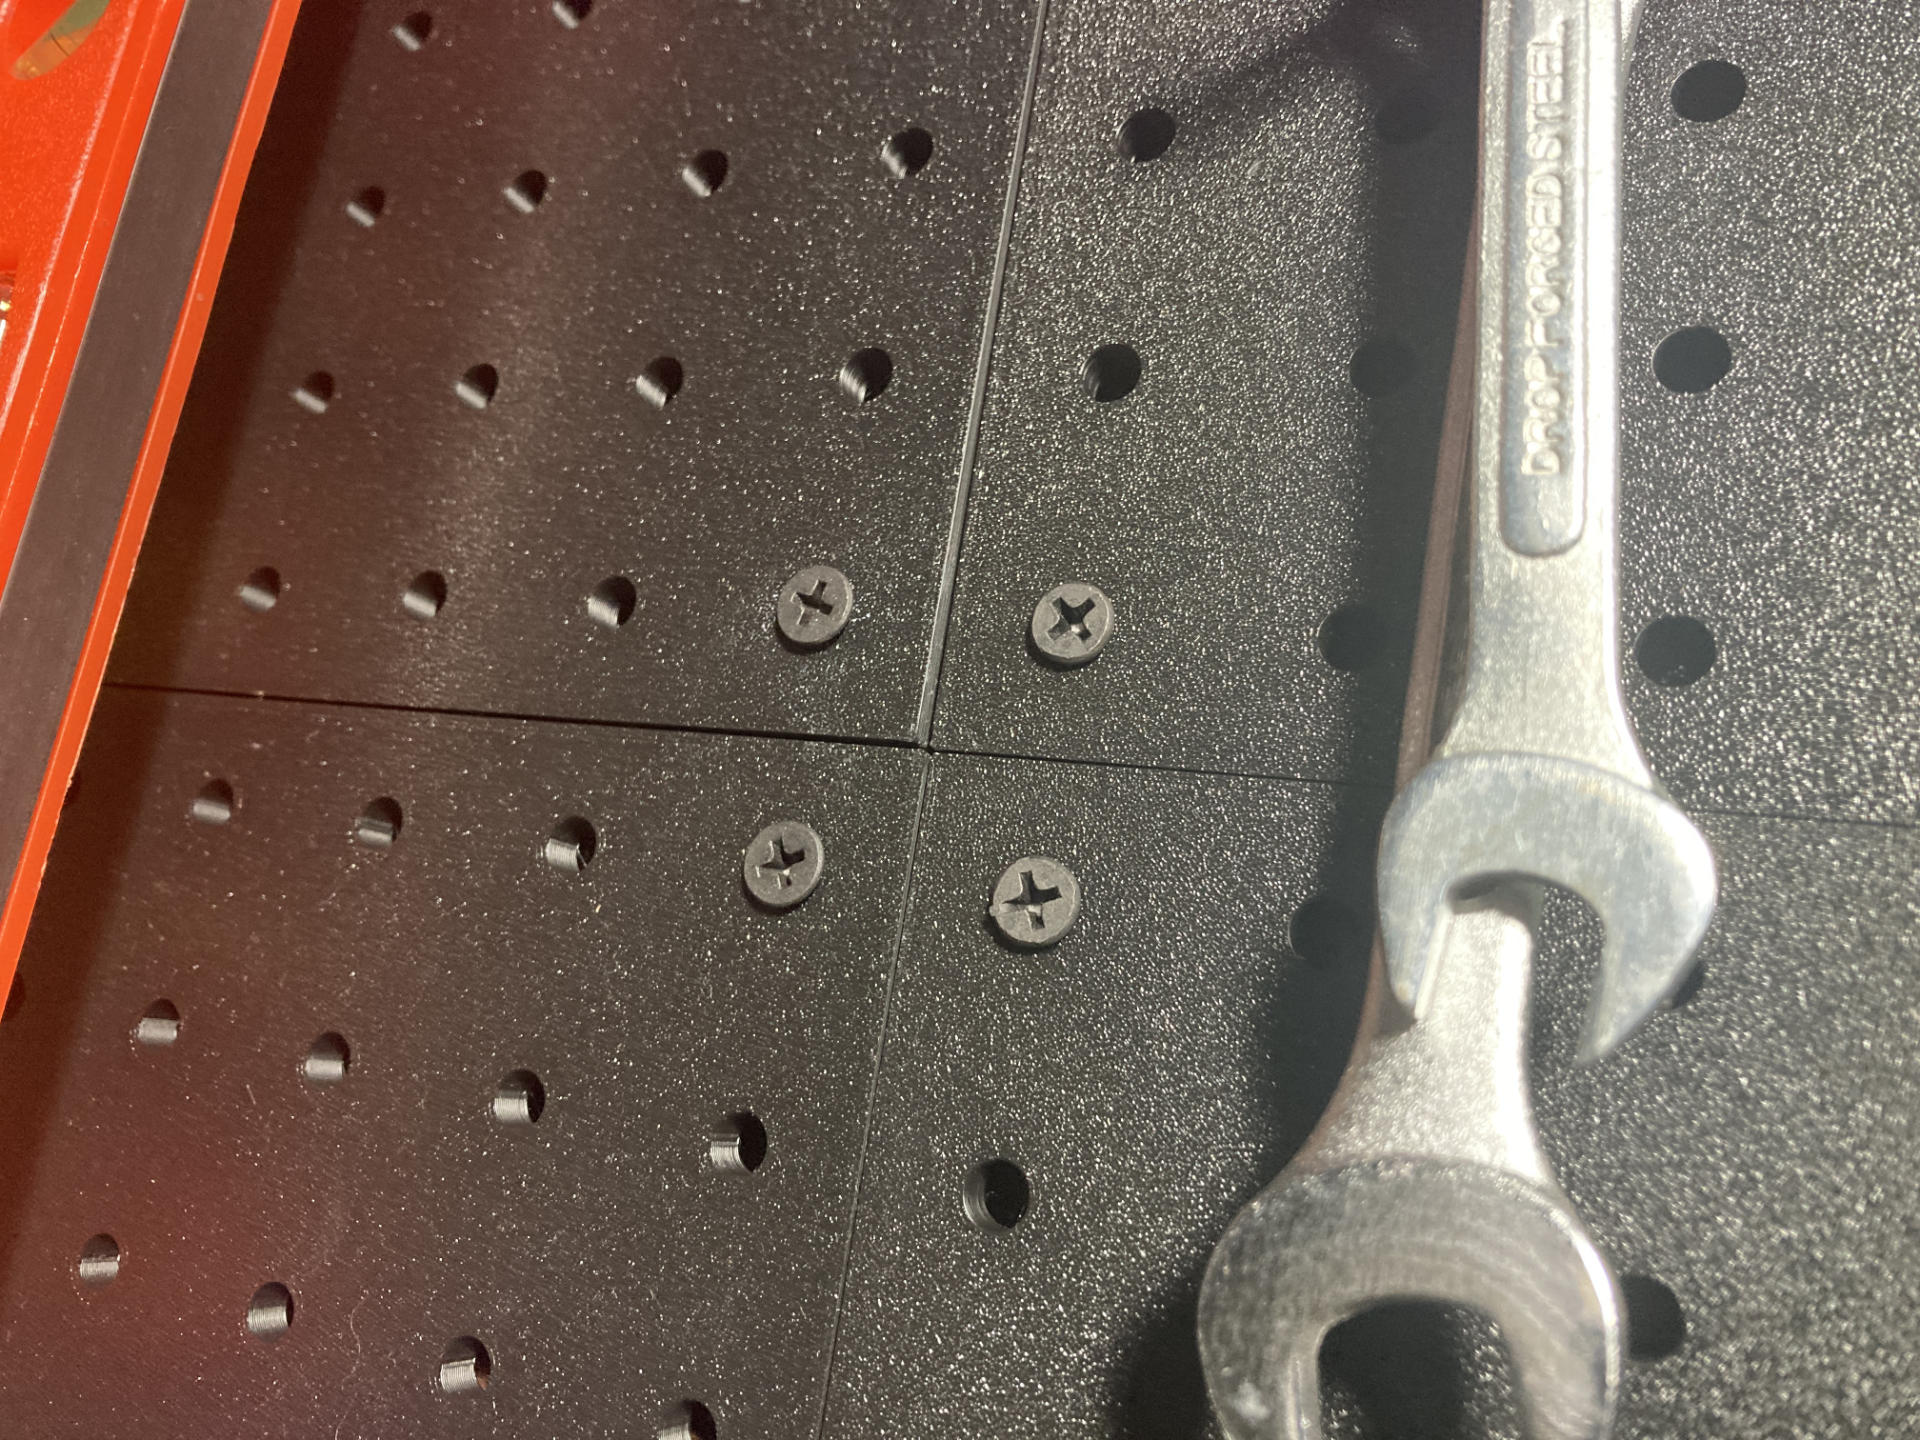
Now my initial idea was to laser cut some pegboard using this library and all of the scrap 3mm plywood I can get from work, but that also seemed like a silly idea, and with 3mm thickness it would not be compatible with my existing pegboard which is much closer to 5.5mm. By 3D printing the pegboard it would allow me to match it up in thickness to what I already have, so I can move things between them.
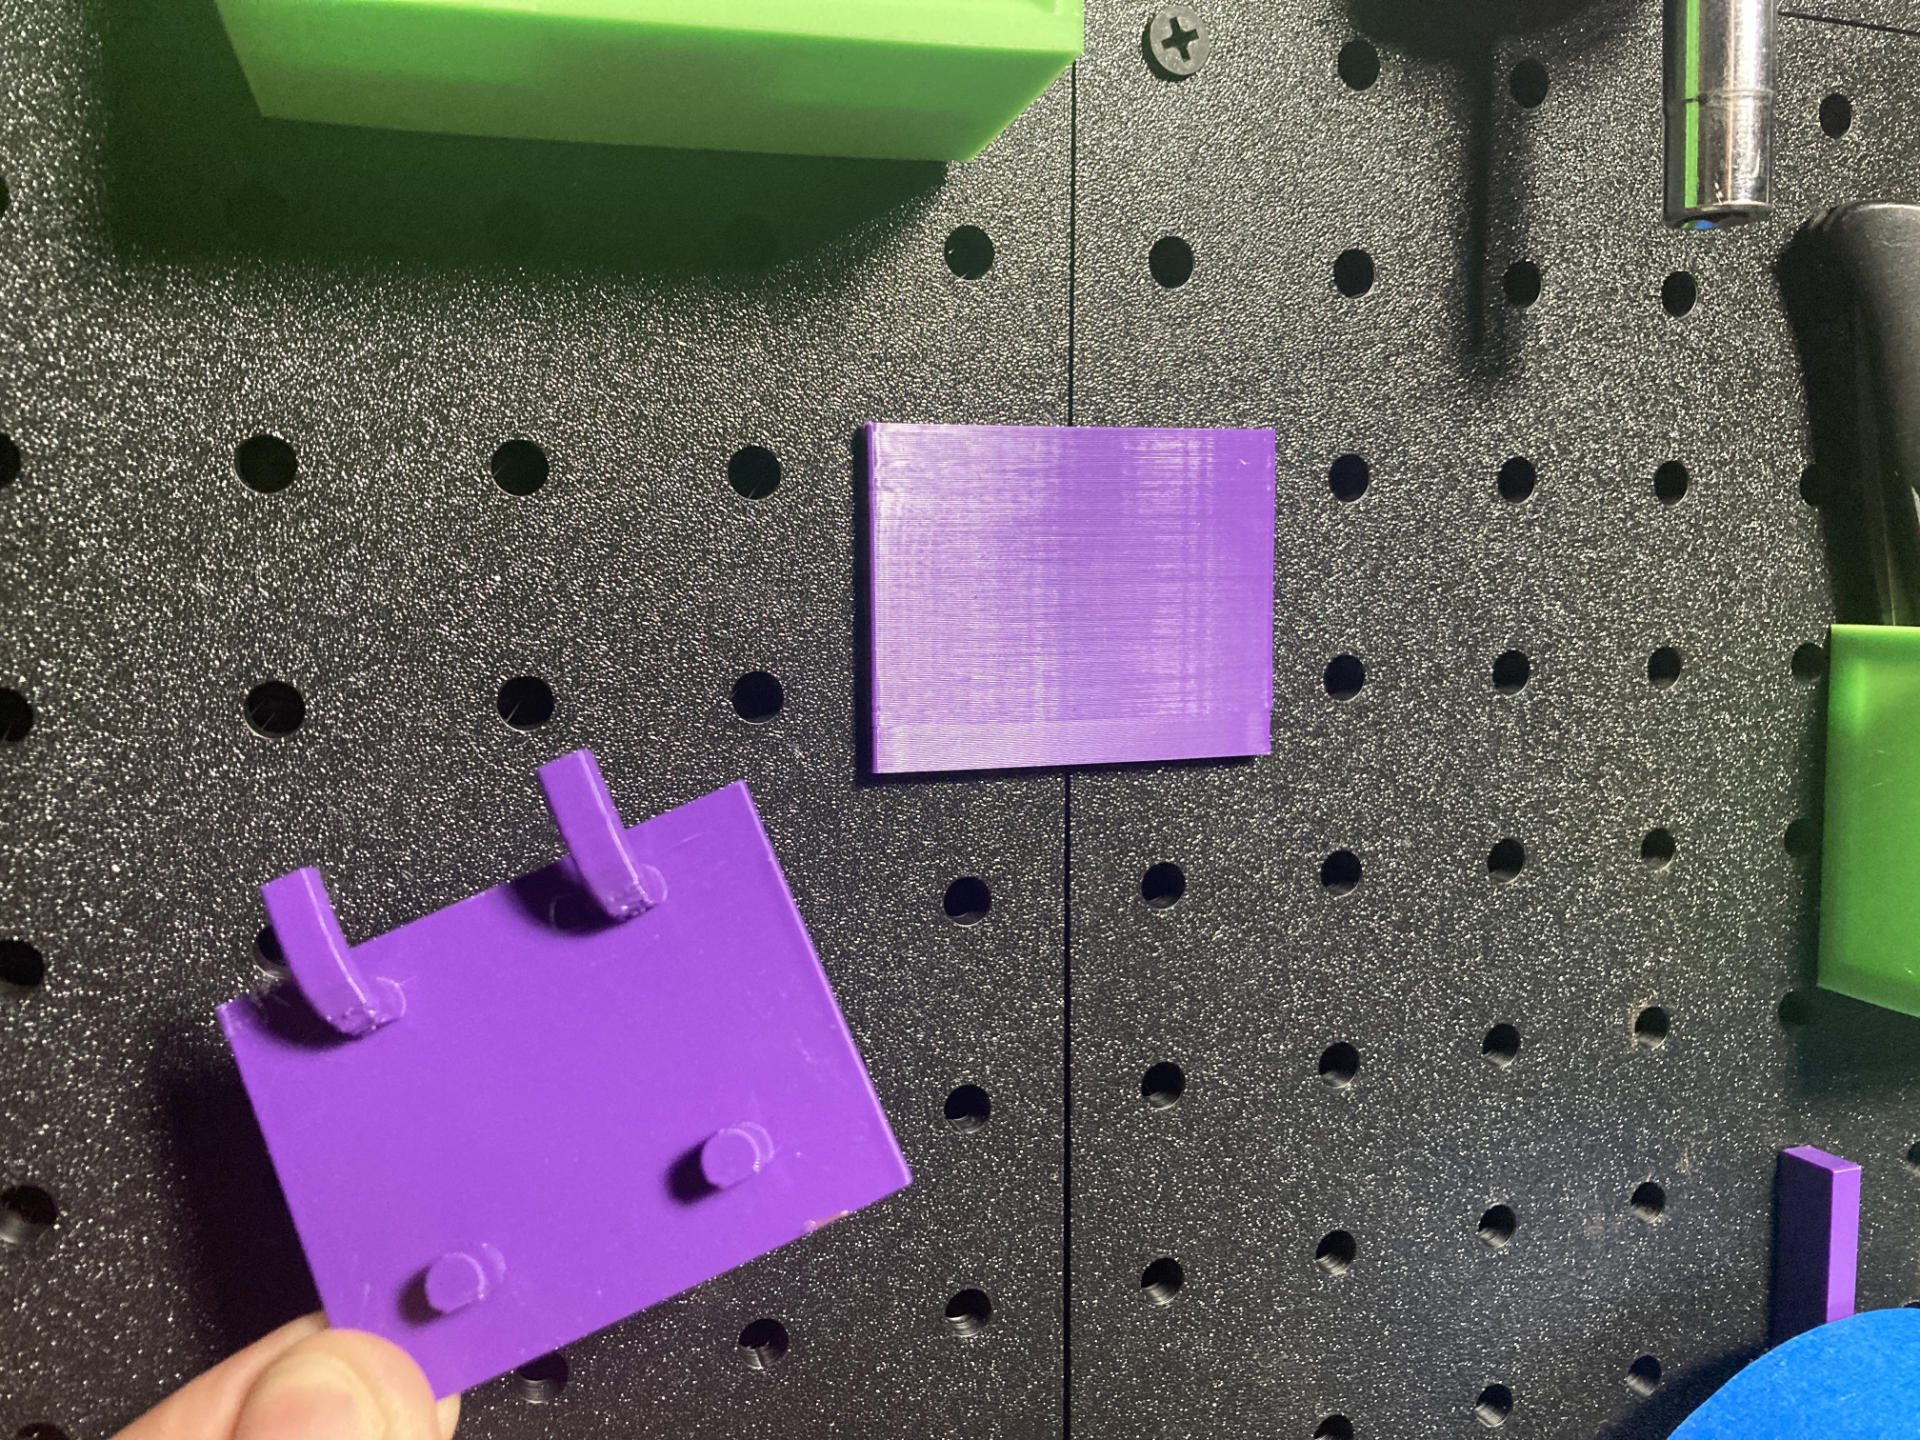
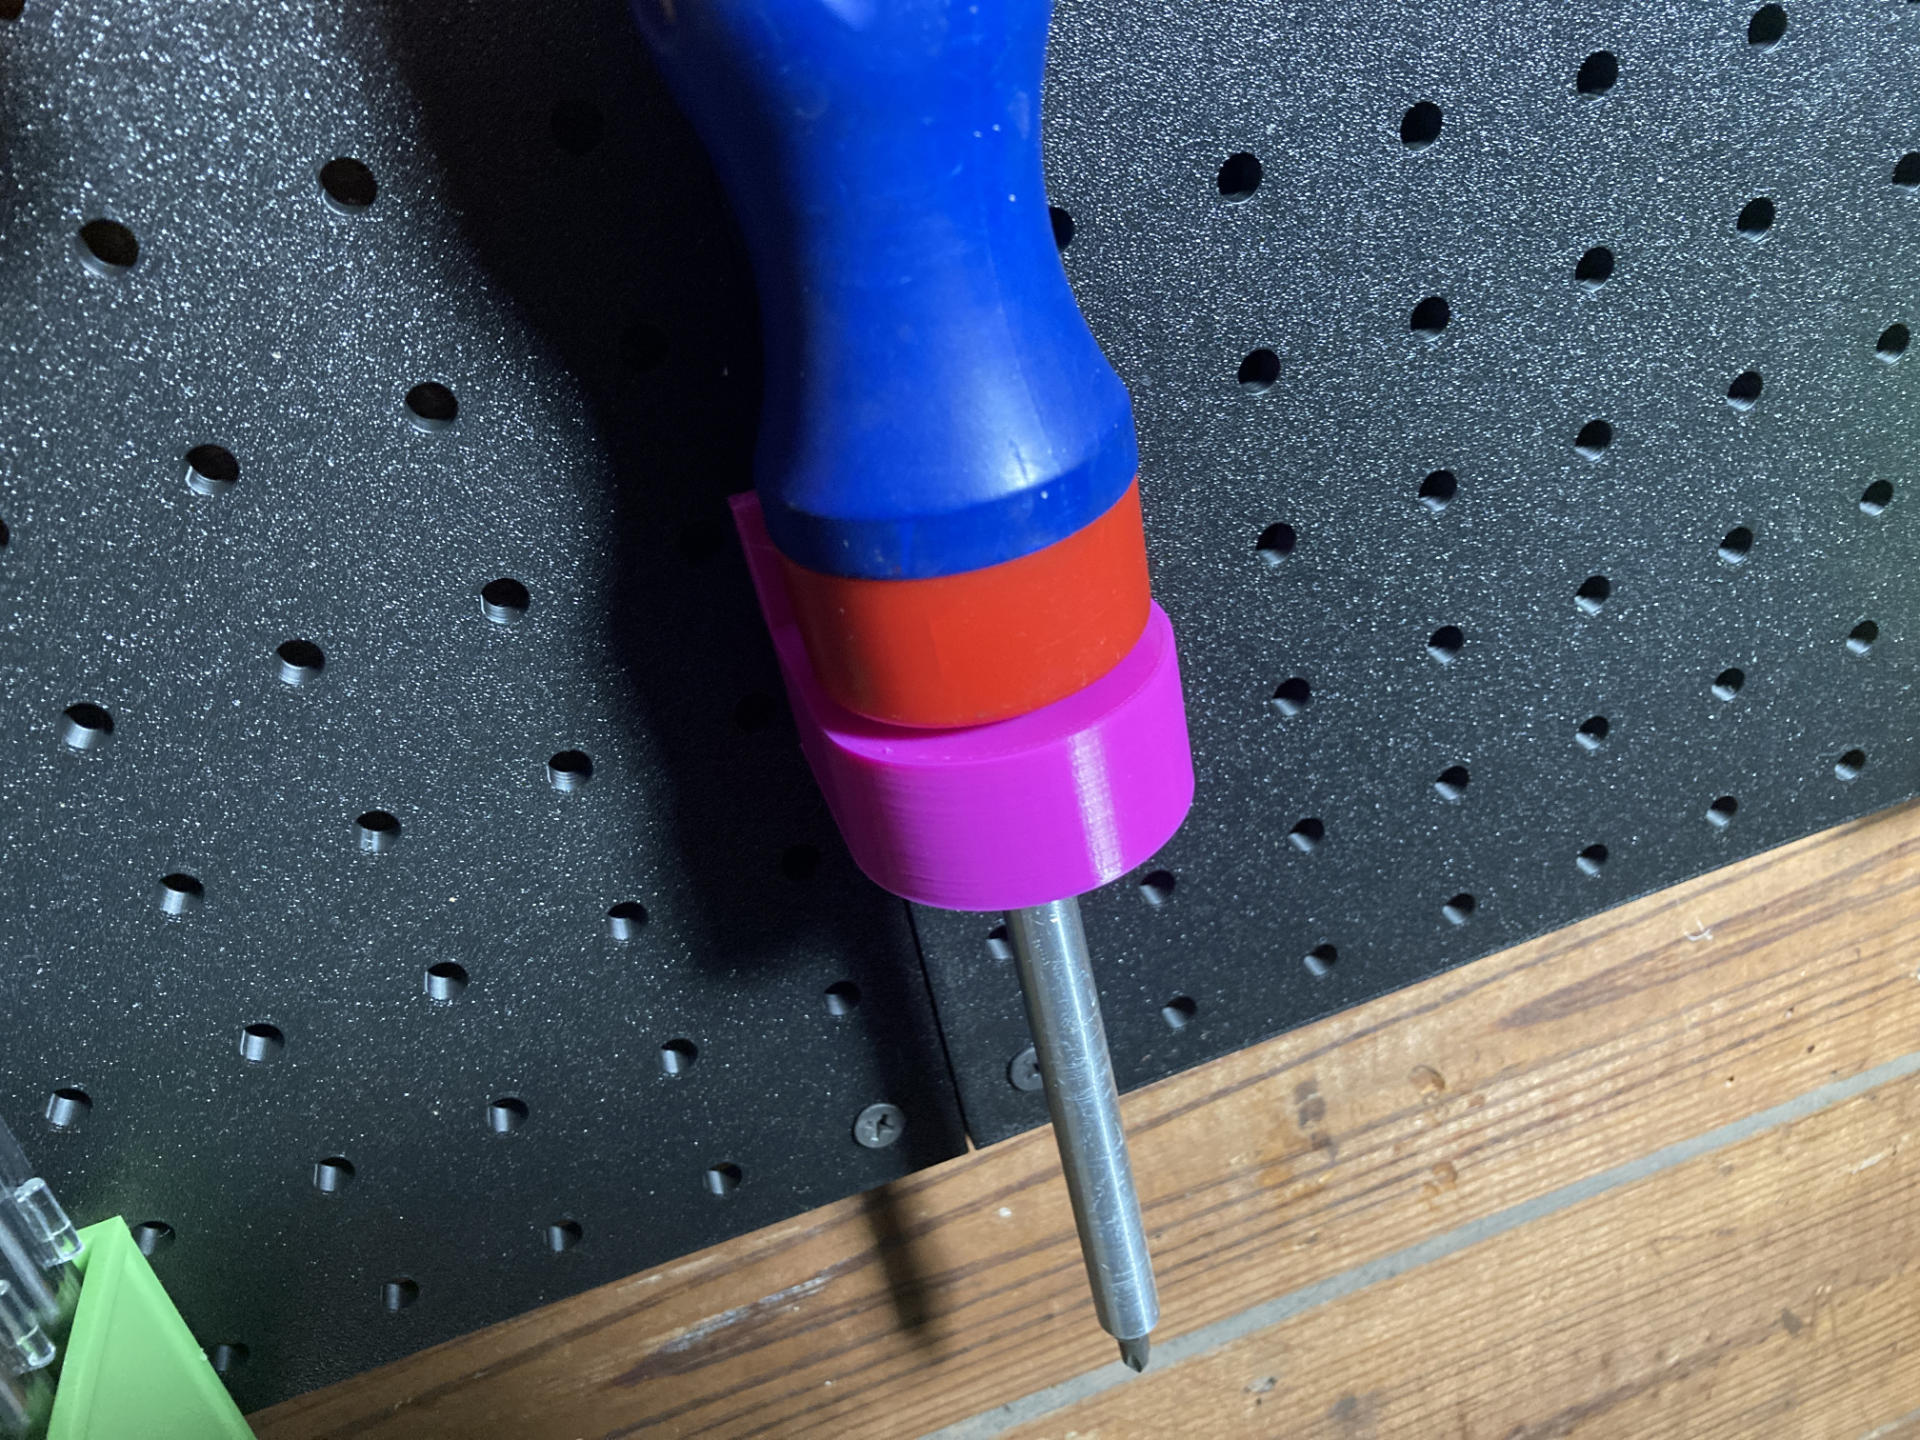
I used Pegmixer to create a simple plate that could be used to align the pieces so the spacing of the holes was lined up across sections. Once I put one panel up I then used two plates to align the next one and then screw it into the wall using some drywall screws in the corner holes.
![]()
I also printed four spacers for each panel to offset them from the wall. Nothing fancy, just some cylinders with holes large enough for the screw to go through. I ended up gluing them to the back of the panels for ease of installation. I originally had them integrated into the panel but opted to just print them separately.
I know some people will question the logic of 3D printing a pegboard instead of buying one (and cutting it to size) or even laser cutting one. I covered some of the answer in my Printing versus… Not Printing? post. Sometimes cutting things with a saw isn’t easy, or isn’t possible, so printing can be a quieter and much less messy alternative. It can take longer, but it can also happen offline, meaning when you are at work or otherwise busy. For laser cutting a pegboard you need a bunch of flat stock, which (depending on size) may be more costly than a $15 roll of PLA filament. (I did manage to print six panels from one roll, though according to the math I could have got 8 total since each uses 118 grams of filament.)
And yes, I do know about the Honeycomb storage wall that seems to be all the rage, but I opted to stick with the system I already have going. Compatibility and all that.
The 3D printed version (printed face down on a textured plate also looks really nice. Standard pegboard does tend to look a bit ugly. Obviously you can paint it, or with laser cut wood you can stain it, or just buy the IKEA version, but again… it’s all about options. And sure, while it looks good, it is in the most terrible looking room in the house, located in the basement… but I’ve considered adding one to my office as well, where a nice looking pegboard would be more appreciated.
So in the end, I’m really pleased with the look (and functionality) of the new pegboard, and now I need to get back to designing all the things that will attach to it to hold tools and other things!
If (for some reason) you want to use the exact same files I did, you can get the STL and .scad files from Printables.com – Pegboard Panel . Otherwise just grab the library, apply a fix if needed, and do your own thing.