I recently setup Nginx Proxy Manager and here’s how I did it. Oh, first I’ll explain what it is. A proxy is a person appointed or authorized to act for another…. well, that’s for people, but with computers it’s pretty similar. One computer acts as a go-between for you and the computers/services on your network. Remember when I mentioned Jellyfin? Well to get access to my Jellyfin server running on my home network I poked a hole in my router using “port forwarding” which allowed me to connect to it from anywhere I had an Internet connection.
So if you’re at home and visit whatsmyip.org it will show you the public IP address of the router from whatever company provides your Internet service. (In some cases this address will change, but if you’re luckily it will remain the same. If it changes you’ll need to know about “Dynamic DNS” but I’ll skip that for now.)
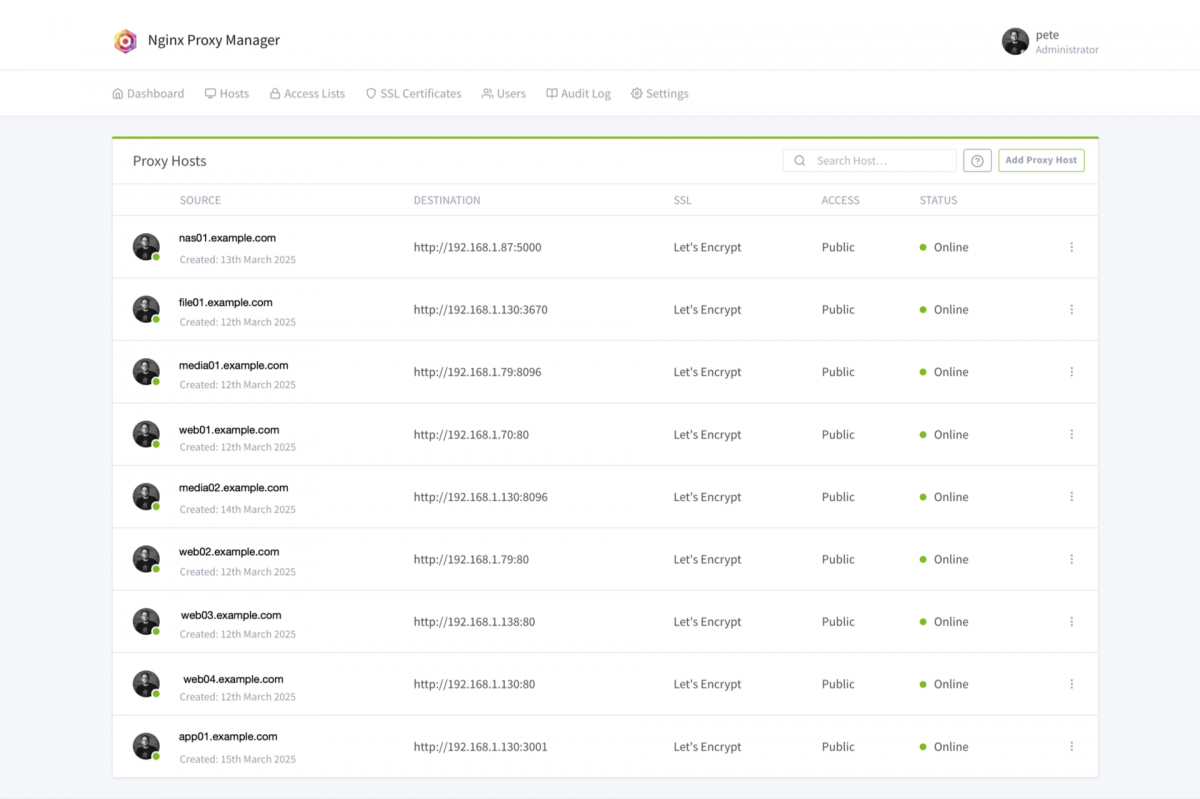
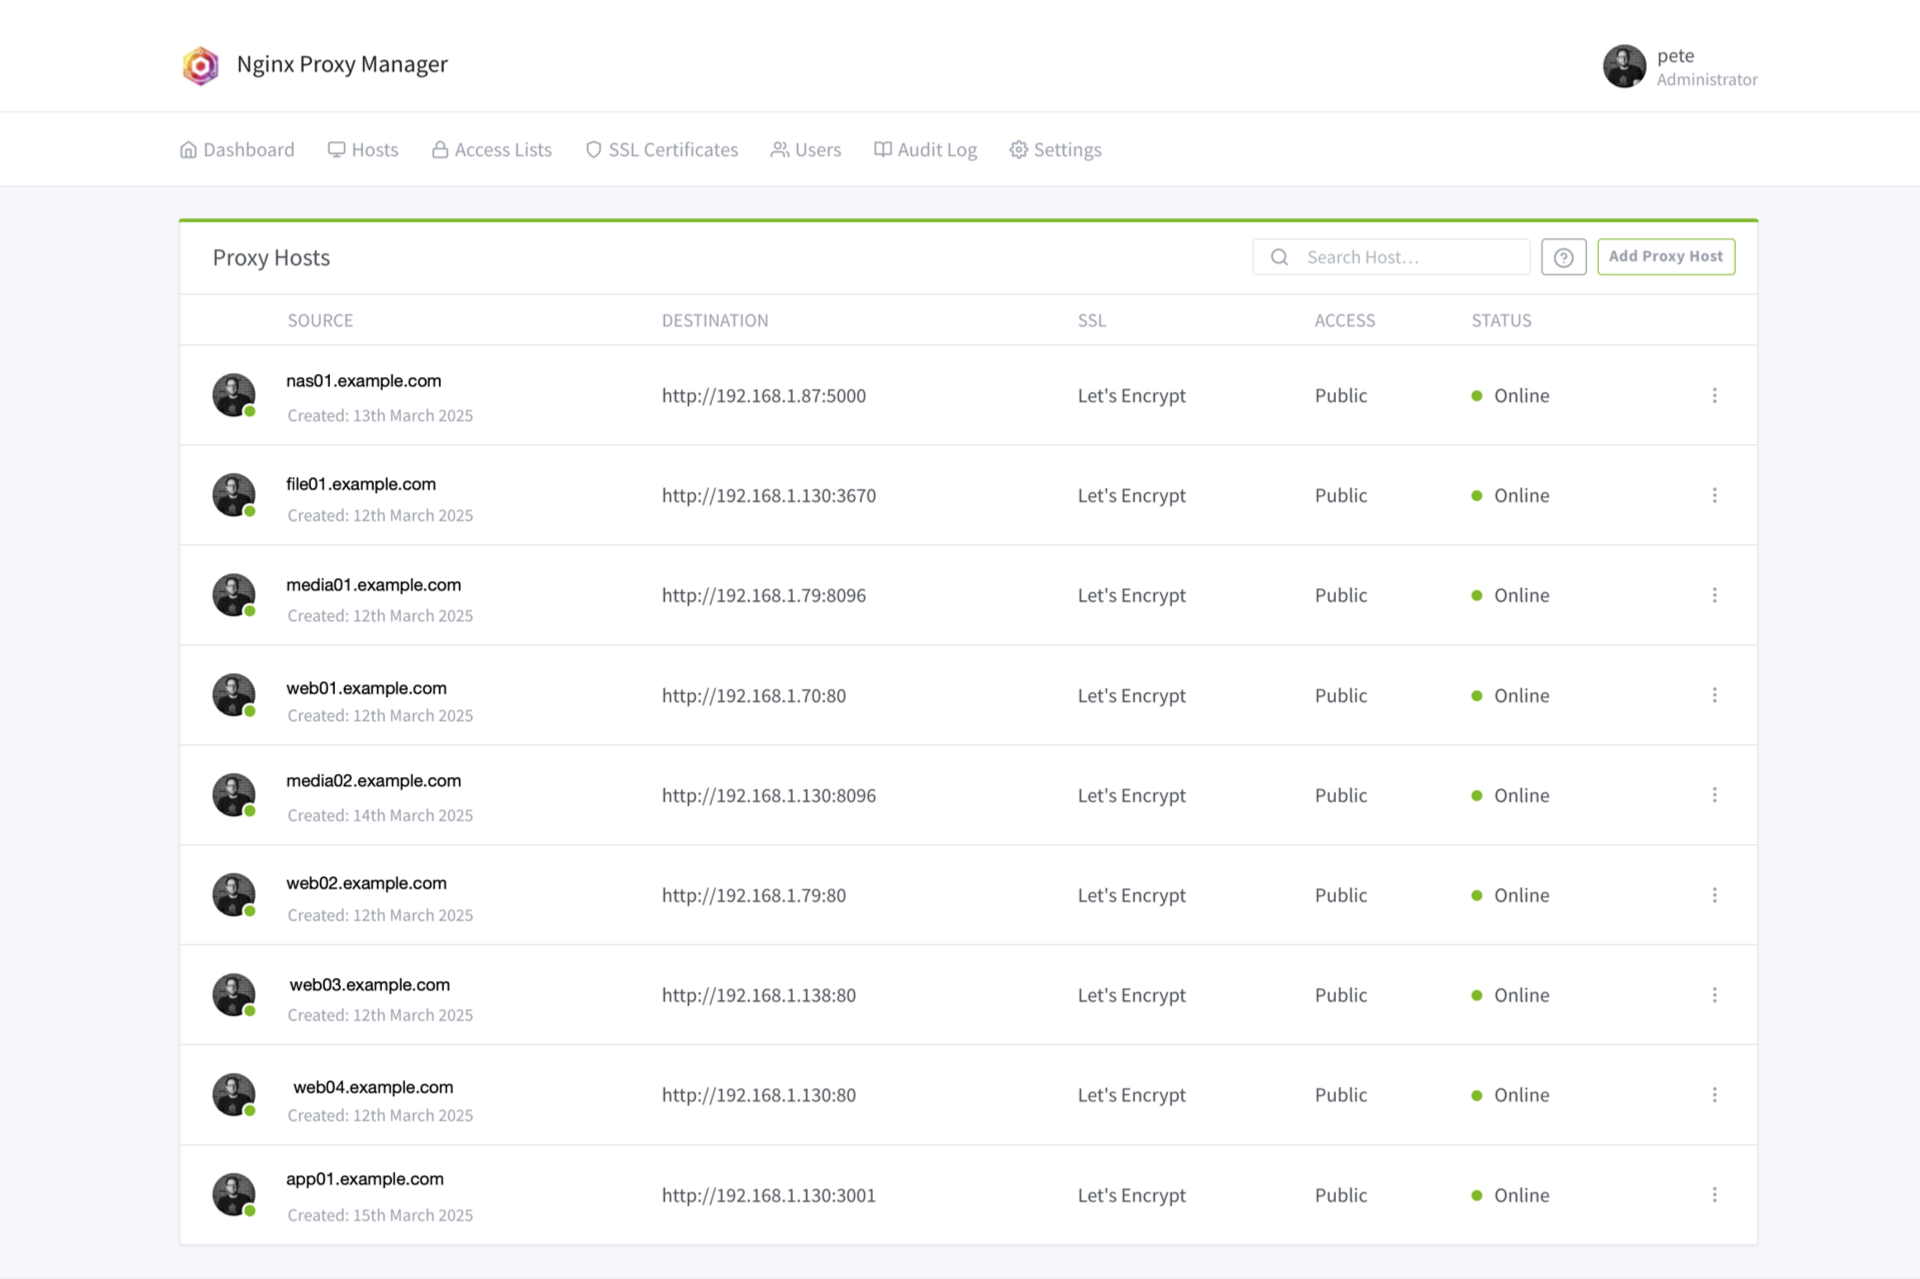
Anyway, I was using port forwarding for Jellyfin, but I wanted to add a few more things I could access and rather than faff about with a whole lot of port forwarding I just forwarded one thing (port 80) to Nginx Proxy Manager which runs on a Raspberry Pi at my house. This single little computer routes all the requests you see in the image above.
I used subdomains to determine what goes where, as I have multiple computers on my network, and some run multiple services on different ports. So if your home IP address is 1.2.3.4 and you normally connect to 1.2.3.4:8096 (ip_address:port_number) you can set up the proxy to accept requests from media01.example.com (on port 80, which is the default) to go to the internal computer at 192.168.1.79.8096 (assuming you own example.com, added a subdomain, and pointed it at your home IP address that is!)
I should note that when I did the port forwarding for the computer running Nginx Proxy Manager I got this scary warning about breaking things… and nothing broke.
Why would you want to use a proxy manager instead of just doing port forwarding? Well, besides making things clean (not having to worry about port numbers) you can use Let’s Encrypt with Nginx Proxy Manager and it’s extremely easy to add secure TLS certificates so your traffic is encrypted. Without this anything you log into on your home network is done via plain HTTP which is not encrypted, so it’s like writing your password on a postcard.
I mentioned I am running this on a Raspberry Pi. It’s an older one, a Model 2 or 3 I believe, but honestly its all that is needed. The nice thing about “Home Cloud” stuff is that you probably won’t have a lot of users. For my stuff it’s pretty much just me. Maybe a few family members might access things at some point but I’m not too worried about the Pi not being able to handle it. If the SD card dies and the Pi stops working at some point the worse that will happen is I won’t be able to access things from outside the house until I fix it. So failure isn’t catastrophic. Our (outgoing) home Internet connection will not be affected.


