
Remember when I got an ebike? It came with a rear rack, which is handy. I added one (along with a bag) to my old Trek, and I used it all the time. I found that commuting to work often required me to move things, and a milk crate on the back worked well, but the zip ties meant it was a pain to put on and take off, so a quick release mount is a good option.
And guess what? The Aventon Level 3 might be MIK compatible. I say “might” because it’s tricky…
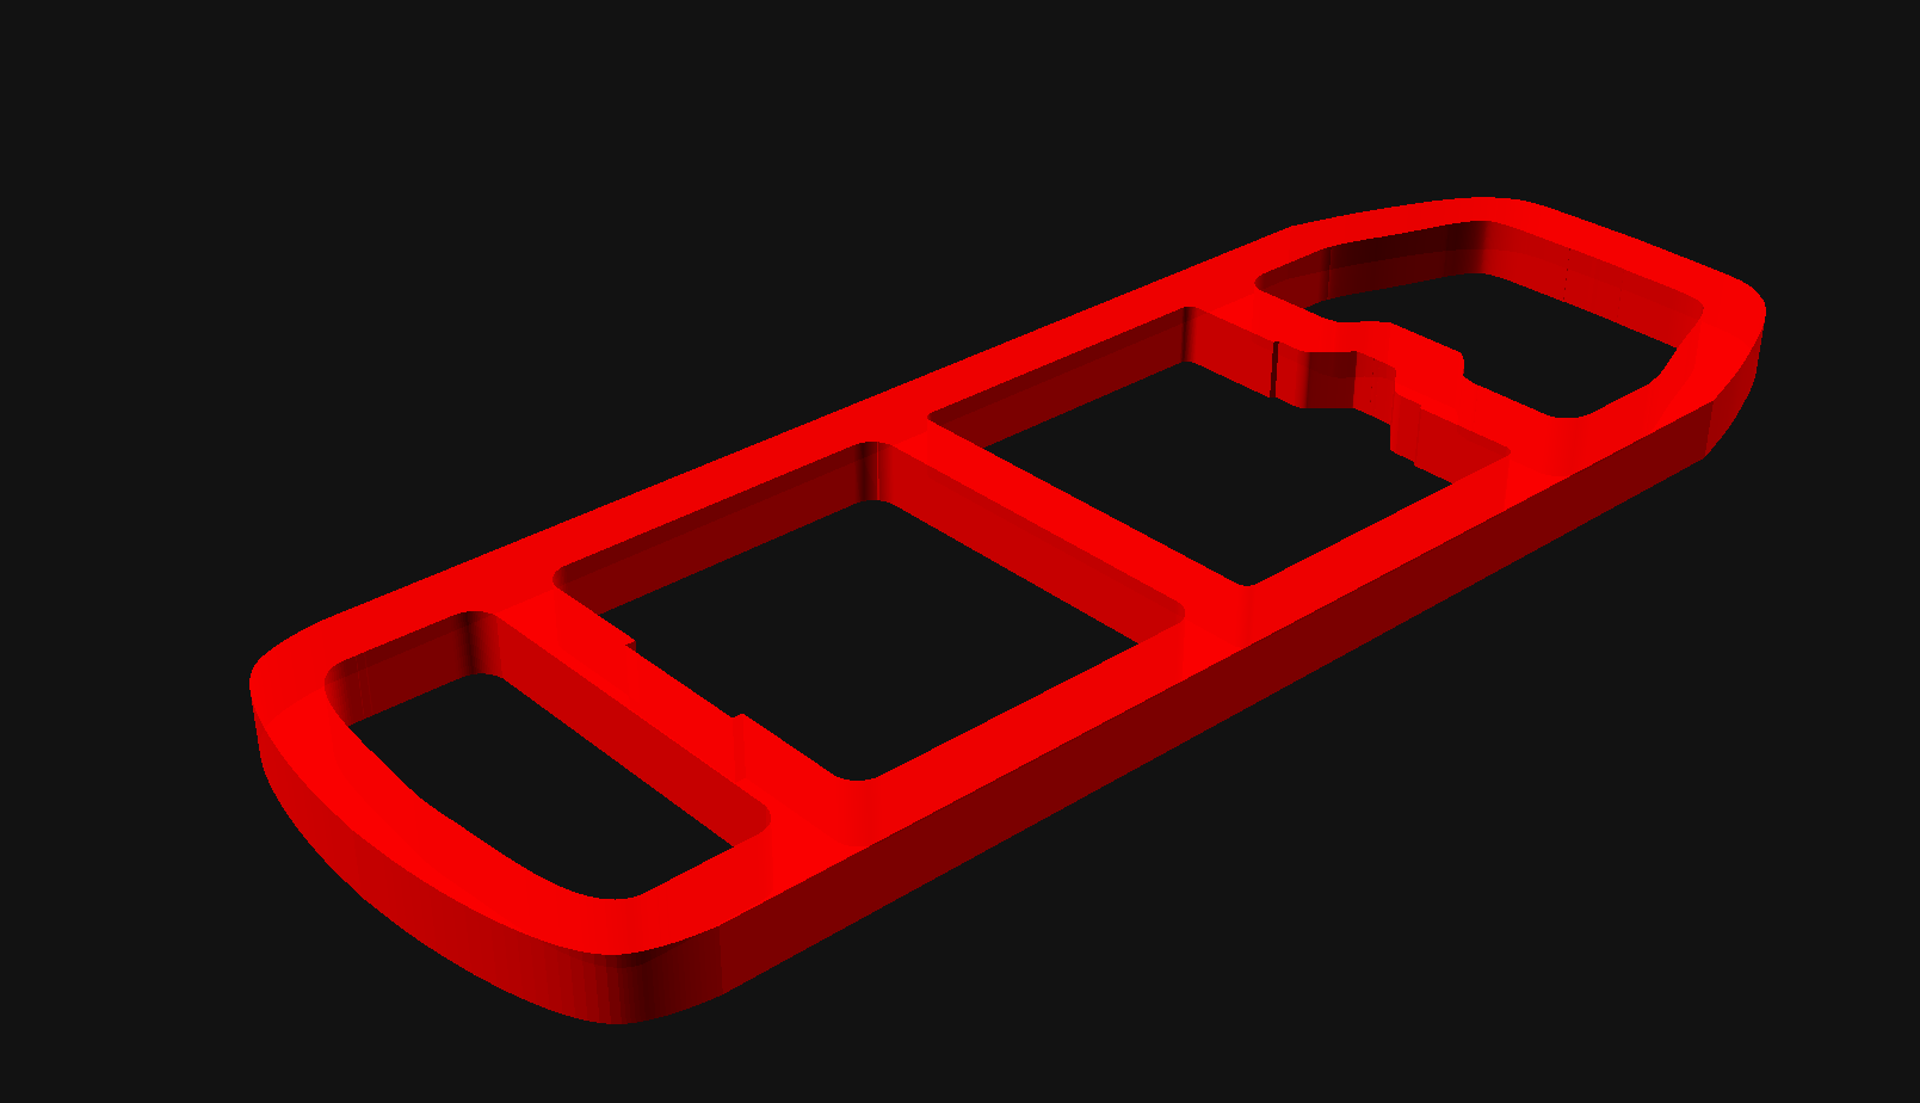
I asked Aventon for specs on the rear rack that ships with the Aventon Level 3 and they could not (or would not) provide them. I ended up modeling a version of the rack so I could virtually model something for it. (Note: The model is not perfect, but worked for my needs.)
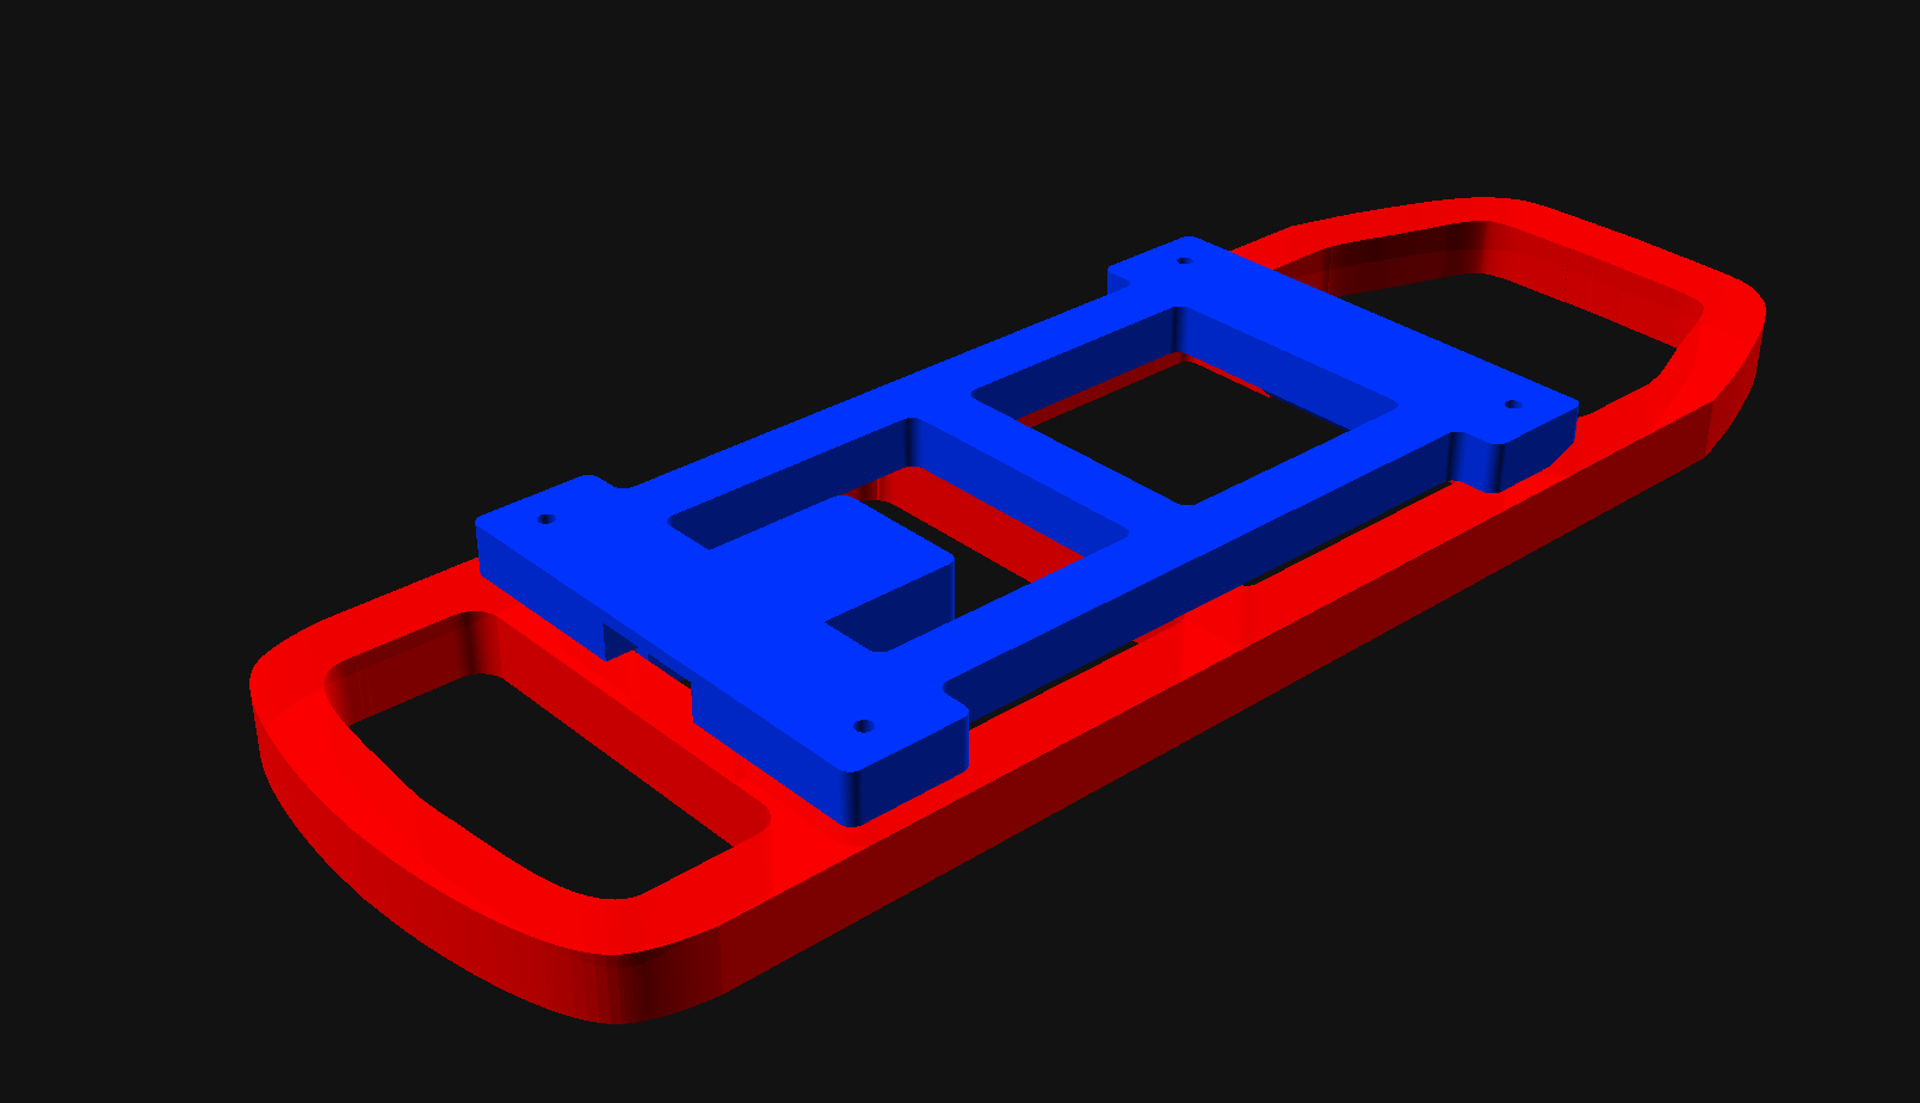
Meanwhile I found this MIK adapter plate on Printables so I thought I would give it a try. (I loaded the STL file with the rack model I created and it looked it would fit.)
Does it work? Yes, but… But it’s 3D printed. This means you can make one for a very low cost as compared to buying one. (Here’s the real thing, at $40 USD.) I used ASA filament and a roll is $30 USD so I can print about a dozen adapter plates…
The first one I printed was actually PLA to make sure things worked. I used it with the milk crate on my bike rack and it did work. I destroyed it when I grabbed the crate to move the bike. Bad idea! The ebike weight over 65 pounds. I just ripped the adapter apart.
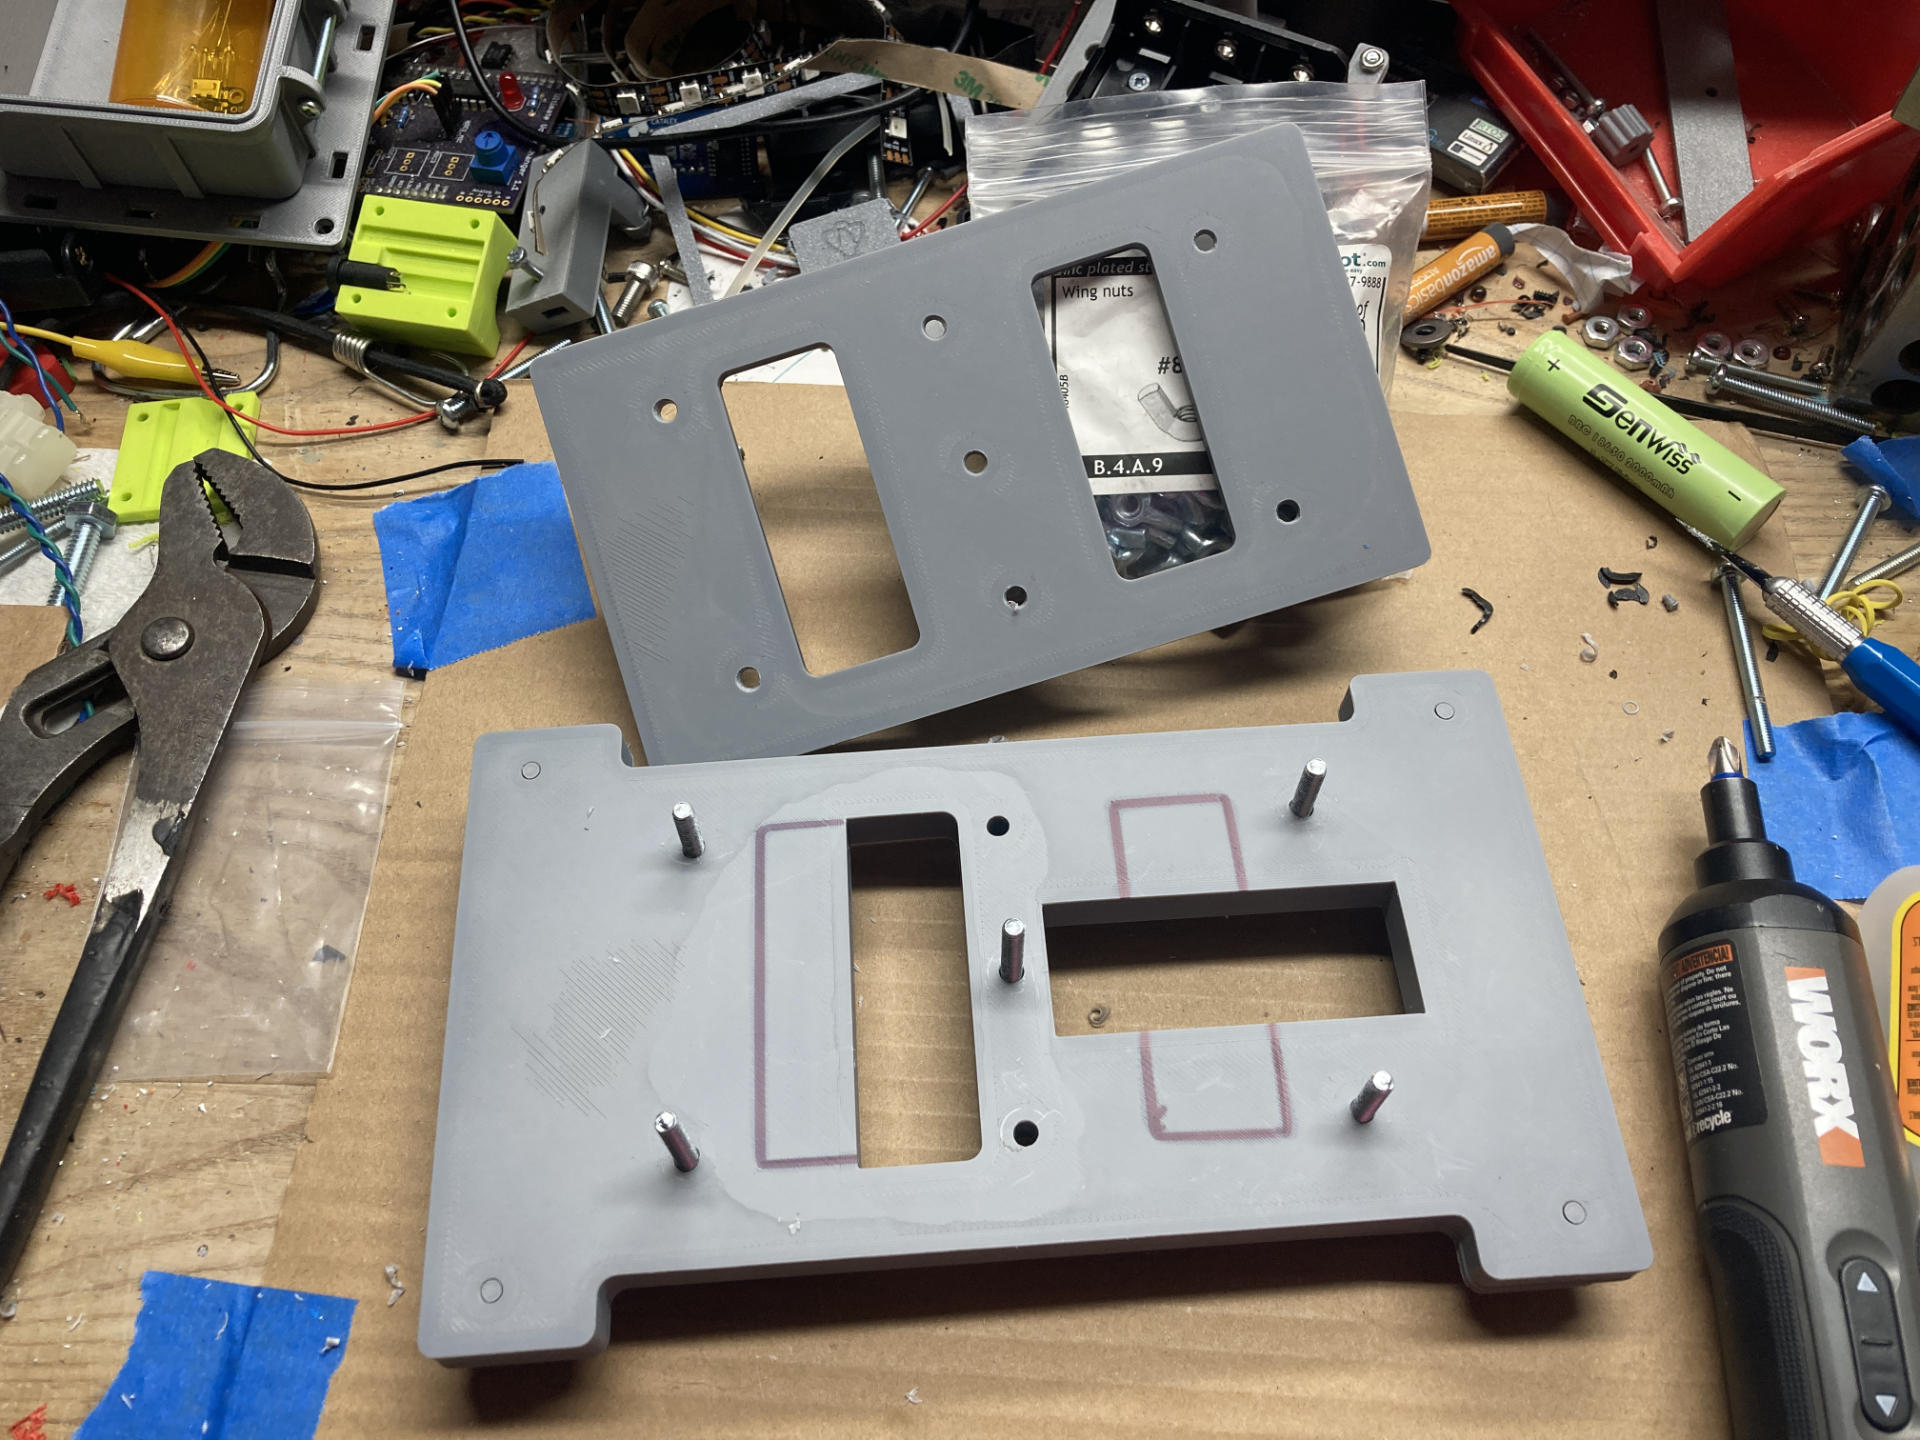
I printed one in ASA and that one broke as well, so I modified the model to make it stronger, but that one flew off my bike when I took a fast corner. So I learned a few things. First, I am riding an ebike, often going over 17mph on rough Milwaukee streets. I can’t always avoid potholes or other street damage so I bump and bounce occasionally. On a heavy bike with a heavy rider on bad streets the 3D printed version might not hold up.
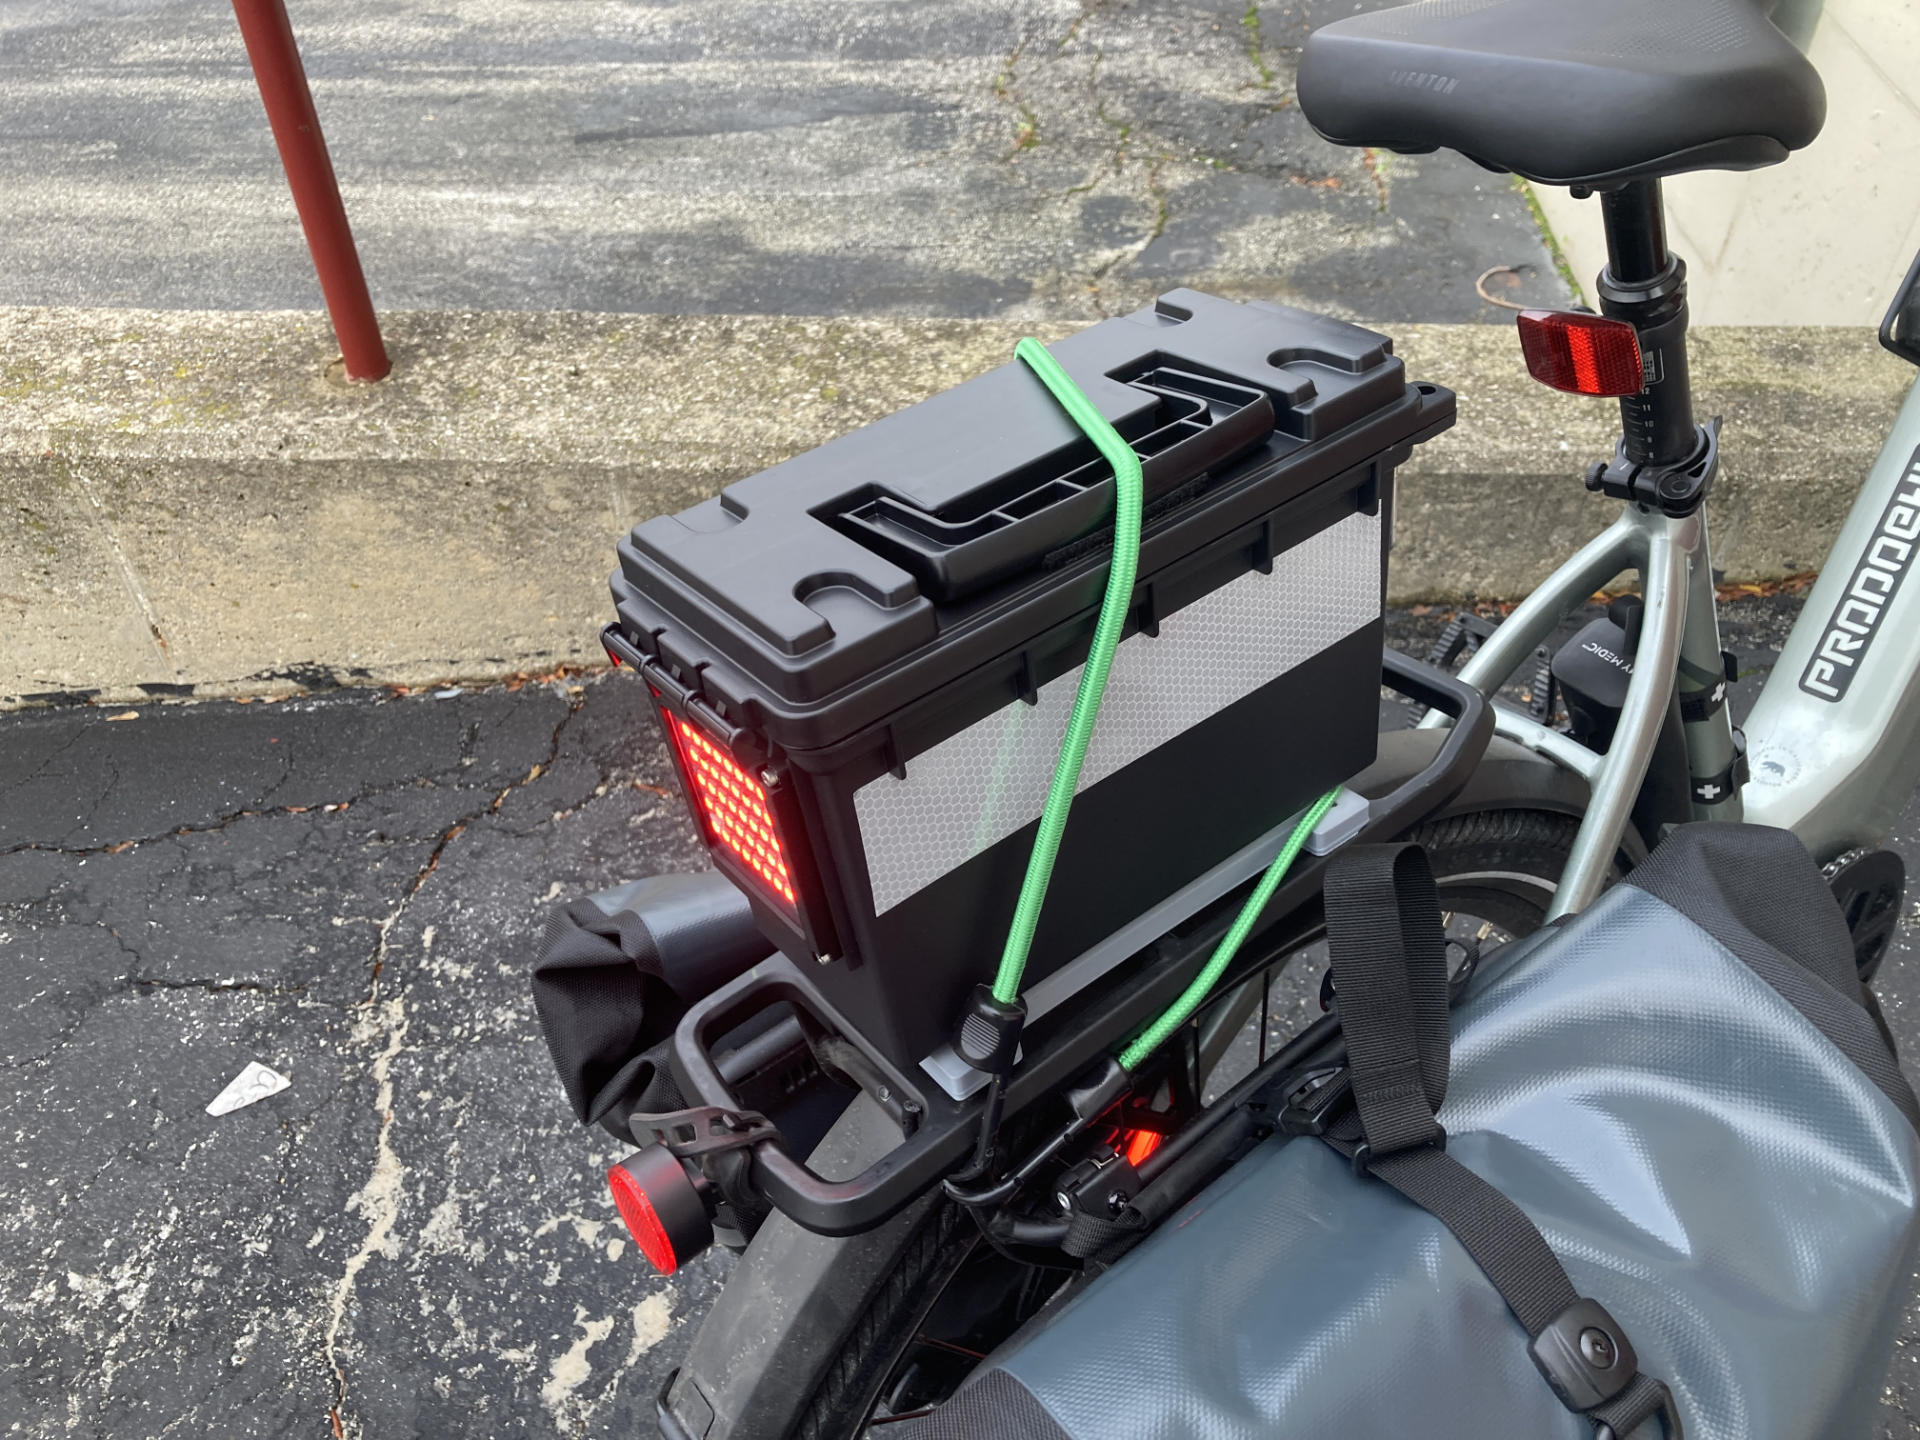
The most recent failure involved the little part that uses a spring to click into place. I realized I should have printed the part sideways instead of flat. I re-printed, and with more shells and infill and it’s held up so far, but I’ve added a bungee cord to be safe.
I may go back to printing with PLA modifying things a bit. maybe creating a better locking mechanism than a spring loaded wedge part. I really think that’s the failure point, and it shouldn’t be too difficult to figure something out. The next alternative after that is to scrap this whole idea and come up with my own mounting solution. In theory it should be quick and easy to install and remove something from the rack, but it should hold well enough to not fall off… how hard could that be!?
Note: This post may contain Affiliate Links. Read More.