Categories
Uncategorized

Hex Driver Handle

I’ve seen a few handles that convert a hex key into a “screwdriver” style tool, so I figured I would make one. (I’m sure there are better ones, but this one is mine!)

This one is two pieces. The main handle has a slot so you can insert the hex key, and then a piece to put into the slot. (Which I call the “Slot Filler” of course.)

When I printed this on the Prusa (not pictured) it came out perfect, and the slot filler filled the slot… perfectly.

When I printed it on the Maker Select Plus (the red version in the photos) it… well, fits, mostly… sort of. Hmmm. I had to X-ACTO knife away the blobs on the end. (Sorry, but the Prusa just prints better!)

You could always glue the slot filler into place I guess. It’s a wedge so it should “wedge” in place. In theory…

The first version had no slot filler, and no hole for the short end. I just smashed it into the slot. I figured making it removable might be a better option though…

Maybe it’s not a god idea? I don’t know. I did widen the slot a bit and added the slot filler. I just like designing these things and testing them out.

You can get the STL and .scad file from Printables.com – Hex Driver Handle (2mm). Print it if you need it!

Categories
Uncategorized

OpenSCAD Local / Modules Variables

I will start with the disclaimer that I’ve never held the title of “Software Developer” or even “Programmer” and my career has been built on being a “Hacker with Many Hats” kind of person. So I tend to go broad and not go deep on a lot of things. I’ll confess, I’ve used a fair amount of global variables in my code, probably some where I should not have. As an old-timer Perl Hacker, it’s… meh. My code was often quick & dirty to get the job done, not elegant and meant to last.

That said, even though I read an entire book on OpenSCAD I somehow had it in my mind that variables in OpenSCAD could not be changed during run-time, as it were. OpenSCAD is… weird, but I’m okay with that. Supposedly variables in OpenSCAD should be thought of as “override-able constants” rather than as variables in the traditional sense.

Also, I’ll admit that often I find examples of code either poorly written or too complex for me to immediately grasp. (I’ll let you decide which is which.) Here, you can read about scope in OpenSCAD User Manual/User-Defined Functions and Modules and OpenSCAD User Manual/General.

Or you can look at my example above… Because yes, you can change the value of a variable in a function / module! Variables are local within a module!

Here’s the demo code shown above. I am guessing 98% of software developers are saying “Duh!” right now… so this post is for me, and people like me, who may have missed this, may have been confused by this, or just needed a simple demo.

Categories
Uncategorized

Wire Spool Holder

I use these spools of silicone wire and they come in a cardboard box with a hole to feed the wire through and every damn time the wire goes back into the box and I have to open the box and feed it through again and wow it’s a pain! This is an attempt to solve that…

Like some of my other designs I wanted a modular thing. The wire comes in six spools/colors but rather than one huge print each spool has its own holder. This makes sense to me. I thought about ways to interlock them, but eventually decided to just add screw holes and mount them all to a piece of scrap 1/4″ plywood that was near the laser cutter.

The hole the wire feeds through is just right for this wire. YWMV (Your Wire May Vary!) The OpenSCAD file allows for adjusting the hole. An X-ACTO knife or drill bit could also be used to fine tune things.

Advantages of this design? It is stackable. I can put stuff on top of it. (Maybe more wire spools?) I can pick up the whole thing easily. There is not one rod holding all spools, and you can easily remove/replace a single spool.

So far I’m liking this thing. It’s similar to my Chonky Solder Spool Holder. It took about four revision to this before I had the final version.

Here’s the first attempt. It was too difficult to feed the wire through the hole, so the hole got moved up and the half-circle notch was added to allow getting a finger in there to feed the wire through. The bottom lip was also added to allow for mounting to the board with screws.

You can get the STL and .scad file from Printables.com – Wire Spool Holder. Print ’em if you need ’em!

Categories
Uncategorized

Headphone Hanger (in OpenSCAD)

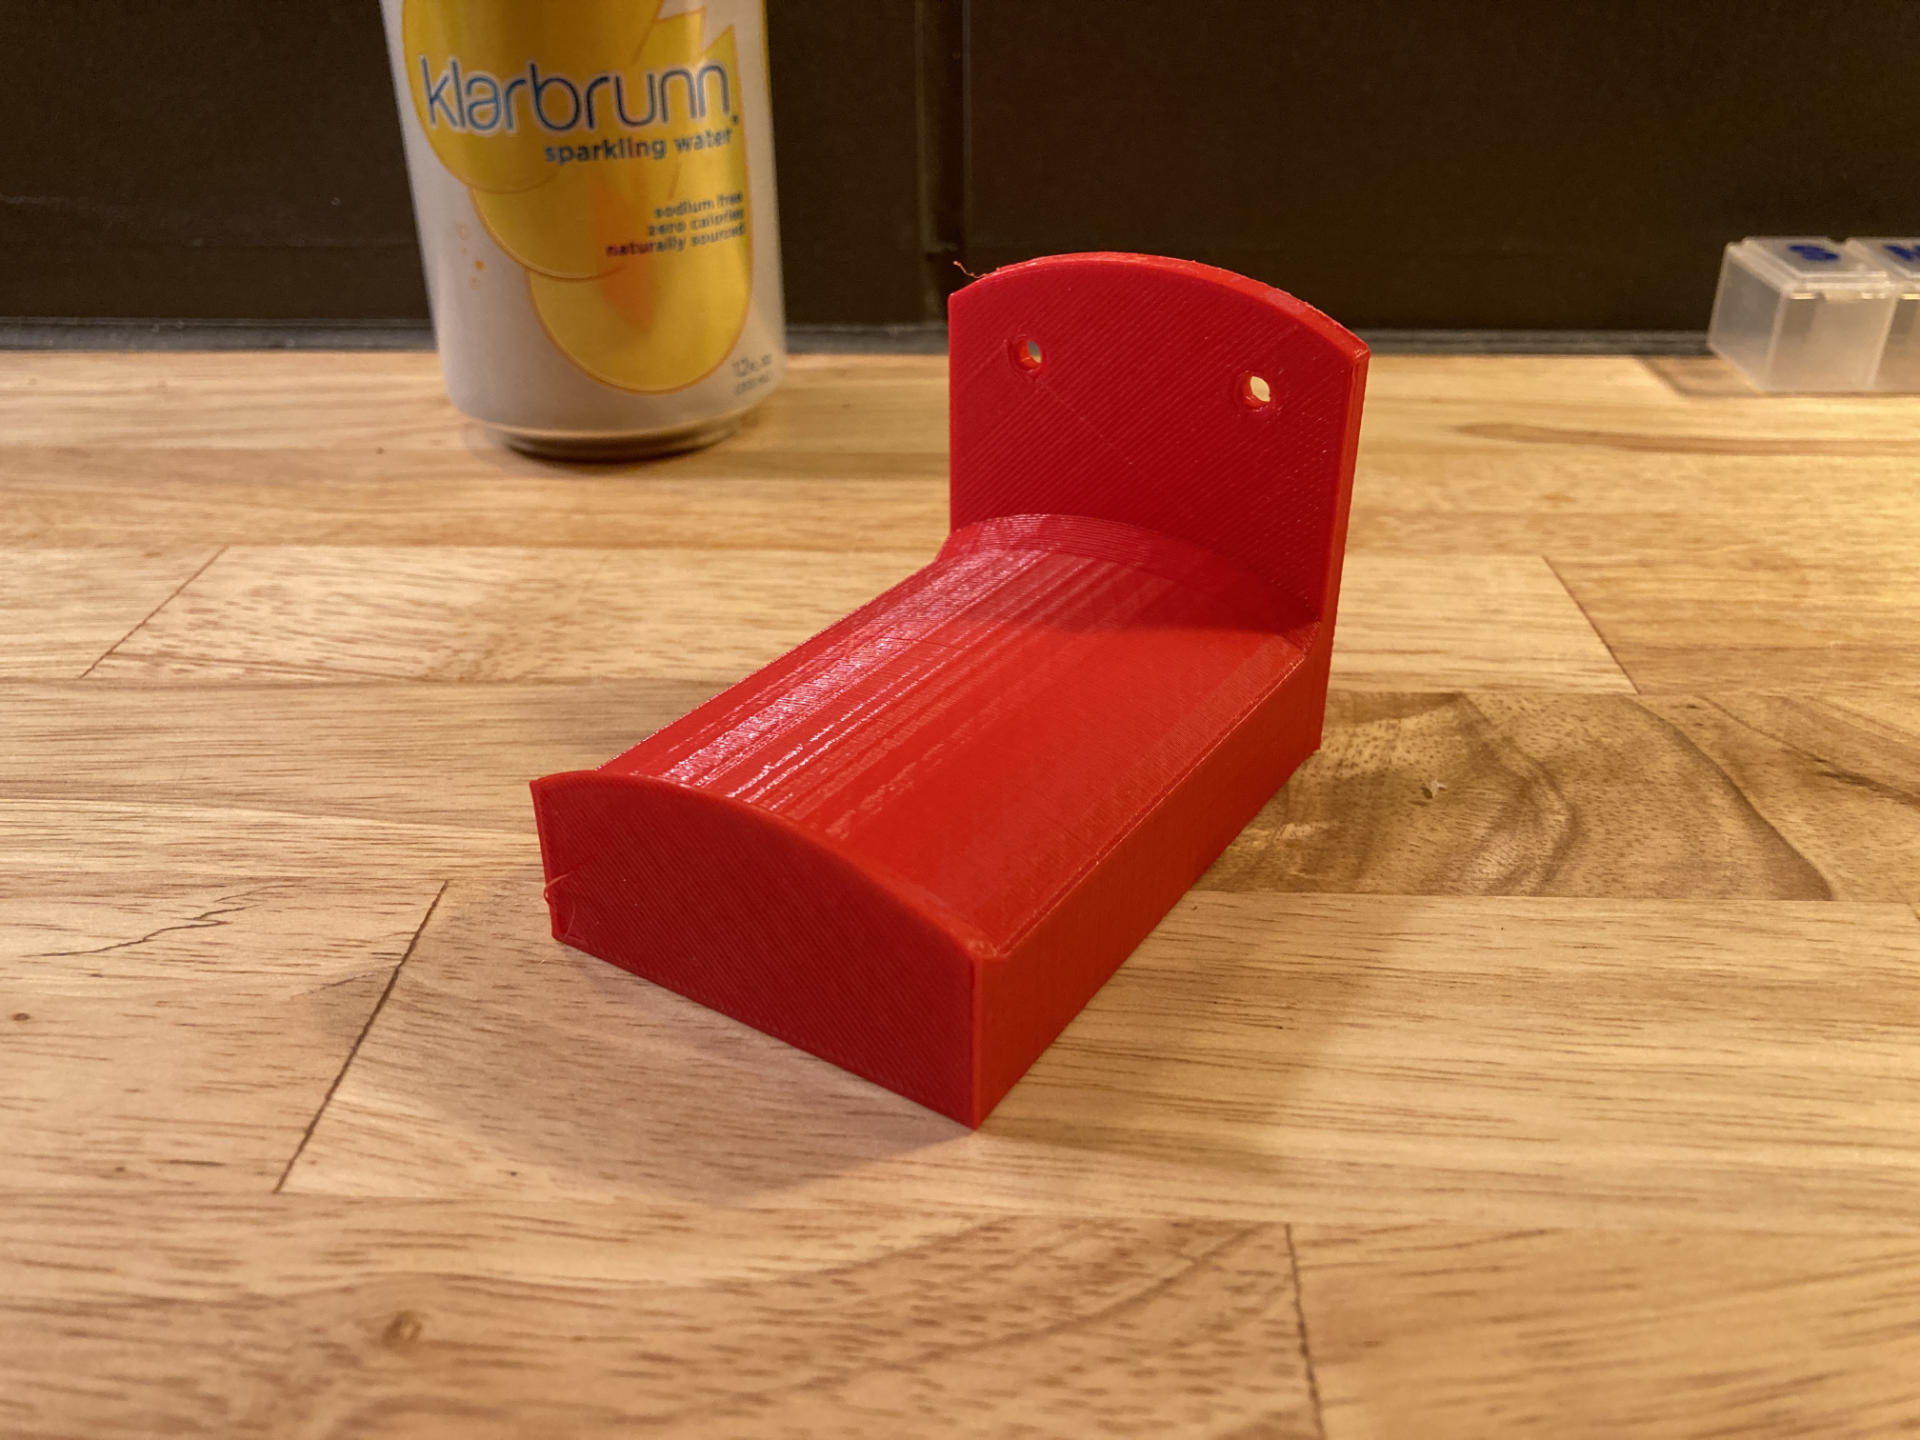
I wanted a simple headphone hanger for my office at work and I found a few really nice ones on Printables.com but I wanted one I could easily change the mounting holes on, so I whipped this one up in OpenSCAD.

Does it sort of look like a dollhouse bed? Yes, it does…

Can of some weird seltzer my partner drinks for scale… Also, I made it parametric so you can make it longer or shorter if needed.

Here’s a really long one…

And here’s a really short one…

And here’s one that’s juuuuuust right!

If you change the length remember to take into account the full depth of your headphones, not just the band that goes on your head, otherwise they’ll hang at an angle against the wall. That long one could probably hold all of my headphones! (I have four pairs. All of the other ones are Sennheiser but the ones I have at work are some Audio-Technica I got from the dumpster.)

You can get the STL and .scad file from Printables.com – Headphone Hanger. Print it if you need it!

Categories
Uncategorized

The (Prusa) Blob

It’s been just over a year since I got the Prusa MINI+ 3D Printer and besides a few minor hiccups at the start it’s been a great experience. I’ve printed hundreds of things without issue in the last 13 months. Sure, there have been a few failures, but they’ve been pretty minor… until now.

A few weeks ago I had some issues printing because I’m in Wisconsin and it’s winter and it gets cold in the basement. If the printer sees a low temperature it assumes something is wrong with the thermistor and won’t print. It’s a safety feature, and probably a good one (though I would like a way to override it.) My “manual override” involved running a small space heater in the tiny room the printer is in. It works, and It’s usually not so cold I need to do it often.

Now, I know a lot of people who get a printer post online immediately “What upgrades should I do first?” and that makes sense if you get a cheap printer where costs were cut. But hey, this is a Prusa! It should be good out of the box. In fact the only modification I did was to add a silicone sock around the heating block to prevent a big blob of filament sticking in the event of a failed print.

So when it was really cold, and the printer wouldn’t print, and I was using the space heater… guess what got the printer printing reliably in the cold. Removing the silicone sock.

No sock, no problem, right? I started a long print and went to work. During the day I checked the camera that points at the printer and noticed the plate had moved. Argh. It’s happened before, so it’s usually just a failed print.

I checked again later and the plate was gone… It was probably thrown free from the printer. No a disaster, but annoying for sure. But wait… can you see it?

I found the plate on the floor and a bunch of useless plastic. Oh, and… The Blob!

Dammit! I heated up the printer and got the large blob loose, but it was all over the place. I grabbed the heat gun from my soldering station and (somewhat carefully?) heated and removed as much plastic as I could. Did I slightly deform the printed fan duct? Yes. Is there still plastic on there. Indeed. Did I put the silicone sock back on, but have to cut it to get it over some of the stuck on plastic. Ugh. Yup.

I haven’t done a full tear-down or clean-up but it’s printing again, and prints look fine. At some point I should probably get it cleaned better… or, you know… buy another printer. ;)