Categories
Uncategorized

Using the Shaper Trace

Back in December I heard about the Shaper Trace and ordered one immediately. I normally don’t order products immediately but a few client payments all came in at the same time and I needed to spend something on new tools before the end of the year, so the Shaper Trace was it.

I am no stranger to using the the Image Trace in Adobe Illustrator or Trace Bitmap in Inkscape to convert images into vector artwork. I’ve also uses a desktop scanner dozens of times to scan an actual object or a drawing, and convert that to vector lines so I can use it in various ways. The Shaper Trace streamlines that process and makes it (in theory) as simple as taking a photo on your mobile device and letting a web site (not a locally installed app) covert it for you.

Does it work? Yes, it does work. Is it perfect? No. I mean, nothing is perfect, but it is quick and easy and as I’ve mentioned before the easier a process is the more likely I am to do it. If it takes me between 5 and 10 minutes to scan something, bring it into Inkscape, and then convert it to lines that’s not bad. But… if I can take a photo with my phone, save the file, and have it in Inkscape as a vector file in less than 60 seconds? Well that’s pretty damn good. Shaper says “From Sketch to Vector in Seconds” and it’s kind of true.

Caleb wrote up a post on Makezine back in July. I dug around but didn’t find too many other posts about it. Some forum posts, and some promotional videos, but few longer write-ups.

The idea that Shaper has is that you’ll use the Trace to capture a paper drawing, vectorize it, and then send it right to a laser cutter or CNC machine for cutting or etching, maybe with some minimal design work along the way. They show someone tracing the outline of a tool and then cutting out a pocket for the tool. I tried doing a few traces of objects and I just wasn’t pleased with the results. I’ve been using calipers and measuring things for CAD for a decade now, and I just feel like that’s a lot more accurate for my needs.

So what is this thing? It’s just a frame? Well, it’s a frame and a web app (not a mobile app) that captures an image and gives you a vector file. Note that you don’t have to perfectly align the camera directly above the drawing as the frame will compensate for angles. That’s nice. (In fact it seems that it might work better if you do shoot from a slight angle.) Each frame is the same on the front (more on that later) but on the back is a unique QR code associated to that frame, and you then register it to your account to use it. Want to share the frame with someone? You’ll need to use one account. The frame itself is just a hunk of plastic with no magic inside. And I mentioned the web app, right? A lot of people were really upset there is no local app that can work without an Internet connection. (I’d like both options, please!)

So basically you are paying a (one-time) fee to get access to an application running on the Shaper Tools web site that works with the frame. For $99 USD I guess I’m okay with that. (I will probably never buy a $2,900 USD Shaper Origin, and $99 is probably the upper limit I’d pay for a device like the Trace. It could honestly be a bit cheaper if you ask me.)

Since this post is titled “Using the Shaper Trace” I should probably explain how I use it.


Look, I made a drawing! It’s an oven mitt, in case you couldn’t tell…

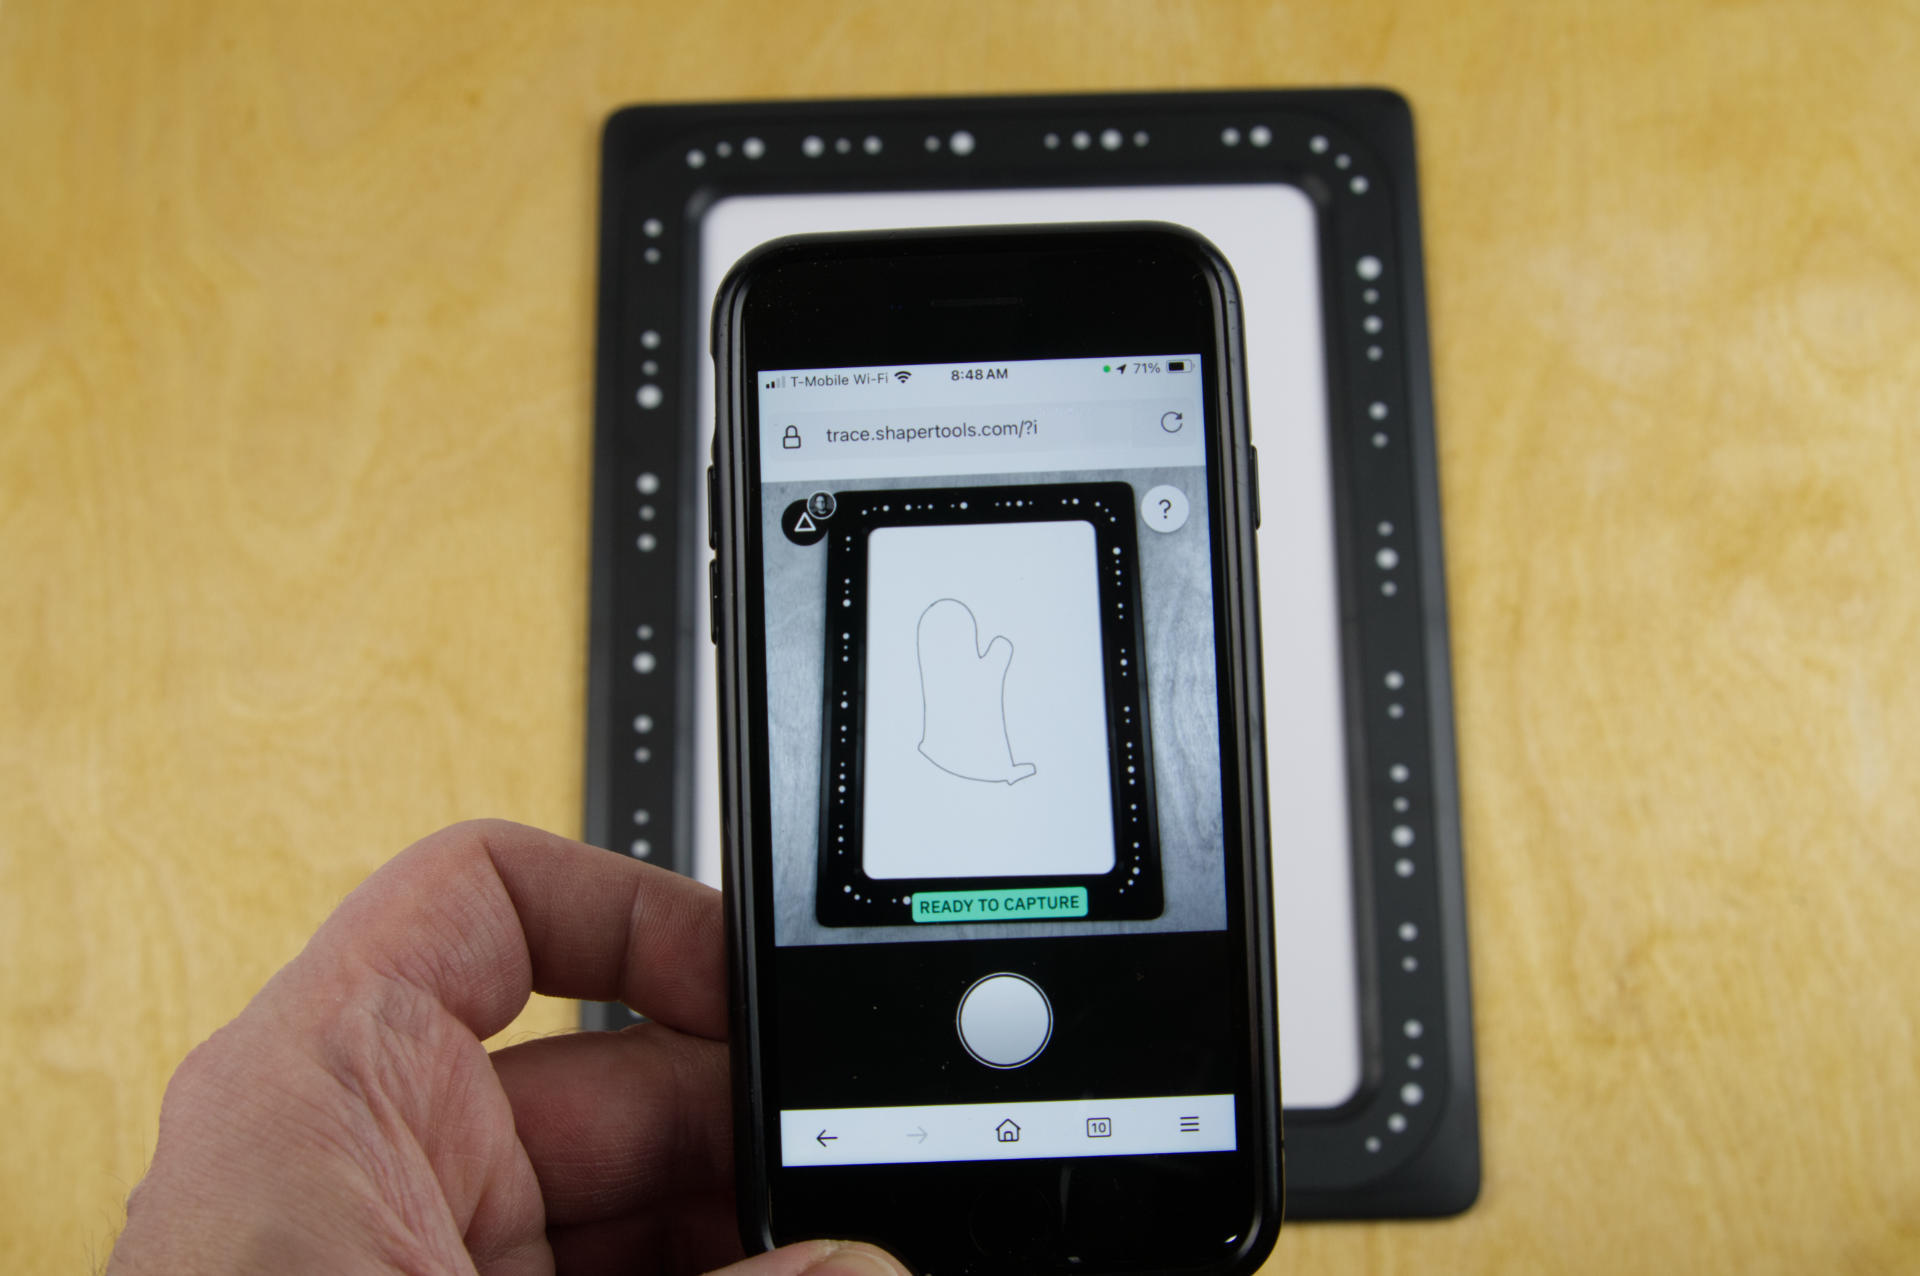
I use my mobile device to load the web site and capture the drawing by placing it within the Trace frame.

The drawing is converted to vector and you can choose two options, outlines and centerline. I pretty much always use outlines since I’ve create my drawings with the idea that the outside of the line is what I want.

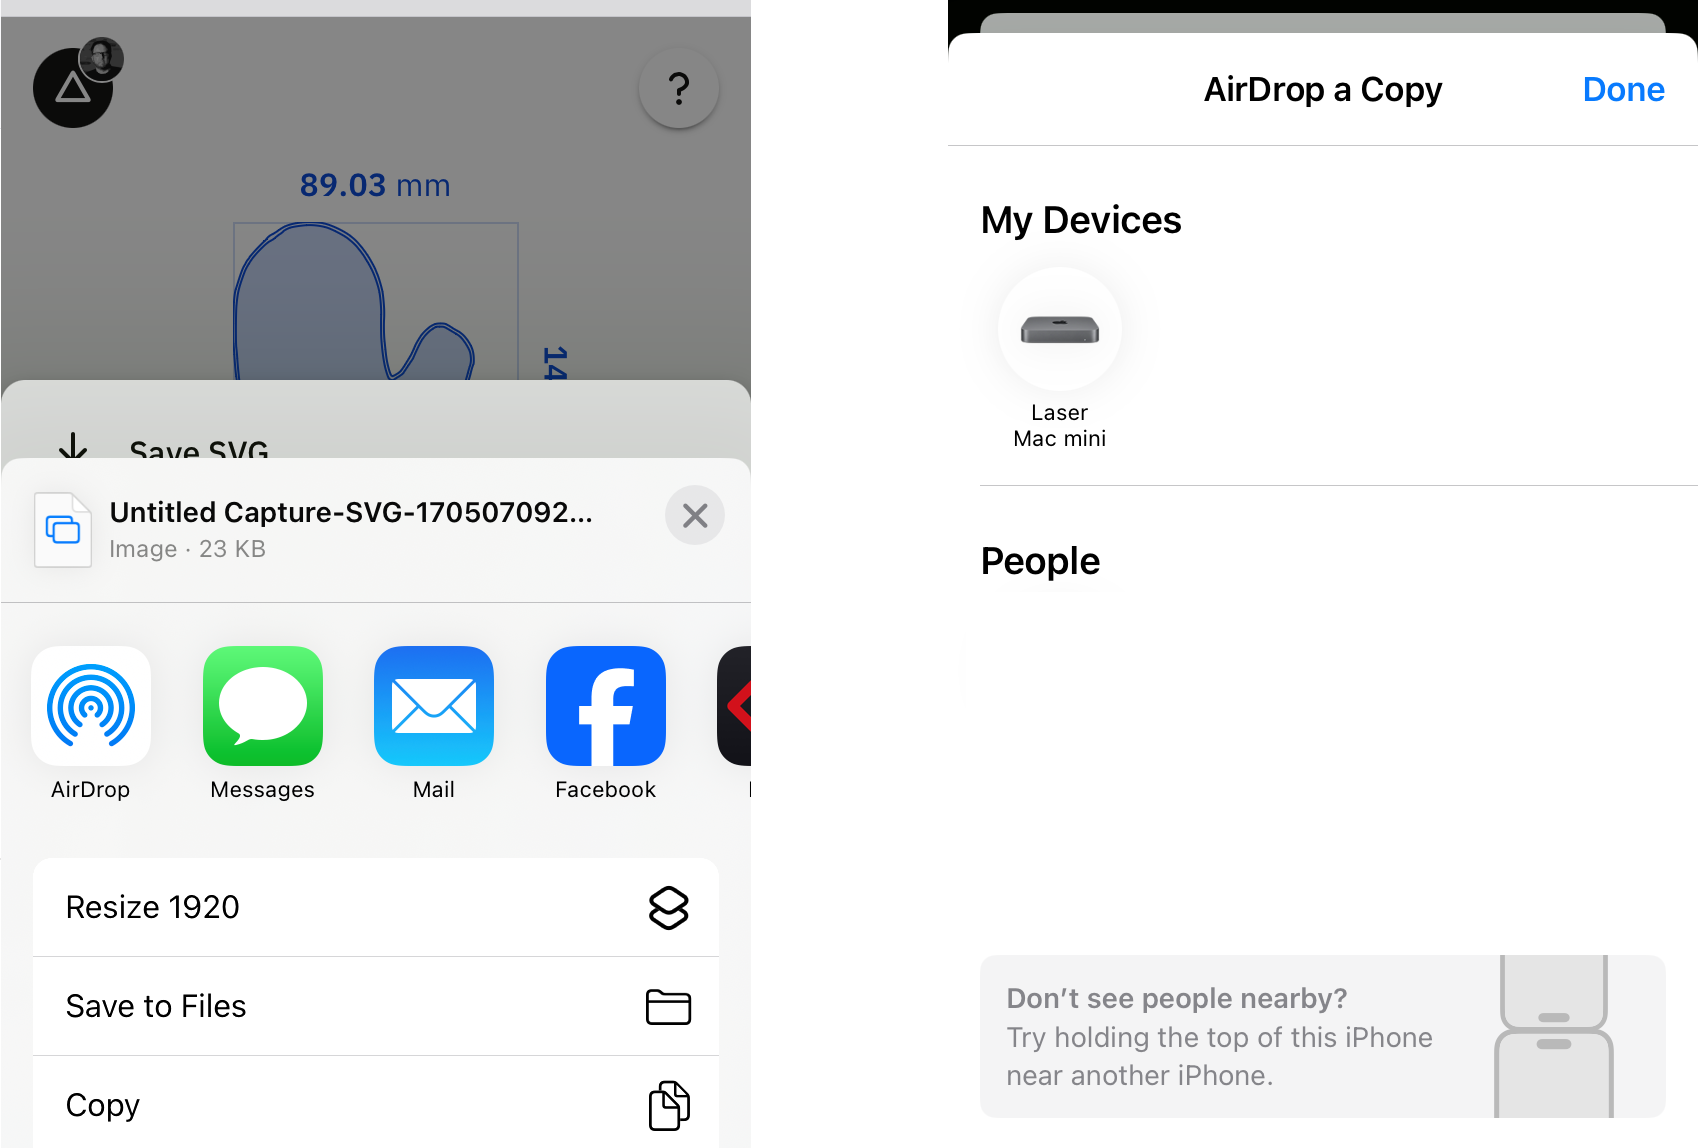
I save the SVG, either to my phone, a drive accessible to my computer(s), or in my case I use AirDrop to send it directly to my computer.

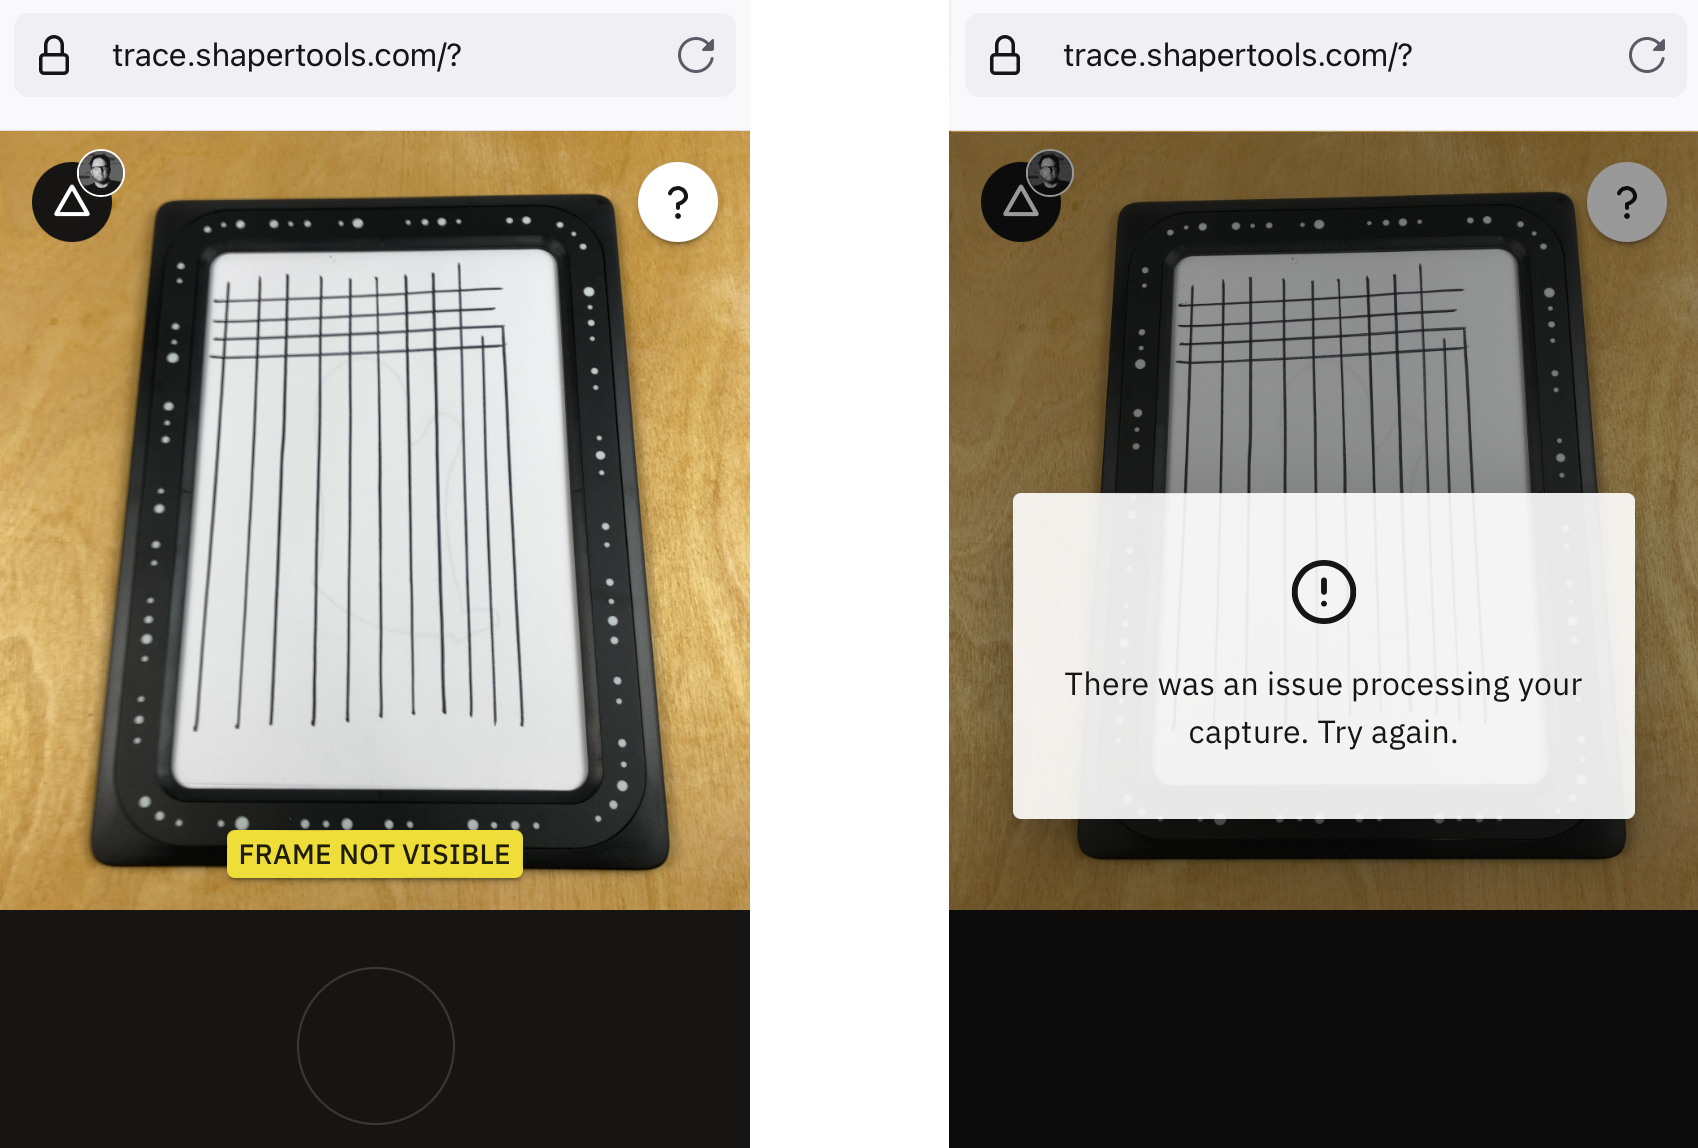
I think I’ve digitized a few dozen drawings with no issues. I do tend to place the Trace and drawing in good lighting and get a nice clear shot of it with the camera. Still, things can go wrong. Here’s an error I got one day. I think I closed the web page, reopened it, and tried again and it was fine. Not sure if the issue was their servers, my browser, or something else. (And of course you do need an Internet connection for it to work.)

I then sit down at the computer and open the saved file in Inkscape where I can do whatever I want with it. (I won’t get into the specifics of editing a vector file, preparing it for use with whatever machine you might be using, but hopefully you get the idea. It’s that simple.)

But Wait! What if you are at work, and your Trace is at home, and you really want to use it? Well, just use a copy. As I mentioned, all the Trace fronts are the same, so the web app doesn’t care what Trace you are using, as long as you have an account and it sees a Trace-like thing, it works just fine.

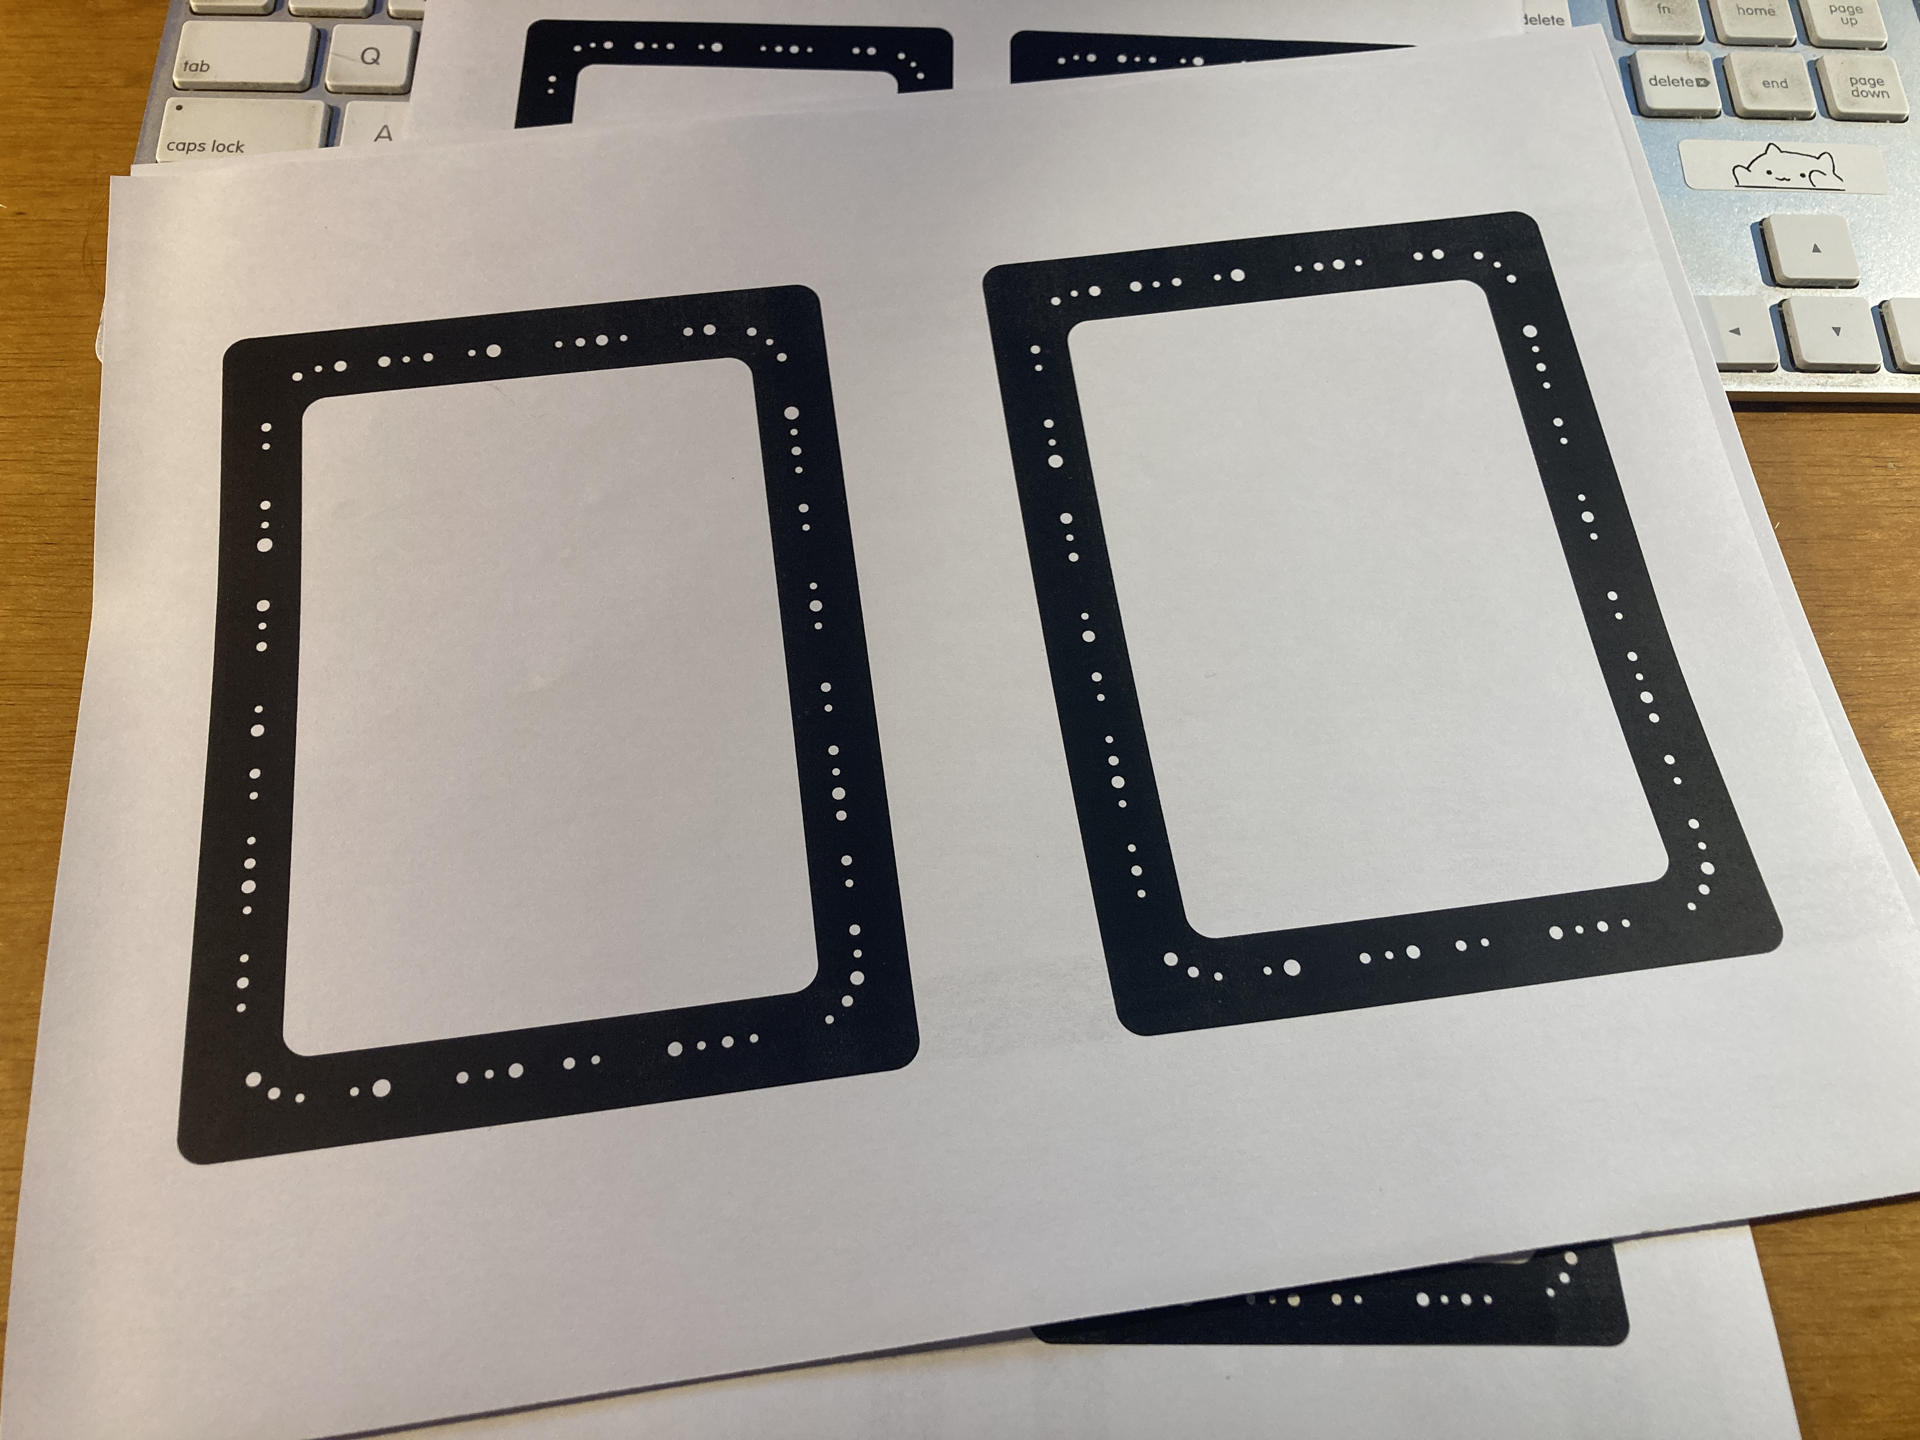
Here’s a printed out copy of the Trace frame. It’s not even my Trace, I grabbed the image from the Shaper web site and printed it on the copier at work. Neat! (Oh, some other people noticed this as well.)

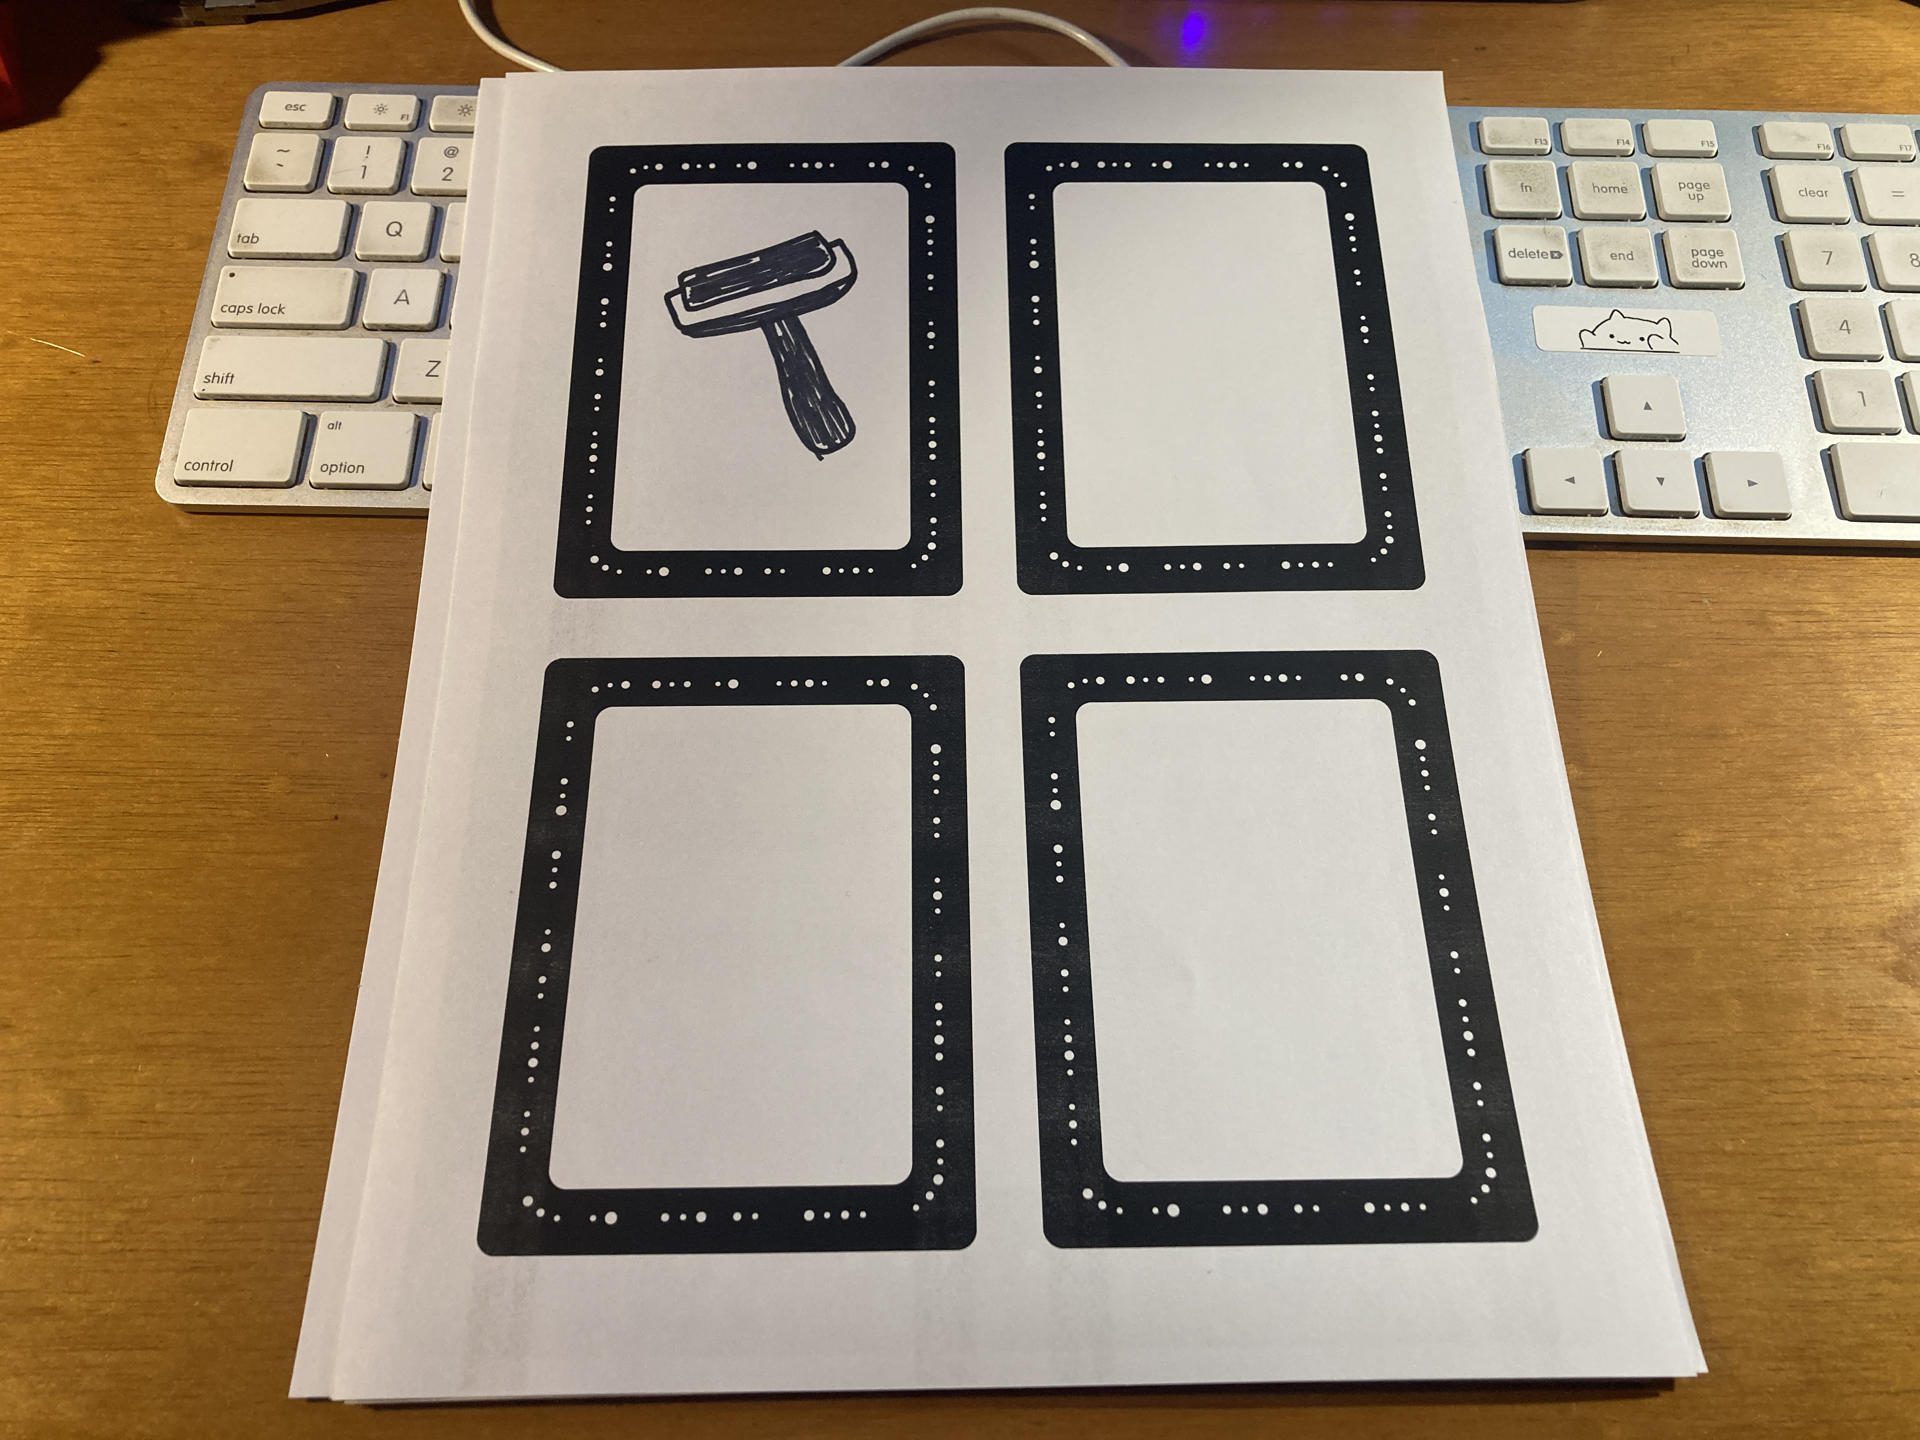
Even better, you can print smaller ones. Here’s a letter size sheet of paper with four Trace frames. You can basically make them any size you want to work with the size of drawing you want…

This is really cool because if I wanted to do a small drawing with the actual Trace frame I’d still need to scan an entire sheet of paper and the drawing might be quite small on it, so this sort of lets you play with the resolution, which can make a different if you are drawing by hand, and lets you play with different pens and line width as well. This basically eliminates the need to even use the actual Shaper Trace frame.

So the Trace is an interesting tool, and I can totally see how someone might get one and it may not do what they want, and I think I felt that way at first, but the more I use it the more I am building a workflow around it, so that’s good. If you’ve got any questions about the Shaper Trace let me know!

Categories
Uncategorized

Fancy Sanding Blocks

About a year ago I “designed” (ha ha!) and 3D printed the Super Boring Sanding Block which has served me well for sanding miscellaneous wood in the shop, but I found a nice parametric sanding block for OpenSCAD so I thought I’d give it a try.

You can adjust the length, width, and height, and basically make it any size you want. I made mine to fit the sheets of sandpaper I normally buy. I’ve now got six of them with various grit for each one so I can just grab the right one and get to work. (I also added labels to each using the Niimbot.)

My one complaint (which someone else also had) is that you can’t easily figure out the size needed to fit a specific length of sandpaper. I don’t know if there is some OpenSCAD wizardry or maths that would do this for you, but my solution was to print a really thin version (repeatedly) and adjusting the numbers until it properly fit my sandpaper, then I made full width versions. Things like sanding blocks are a perfect match for 3D printing.

Categories
Uncategorized

Gridfinity Organization (Part 1)

I mentioned Gridfinity a bit in my post about a custom box for hardware, but I’ve also been working on an organization system using Gridfinity for my soldering desk. I’ve got Version 1 done, but of course the beauty of Gridfinity is that it’s modular, and you can make it more modular depending on how you do it.

Usually when you see people print the baseplates for Gridfinity bins they are a large rectangle because they are putting them in a drawer or some other very rectangular area, but I have a weird non-rectangular thing going on, so I printed a bunch of smaller baseplates and bolted them together. The Gridfinity Rebuilt in OpenSCAD library adds some nice features, and one of them is these baseplates with holes, so that’s what I used. (As a bonus I used a bunch of #4-40 hardware I had lying around because I tend to use 3mm hardware for most things.)

As mentioned, it’s modular. So it’s easy to rearrange things, take bins out and move them around, and put them back in place… and they are held into the baseplate with magnets, so they (mostly) stay put. The larger gray one on the left side is my little trash bin. When soldering I put bits of insulation, wire, or any other tiny scrap in there, then dump it into the rubbish bin when it gets full. The rest of the bins are the things I use most often when soldering. I may still make a few tweaks but this is a huge improvement over the cut up cardboard box I was using. The “everything in its place” approach can definitely be a good one.

There’s one custom thing here, in the back row, which is inspired by The New Tool Holder but in Gridfinity form. I rushed that piece and didn’t have enough clearance on two of the holes so I ended up drilling them out a bit. It worked fine, but it does serve as a reminder to slow down and get it right.

(I didn’t get a photo of it actually on my soldering desk… if I’m honest it’s still a bit of a mess, just because there is so much on it. If I get it cleaned up I’ll grab a photo and add it here.)

Categories
Uncategorized

NIIMBOT Label Maker

I recently got a NIIMBOT D11 label maker. I’ve had a DYMO for years (and even shared a great tip for it!) The NIIMBOT has some nice features but also a few things that are sort of annoying, and I’ll ramble on about those things in this post.

Here’s a short list of the good things:

  1. It uses an app
  2. It has a built-in battery
  3. It’s inexpensive
  4. It’s pretty simple
  5. You can make fully custom labels

And another list of the bad things:

  1. It uses an app
  2. It has a built-in battery
  3. It cannot stand up
  4. It’s complicated

The App
Okay, let’s start with the first item on both lists… the app. Many years ago I got a DYMO LabelManager 160 Portable Label Maker. It’s dead simple to use, does not need an app, and just… makes labels. We have one at work, and at my previous job, and anyone can use it quite easily.

With an app, you first need to install an app (of course) and that is the only way you can use a NIIMBOT. There is no keypad, you can’t connect it to a computer (which would be awesome) and so yeah, an app. The world is full of apps now, and you need them to do things, which means you need a mobile device to do things.

And yes, the NIIMBOT is a Chinese product, so the app is also from China, so if you are hesitant about installing apps from China, you are out of luck. Supposedly you do not need to register to use the app, unless you want to save labels/templates for future use. I found this out after I registered. The app also has “Premium” content, where it shows you clip art and fonts that you cannot use unless you pay, which is quite annoying.

The Battery
It has a built-in battery, which is of course good and bad. When the battery dies, it’s not going to work until you charge it. You can’t swap in a fresh set of cells. Of course this also means it won’t kill a set of 6 AAA batteries like the DYMO might. The built-in battery thing is a toss up but everything nowadays seems to be headed that way. Once the internal battery is dead I guess you just chuck the whole unit into the bin. More rubbish.

The Cost
The NIIMBOT D11 costs just under $20 USD, which isn’t too bad. My DYMO purchased in 2017 was about $10 USD (and is currently $45 USD!?!?) of course you can get an old school embossing label makers for $12 as well, and no batteries are needed!

It cannot stand on its own…
The strange design choice to add a completely rounded bottom to the unit means it cannot stand upright. I fixed that with a 3D printed NIIMBOT D11 Stand.

Simple
If you just want to print labels, it’s pretty simple. In some ways using the app can be easier than using the keypad on a DYMO 160. So yeah, as long as you have no issues using the app, you get simple.

Complicated
If you want to get complicated, you can. As I mentioned, completely custom labels are possible but they are more work. If you don’t like some of the aspects of the app (China, Premium content, an account) or have issues connecting via Bluetooth, well… it can get more complicated.

Completely Custom Labels
Now for some good news. Since you can load any image into the app, you can create completely custom labels outside of the app. Just use your favorite software to design a label the proper size (in one color) and export it as an image file (PNG or JPG) and then load that into the app and print it. This works well, but is obviously more work than just doing the label design within the app. I used Inkscape on my desktop computer, but for you mobile freaks you can probably figure out some mobile app that can work.

One More Bad
I saw a YouTube review of a NIIMBOT printer and supposedly the reviewer had a NIIMBOT made by… not NIIMBOT. Yes, there are fake/counterfeit units. NIIMBOT themselves even note that there is a fake app you need to avoid. So fake hardware and fake software are things you need to avoid when dealing with this device. Fun! (No, not fun. Bad.)

Whew! With all that out of the way, the labels themselves are good. The app can certainly be easy to use, and spits out labels quickly and they stick well. So yeah, a label maker should be simple, and the NIIMBOT D11 certainly can be simple.


Note: This post contains an Affiliate Link. Read More.

Categories
Uncategorized

Hardware Gridbox

After I got the Bambu Lab P1S I stress tested it a bit with the 3D Printed Pegboard but before that project I actually printed this Gridbox which uses the Gridfinity organizational system.

The way Gridfinity works is that there is a grid (duh) and you print bins or other “things” that fit into the grid. The bins can be 1×1 or 2×1 or 4×4 or whatever fits into the grid. I actually used Gridfinity Rebuilt in OpenSCAD to generate these little bins because I prefer OpenSCAD to Fusion 360.

I scaled the height of the bins to the internal height of the Gridbox. I can tip the box over and all the hardware stays where it should. Almost. The washers are small and thin enough they occasionally end up in the top part of the bin where the labels are. I could probably solve this by gluing a piece of foam inside the top lid so it closes and provides just an extra bit of cushion. I may try that… If I did this again I would perhaps alter the bins just a bit to have flatter tops since I won’t be stacking these bins.

This really is a great way to store all of my 3mm hardware. As I’ve mentioned in other recent posts, I’m really trying to organize my shop and maximize efficiency. Before this I kept all the hardware in individual bags and then in a larger bag, which meant pulling out all the bags, grabbing the one I wanted, opening that bag, getting the hardware, etc. Again, let’s make this easy. I can also see how much hardware I have in each size easily, as compared to being stuffed into bags.

This Gridbox is a really nice design. I used the 4×4 version and will probably make another for my 2.5mm and 2mm hardware. There’s also a version that allows for a clear acrylic laser cut piece to fit into the top lid so you can see what’s inside. I don’t need that for my hardware, but it is a useful feature.

The model is based on the Rugged Box (Parametric) by Whity, which sadly is only parametric if you use Fusion 360. Sigh… I did find this Parametrizable Rugged Box (OpenSCAD) by Dochni but I don’t love it. I’ve started to try improving the code to do what I want but then I just started to write my own which I haven’t finished yet. (Note: See Rugged Parametric Box in OpenSCAD for a great new model!)

Besides a few things that give it away as 3D printed, this is another print that just does not look printed. The quality of the print is so good, and the design is top notch, so yeah… we’ve come a long way since 2011.

Anyway, the 3mm hardware is now sorted! That said, I have been using my Parts Tray with Sliding Lid for over a year now and I’ve been quite pleased with it. I may make a few changes to it though, as there are a few specific pieces of hardware I like to have at the ready.