First, a disclaimer! I’ve known Jeramey from Urban Milwaukee for over 20 years. I’ve also worked with him and Dave on a project once, but it was over a decade ago. I’m a fan of Milwaukee, a fan of publishing, and I like what Urban Milwaukee does. I’m a supporter.
I’m also a fan of filling potholes, and I got probably 30 of them filled this year by reporting them to the city. The first batch were filled within a few days, which is awesome.
So many people complain about potholes but do nothing about them. Report them to the city using the MKE Mobile Action app. It works!
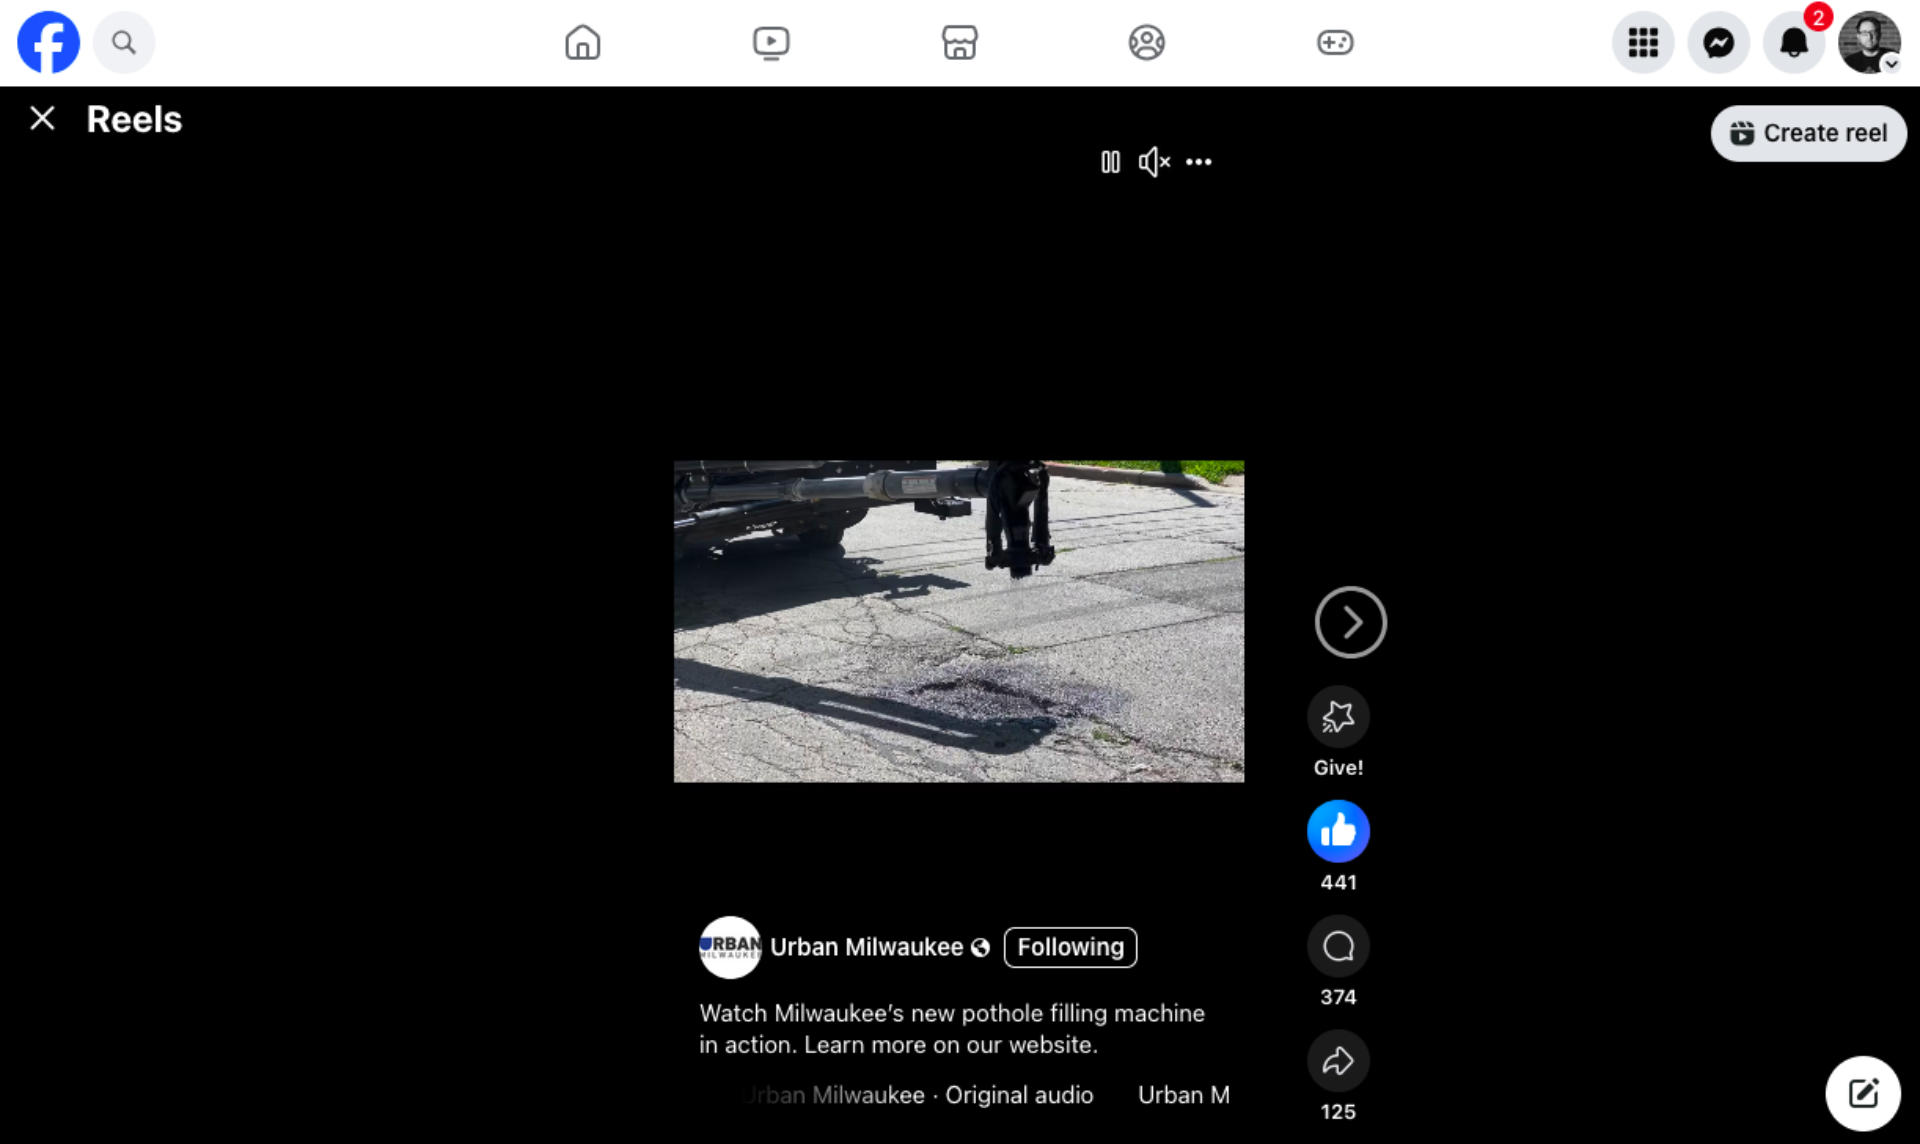
Urban Milwaukee published an article: See Milwaukee’s New Pothole Filling Machine but they also published a Facebook Reel (or Instagram Reel?) and it is inundated with comments from ignorant people who didn’t read the article.
A large majority of people said they could do it faster by hand. Cool. Do it. These are the same people who see a painting and say “I could paint that.” These are people who don’t seem to know or care that DPW laborer Bryan Rodriguez was struck and killed by a hit and run driver while filling potholes. These are people who say city workers are “lazy” and one person works while five others watch. Some of these people probably say “I’m a good driver but everyone else on the road is a terrible driver!” We also got some anti-union comments! Of course unions do things like protect workers, so they don’t get injured or killed on the job… Bitching about wasting taxpayer’s money, and all sorts of other things that were addressed in the article none of them seemed to read.
Sigh… I can’t even. I hate to say the old “Don’t read the comments…” thing is the solution, because we do need to be able to share our views in a public forum.
And I don’t want to blame Urban Milwaukee. I could blame Instagram for not allowing actual working links for posts (because Instagram is anti-web) but I guess I can also blame what we as a society have become… Terrible People.
So please, I’m begging you… don’t be a terrible person.