Categories
Uncategorized

Acetone Vapor Finishing

Safety First!

I decided to try my hand at this acetone vapor finishing method of making 3D printed parts smoother.

If you’ve seen 3D printed parts from a “fused filament modeling” printer, you know that there are tiny ridges in the prints. You can print at different layer heights for finer layers (and smaller ridges) but that increases your print time.

As you might be able to see in the image above, I placed a large glass jar on the print bed of my RepRap and cranked the heat up to 110° F. I had maybe 2mm of acetone in the jar. (2mm may not have been enough.) I waited until I could see the vapor cloud on the sides of the jar and then (with gloves on) placed the prints inside.

Here’s the results:

Skulls

Skulls

Skulls

You can see an untreated print on the left, and a treated print on the right. The treated print didn’t get quite enough melting to smooth everything out. (And yes, these were a challenge to photography!)

TARDIS

TARDIS

Another one… the TARDIS on the left shows the ridges while the right one is smoother. Note that the smoothing worked much better on the outer edges, and not as much on the inset parts of the print. It sure does make your parts shiny, though!

I’m sure I’ll keep experimenting with this technique, and hopefully start to improve it.

If you feel like seeing the original full-size photos, check the Skulls and TARDIS on Flickr.

Categories
Uncategorized

PIY vs. Buy

Camera Mount

PIY stands for “Print It Yourself” which is a little like “DIY” but involves things you can easily print on a home 3D printer instead of buying.

Remember last year when I made this hot shoe audio mount? Well, a few months back we picked up a Zoom H4n to use for some DSLR shooting, and for the quick & dirty stuff it makes sense to just mount the Zoom on the camera. I just printed another one of my mounts, added two nuts and a bolt, and had one we could use. They’re cheap enough that I could probably print 10 of them so we have spares on hand if needed and still come in under $20.

HS-1

The story doesn’t end there though… at some point I was looking up specs on the Zoom and wanted to check out the accessories and came across the HS-1 Hot Shoe Mount Adapter. It’s basically the same as the mount I made, except it’s probably metal, and it’s about $20 for one of them.

So this time around it was the opposite of my GoPro Frame. For that one, I saw the frame on the GoPro web site and sat down to design my own. For the Zoom mount I ended up making my own before I even knew they had one.

This is the amazing world we live in now… where open source 3D modeling software allows you to quickly and easily design something, and open source 3D printers allow you to quickly and easily print them out.

PIY is the new DIY.

Categories
Uncategorized

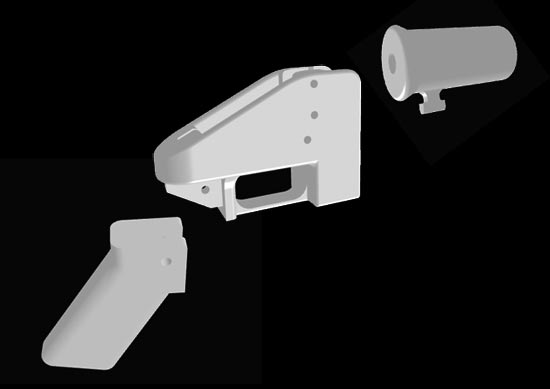
Printable Guns on WNYC

WNYC 3D Printed Guns

A few weeks ago I was interviewed by a reporter from WNYC for their New Tech City show about 3D printed guns.

I know a lot more about 3D printing than I do about guns, but since the two have intersected, the media is looking for people with knowledge in both subjects, and I guess I know enough about both to talk intelligently about it. :)

We are not yet at the stage in home 3D printers where you can just download and print a working gun. It may be 10, or 20, or 50 years out, but don’t worry about it, because the one thing I’ve heard numerous times in talking to various members of Milwaukee Makerspace is this bit from Have Blue:

The one point I try to make (and that they generally fail to grasp) is that if it eventually becomes possible to download a file from a website, feed it to a printer, and have a fully operable handgun a few hours later, the technology will have already impacted our lives in far more incredible ways.

Just think about that… We’re already making progress on printing human organs. Imaging printing a medical device that could save someone’s life, or medication, or your next mobile phone, or food, or any specialty tool you need. It’s potentially World Changing, so to focus on guns alone is just silly.

You can check out the episode on their site: 3D-Printed Guns and Violent Video Games, or listen using the embedded player below.

Categories
Uncategorized

Buy my thing! (But not from me?)

GoPro $$$

This is an interesting one, and I’m still not sure what I think about it…

I’ll start by saying that I’m a fan of open in that the sharing of knowledge is important to me, as is the sharing of sources, not just in software, but in other areas as well. Yes, there’s money to be made, but generally, besides the fact that money allows us to have a place to live, and food to eat, and all the other things needed to survive, I’m not really a fan. Money itself is boring, but it can allow you to do interesting things.

I recently posted about the GoPro Hero3 Frame I made. I made it because it was a thing I needed, and didn’t feel like spending $40 on the nice one that GoPro sells. I shared the design files because I thought they might be useful to others. I share things because I’ve gotten so much value out of others sharing things over the years. It’s been over 20 years that I’ve tried to live by that ideal. It mostly works.

I was quite pleased to see that someone found value in my sharing, and improved upon my design to create GoPro Hero3 Frame – Improved. Again, this is how I want the world to work. I made a thing, and someone else made it better. Everyone wins, right?

So anyway, I’m doing the daily browse, and I come across this blog post from Shapeways titled 3D Printed Stand for the OP-1 Synthesizer. I have little interest in a synthesizer stand, but I love 3D printing, and think it’s the future. In the post is a link to all the GoPro items on Shapeways. (Shapeways, for those who don’t know, lets people design things, get them 3D printed for themselves, and even sell them to others. It’s a great thing for people who don’t yet have a 3D printer, or want higher quality, or different materials, etc.)

Shapeways

Where was I? Oh yes, I click on the link to see the GoPro related items and see a GoPro Hero3 Frame and think “Hey! Someone else made one too! Cool!” and I read the text, and it sounds just like mine! Now, it was about 4am so my brain was a little slow… but I clicked on the link…

Shapeways

Holy Crap, that is mine! Yeah, that’s mine. And it’s for sale, but not by me. Here’s where you decide whether to freak out… and to what degree.

Now, I designed my item, and shared it freely on Thingiverse, and even used a Creative Commons Attribution License. I specifically wanted others to be able to have it. Mission accomplished, right? Right.

So the freakout… is it a good freakout, or a bad freakout, or a weird mixture? Do I want to be in the business of selling GoPro Hero3 Frames? Probably not. I have enough other business to deal with, and as I said, GoPro sells one, and it’s probably of much higher quality. Am I upset that someone is using my work? I shouldn’t be (right?) The description does say “Created by Raster” and has the URL (but not a link) the the Thingiverse page. But who is cadbury204? They have no designs of their own in their Shapeways shop. Is it some automated bot that pulls items from Thingiverse and sells them on Shapeways? I don’t know… if it is, does that change things? I don’t know…

If I think about the “spirit” of open source, as it’s ofter referred to, is this “cadbury204” following it? Are they providing value just by allowing someone to easily order the item through Shapeways? Are they just out to make money from the work of others? Again, I don’t know… I don’t even know if I should care, but I guess I do, mainly because I find it interesting.

And, I’m interested to hear what you think about it.

Categories
Uncategorized

The Making of MAKE

One of the great things about Milwaukee Makerspace is the inspiration you get from other people. Kevin recently used our aluminum forge to create a piece he calls FEAR, which he said was an update of Robert Indiana’s LOVE.

I’m not one to give in to fear, and I figured that with a new year beginning we should focus on something a bit more positive, so I created MAKE.

I also figured I’d walk through the process of creating this piece.

MAKE in Inkscape

While MAKE is three dimensional, it’s really just an extruded two dimensional form (sometimes called 2.5 dimensional) so I started as I often do, with Inkscape. I used Georgia Bold, which is the font Kevin used in his piece, and typed up the letters for MAKE.

MAKE outlined

I selected each letter and combined them into one object via the “Union” command under the “Path” menu.

MAKE outlines joined

At this point we no longer have editable text but an outlined object. We still have curved lines though, and that just won’t do for 3D printing, as we need all straight line segments.

MAKE with straight lines

I selected all of the segments and inserted new nodes. Once you have more nodes, you can convert all of the segments into straight lines. No more curves! If you add enough nodes the short straight line segments will look like a proper curve. (Adding more segments can increase the complexity of the file, which can increase the time to process and print it, so don’t go too crazy.)

MAKE reversed

After I had my artwork outlined, I exported it as a DXF file and brought it into OpenSCAD to extrude it. Also, here’s a trick: I actually flipped it 180 degrees in OpenSCAD so that it would face down on the print bed. I wanted the “front” of the piece nice and smooth.

MAKE

Here’s what it looks like in proper perspective… What’s that? You’re already getting inspired to make something? Excellent!

MAKE in plastic

And here’s our final piece. MAKE… in plastic… for your desktop. I like the white, but I definitely need to get more filament colors… I think this would look great in orange or red!

MAKE it BIGGER

I made an attempt at a larger version, but the old RepRap went a little crazy and the print failed about 15% into it. Still, it’s a pretty good MAKE if you ask me. Perhaps this one is more suitable for the wall than the desk.

(Note: grab the file from Printables.)