Categories
Uncategorized

High Capacity CPAP Water Tank

Hack to add on an auxillary water tank for a CPAP machine

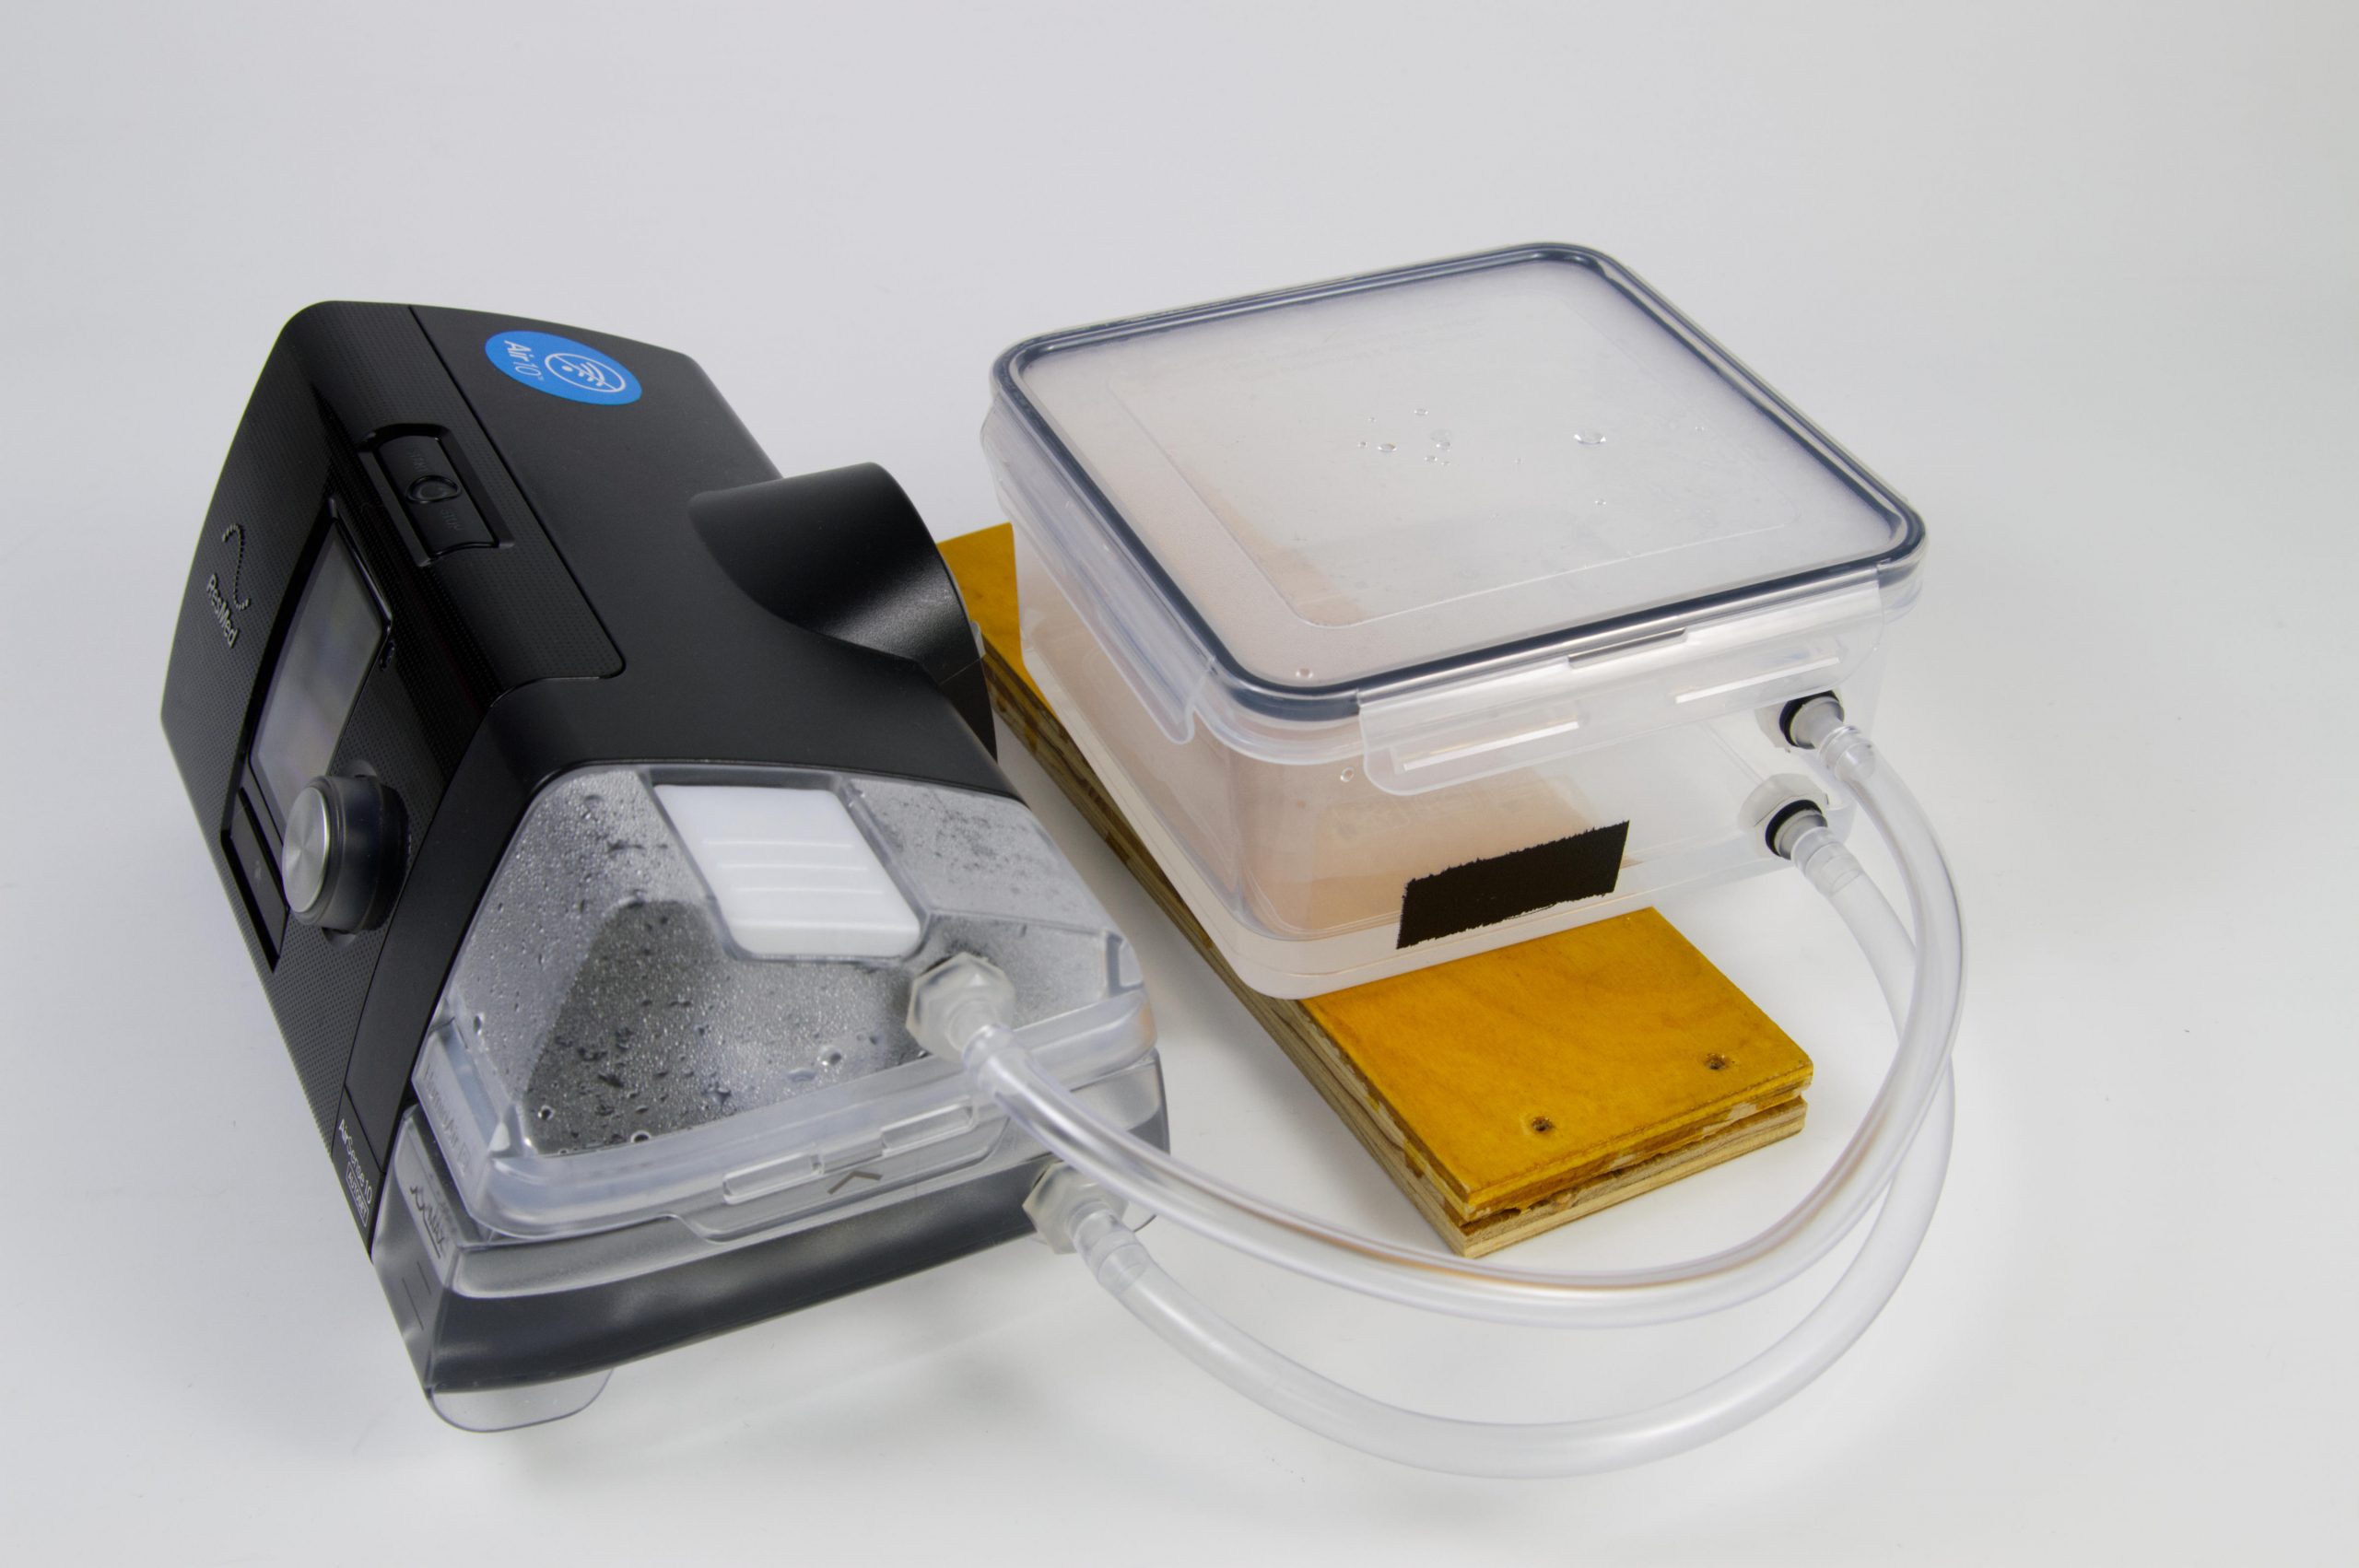
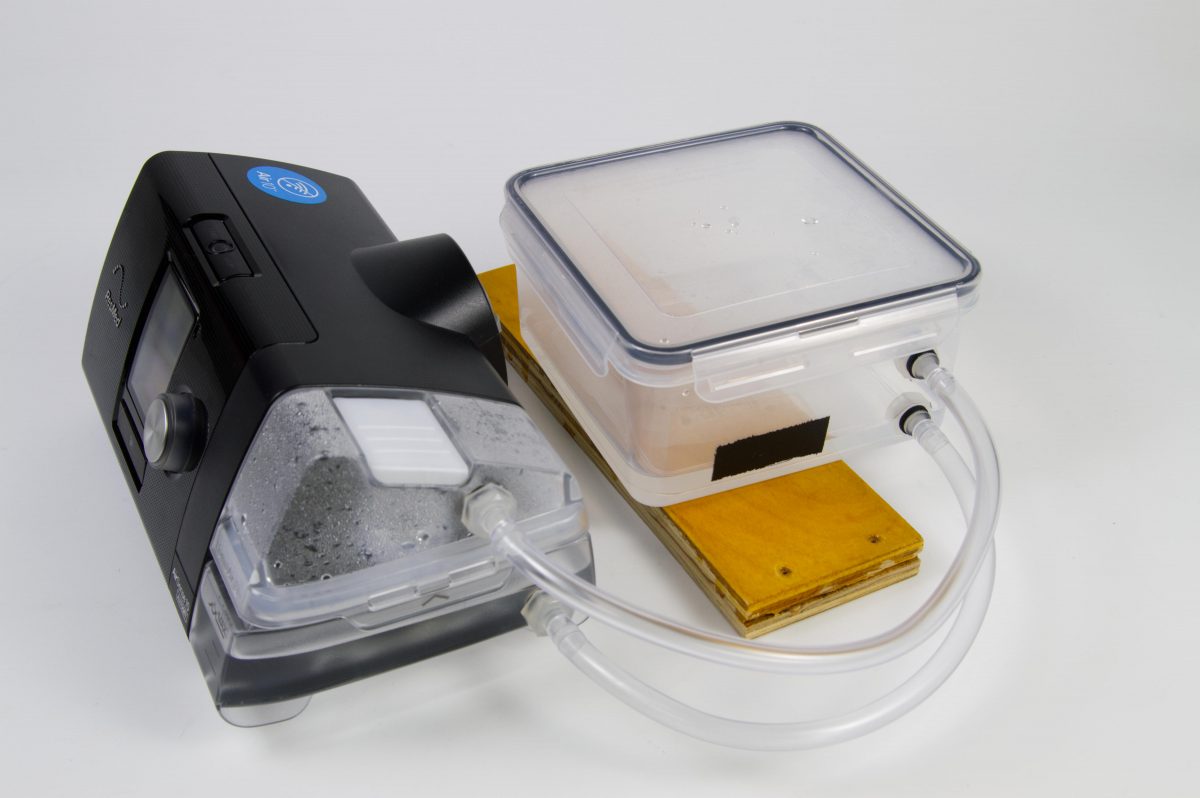
I ended up making a High Capacity CPAP Water Tank (Or an “Auxiliary Tank”) because the manufacturer doesn’t make one. This post will show what I’ve done and talk about how it works a bit.

I use a CPAP and got a new one in 2024, and while it works much better, there is still one issue with it… If I set the humidity too high it runs out of water in less than six hours, which is how long I usually sleep. For a while I was filling a second tank and then swapping in the middle of the night when I awoke from the dryness. It works, but it’s not ideal…

So I wondered if the manufacturer had a larger capacity tank… they do not, but in the process I found someone who had come up with solutions, and I’m a maker so I had a go at it.

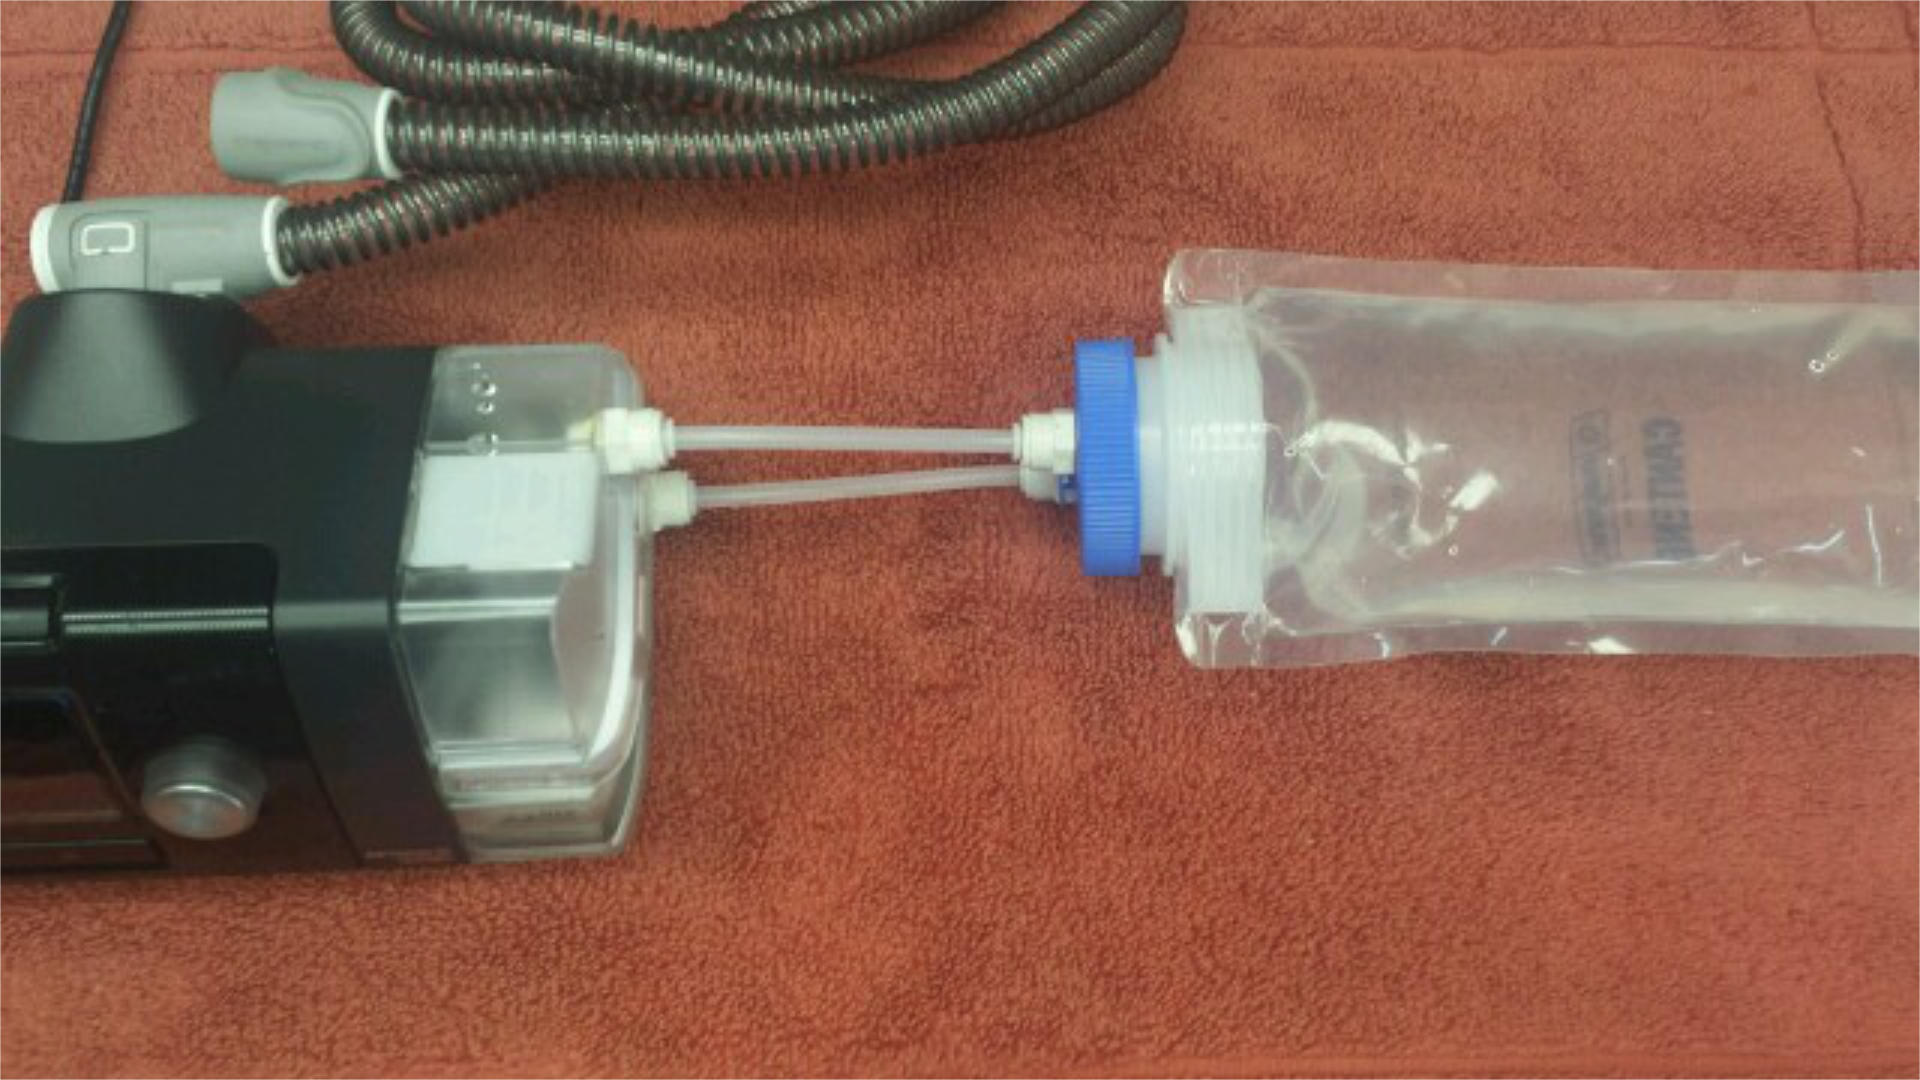
RonKMiller used a collapsible water bottle with some hose fittings…

Hack to add on an auxillary water tank for a CPAP machine

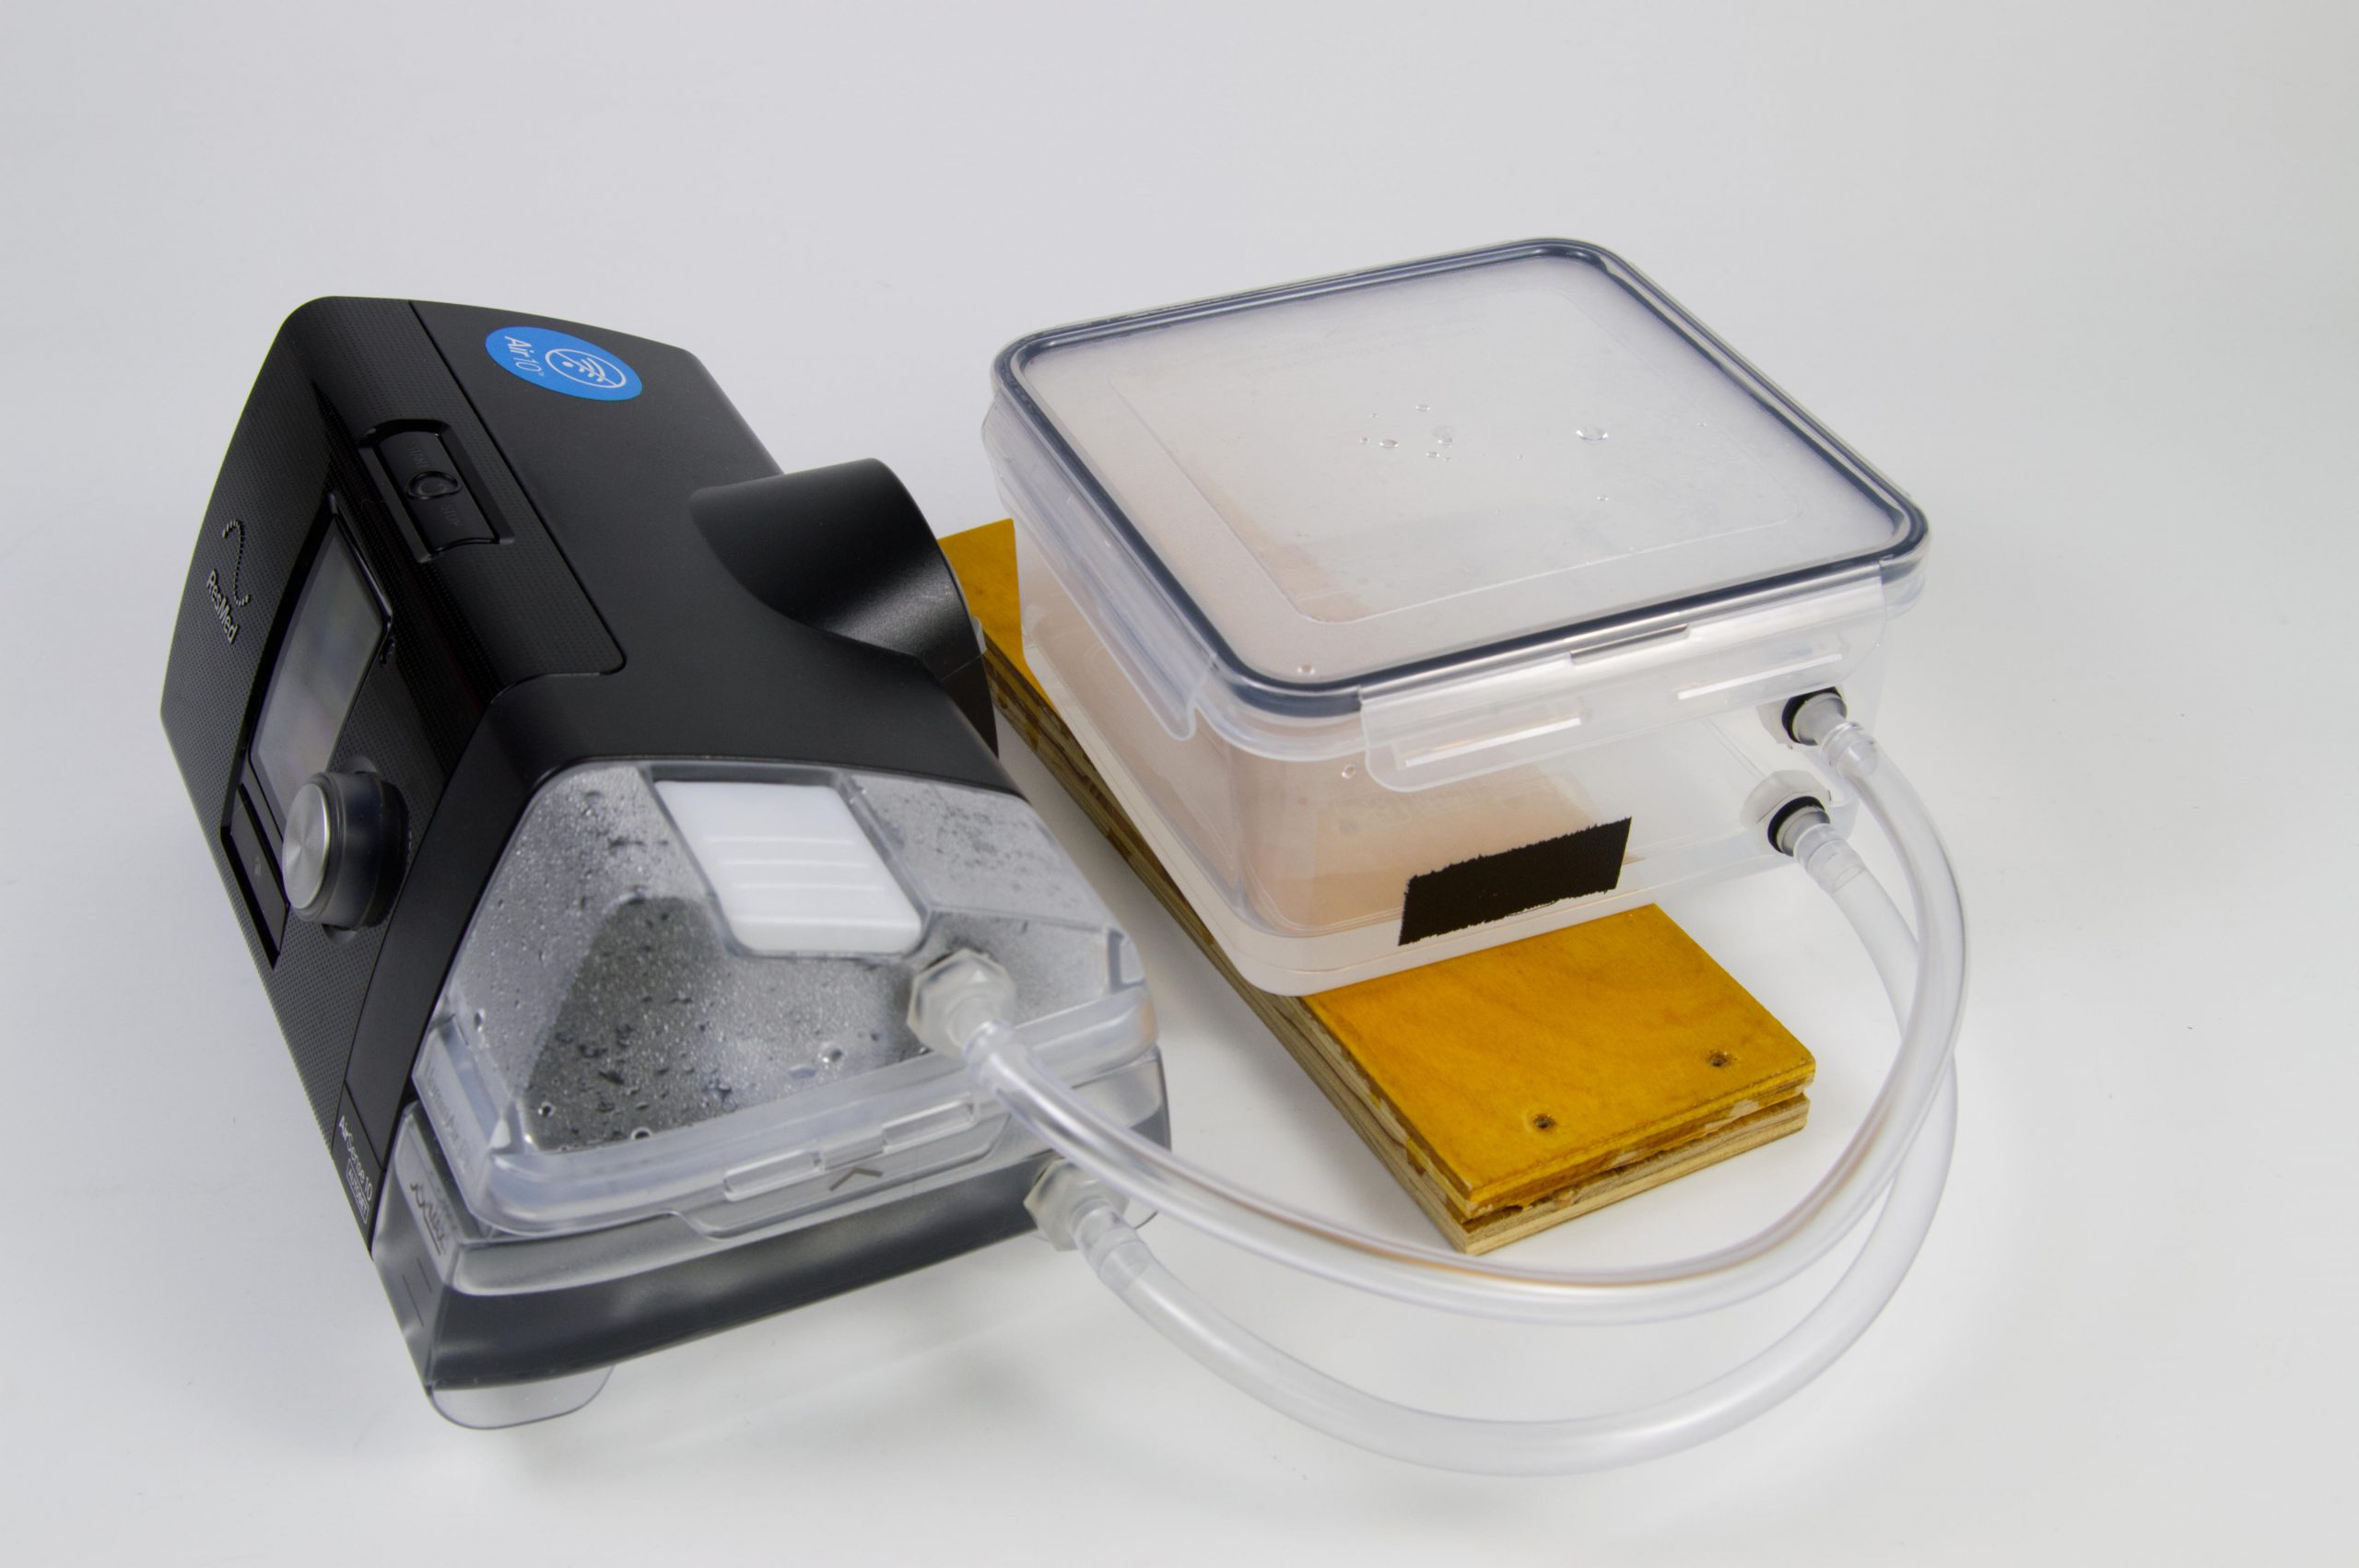
Now, if you’re wondering why there are two tubes, it’s because the bottom one is for water and the upper one is for air. Since the CPAP machine uses pressure you need to have the air flow into both containers otherwise it tries to come to pressure and blows the water in the built-in tank into the secondary tank.

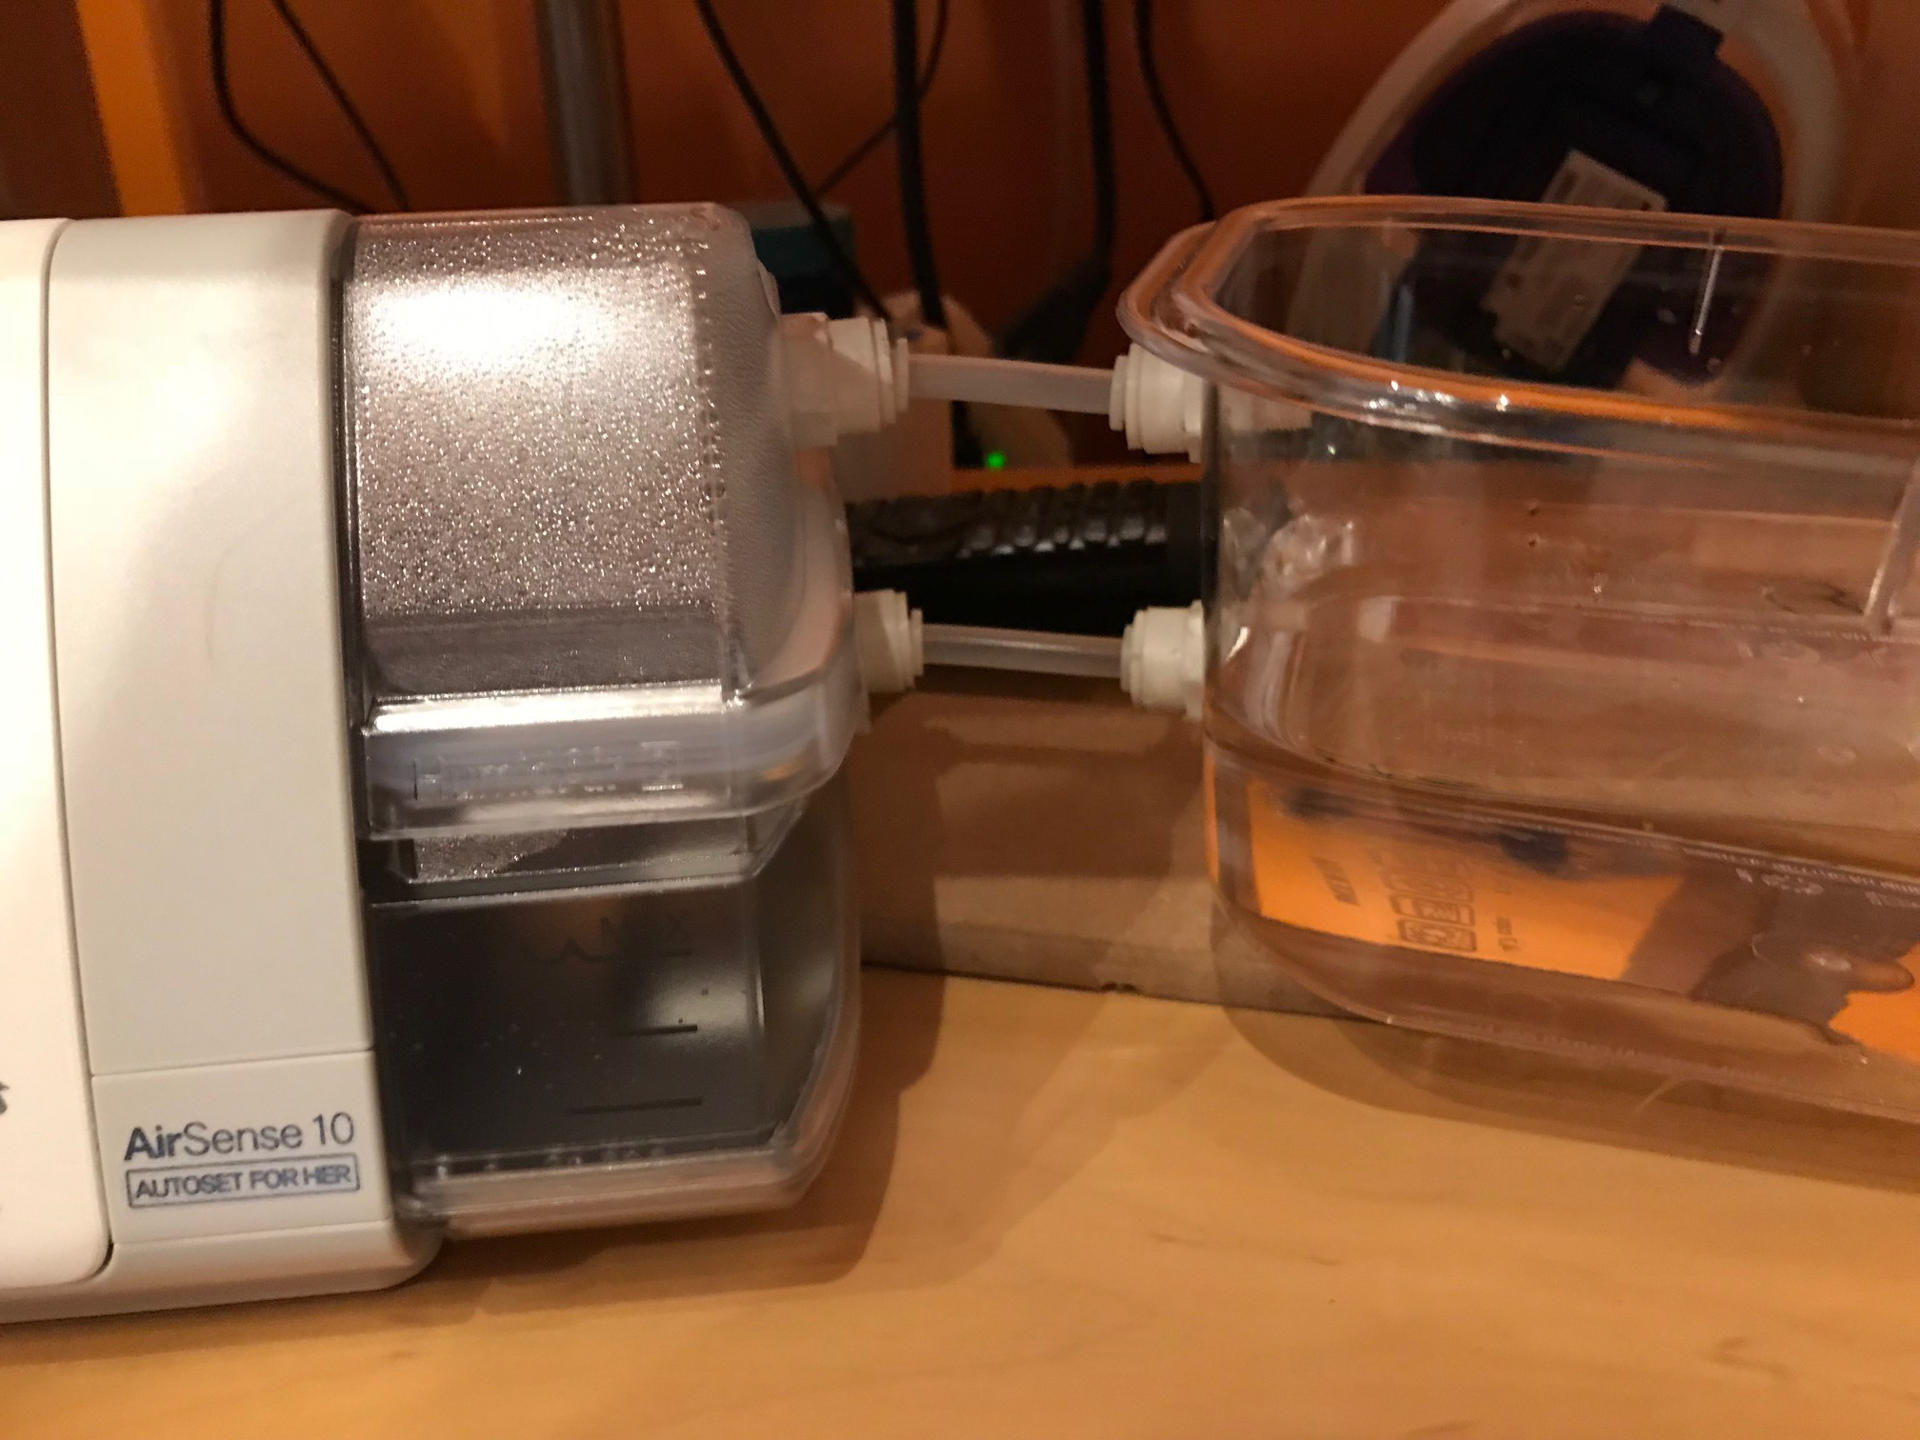
jdm5 took a different approach, and used a large container with a sealable top…

Hack to add on an auxillary water tank for a CPAP machine

Both of these posts were valuable in figuring out what I was going to do. My build is similar to the one from jdm5 though I chose different connectors. Here are the things I used:

Hack to add on an auxillary water tank for a CPAP machine

In total this project cost about $75 USD, but I can subtract the $30 for the Air10 HumidAir Water Chamber because my HRA covers that so it’s not out of pocket for me. In addition I only used one piece of the 40 Piece Food Storage Container Set. If you already have a container or can buy just one that can be a huge savings.
Hack to add on an auxillary water tank for a CPAP machine

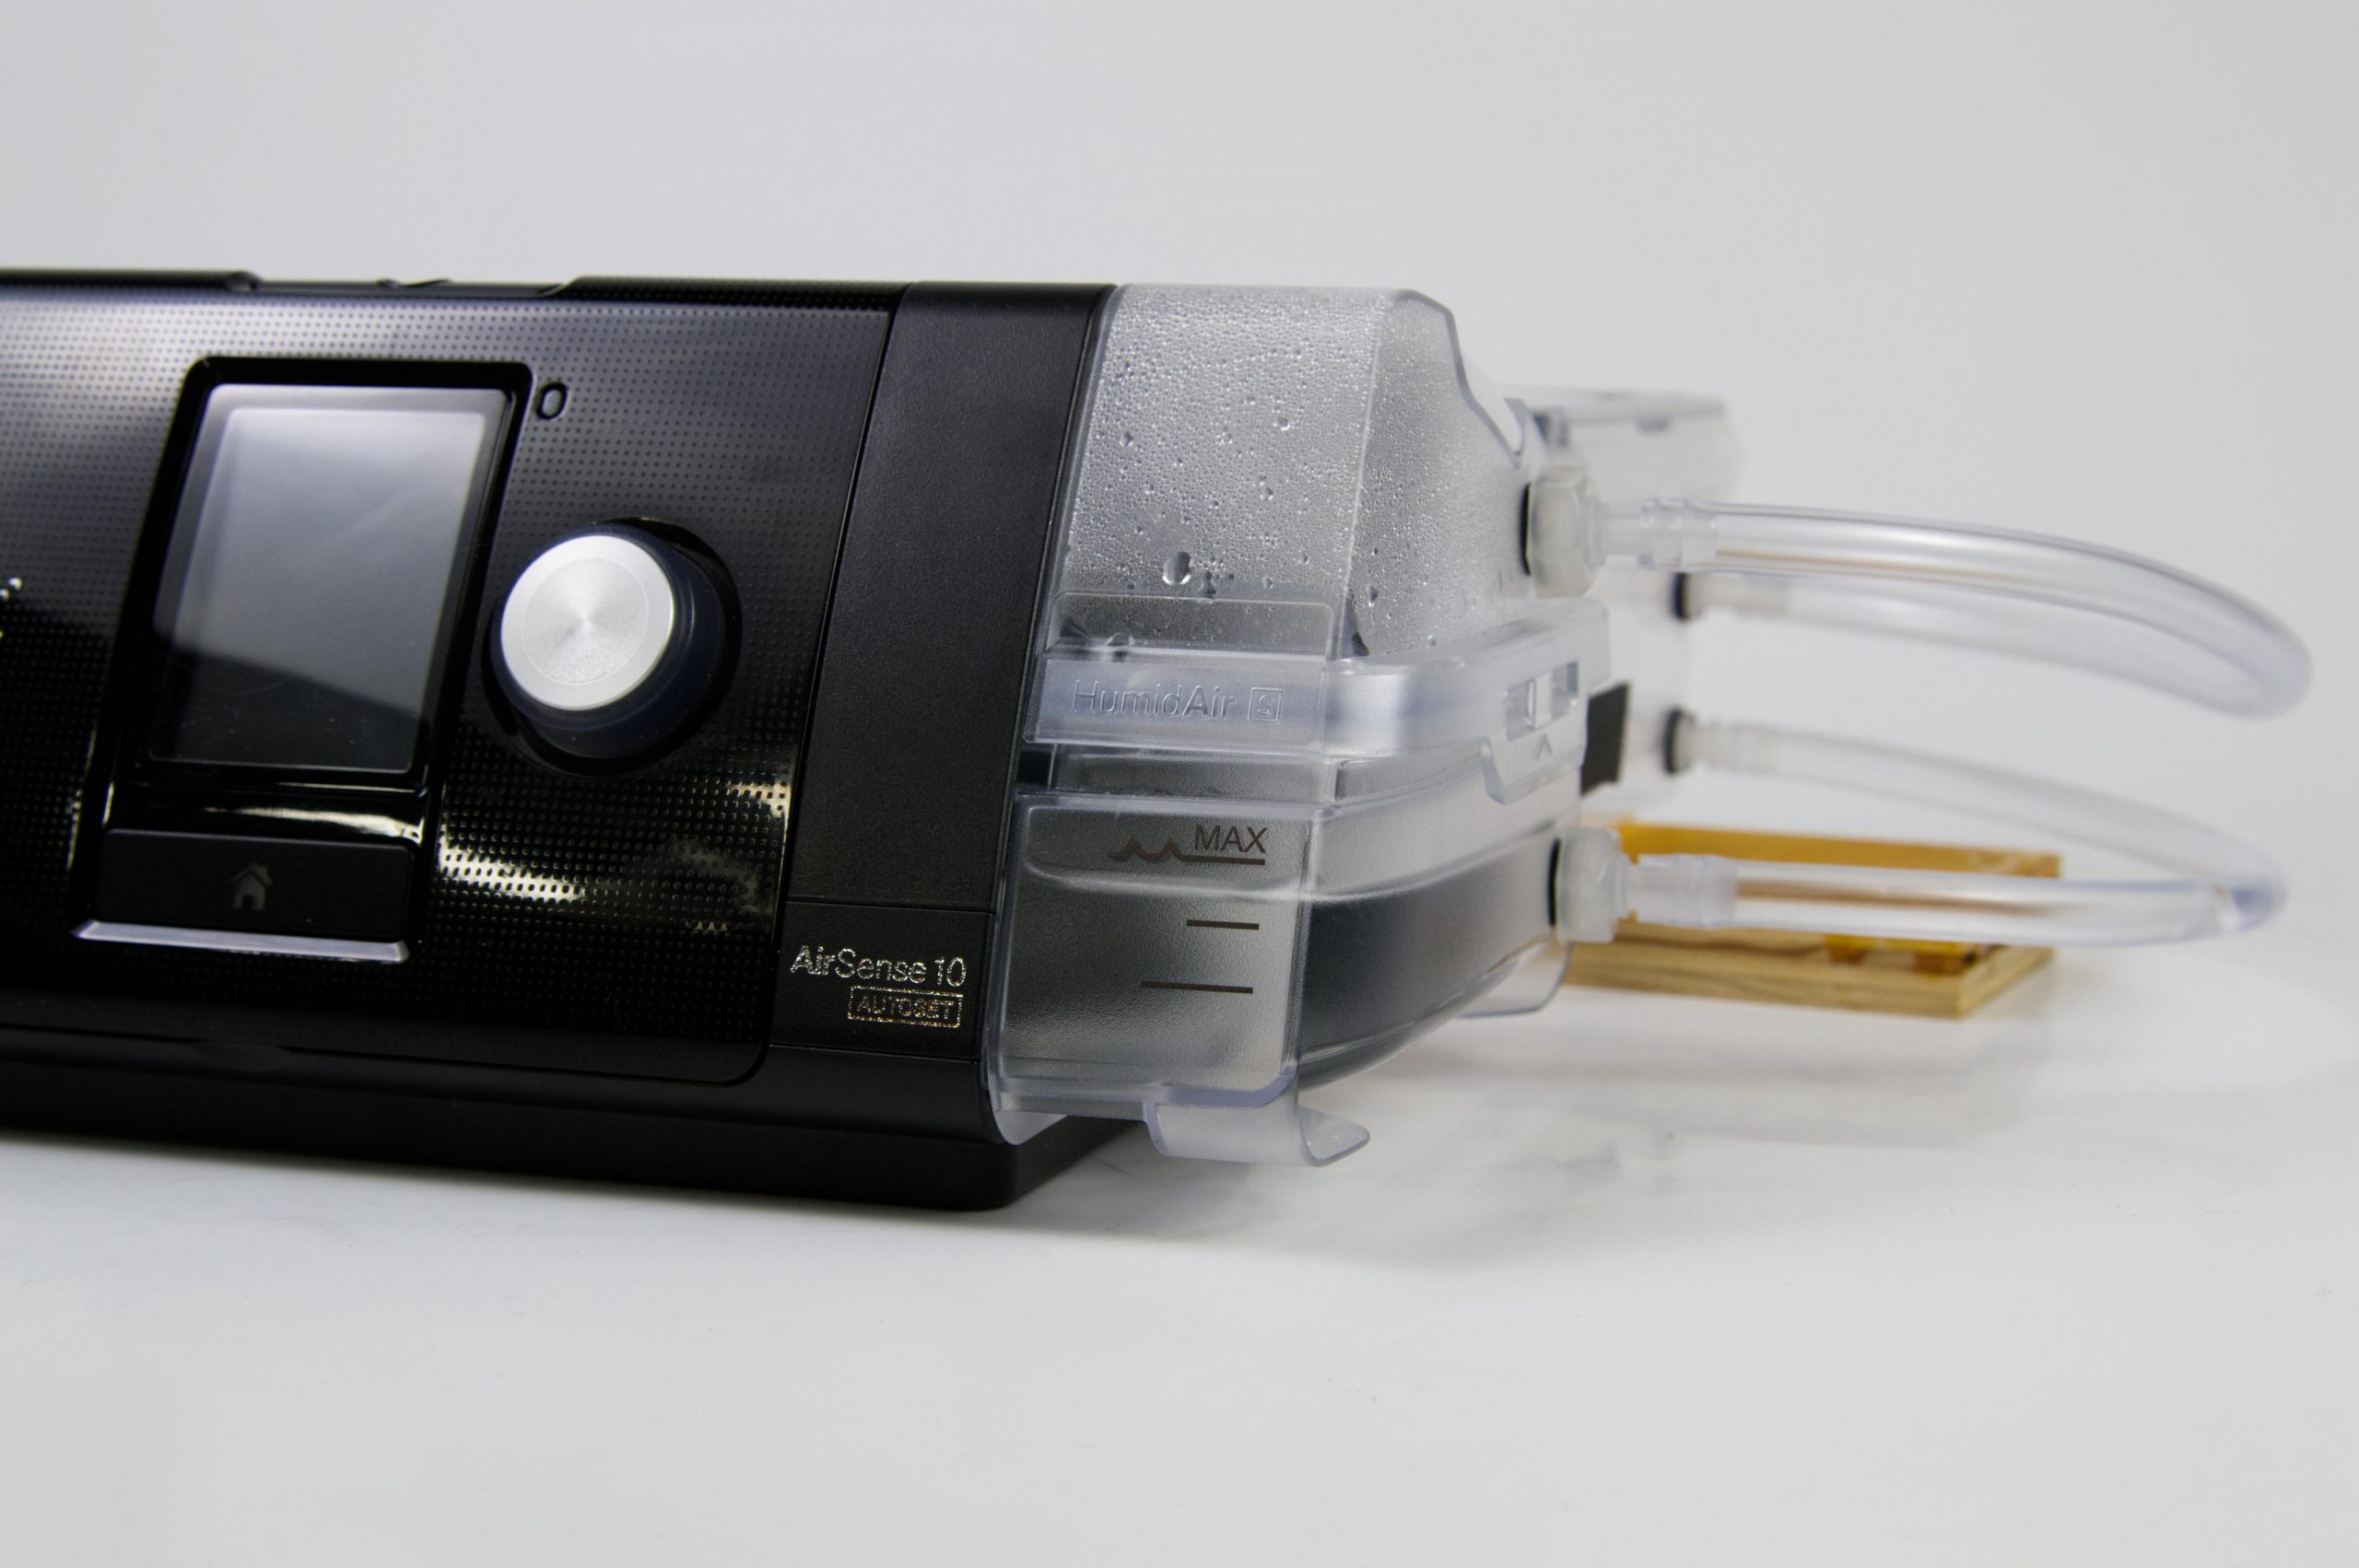
For the Rubber O-Rings I had these on-hand for other projects but you can probably just buy what you need from a local hardware store. The PVC tubing is much cheaper than Silicone, so if you do choose Silicone that price will go up… probably triple or more. And again, you can choose different hose connectors but the ones I chose work for me.
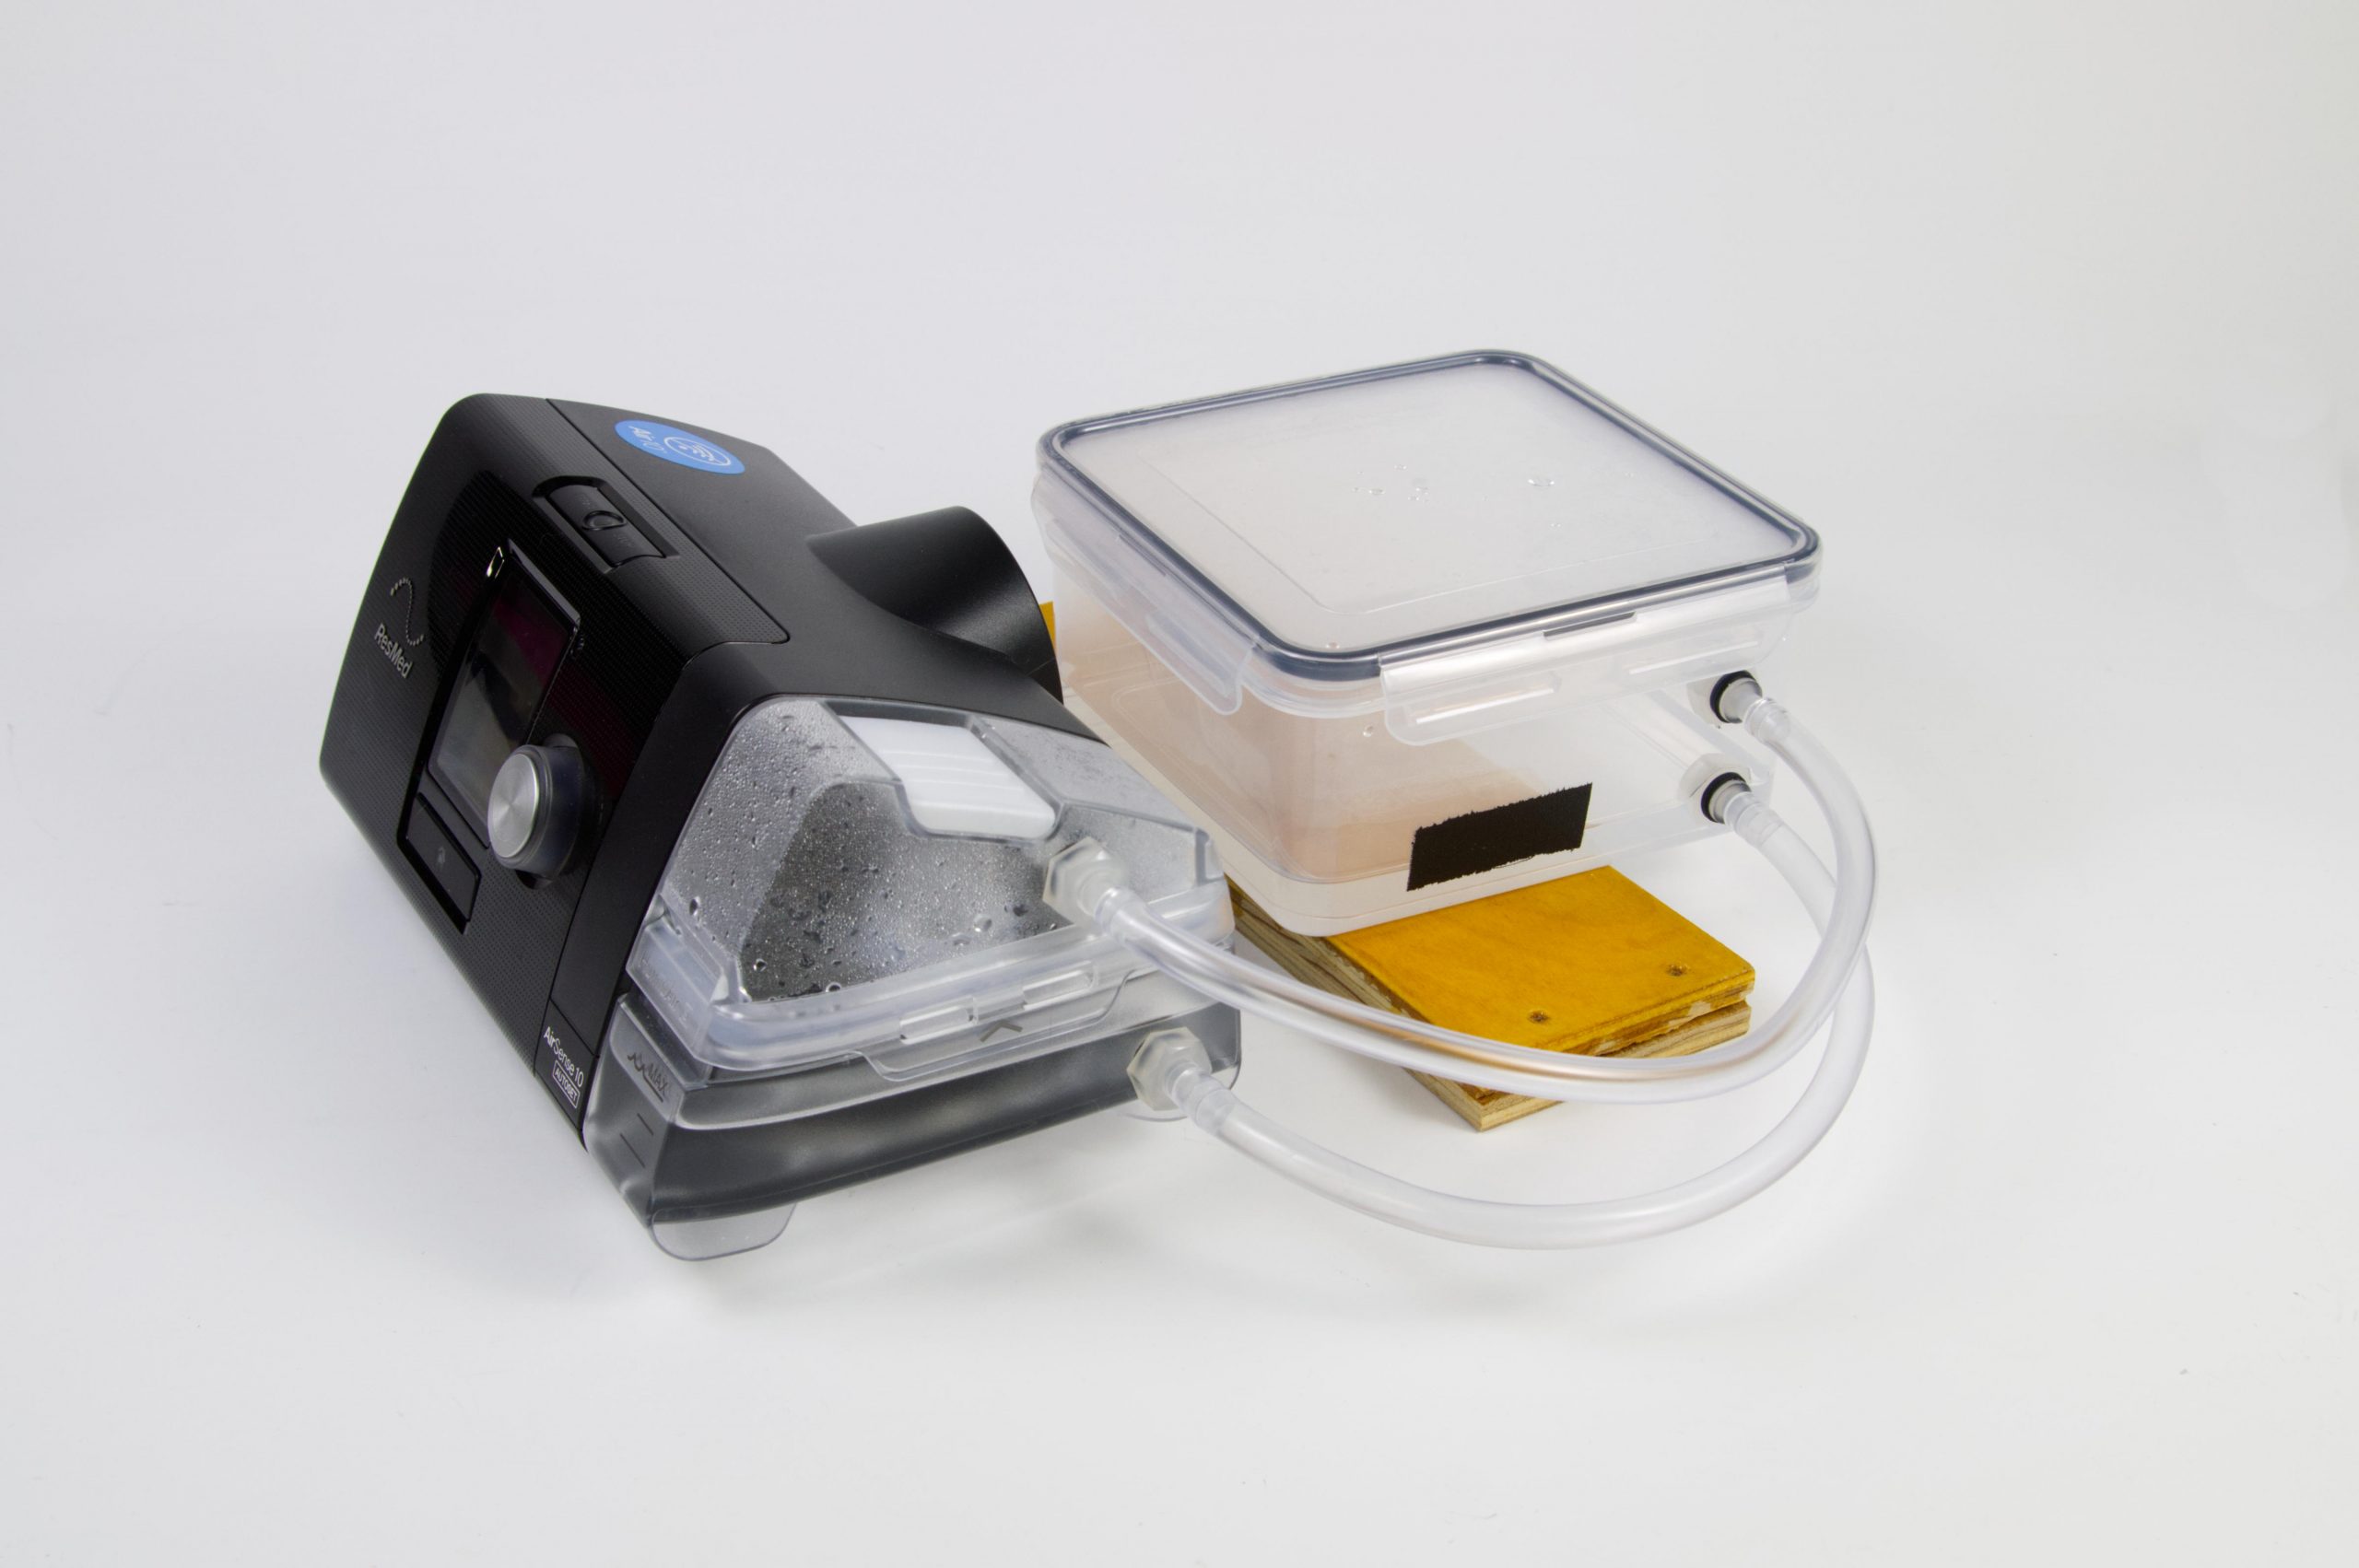
Hack to add on an auxillary water tank for a CPAP machine

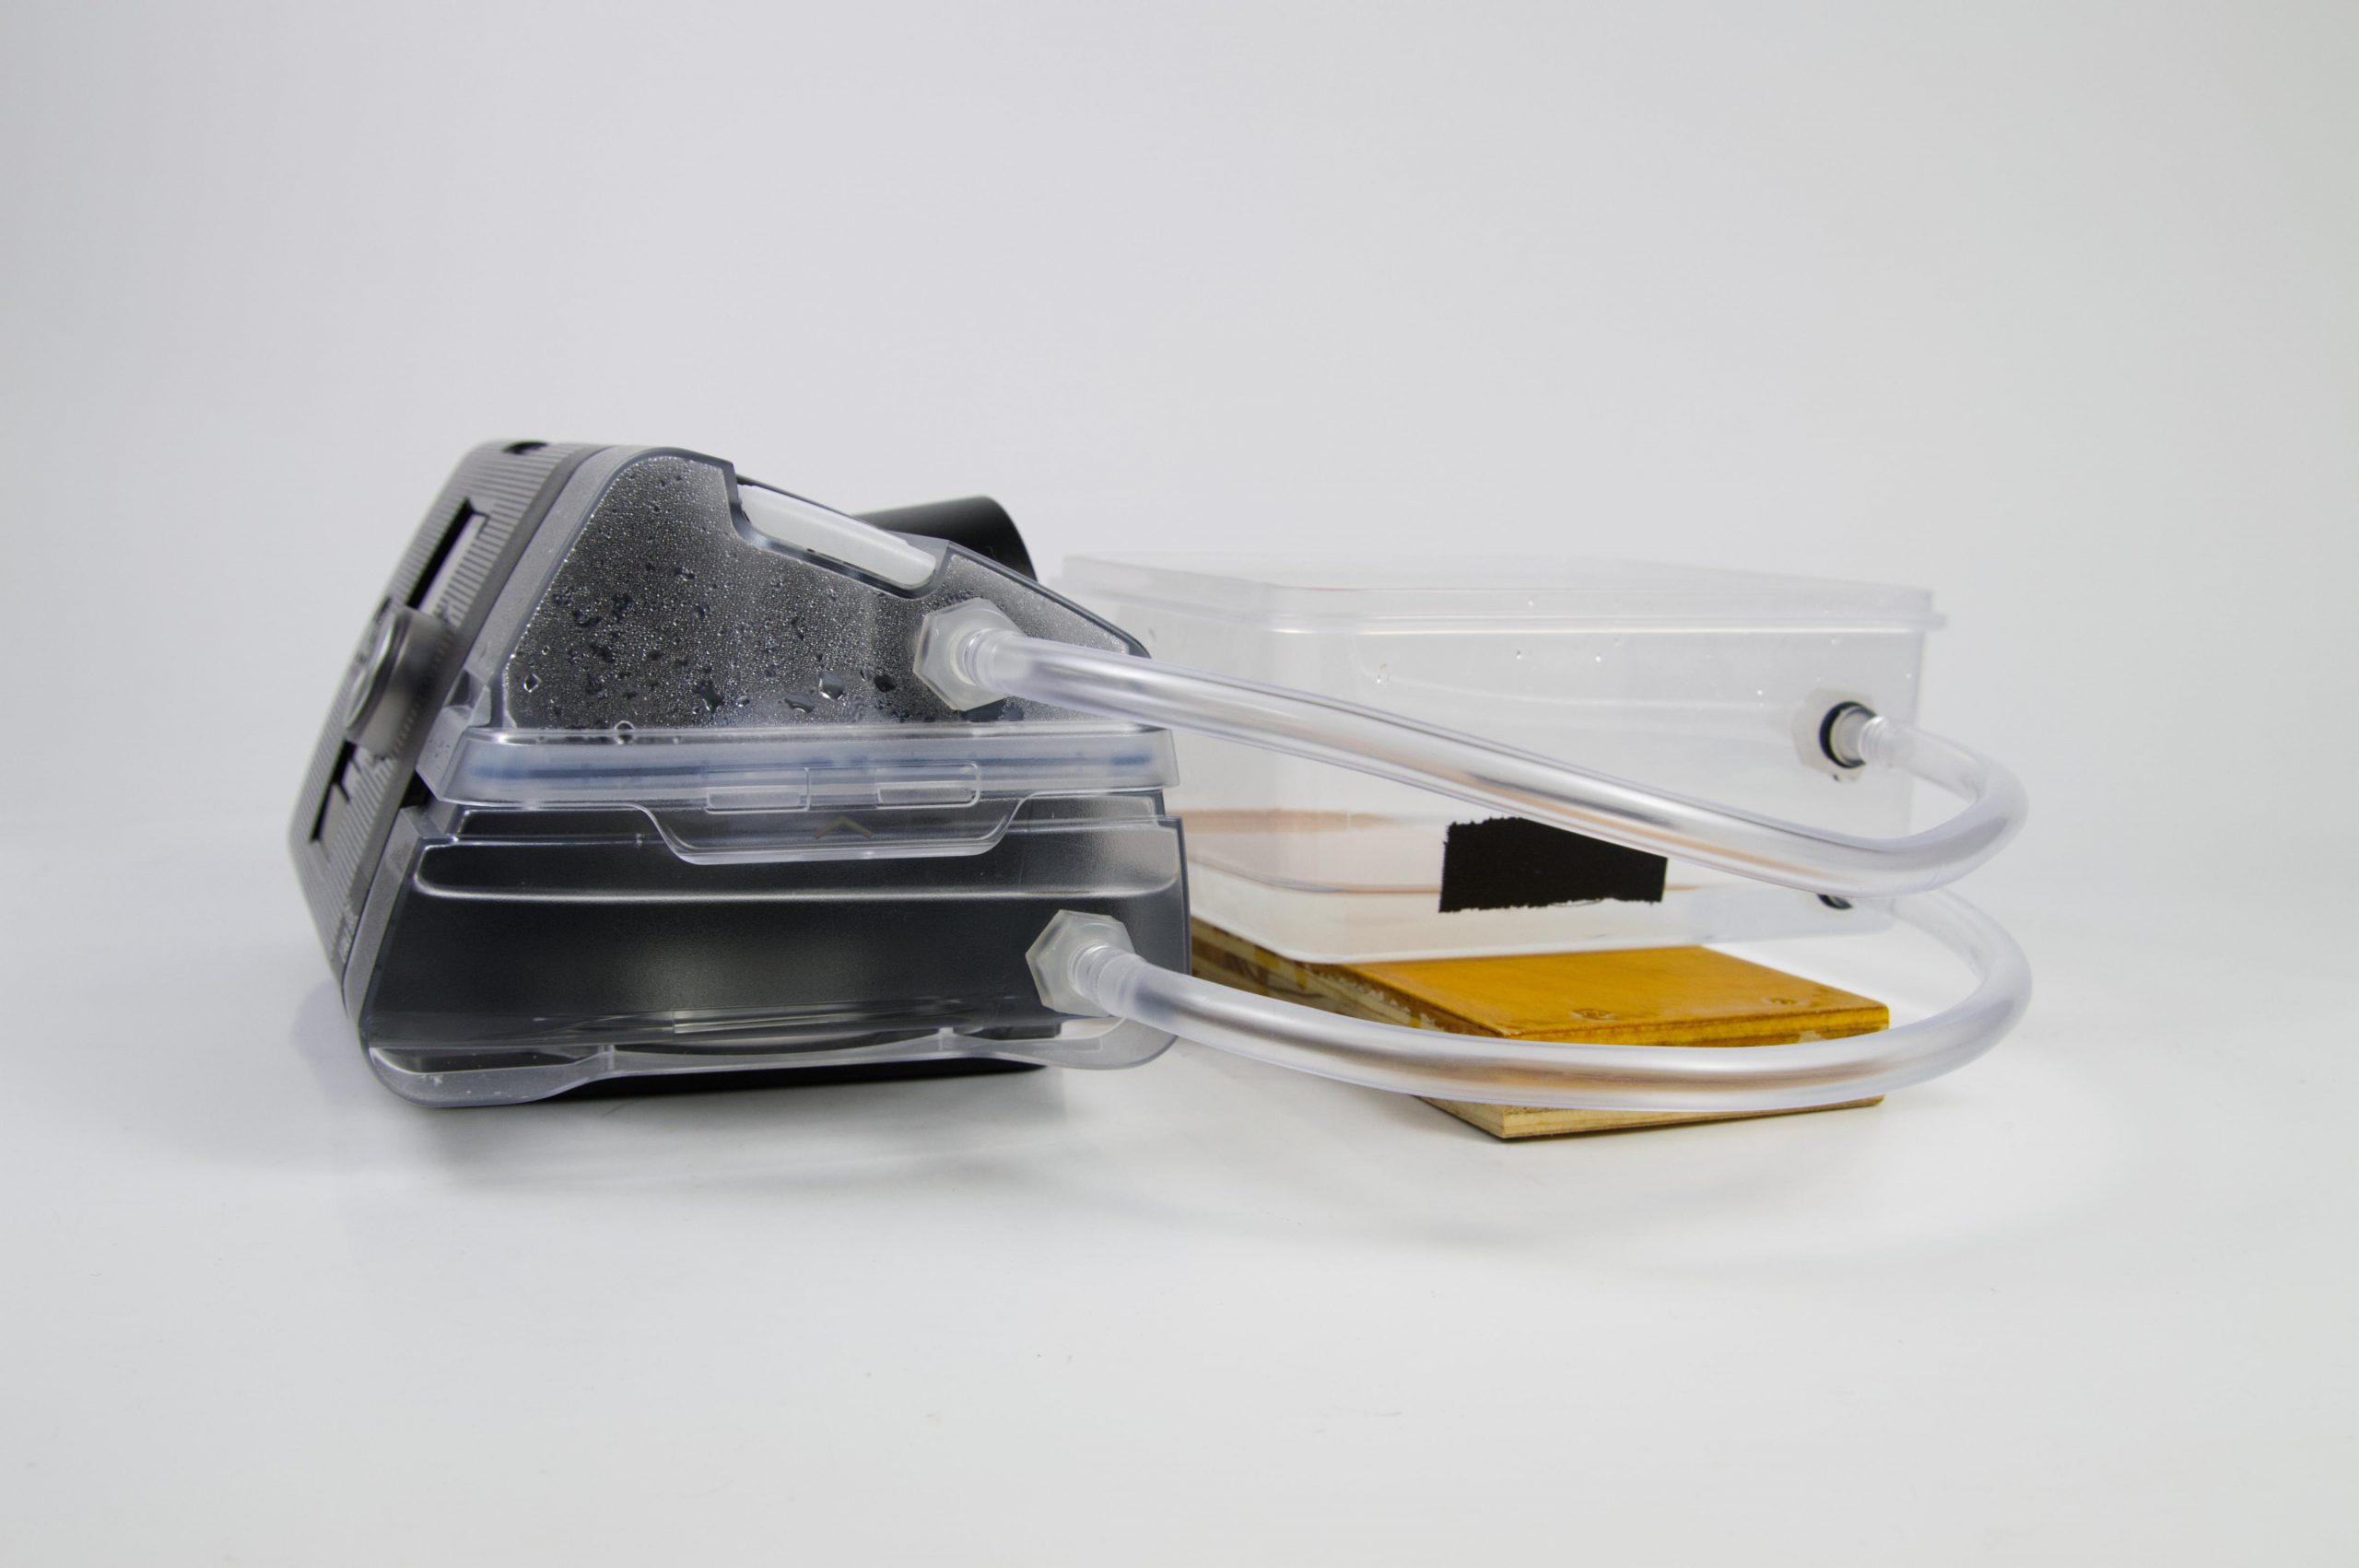
The piece of wood is under the tank to raise it up to the proper level so the lower hose entry points are the same height on the auxillary tank as they are on the CPAP’s reservoir. This is so water will level out between the tanks.
Hack to add on an auxillary water tank for a CPAP machine

Due to space constraints on my nightstand I need to put my container behind my CPAP machine, not next to it. I just made the hoses longer. I may consider switching to silicone tubing in the future, as it’s much more flexible than the PVC tubing I have now.
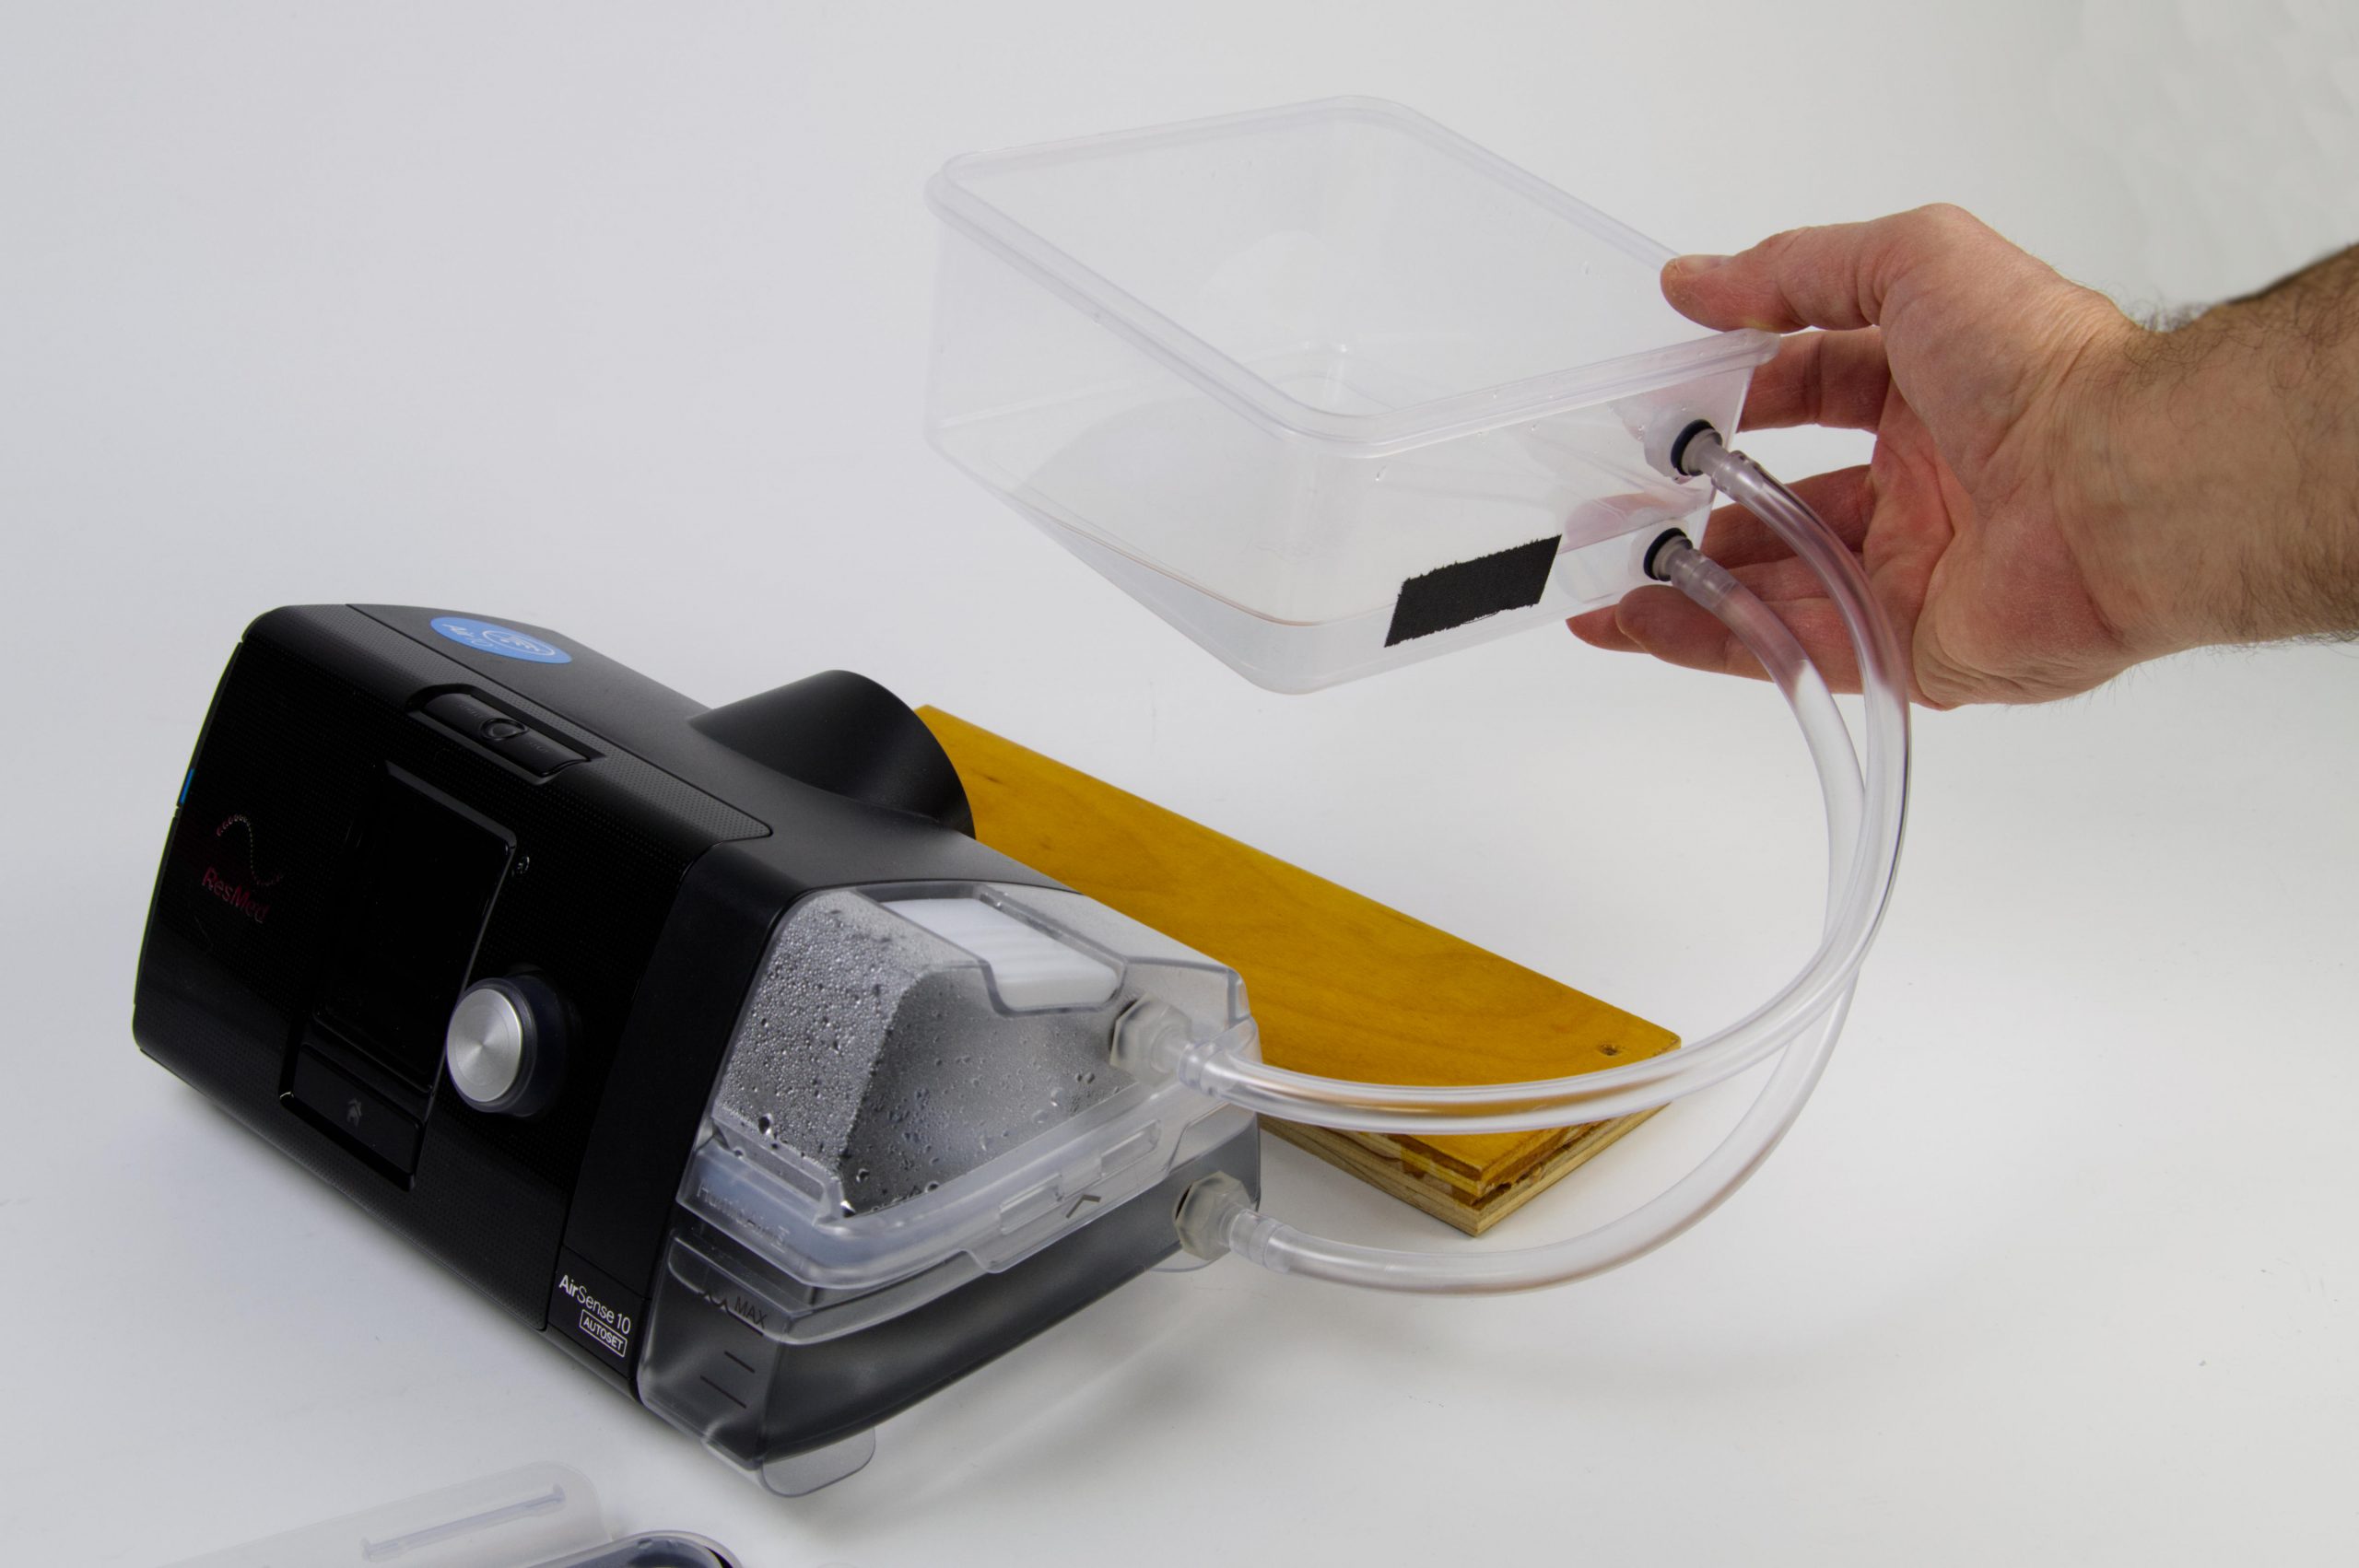
Hack to add on an auxillary water tank for a CPAP machine

So to use this I just pop the top off the external tank, fill it with water to the “fill line” (where I’ve added a piece of black gaff tape) and then lift the tank higher than the other tank, slightly tilting it so water can flow into the CPAP’s tank. Once the level on the CPAP’s tank hits the fill line I put down the external tank. If need be I can then top it off, but I usually don’t need to as it will be plenty of water to last the night.

This system isn’t perfect, but it’s a huge improvement over what I used to do. This is the best system I could come up with for the lowest dollar amount, and after four months of using this I am fairly pleased with the results.


Note: This post may contain Affiliate Links. Read More.

Categories
Uncategorized

A Shorter Raspberry Pi Pico

Yes, I literally cut a Raspberry Pi Pico on a bandsaw. And… it works! It still mounts and it runs code as expected.

I noticed that the back portion of the Pico seemed to have no components, and just traces running to the pins, so it was worth a $4 test.

This makes the Pico a bit closer in size to an Arduino Pro Micro or a Teensy LC.

So why would you want this? You can get a Adafruit KB2040 – RP2040 Kee Boar Driver or a SparkFun Pro Micro – RP2040 but those both use USB-C instead of Micro USB and for specific cases, that may not be ideal.

(I originally posted most of this on Mastodon, but figured I should drop it here as well.)

Categories
Uncategorized

SD Card Rescue Mission

SD Card Rescue Operation

I got a frantic message from my daughter Saturday morning. Seems she was shooting photos all day on Friday and when inserting the SD card from her camera into her computer (and another computer, and then her camera again) it would not mount. She did note that it was a little “damaged” on the corner…

The photo above shows some of the carnage that ensued. She brought the card to me, and I told her I’ve read that you can cut the card in half, remove the “chip” and insert it into a new card. I first cut in half a micro SD card adapter (since I have a lot of them) but that was no good. It’s internal design didn’t match up. No loss. Then I tried the card that came with my 3D printer, since it was only 4GB, and that did not work… I eventually told her that she might have to purchase an exact match so the chip would fit right…

She headed out to the store, found one, brought it to me, and five minutes later, Bob was your uncle. Meaning… it worked! I did warn her to just copy all files off it, and not to rely on it for the future. (She also bought a new SD card to replace it.) So now I had two of the “chips” from SD cards with no cases…

SD Card Rescue Operation

What else to do but 3D print replacements! I found a few models, and chose this Replacement SD Card Case to print. It printed pretty quickly, since it’s small and flat.

SD Card Rescue Operation

I ended up using a bit of super glue to hold the chip in place, and then adding electrical tape to it to shim it a bit so it would fit right into the SD card slot…

SD Card Rescue Operation

It sort of works… in some SD readers, but not all. That said, I’d recommend this fix for rescue, but I’m not sure I’d call the card reliable for everyday use. For instance, I’d prefer to not have it fail physically in my laptop, but in an external card reader I could tear apart if needed, I’ll use it. It seems to work fine in my Nikon camera, but not in my 3D printer, so… hit and miss.

SD Card Rescue Operation

If you go this route it might work, it might not… maybe there’s a better 3D model to use, I don’t know, and I super glued mine in place, which means I’ll wait until the next SD card failure.

Categories
Uncategorized

This is a Hack.

MacBook Pro Power Adapter

This is a Hack. This is a Hacked thing. This thing was Hacked.

Hacking is an art form that uses something in a way in which it was not originally intended. This highly creative activity can be highly technical, simply clever, or both. Hackers bask in the glory of building it instead of buying it, repairing it rather than trashing it, and raiding their junk bins for new projects every time they can steal a few moments away. [1]

I decided to clean my MacBook Pro power adapter cable, which was good because it was filthy, but bad because in the process of (gently) wiping it, I somehow destroyed it. I didn’t realize until I was at work a few hours and noticed it wasn’t charging my computer.

I was down to 30% battery which would not last the day, and no one else at work has the same power adapter (Damn you, Apple!) I contemplated running to the Apple Store during lunch to get a new one, but instead decided that since it didn’t work, I had nothing to lose, so I cracked it open.

Oh wait, before I cracked it open I verified that no power was getting to the connector. I grabbed a multimeter first, got nothing, and then cracked it open. (Luckily the MagSafe Wikipedia page has some useful info.)

Cracking things open is sometimes the most dangerous part of hacking. I occasionally stab my own hand with a screwdriver. (It didn’t happen this time.) With the power adapter opened I saw two wires (black and white) leading to the thin round cable.

I checked the voltage on the black and white wires and got about 6 volts, which is way under what it should be according to the MagSafe info… but I figured that was due to there being no load, and that was correct, as verified by a note at the bottom of the MagSafe Wikipedia page.

I ended up chopping about 6 inches off the thin round cable and stripped the ends, then slid on some heat shrink, soldered things together, shrunk the heat shrink, and it all worked fine again. I had my power adapter back.

I fixed a broken thing rather that buying a new thing. I also managed to fix it in much less time that it would have taken to get a replacement. #HACK

Don’t get me wrong, I don’t see this as some amazing feat that will be celebrated by hackers everywhere, but it’s just one more reminder that if something is broken, you may have nothing to lose by trying to fix it. I mean, you could make it more broken but if it doesn’t work to begin with, there’s a chance you can revive it and get on with your day.

Keep on Hacking!

Categories
Uncategorized

DokuWiki Yak Shaving

DokuWiki

Yak Shaving is described as “any seemingly pointless activity which is actually necessary to solve a problem which solves a problem which, several levels of recursion later, solves the real problem you’re working on” or something like that.

I’m not 100% sure this would be considered yak shaving, but I’m working on something that requires random pages to be served from DokuWiki, just like the built-in function that MediaWiki has. (I used to use MediaWiki, but switched to DokuWiki, and like it much better. We also use it for the Milwaukee Makerspace wiki.)

There is a random page plugin for DokuWiki, which did not work. So I took the existing code, poked at it a bit, mainly by comparing to other plugins that did work and making simple edits, and got it working. (YMMV obviously.)

Because I’m a believer in “doing the right thing” and helping other people in their quest to not reinvent the wheel and stay DRY, I figured there was more to do…

So I emailed the original author of the plugin. I’ve not gotten an email back yet. Also, they appears to be French, and I’m a stupid American who can’t read French. (I’m not even sure why I mentioned that part.)

Anyway, I was happy that I fixed something so I figured I’d toss it on the old GitHub in case someone else was looking for a random page plugin for DokuWiki that (seems to) work.

Oh, and not content to not mention something I did, I posted the link on Google+, which was picked up by Nils Hitze who mentioned it to Andreas Gohr, who happens to be the author of DokuWiki (who I follow anyway, because he’s a RepRapper too) and he suggested I adopt the (possibly orphaned) plugin.

tl;dr → I fixed the Random Page plugin for DokuWiki. You can grab it from GitHub.

Also, this is how the f’ing Internet works!