NOTE: Need a button? Now you can buy one! Visit raster.etsy.com.
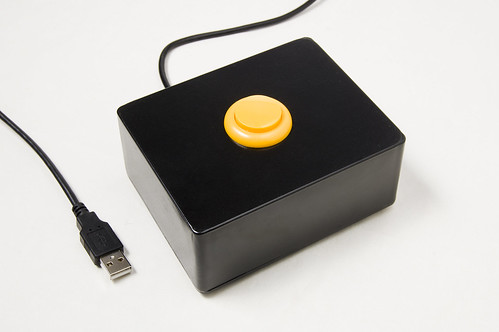
I was in need of a button, but not just any button. A USB-enabled button that could emulate a single key being pressed on a keyboard. This is that button…
It consists of the following materials:
- Teensy
- Mammoth Electronics Die Cast Aluminum Enclosure (4S1590BBT)
- Yellow Push Button (33mm)
- USB A to mini-B Cable
- Rubber Feet

I used a Teensy as it’s a very simple (and cheap!) way to emulate a USB HID. I do wish the Teensy had mounting holes. I ended up not mounting it at all and letting it just hang loose, which should be fine, as it’s so lightweight. There’s a bit of electrical tape wrapped around the Teensy and the solder joints.
For the box, I wanted something metal, so it would be heavier and more sturdy than the typical plastic project box. Matt Gauger of Milwaukee Makerspace suggested I check out Mammoth Electronics, as they make boxes for guitar pedals. I ended up choosing their “tall” enclosure.
For the button, I really like this button over the one I ended up using, but it was too tall to fit in the project box. Unless you’re a “button snob” you probably won’t notice much difference between the two.
If you’ve got USB cables lying around, use one… otherwise, you can get one from Monoprice for less than a dollar. I pretty much buy all my cables from Monoprice.
As for the rubber feet, I picked some up at the local hardware store… as well as some black spray paint. (Note: If you are ordering the button from Sparkfun, just get the rubber feet from them too!)

There was one more item I needed. The button needs a 27.3 mm hole to fit into, which means I needed a hole that was 1.07480315 inches wide. Well, 1.07480315 inches is pretty close to 1.0 inches, so I ended up getting an Ace Bi-Metal Variable Pitch Hole Saw. (The link is not the exact one that I got. I ended up getting mine at the local Ace Hardware store.)
As for the process, the Teensy part took a small amount of time, (see the AWESOME Button) and the drilling was a little tricky, as the 1.0 inch hole was just slightly too small. A bit of creative drilling with a regular drill bit fixed that though. The spray painting was the real time consuming part of it all. As for the assembly, I originally envisioned mounting the Teensy on the bottom plate of the box, and having a hole where the USB connector would be accessible, but I ended up going with what you see in the photo. (I just used the Dremel to cut a small groove for the cable to fit into.)
And why do I need a yellow button that can emulate a key being pressed? Well, sometimes you just need a yellow button that can emulate a key being pressed…

Note: A number of people have asked for the code I used, and even though it is in the comments, I thought I should post it in here as well.
/*
 * Button.pde
 */

void setup() {
  Serial.begin(9600);
  pinMode(10, INPUT_PULLUP);
  delay(500);
}

void loop() {
  if (digitalRead(10) == HIGH) {
    delay(10);
  } else {
    Keyboard.print(" "); // we print a space
    delay(1000);
  }
  delay(10);
}