Categories
Uncategorized

Little Printing Press

printmaking-0999

I came across this DIY Printmaking Press from the Open Press Project and since I’ve always been a fan of printmaking I thought I should 3D print a printing press on my 3D printer so I could print paper on a 3D printed printing press.

printmaking-1007

The (3D) printing went well, and all the pieces turned out good. I did add support to the rollers, to ensure they’d print well without sags. The one piece that is weird is the roller pin, which seems too small. It falls out a lot and doesn’t fit tight in the roller or the roller wrench. I may design a new one that fits snug.

printmaking-1009

I also did not have any 5mm bolts of the right length, so I used 6-32″ bolts. I’ll have to glue in the nuts so they don’t fall out, but that’s pretty minor. I’d also consider using hex head bolts and 3D printing little knobs to put on the heads so you can adjust the pressure without needing a screwdriver.

press-assembly

I did not have any press blankets, so I used some foam rubber sheets I had on hand. It seems to work okay. I may ask my printmaking friends for some scrap blankets.

printmaking-lc

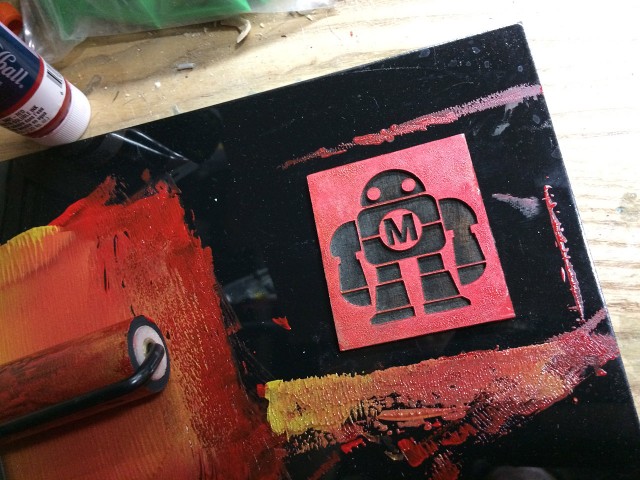
For my first printing plate I grabbed a vector image of Makey and laser etched it using 3mm Baltic Birch. (Sidenote: LightBurn is awesome.) I did not seal the wood as I was anxious to make some prints!

printmaking-1010

This is a small press, and my plate was 57.5mm x 65mm. This might be a good press for making business cards or maybe printing stickers. The nice thing is that since it is so small, it’s portable, and you can make a lot of tiny prints for pretty cheap.

printmaking-1011

printmaking-1012

This was a fun little project and I’m guessing the cost of making this printing press was maybe a few dollars worth of filament and hardware. The press blanket is probably the more difficult thing to get cheap, though perhaps an alternative like some thick felt (or layered up thin felt) could be used.

Happy Printing!

Categories
Uncategorized

LaserCut LetterPress

ART

“LaserCut LetterPress” (for lack of a better name) is a project I worked on in 2014/2015 which was an idea to create a full letterpress set using a laser cutter capable of cutting 3mm Baltic Birch plywood. The idea was that the files would be released that allowed anyone with access to a laser cutter (even lower-powered cutters with small beds) to create the set.

I know there are many ways to create things, but at the time I wanted to limit production to one method, and one particularly fast method, vector cutting with a laser cutter. (Note: If you’re fascinated by the production of wood type, check out Moore Wood Type.)

I mentioned some of the process in a post titled Measure Twice, Laser Once… but never wrote up the whole thing, so here we go.

LaserCut LetterPress Example Print

The typeface I chose was OpenDyslexic, which was inspired by a friend who is Dyslexic. I also thought it would be interesting to use a typeface that was new, and didn’t exist in the time that wooden type was widely used.

Art Letters

I did the design in Inkscape, creating the letter and the pieces that fit under the letter so it could slide into a tray.

Letter and Tray

Wood is such a wonderful material, except when it isn’t. Tolerances caused a number of issues, but I kept going forward, and didn’t worry too much about having things fit together perfectly. (I won’t say this was my downfall, but I spent a lot of time fighting it.)

Art Letters Tray

Here’s the design for the small tray. Ultimately I wanted a larger tray that had multiple lines so you could do an entire poster. That of course would have required an entire alphabet, and multiples of most letters, and punctuation, and… letterpress is hard.

Oh, somewhere along the way I also started to write code that would generate all the characters needed by outputting the needed SVG files. In theory it was totally doable, but in practice it served as a distraction that I eventually ignored.

Art Letters

With the plan to turn this into a kit that one would assemble, I thought about how one would determine what pieces would go together, and thought that etching the letter onto each piece would be a good idea. (I didn’t get to this step due to being stuck in the prototyping phase.)

Tray

Here’s the letter “A” sliding into the small tray I made. Tolerances were good with the first batch of letters, but with subsequent pieces not so much.

ARTS+TECH

You can see a bit of the height difference with this batch of letters…

Height Comparison

…and you can really see it with these. Yes, this is all 3mm wood. Again, as mentioned with the previous post, there can be quite a difference when the layers add up.

ARTS+TECH

I did manage to create enough letters for one of the Arts + Tech Nights at UWM.

TEACH ART

And oddly enough, I was able to arrange the letters into “TEACH ART”, which I ended up doing six months after I abandoned this project.

LaserCut LetterPress Example Print

Here’s a few test prints I did. They worked fine, which made me think I may have overthought how “perfect” it had to be. In the process of talking to printmakers (who were very interested in the project) they got me thinking about type height, which is useful for a press (and I considered using these letters on a press) but in the end I think I should have stuck with my “hacker ethic” and just made it work with the minimal amount of success.

I don’t consider this a “failed” project because I learned a lot in the process (and got to meet & work with some awesome people) but I’d love to see someone else run with this idea… or maybe it’s something I’ll pick up again in one form or another.

Remember kids, Keep on Making!

Categories
Uncategorized

Printing Plates v2.0

My last attempt at printmaking didn’t turn out as well as I had hoped it would, so I figured it was time to try again. And actually, the main reason I wanted to try again is because I saw the work of Jenie Gao at Milwaukee MakerFest, and after I took over her table so she could take a break, I asked her a few questions about printmaking, and the most important thing I learned is that I should seal the wood. With that small bit of advice, I was ready to try again…

Laser cutting the plate

Rather than do the same thing I did last time, I decided to start fresh. I once again used the laser cutter, but this time I didn’t want to use a raster etch, but instead opted for a vector cut to create the plate. (A raster etch works quite well of course, as Bret recently demonstrated, but they are time consuming, and tie up the laser for a long time. Vector cuts are much faster.)

Sanding the plate

Once I had my pieces cut from 3mm Baltic Birch, I used the piece of wood I cut them from as a guide to glue them down. After the glue dried I sanded it to make the surface nice and smooth. I’m not sure I needed to do this, but sanding always feels like the right thing to do in these situations.

Sealing the plate

I then coated the piece with polyurethane, sanded it down a bit, and repeated that process two more times. (I’m just doing what is recommended on the can. I don’t know if multiple coats are really needed, but it can’t hurt, right?) I let the whole thing dry for at least 24 hours.

Inking the plate

Ready to print! I inked up the plate and slapped down some paper, did a bit of rubbing, and I actually got a decent looking print! One thing I should do next time is create a larger backing piece, as it was hard to hold the plate in place while inking it, and I got a good amount of ink on my fingers and the table. (And yes, that is a mirror I am rolling the ink on. It’s from a 3D printing experiment long ago.)

MKE Print

The final print. There’s a few spots that could use more ink, but as I wasn’t doing a large run, I didn’t use a lot of ink. I also printed on crappy paper and it turned out good. (Supposedly the suggestion of using ‘Rives BFK’ can be ignored. Regular drawing paper can be used instead.)

Ultimately, my plan is to sort of merge the concept of printmaking with letterpress to make a weird combination of the two… but, you know, using a laser cutter and cheap Baltic Birch plywood.