Categories
Uncategorized

Handmade Paper

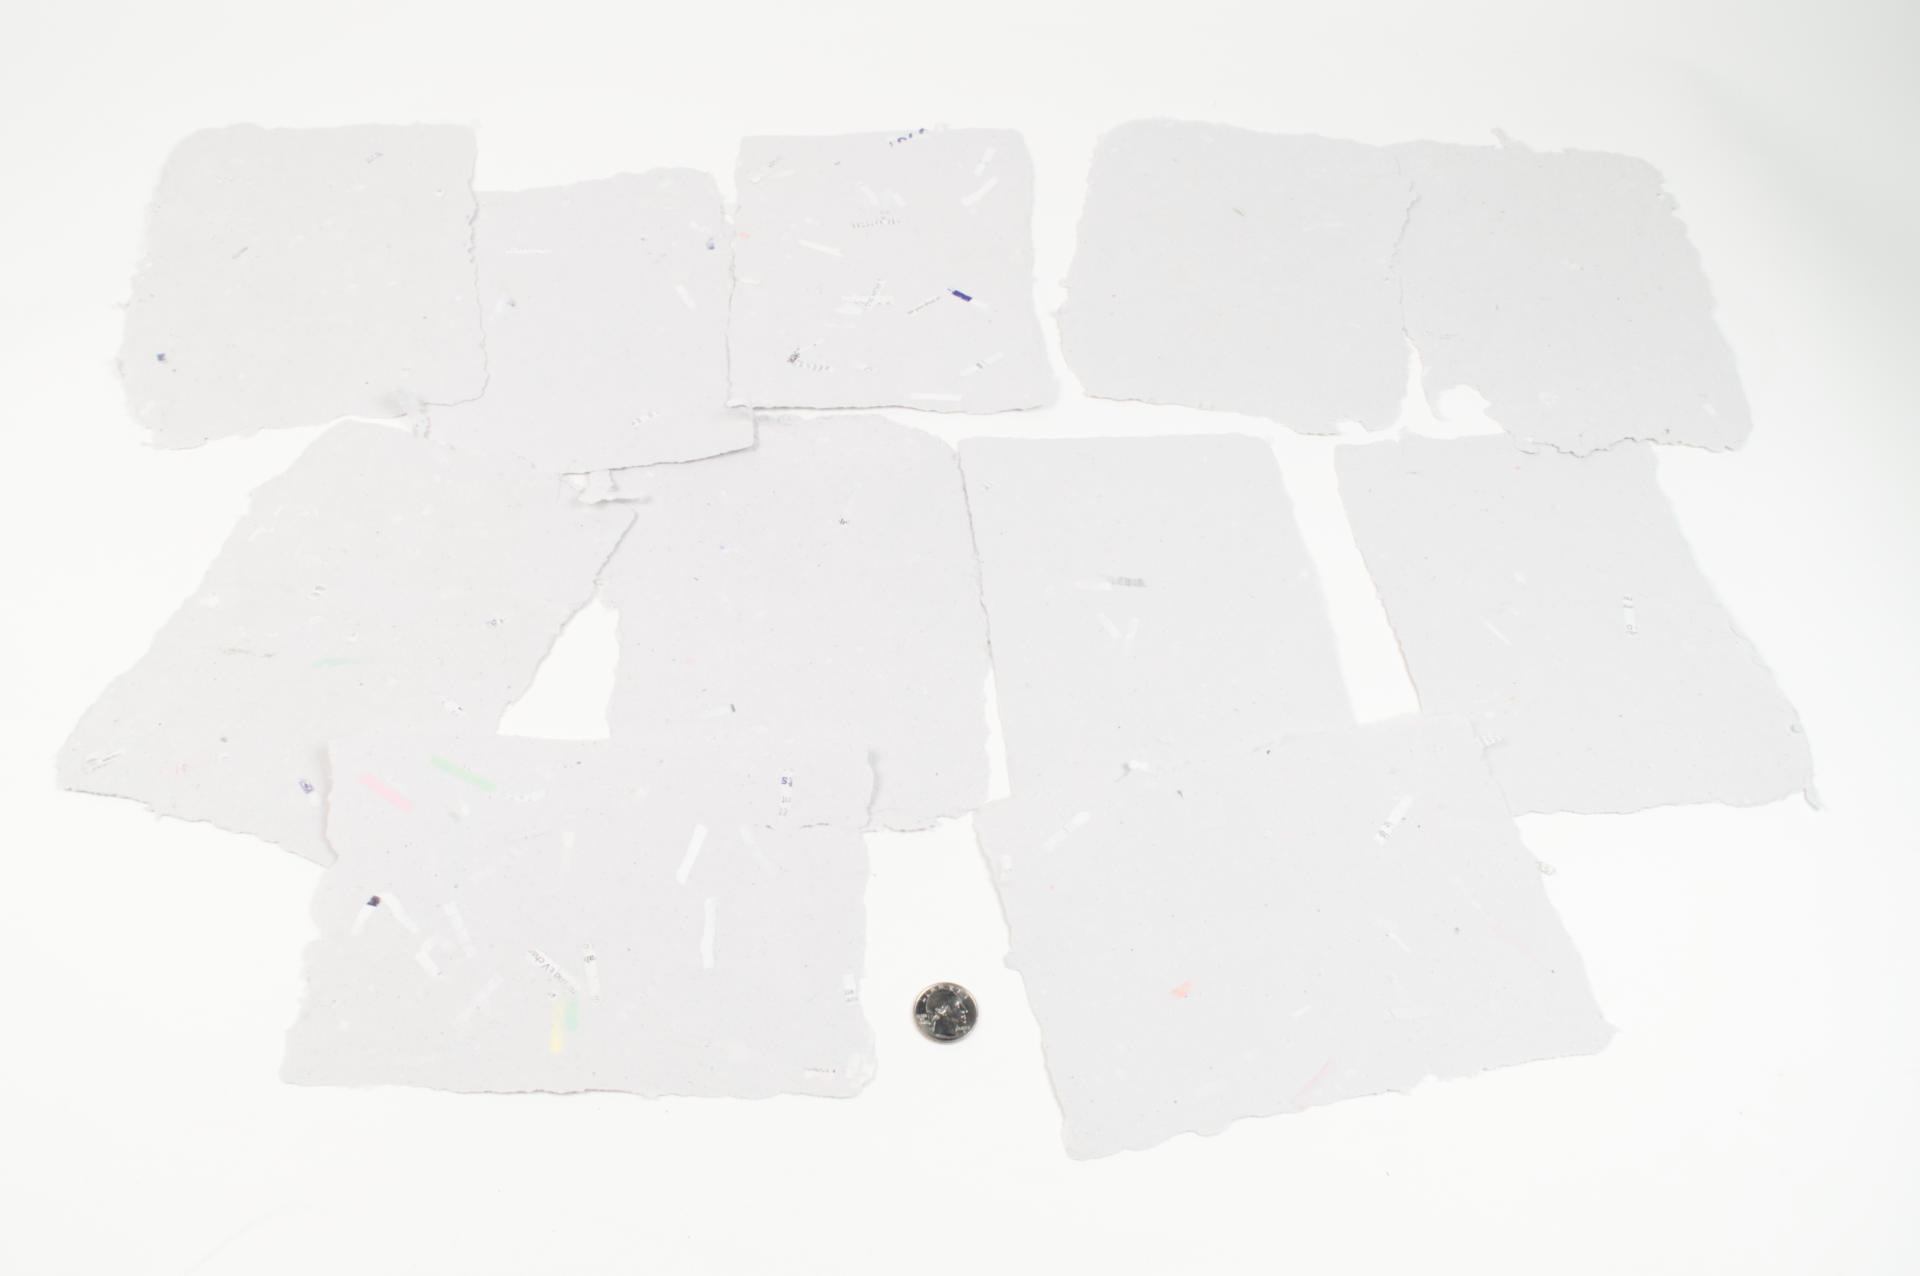
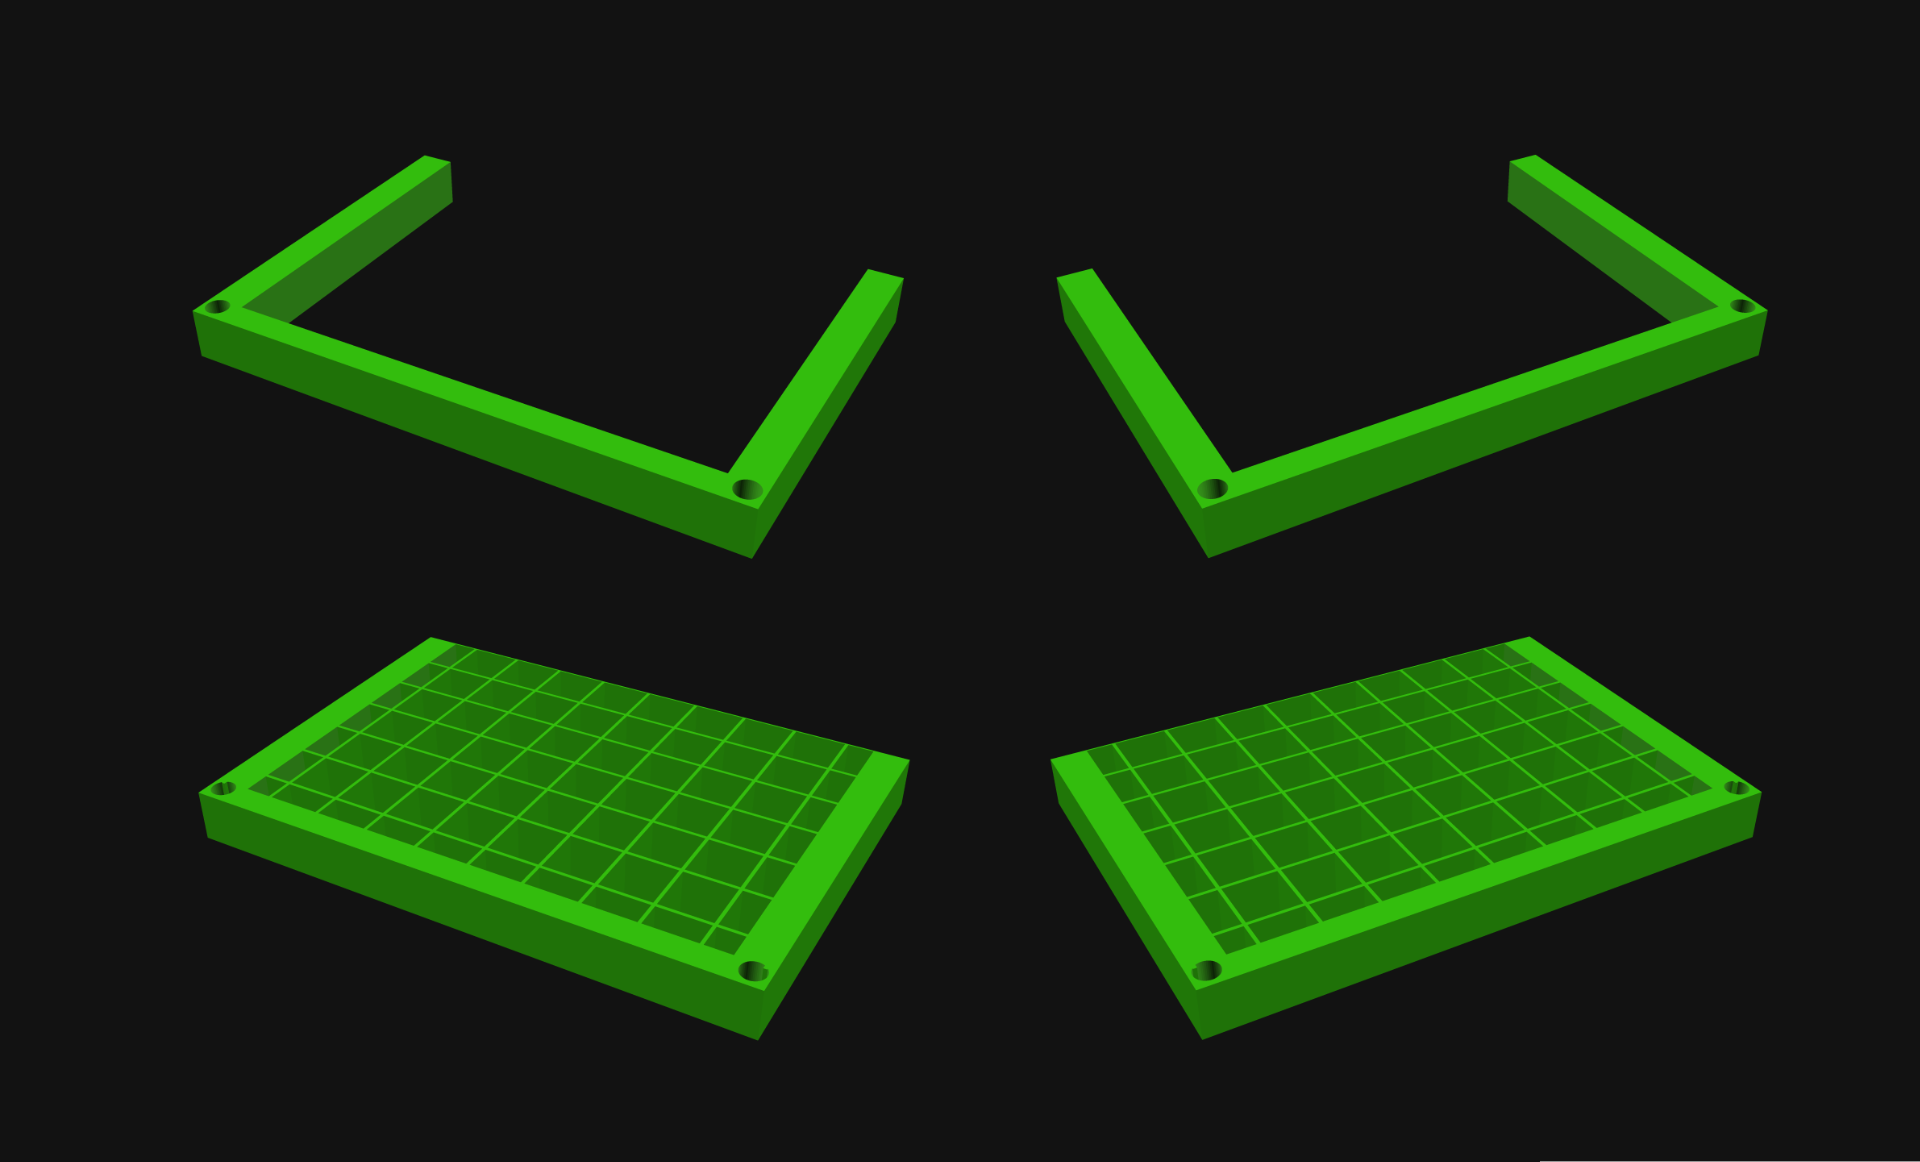
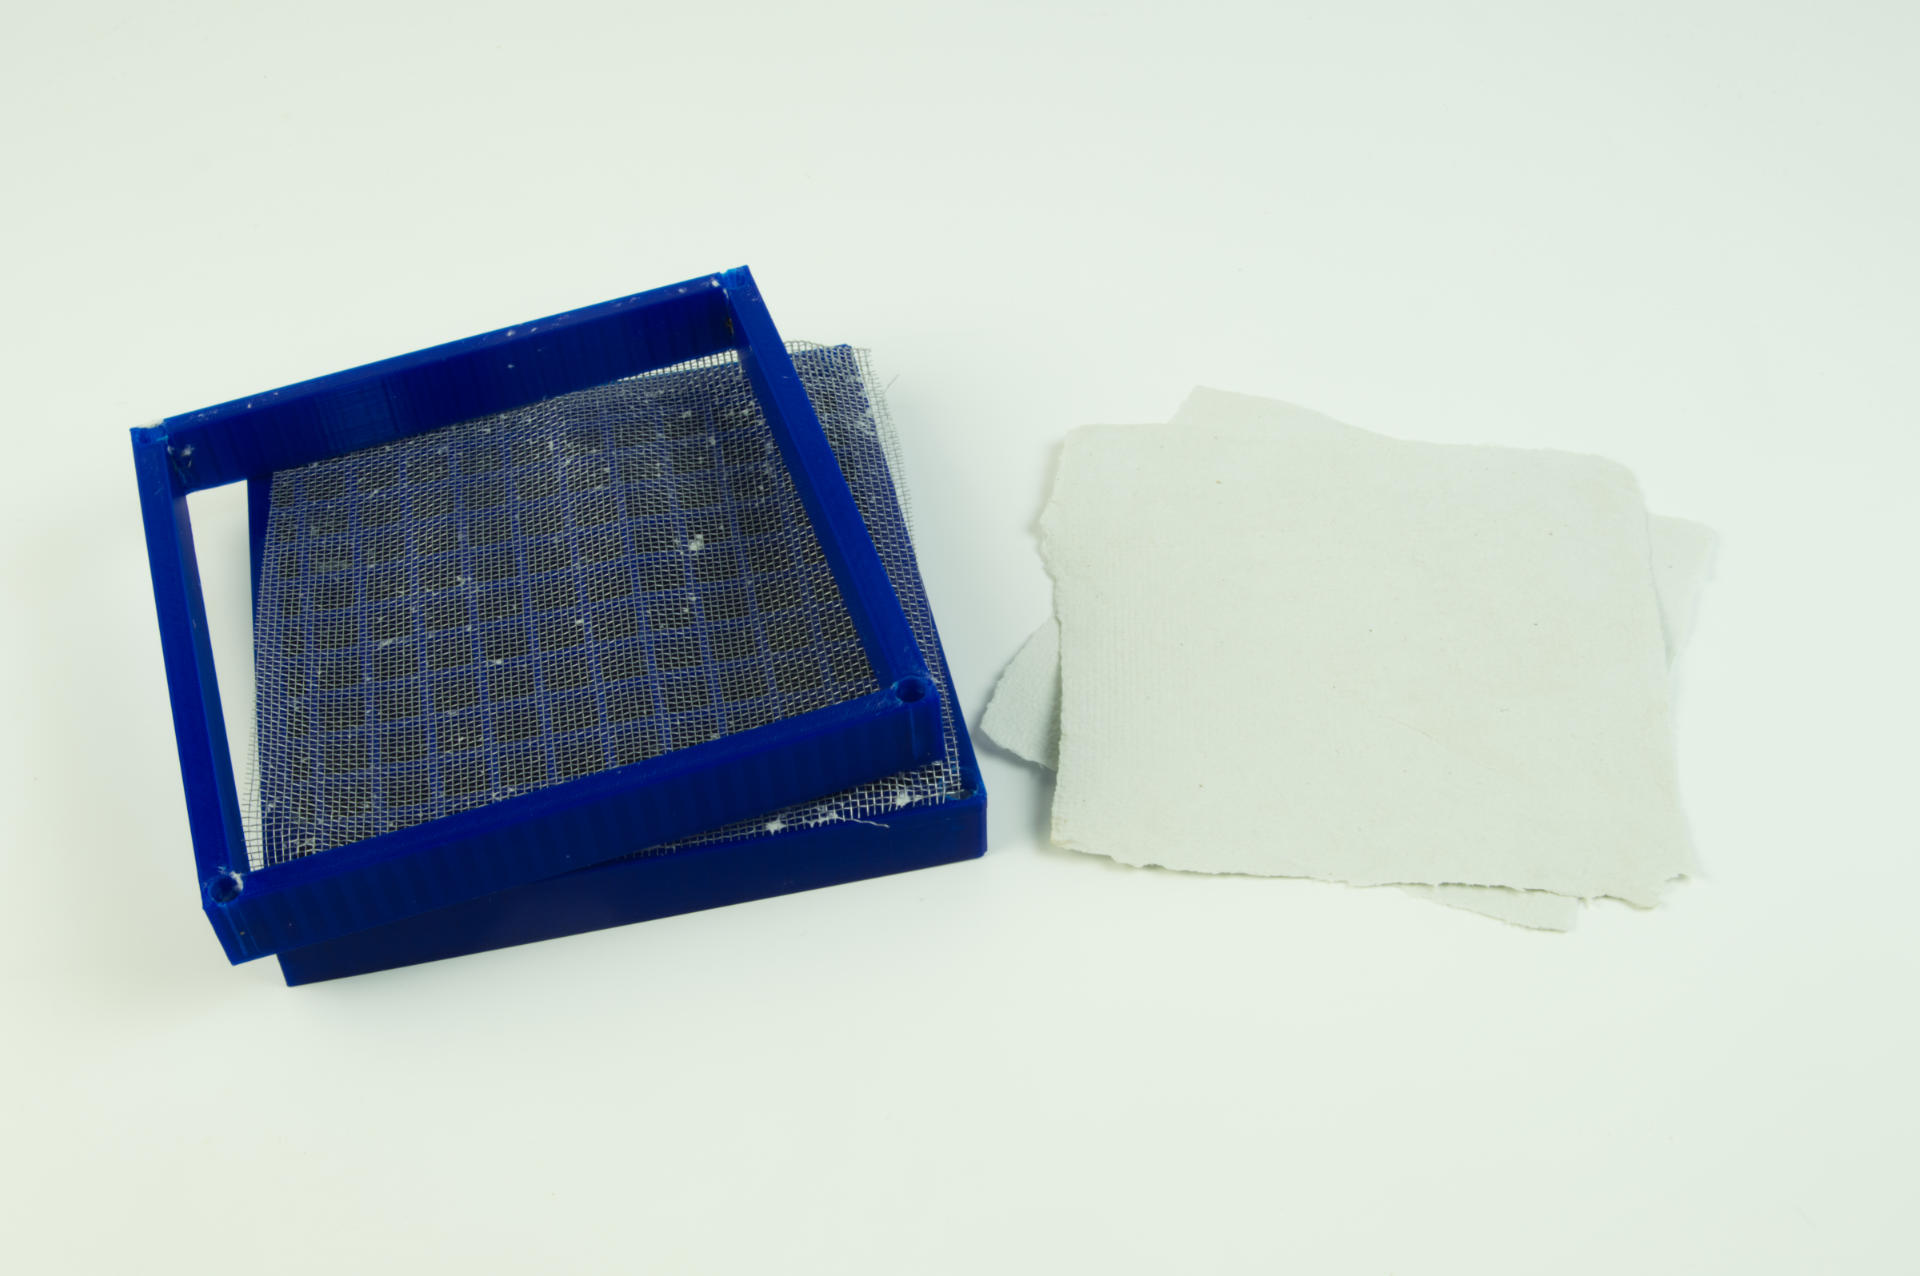
If you read the previous post you saw the mould and deckle I made, and the start of the process of making paper using the mould and deckle. Well, once the paper dries it looks quite different!

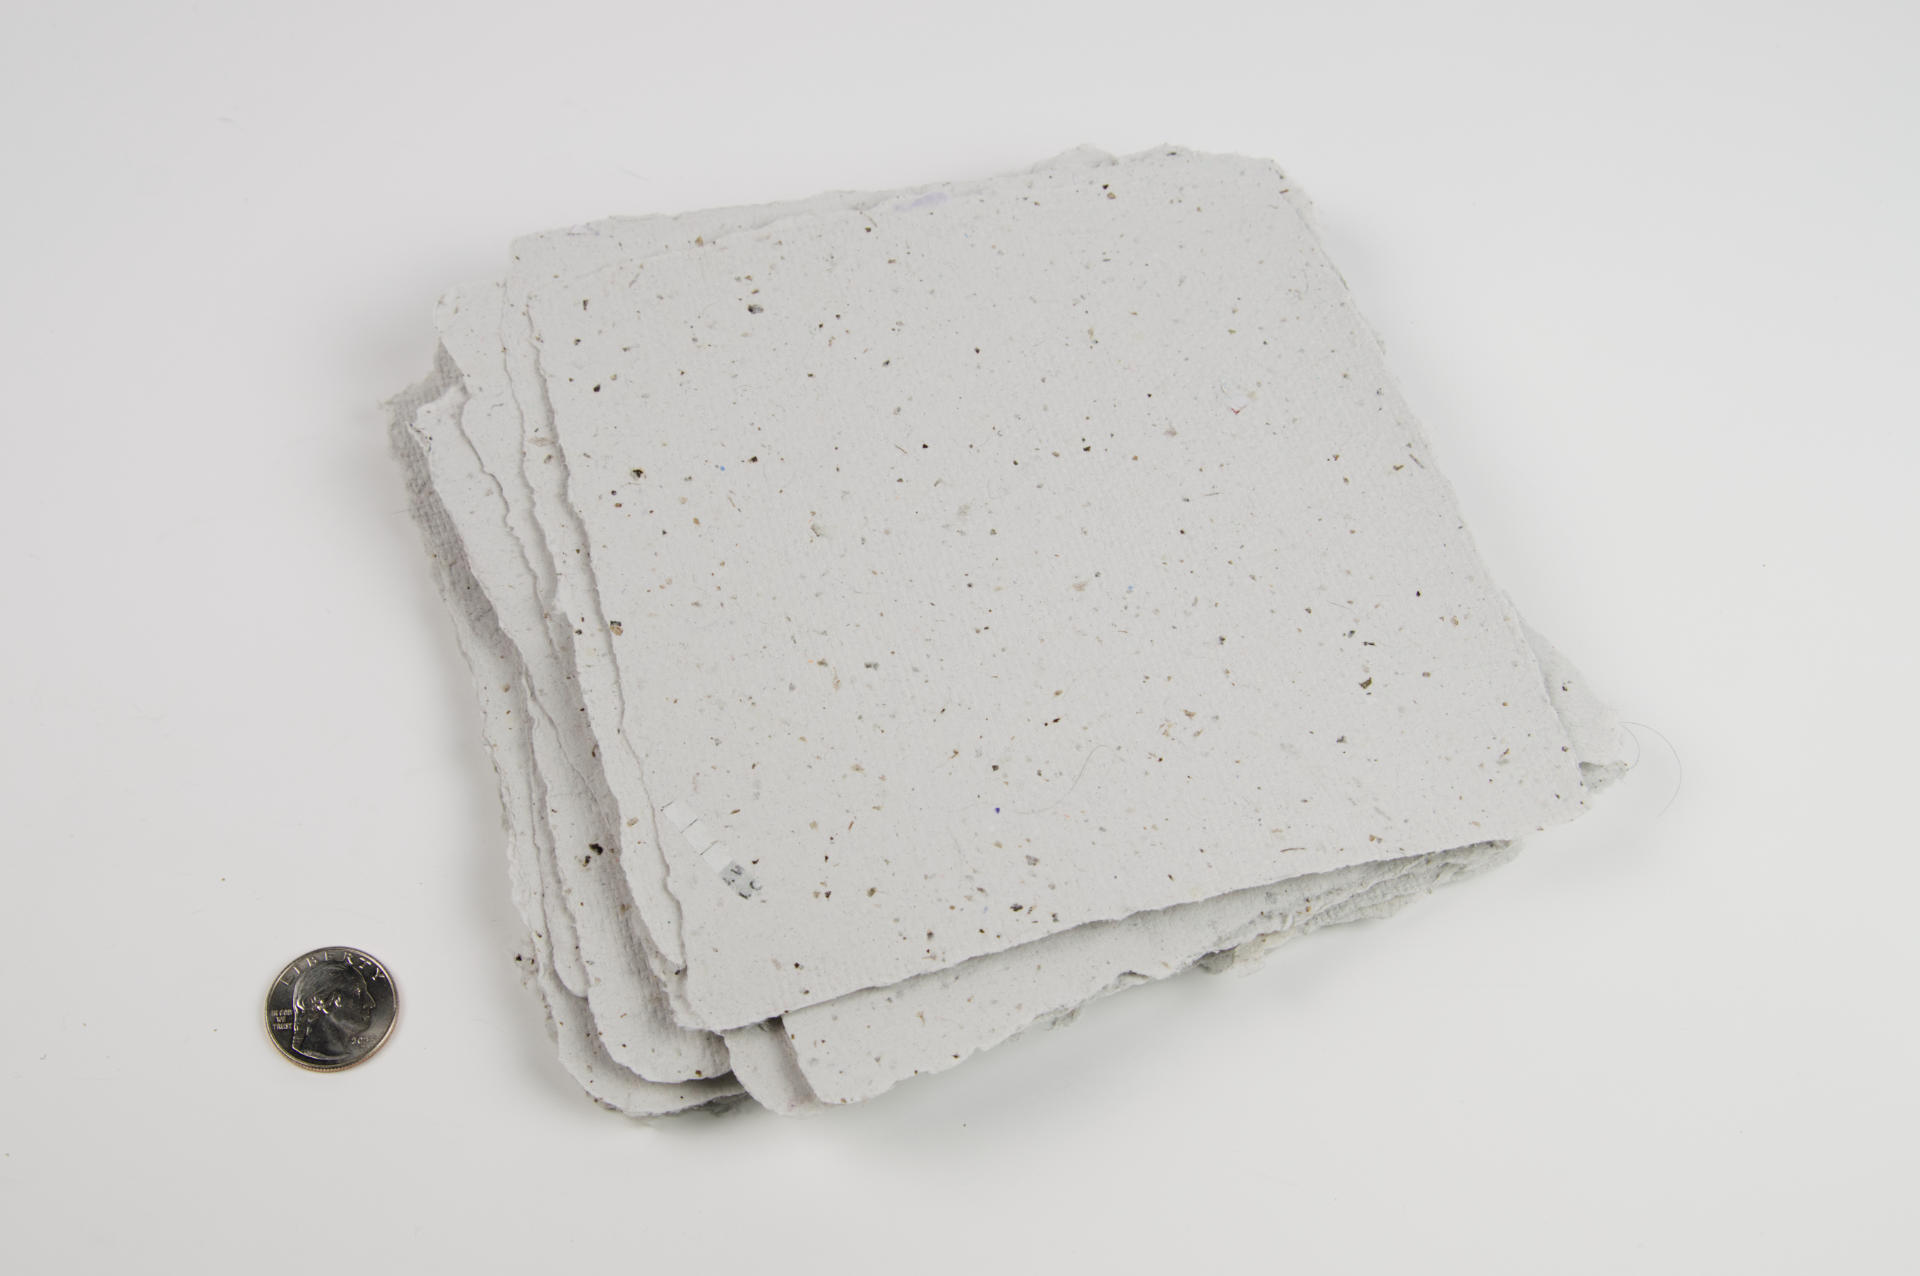
Here’s a stack after the pieces have dried. They are not exactly flat, as they curl up while drying. I couch them onto cut up pieces of an old bed sheet. I don’t press them when they are wet, I just let them air dry while laying flat, which takes about a day or so.

(Most people will tell you to press the paper when wet to remove the water and to flatten it, but I just sort of do it the way I’m doing it and so far it seems to be working fine.)

Once the sheets are fully dry that’s when I press them. I put each piece between a sheet of 3mm thick Baltic Birch plywood and then put the stack between two steel plates in a hydraulic press. (Here’s a press similar to the one I have.)

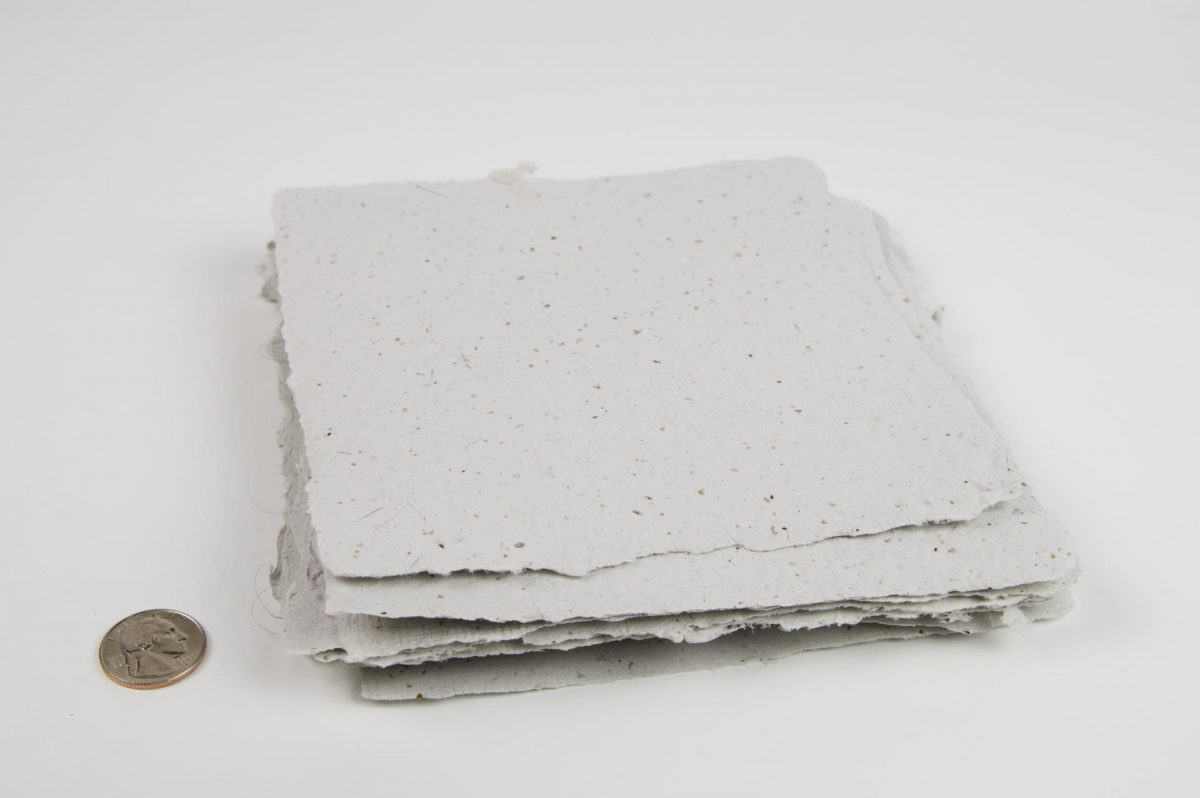
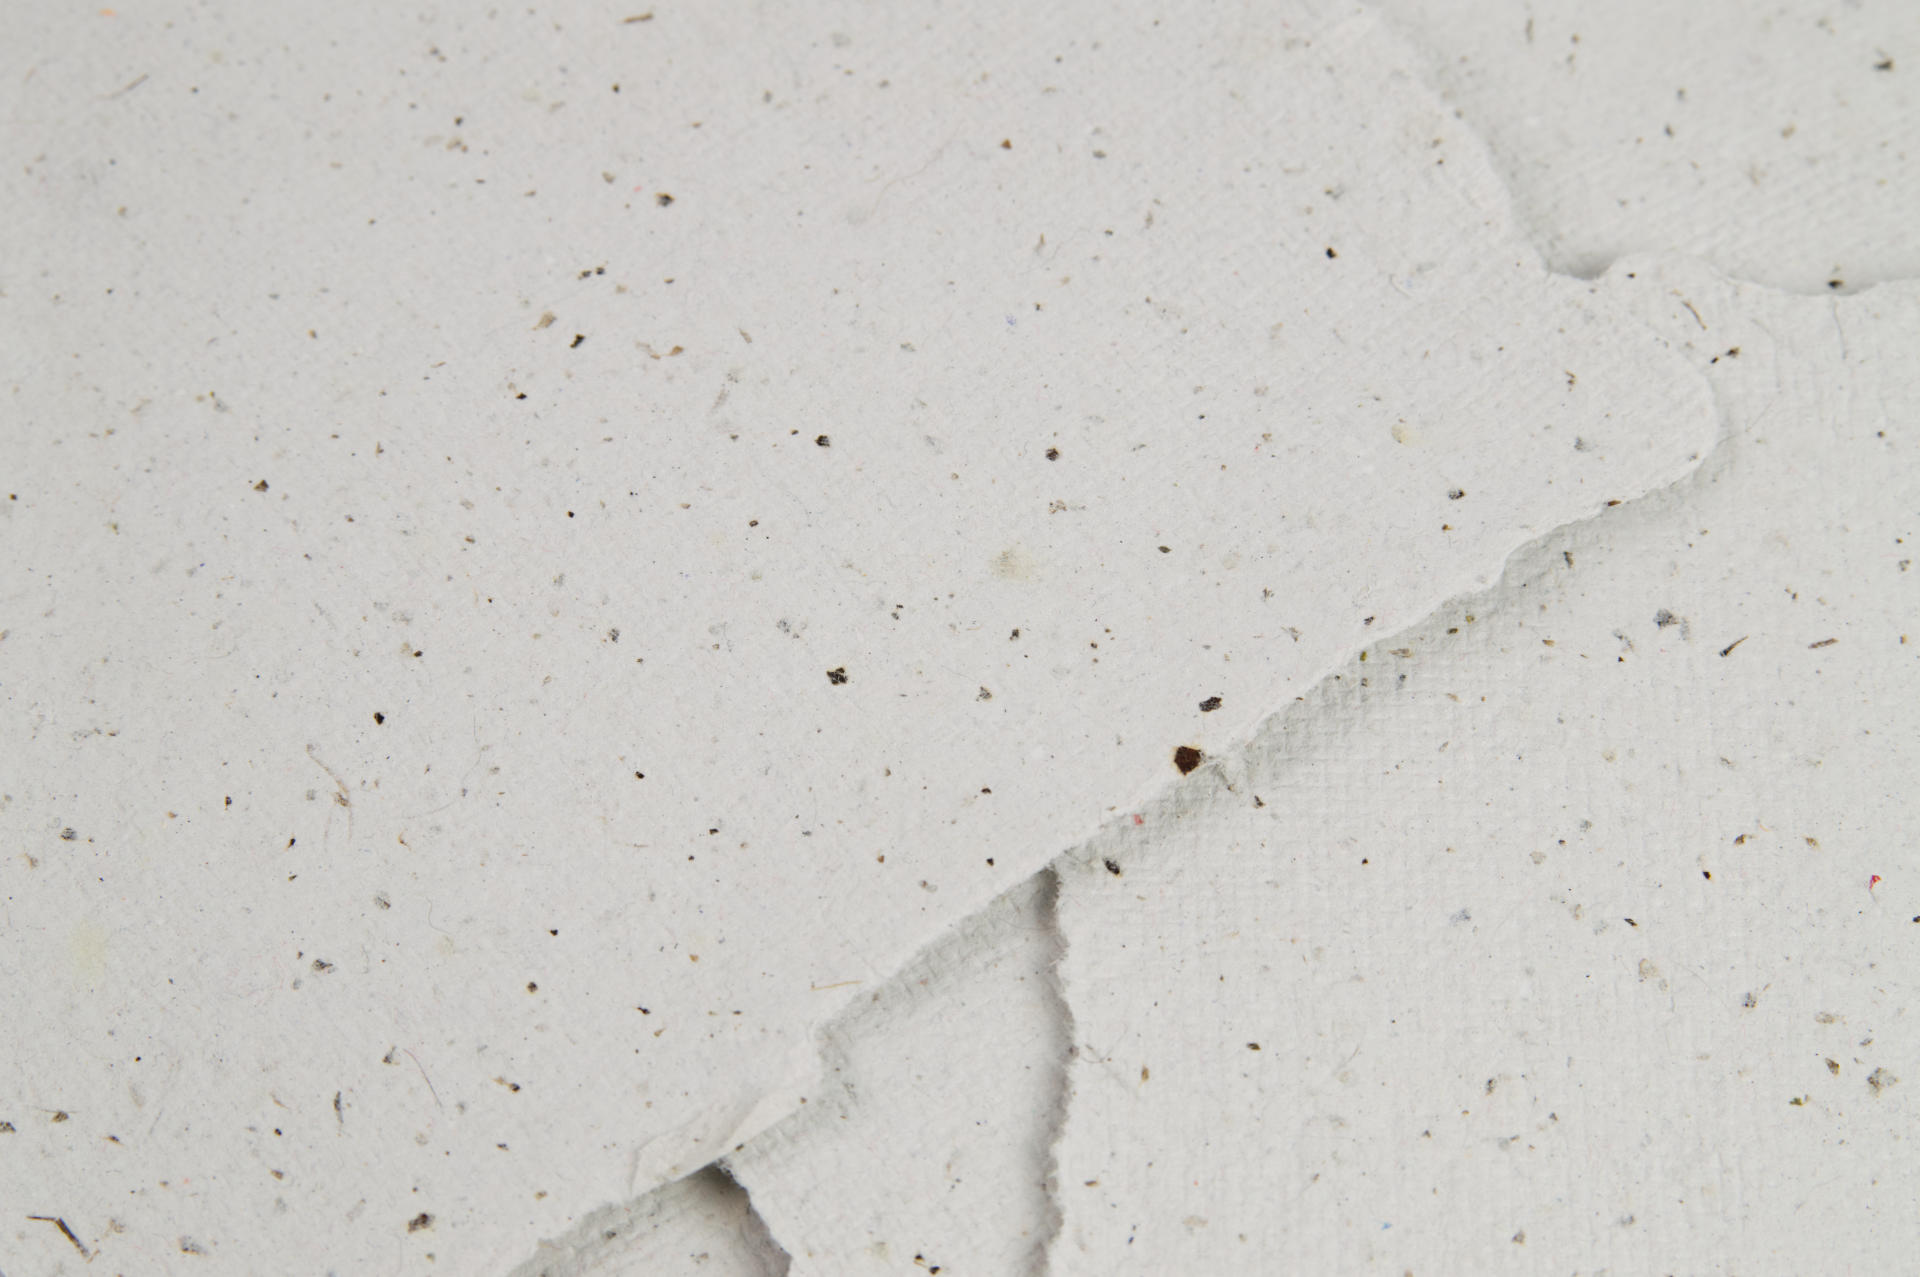
I’m still experimenting with the right amount of pressure. If I totally crank the press down hard I can get some very flat (and sometimes very thin) paper. One batch was actually a bit too thin! This batch is a bit thicker (since it was made better) but I also didn’t apply quite as much pressure, so it would retain some of the texture. Either way, one side is going to be much smoother (the side that dried face up) and the side that was against the bed sheet will have some texture to it.

Wait, bed sheets? Yeah, this is all pretty DIY, and I’m mostly using materials I have available and not purchasing a bunch of stuff. As I mentioned in the mould and deckle post I am using old window screen material because I have a bunch of it.

To make the pulp I am using paper shreds create by our home paper shredder. I’m making sure I don’t shred any envelopes with plastic windows or other strange matter (though my first batch did contain plastic!) The paper is never white because the ink/toner/whatever from the paper mixes with the water and pulp and turns it gray, which is fine. I do plan to experiment with some colorants. If you notice the brown speckles in this batch that comes from a bunch of dried up leaves I harvested from the garden. I crunched them up and added them to the pulp when blending it. I think it adds some nice character to the final product.

I was able to make a total of 16 sheets on the attempt, which isn’t bad, as I am somewhat limited in space. I’m starting to get to the point where I know how much pulp and water to use and how much it will make, so that’s good. I should probably measure things and write it down but at this point I’m still just screwing around to see what works and what the outcome is… Stay Tuned!


Note: This post contains an Affiliate Link. Read More.

Categories
Uncategorized

Paper Making (Again)

I made some paper… again. The first attempt used a small 3D printed mould and deckle, and this time around I made a new (slightly larger) mould and deckle.

I also experimented a bit more with the paper, this time using paper from our paper shredder and mixing in a few “raw” pieces to some sheets. The results are definitely interesting.

I tried a new technique with the hydraulic press after they were all dry as well. Last time I stacked them all and flattened them in the press, and you can see the screen texture in those. This time I did that, and then followed up with pressing them with a piece of wood between each individual sheet. Some of them came out incredibly flat and smooth! I’m curious to see how they take ink when printing on them.

Some of them are a lot more ragged around the edges. (That’s the “deckle edge” you know.)

Here’s a few I added shredded paper to that was not blended or soaked, just tossed onto the pulp before drying. It seems embedded really well and certainly gives a look.

A bit more closeup view… you can see and read some of the type, which I think could be really interesting since I used shredded (and potentially sensitive) documents. There’s probably a whole project there all on its own.

Because I printed this larger mould and deckle on my (small) Prusa MINI+ I split it in half in OpenSCAD, printed the parts, then glued them together. When assembled this one is about 165mm x 224mm and the paper comes out around 145mm x 204mm.

Printing in halves and gluing together mostly worked. I had to print small shims on the side to make it more rigid, but now I really want to make an even larger one! (Though I will need a larger pulp bucket then.)

Magnets embedded into the corners of the mould and deckle work to hold the whole thing together with the screen between the two parts. I’m happy with how this turned out. I just made holes and stuck 1/4″ cylindrical magnets into the holes (making note of polarity) and then shot some hot glue in the holes to hold them in place. (Yeah, sometimes hot glue is quicker and easier than perfectly modeling a hole with friction bumps.)

Despite a few issues combining the halves to make a whole, I’m quite pleased with how the mould and deckle turned out, and I’m sure I’ll experiment with others in the future, especially since it’s trivial to make any shape… round, hexagonal, triangular? No need to be confined to a rectangle. (And yes, I’m very happy with the paper as well!)

Categories
Uncategorized

Recycle Print

After I made my own recycled paper I had to do something with it… Well, the plan was to print on it! So I did. I used my (recently built) printing press to print a recycle symbol on the paper… which seemed fitting, since it is recycled paper.

I really love how this turned out. One of the things about printmaking is, you need paper. I remember when I started experimenting with printing and was told “Two words: Rives BFK” and yeah, you know what? That shit’s expensive!

I get that to make high quality prints you need high quality materials, but I’m also cheap, and I love doing what I can with low-cost materials. I’m using water based inks because they are cheap and easy to use (and clean up in my slop sink) and I do get some paper that isn’t total crap sometimes, but I’m also going to use cheap material sometimes because art should be accessible. But…

The more I think about it, the more I want to just make my own paper using the stuff we already recycle at our house. We shred plenty of paper, and toss a lot in the recycle bin, so why not put it to use? I think making my own (recycled) paper and then printing on it makes perfect sense.

Categories
Uncategorized

Making Paper

Hey, I made some paper! To be more precise, I made recycled paper using scrap paper from my own home. I remember facilitating an event years ago at the museum where we had people make paper, but it was one of those things where I was so busy running things I didn’t actually get to make anything. So a few years later (and with my renewed printmaking efforts) I figured it was time to make my own paper.

And if you’re interested in the whole process, there’s a ton of information online, and plenty of videos on YouTube. I watched a bunch, and while I didn’t follow any one of them exactly, I got close enough to get some good results for the first try. I bought a tub, strainer, and sponges from a dollar store, found a piece of scrap screen from a window, and then I made my own mould and deckle.

This is one of those things where if you’ve got a wood shop and scrap wood and that sort of stuff, cranking out the mould and deckle would be quick and easy… Since I don’t really have access to those thing I figured I would 3D print them. I designed the two parts so I could embed magnets into the corners to help hold them together while in use. It mostly worked. I may tweak a few things in the next revision.

I printed the parts on the Prusa MINI and they’re about 160mm square, so the paper I made is just slightly smaller than that, probably closer to 145mm x 145mm, which is about 5.5″ square which should work well for my prints that are on 3″ x 5″ paper.

I made two pieces, one of them turned out good. It’s thick enough that no light passes through it…

The other piece, not quite as good. It’s a little thin, and you can see the lighter spots in the photo where it’s a little translucent due to the thinness. Still figuring out the technique. I used an old t-shirt for my couching sheet, but I may need to experiment with other material or break down and actually buy some real sheets.

Overall for a first attempt without really knowing what I’m doing, I think this is a success! If you remember my experiments with home recycling of HDPE this is pretty similar, except it’s with paper, and less heat, and probably more useful for the art I’m creating now.