Categories
Uncategorized

The New Tool Holder

If you’ve seen my post The (Old) Tool Holder and The (In Progress) Tool Holder then this one is just another in that series and I’m going to ramble on about a few things in the process…

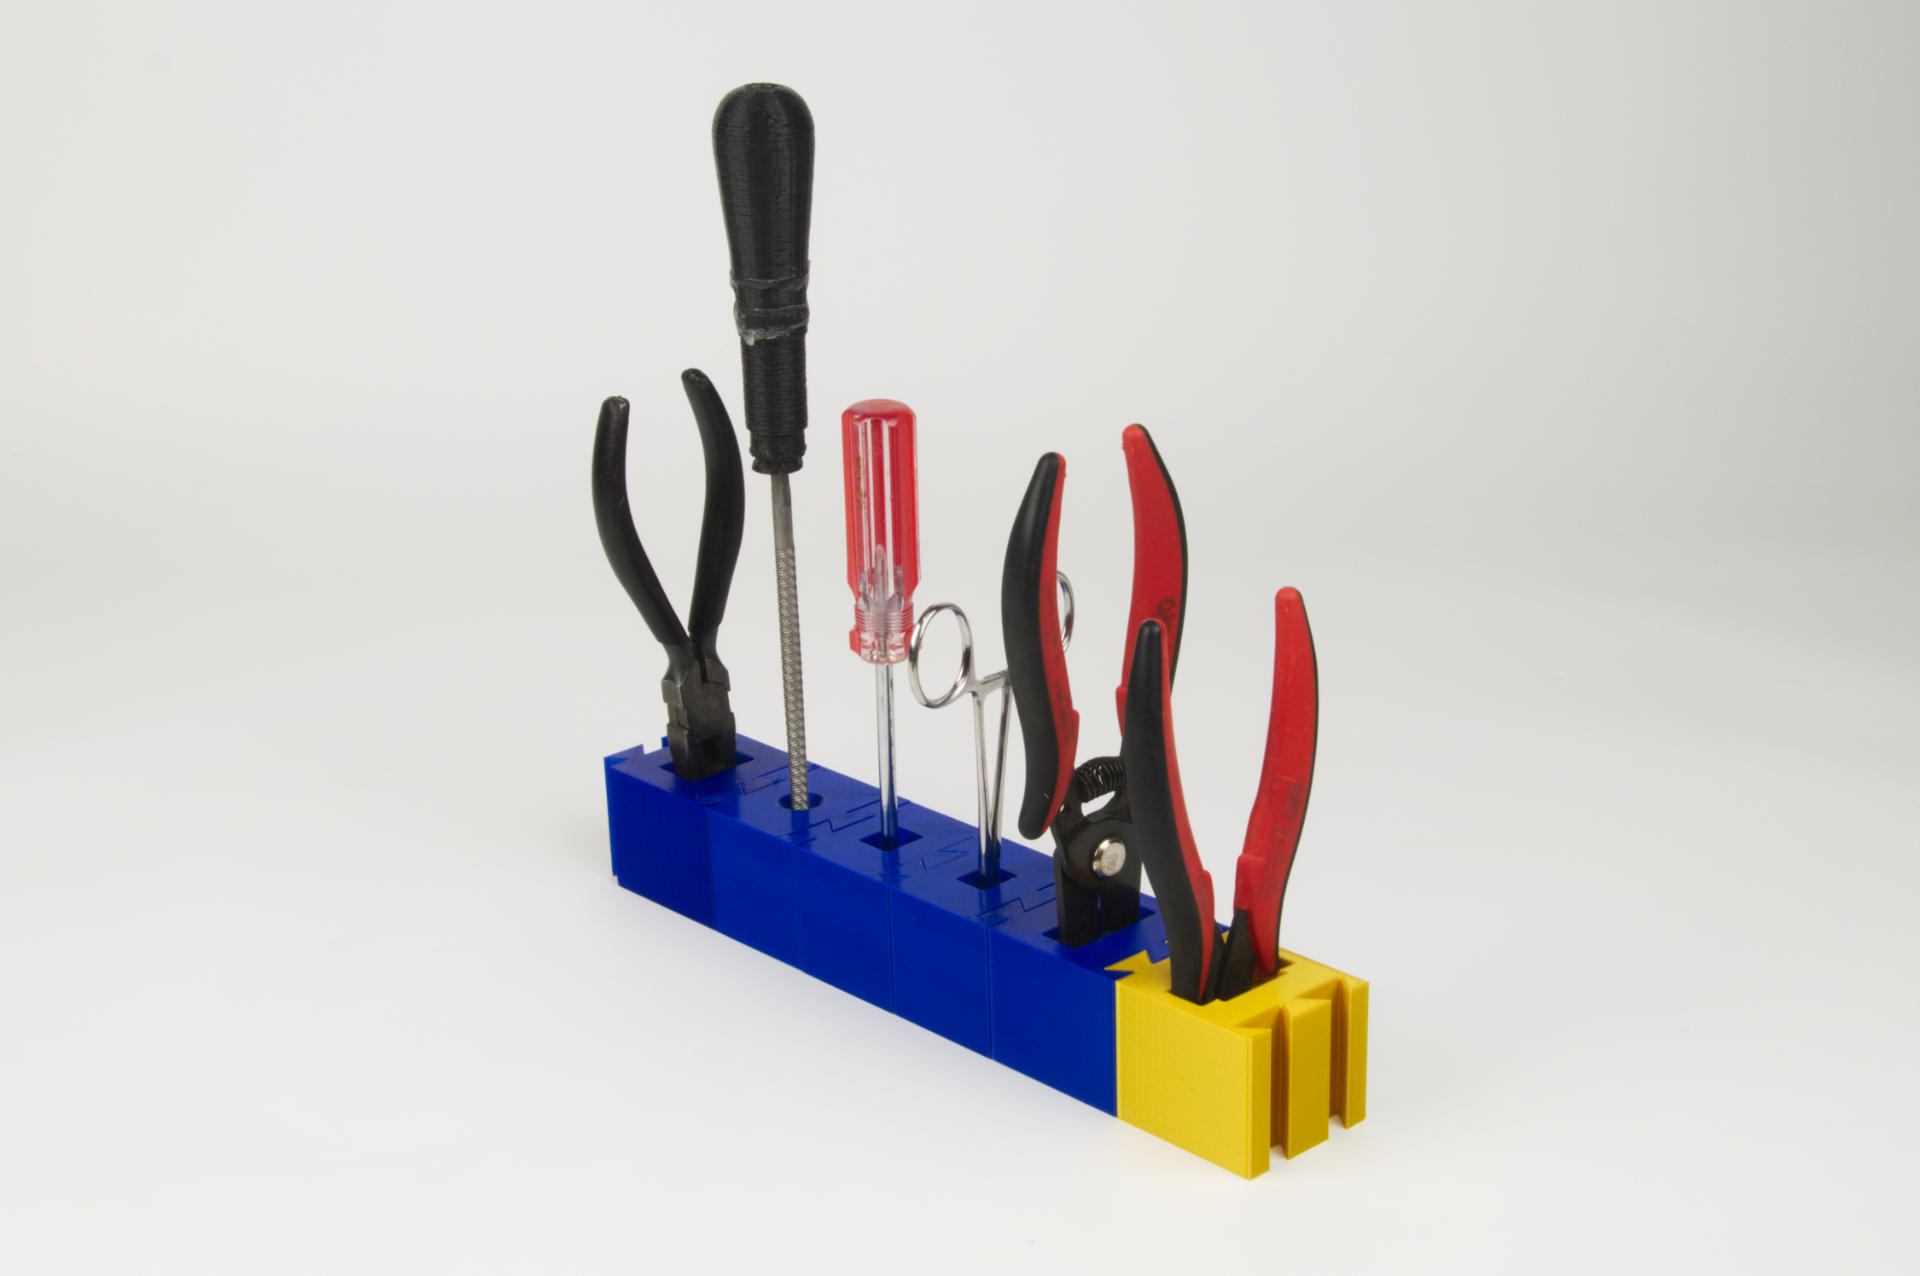
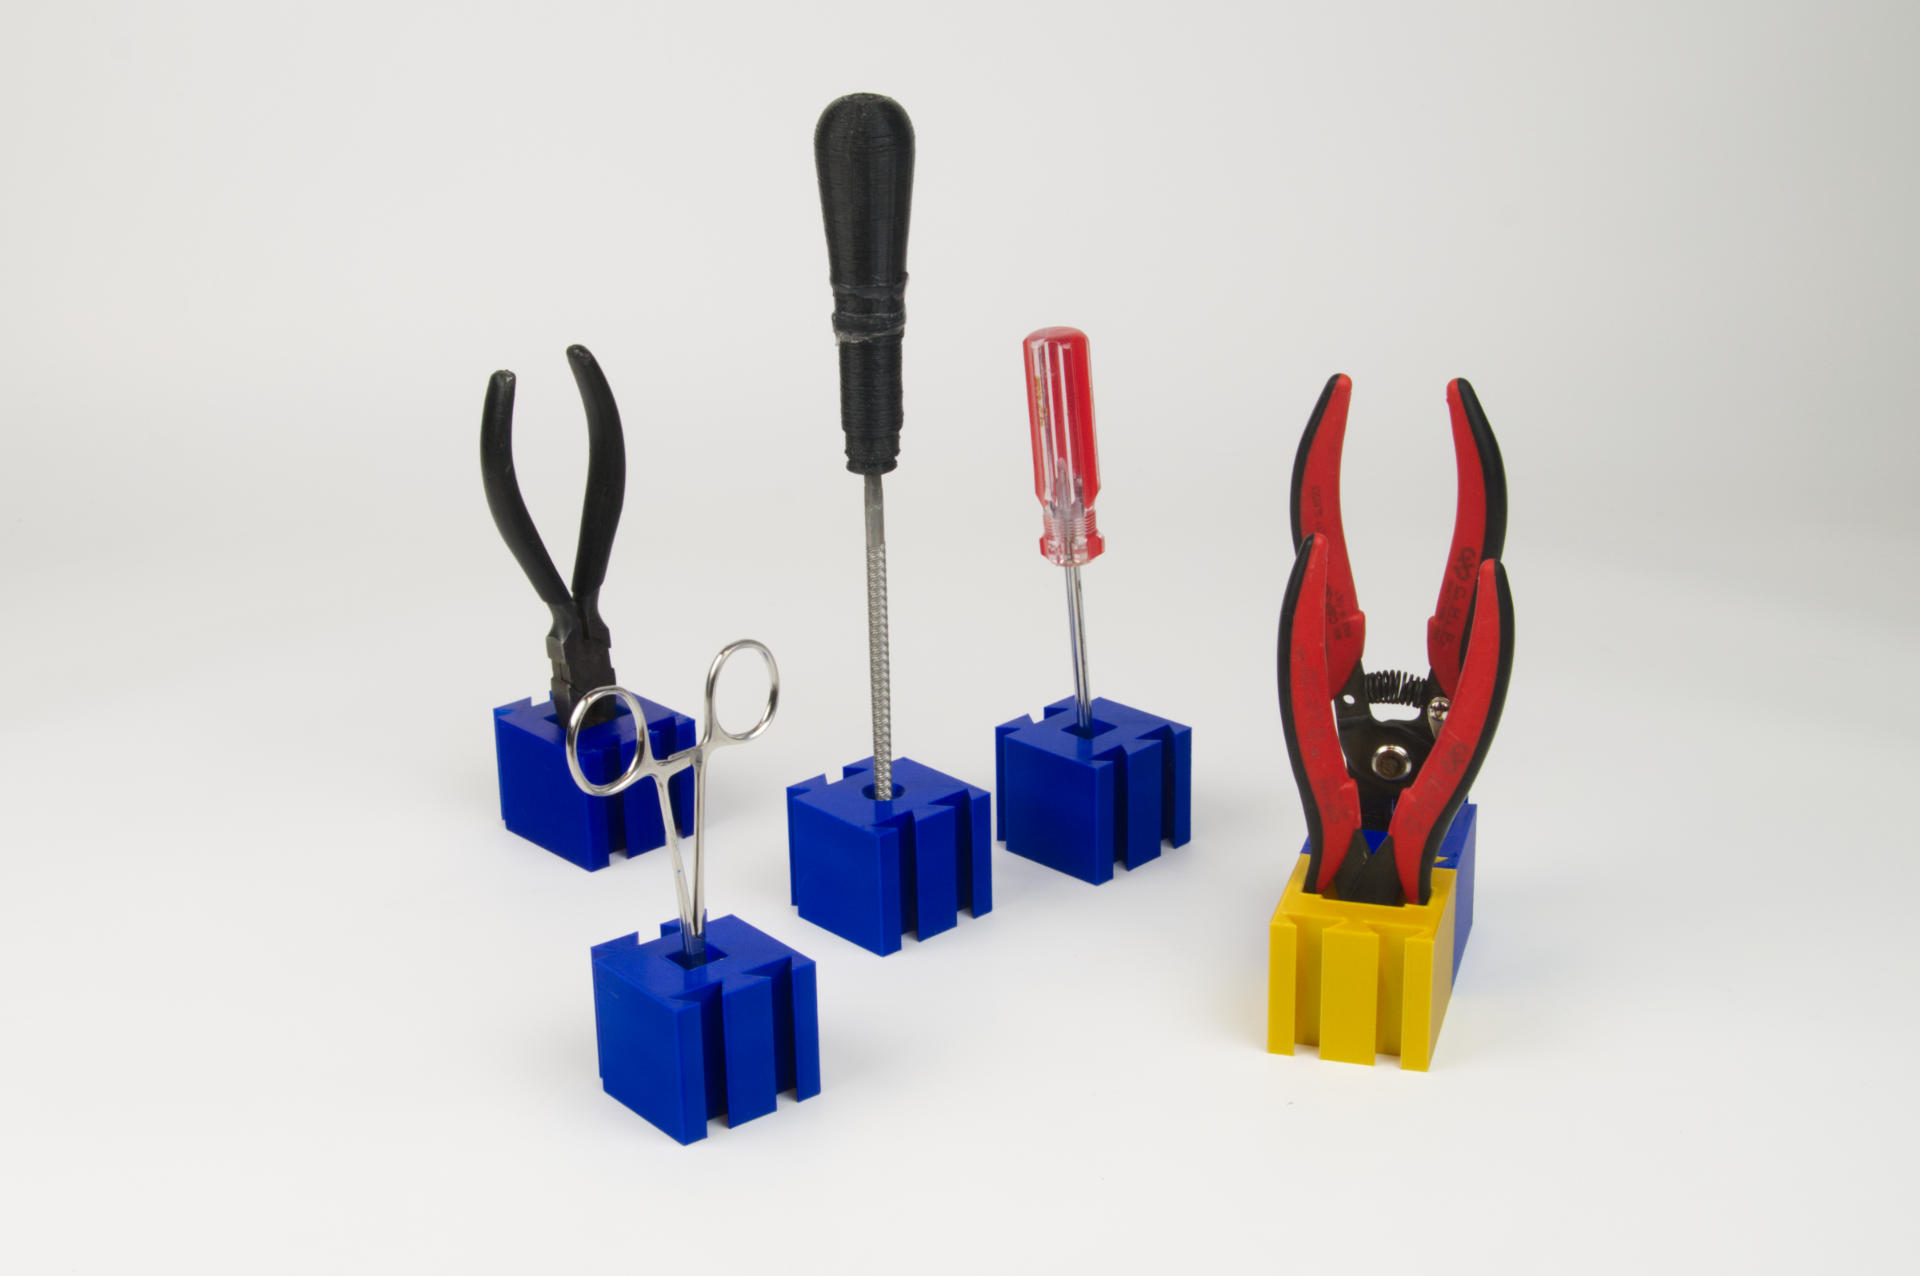
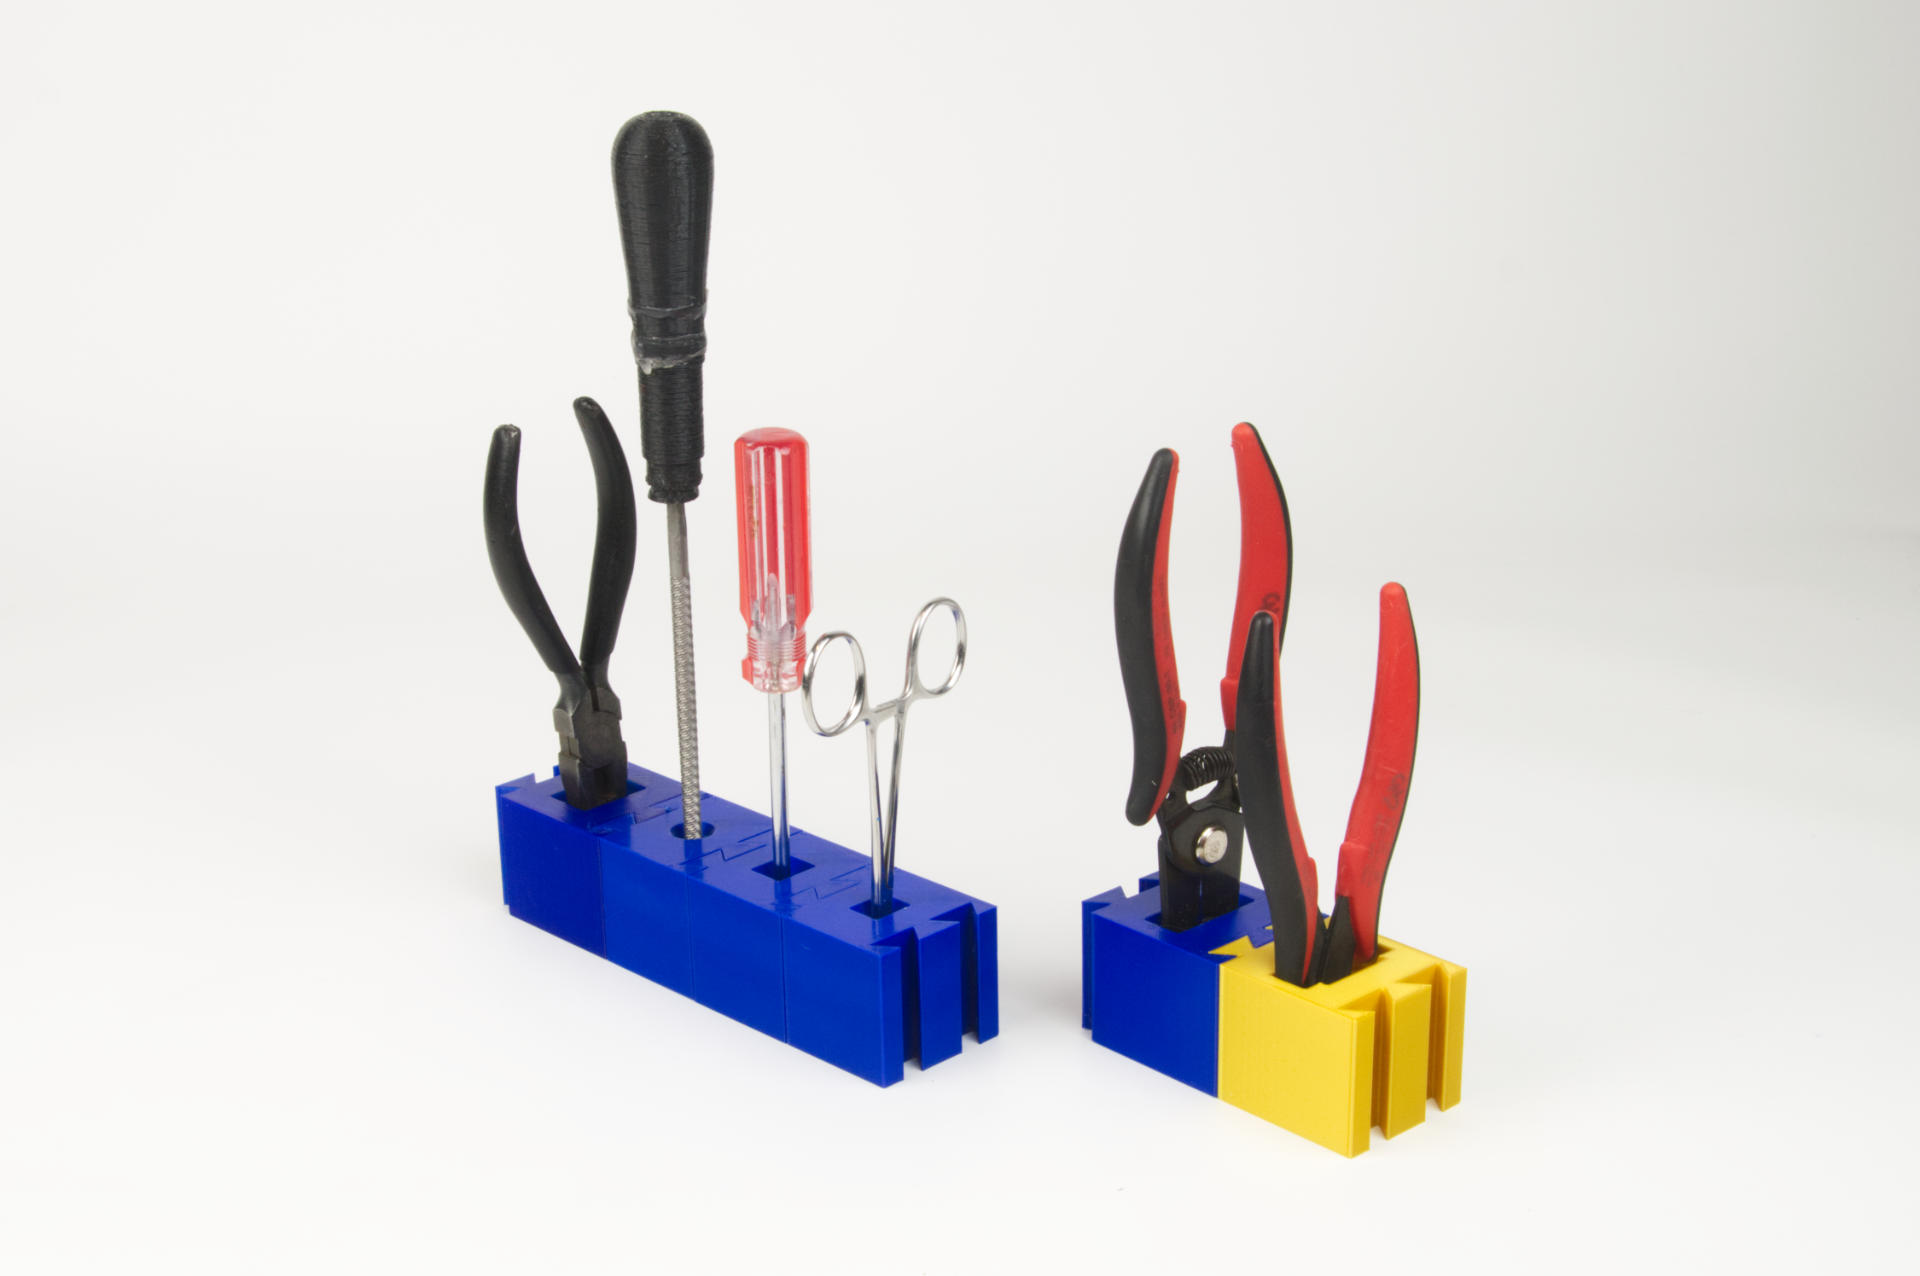
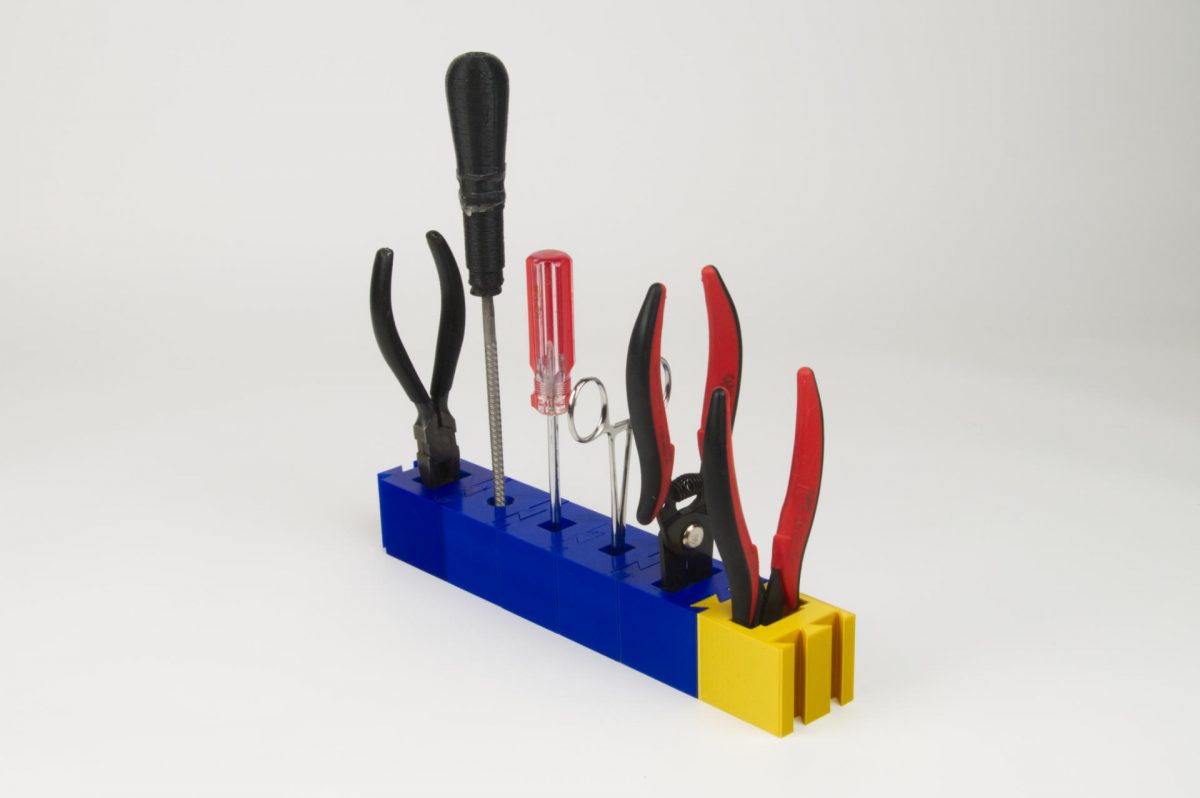
Here’s the final result of what I’ve been working on (on and off) for Wow! Almost a year… I mean, the on and off part meant I took huge breaks for months without doing anything…

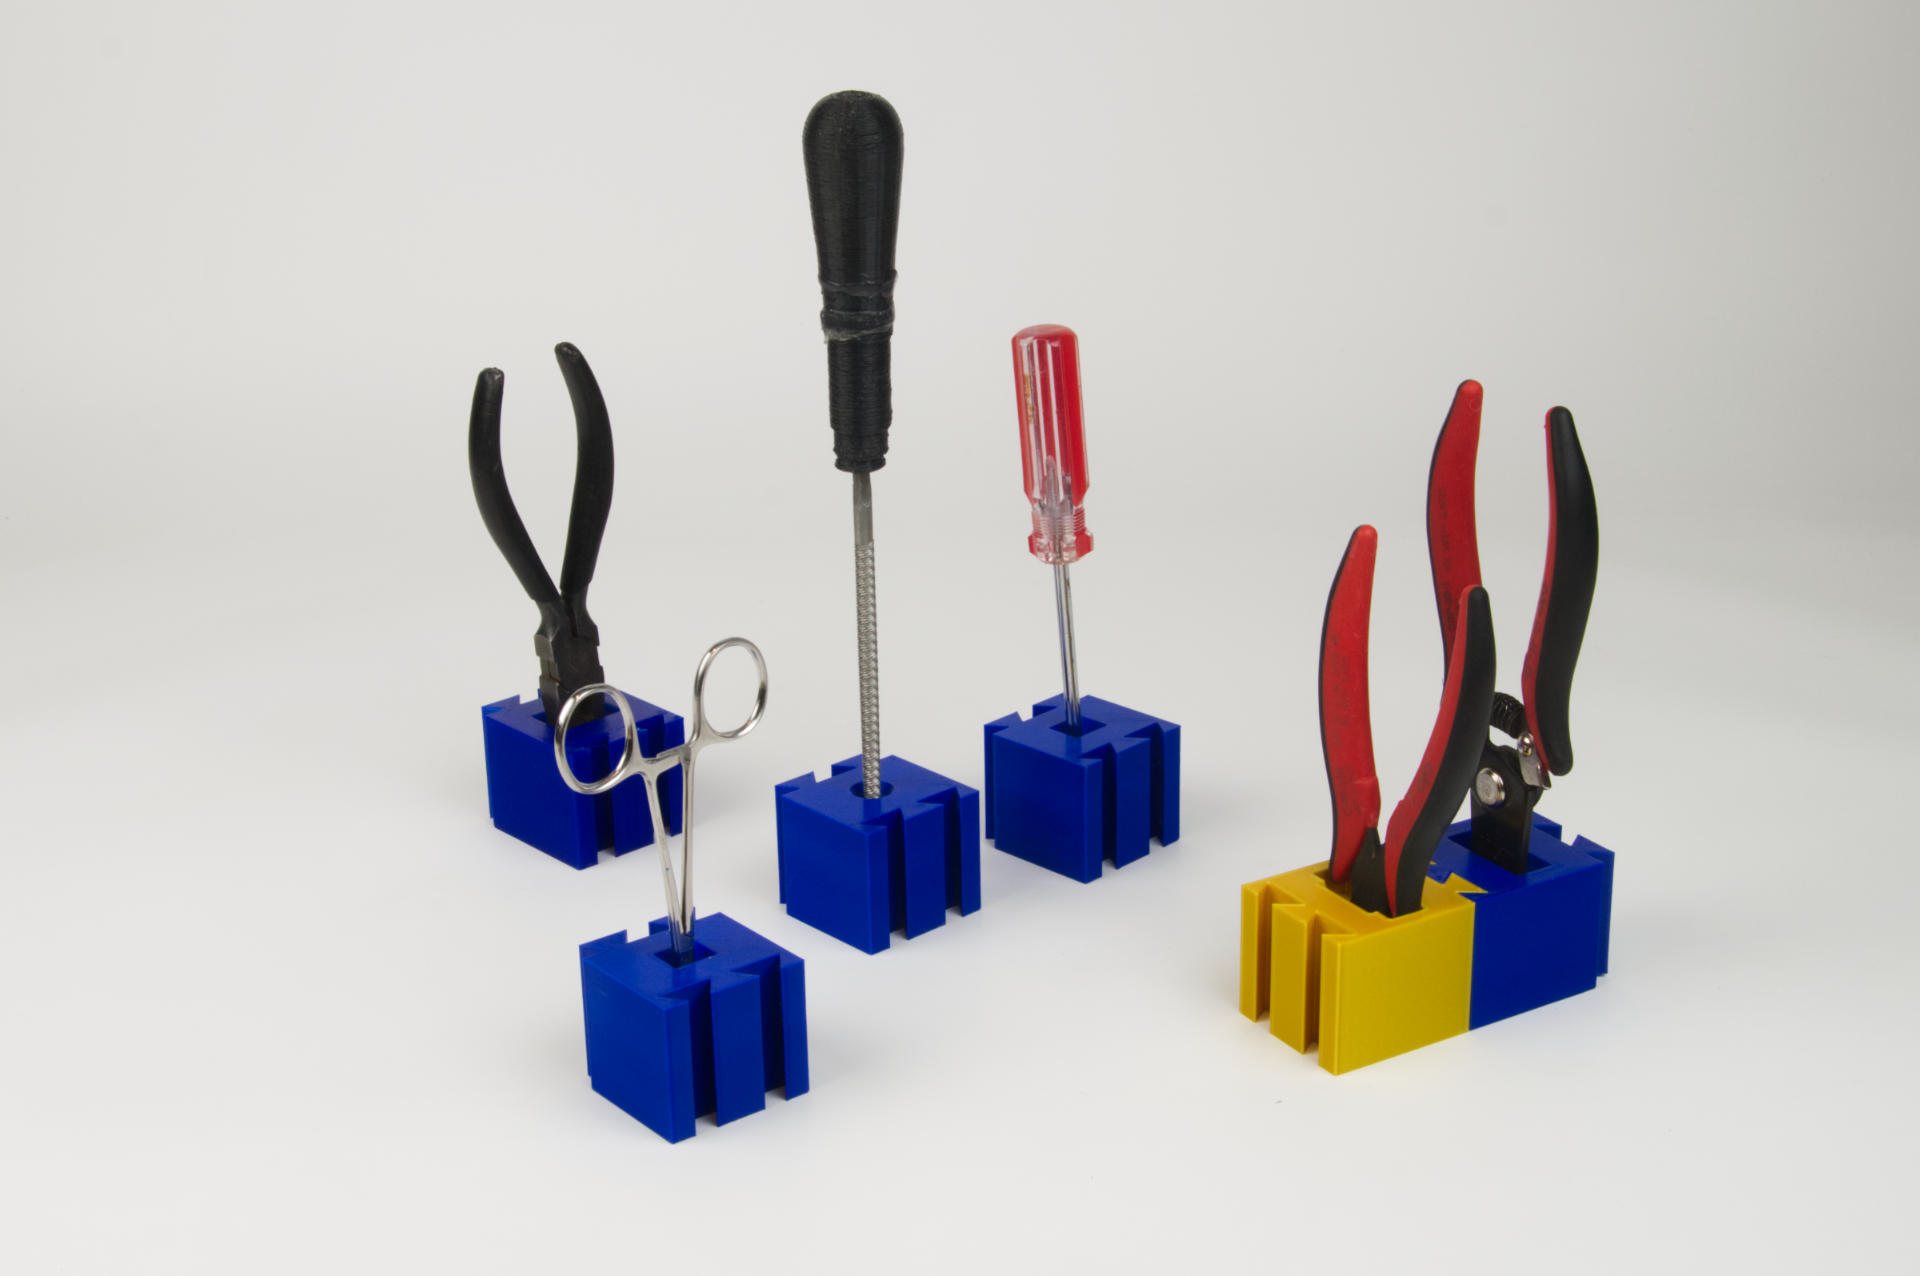
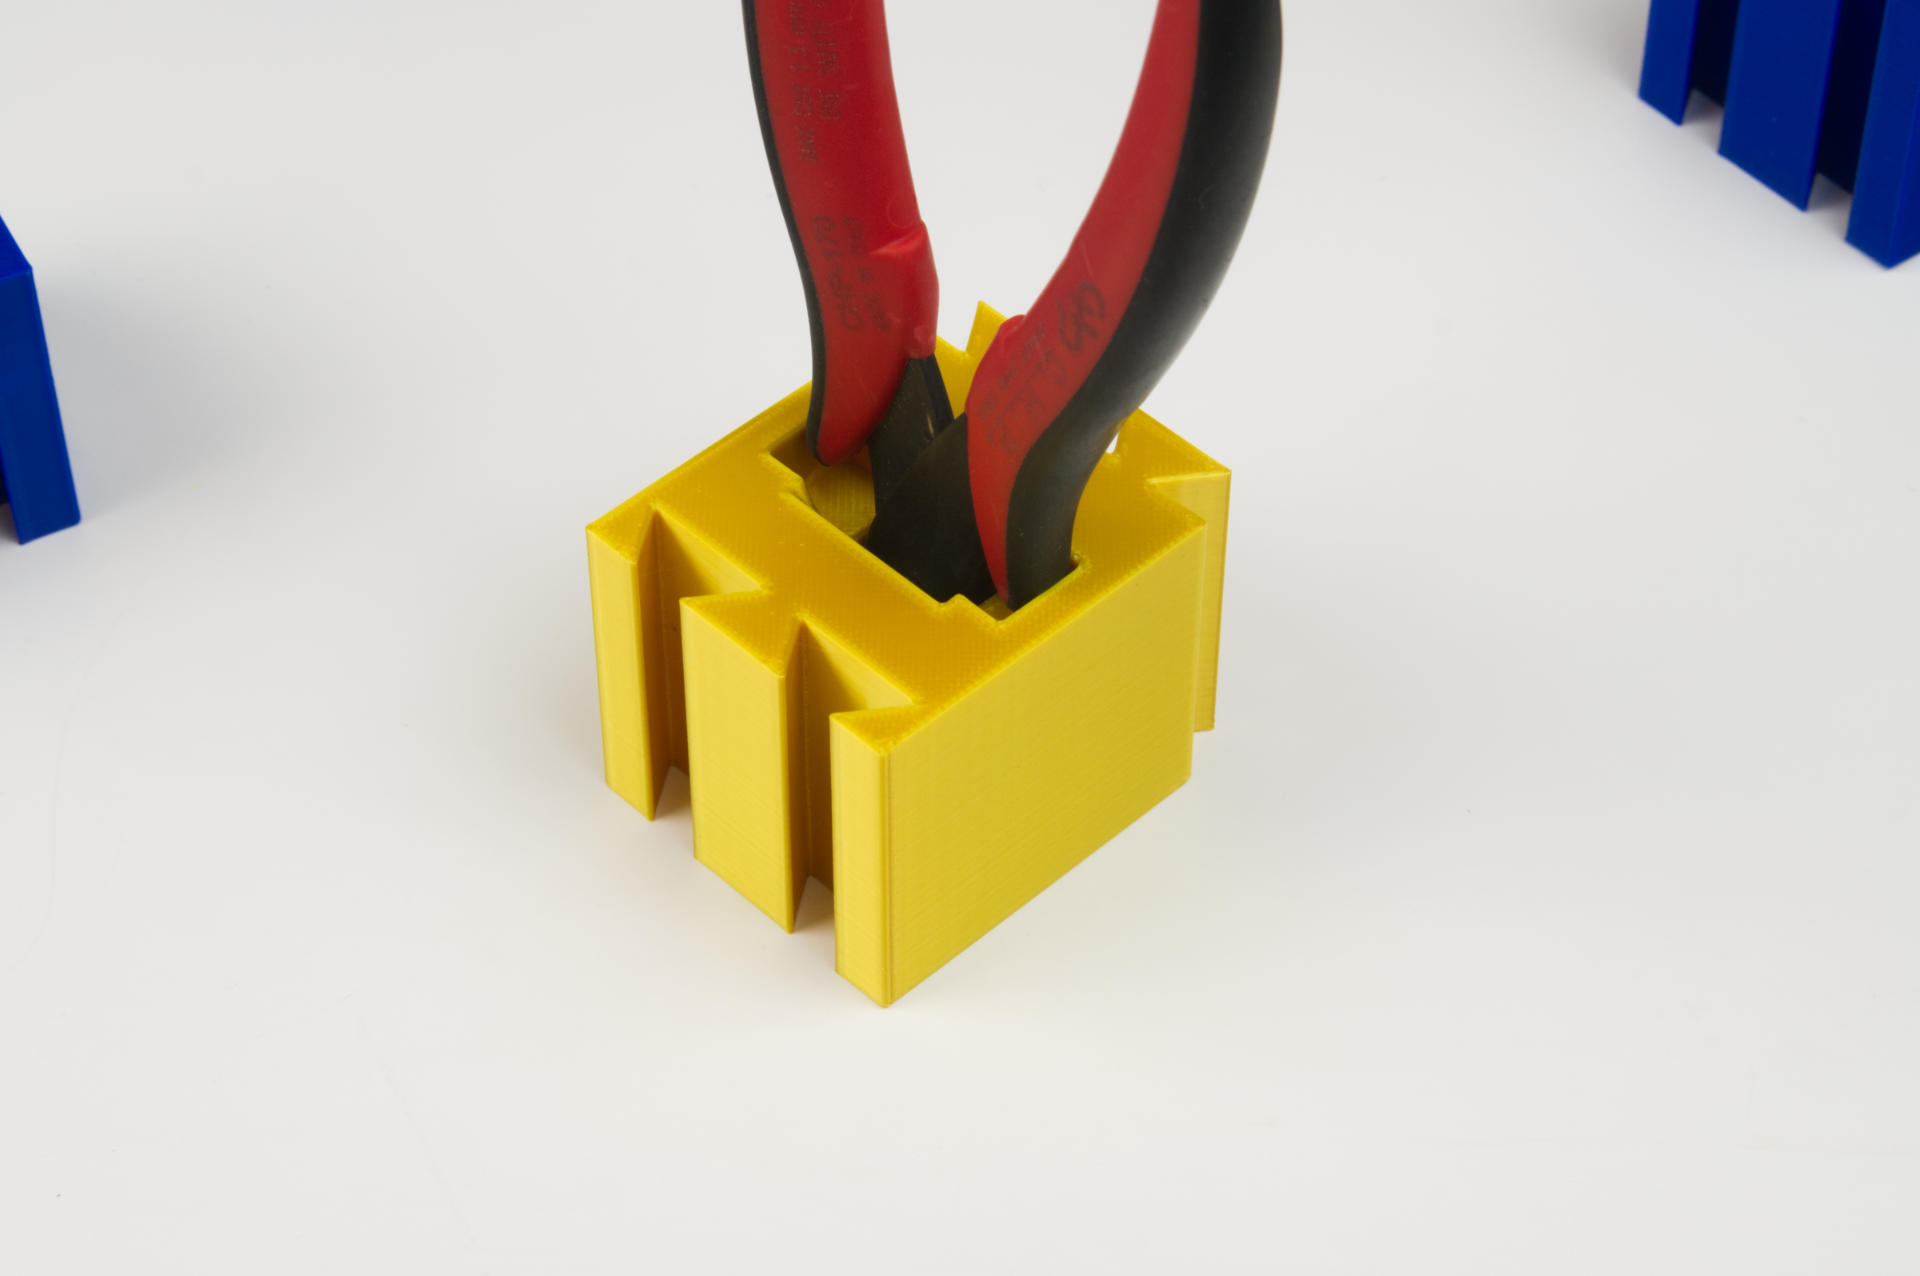
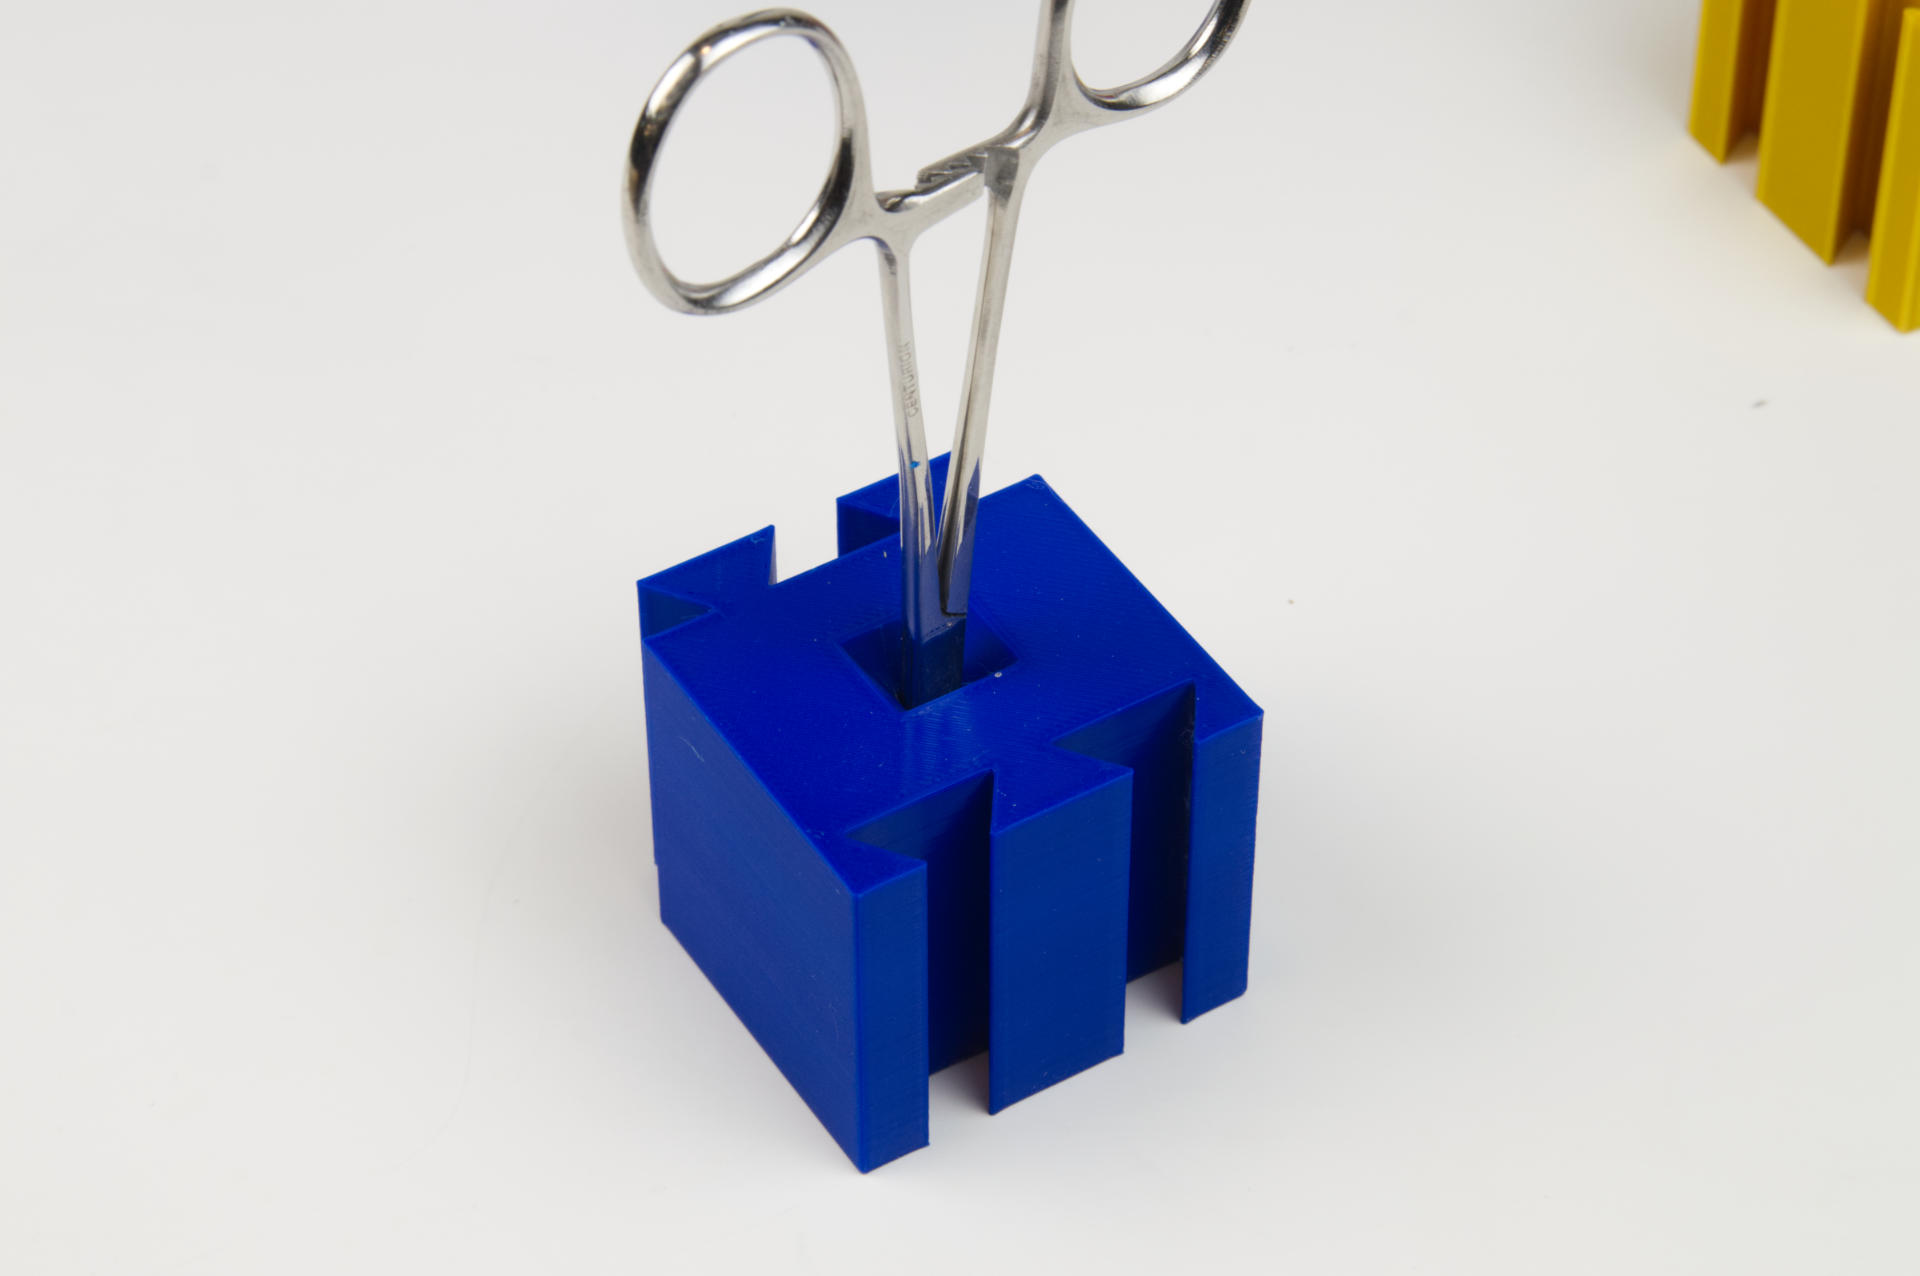
The original plan was to replace the old tool holder at my soldering station with a 3D printed “modular” system. See, instead of printing one (or two?) giant blocks with specific holes in specific places, the blocks would allow for easy rearrangement… and the dovetail was a nice way to connect them (but not permanently).

Each tool had a block designed just for it. Well, the blocks are all the same, except for the hole/slot the tool went into. Each tool went it with the handle sticking straight up making it easy to grab.

I eventually removed the block that held the round file because I really wasn’t using it anymore in my soldering. (I had one weird specific thing I used to use it for.) That was the nice thing about separate blocks! I could easily remove one, add in a new one, etc.

To be honest though, I am just not sure the dovetail was the best idea… When I started it was a really fun challenge to get the tolerances just right, which was really easy on my Prusa MINI+, and not at all easy on my old Monoprice Maker Select Plus. (I guess + is better than Plus!)

So while the dovetail is neat and interesting… it may not be the best solution for this specific thing. It’s still a great way to connect certain things, and I love when digital fabrication can borrow from traditional woodworking techniques… But I also realized (again) a few months ago that sometimes it’s just dead simple to use a screw to attach two 3D printed parts.

When I mentioned this recently someone assumed I mean “drill a hole and stick a wood screw in there” but what I meant was “put holes into the two things you are printing and put a screw in there”.

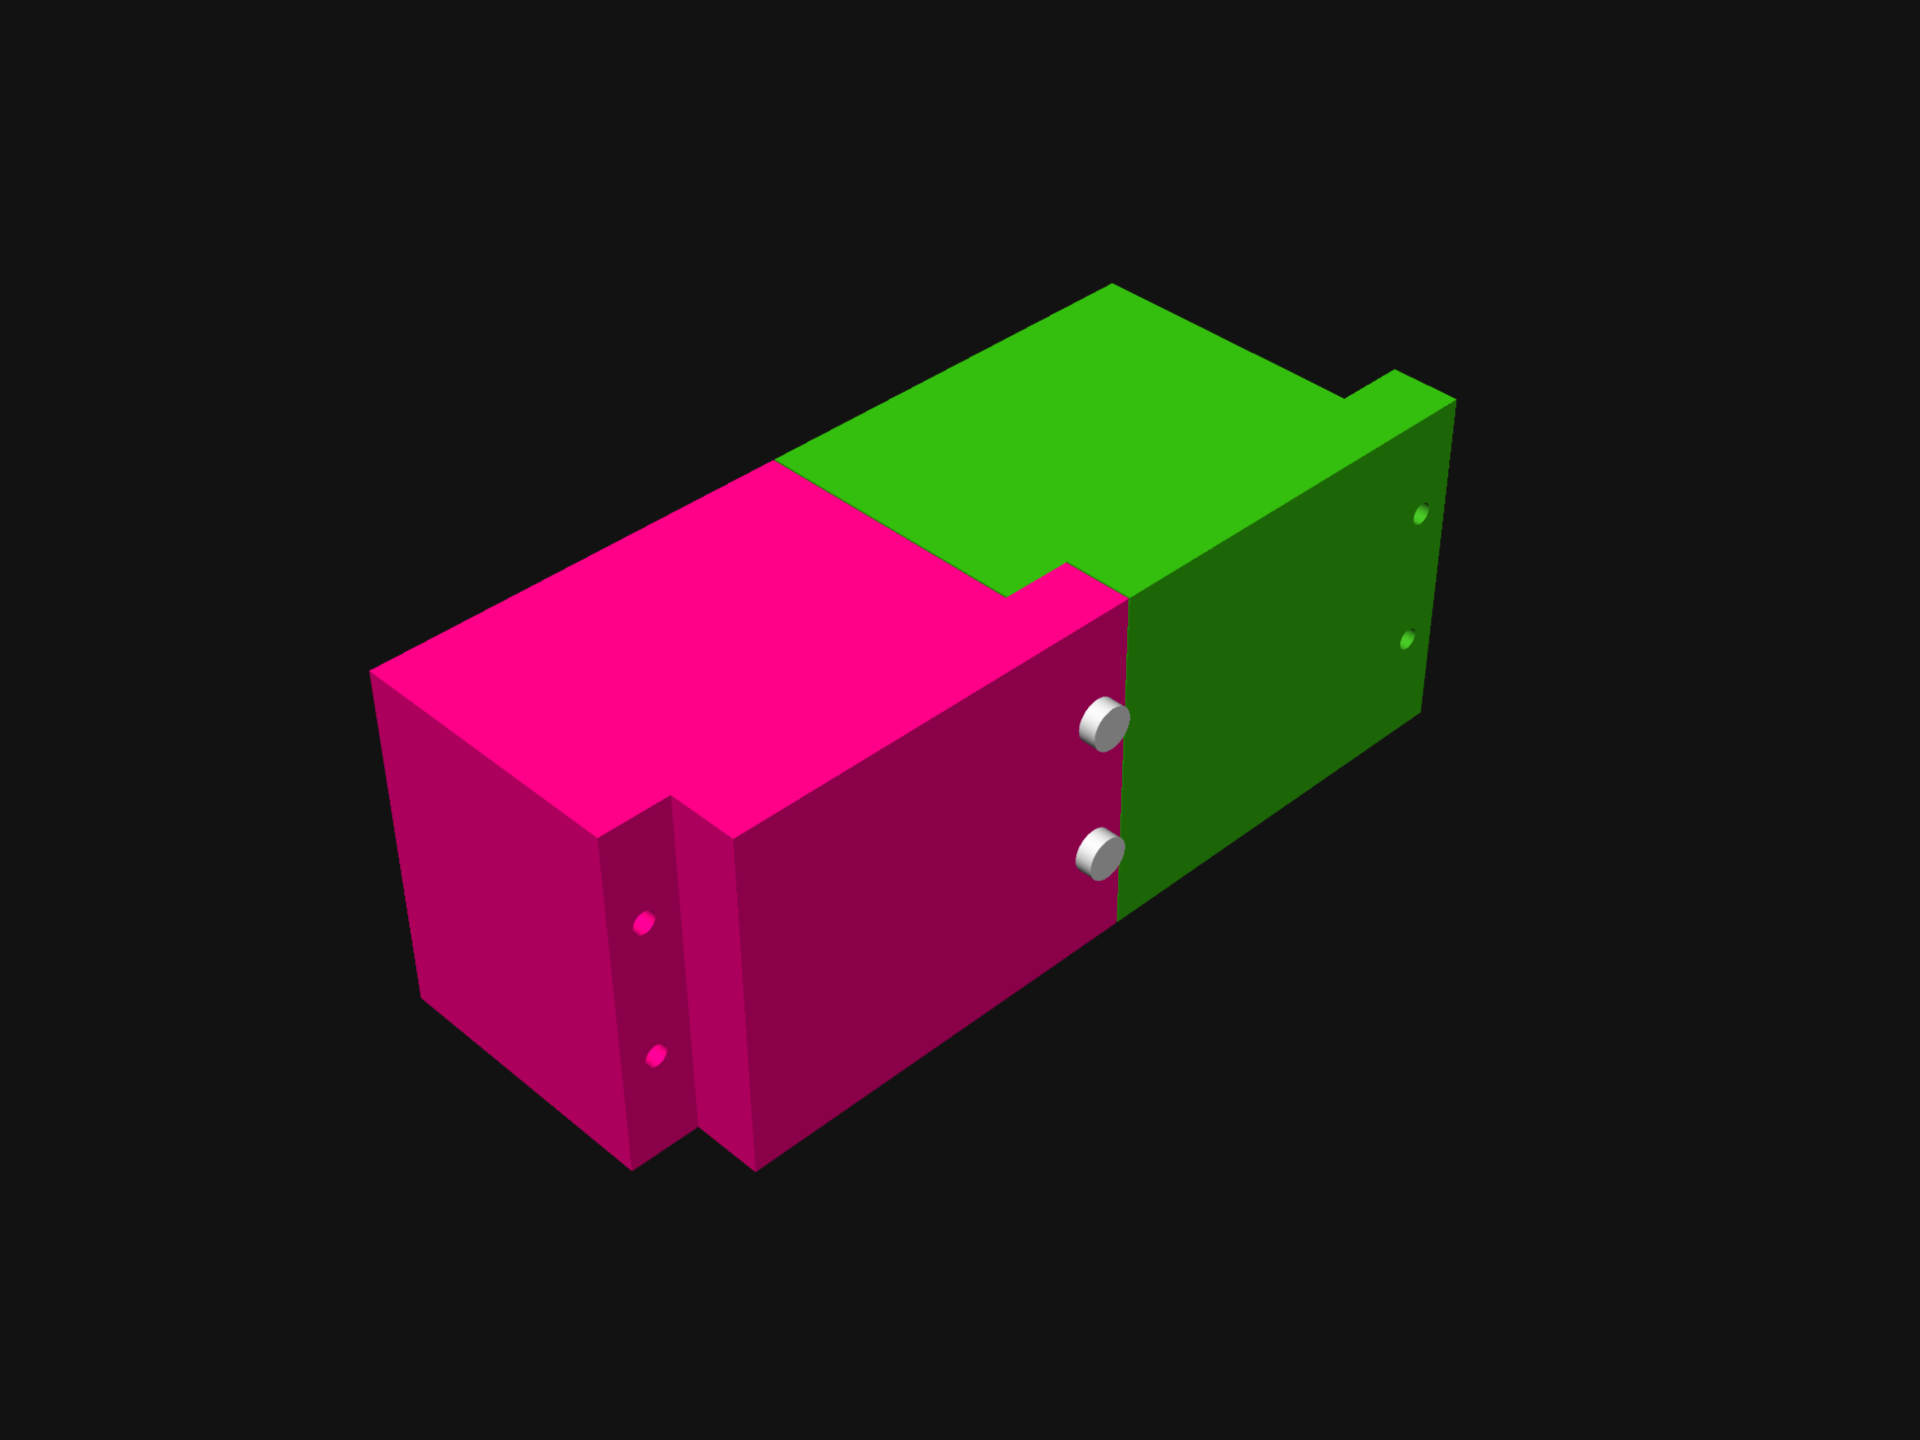
So I did a quick design for a “lap joint” style version of the blocks. Each would connect with 3mm screws, probably 12mm long or something. I have a huge collection of 3mm hardware that I use for so many projects that using it should be a no-brainer when doing this stuff.

I also found that I didn’t rearrange the tools much once I got a configuration that worked. If I used screws to hold things together the power screwdriver would make it pretty simple to pull them apart and rearrange them anyway.

I don’t know that I’ll redo the Tool Holder (yet) because it does work just fine, and if I’m honest I’ve got other things that need organizing. In fact since I just started building a Gridfinity system I wondered if I should make a Gridfinity version of this thing… but I don’t think I will right now. (Maybe some day?)

By the way, the blocks are printed with a lot of infill, because I wanted them to have a bit of weight to them, hence the size of them. Anyway, the Tool Holder is done (and has been for months now, I just never got time to finish this post!)

Categories
Uncategorized

Worx 4V Power Screwdriver

Hello friends, I am here today to tell you about the Worx 4V 3-Speed Electric Power Screwdriver (Specs) but first I will tell you about my other power screwdrivers.

Many years ago I got this General Tools Precision Cordless Electric Screwdriver for light-duty tasks like dealing with screws in laptops, or anything 3mm or smaller in the electronics projects I build. It’s not meant to crank a screw in super-fast or super-tight, but meant to help prevent having to crank your wrist in a twisty motion dozens of times. (Note: As you get older, you get more tired faster, and things tend to hurt more.)

The size is just right for delicate work, and my only complaint is that it is maybe a little under-powered. It uses AAA batteries, so no built-in rechargeable battery in this one, which has its own pros and cons. It uses the small 4mm tips so I use it for small things.

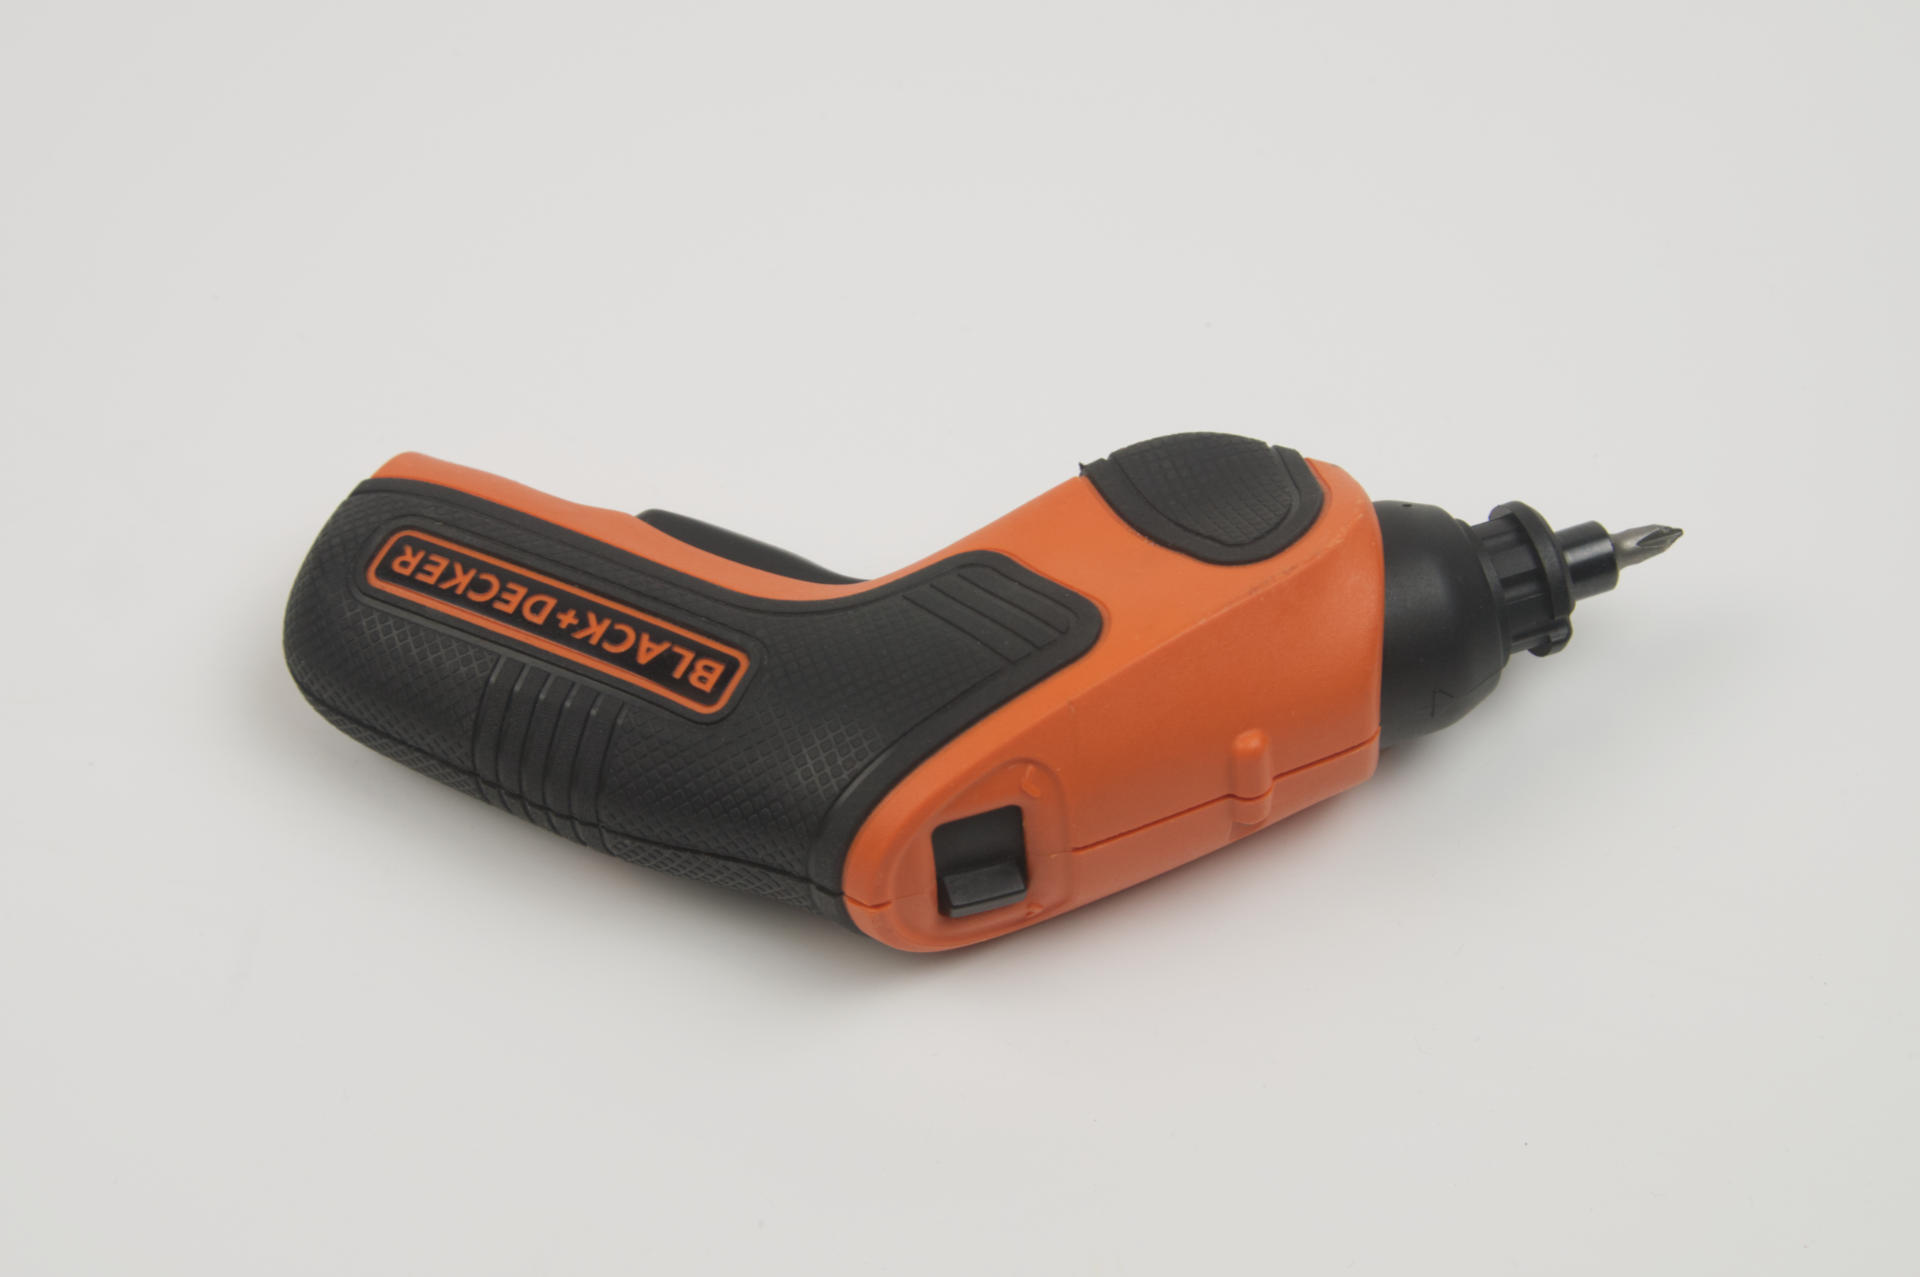
Around the same time I got the small one I also wanted a larger power screwdriver I could dedicate to a specific task in the production of the products I make. This Black + Decker 4V (pistol-style) screwdriver. It works well for putting screws into enclosures as well as more medium to heavy(ish) duty things. I don’t drill big screws into wood with it because I have tools for that, but in a pinch it’ll drill small holes into wood for #4 screws pretty easily. (And I’ve done that a number of times building exhibits.)

The pistol-grip style makes it ideal for some things, and not great for other things. It’s got a big switch to change direction, so it’s a two-handed operation sort of thing. I swear I only charge the thing about once a year, which is nice.

Okay, onto the Worx! It has… features. I got this because I needed a second (large) power screwdriver in my shop, as the Black + Decker lives in one spot and has a dedicated task assigned to it. I wanted to try this style (classic “screwdriver” rather than the pistol-grip). So far I’m finding it to be a nice very well made power screwdriver, though I do have a few observations…

First, why is the switch where it is? When you hold this in your hand the natural positions for the switch would be where the logo is. To properly press the switch with your thumb you need to sort of hold the back end of it, which seems weird as I’d prefer to get a good grip on it, not just hold the last 1/3rd of the device. (To be fair, the first powered screwdriver I owned about 30 years ago, was probably close to twice the length of this one, so a shorter tool is appreciated in this respect.)

The torque switch is at the very end. Again, it might make sense to have that closer to the front. Maybe the battery and motor placement dictated the position of the switches… I don’t know, but it’s not really optimal for how I use a power screwdriver.

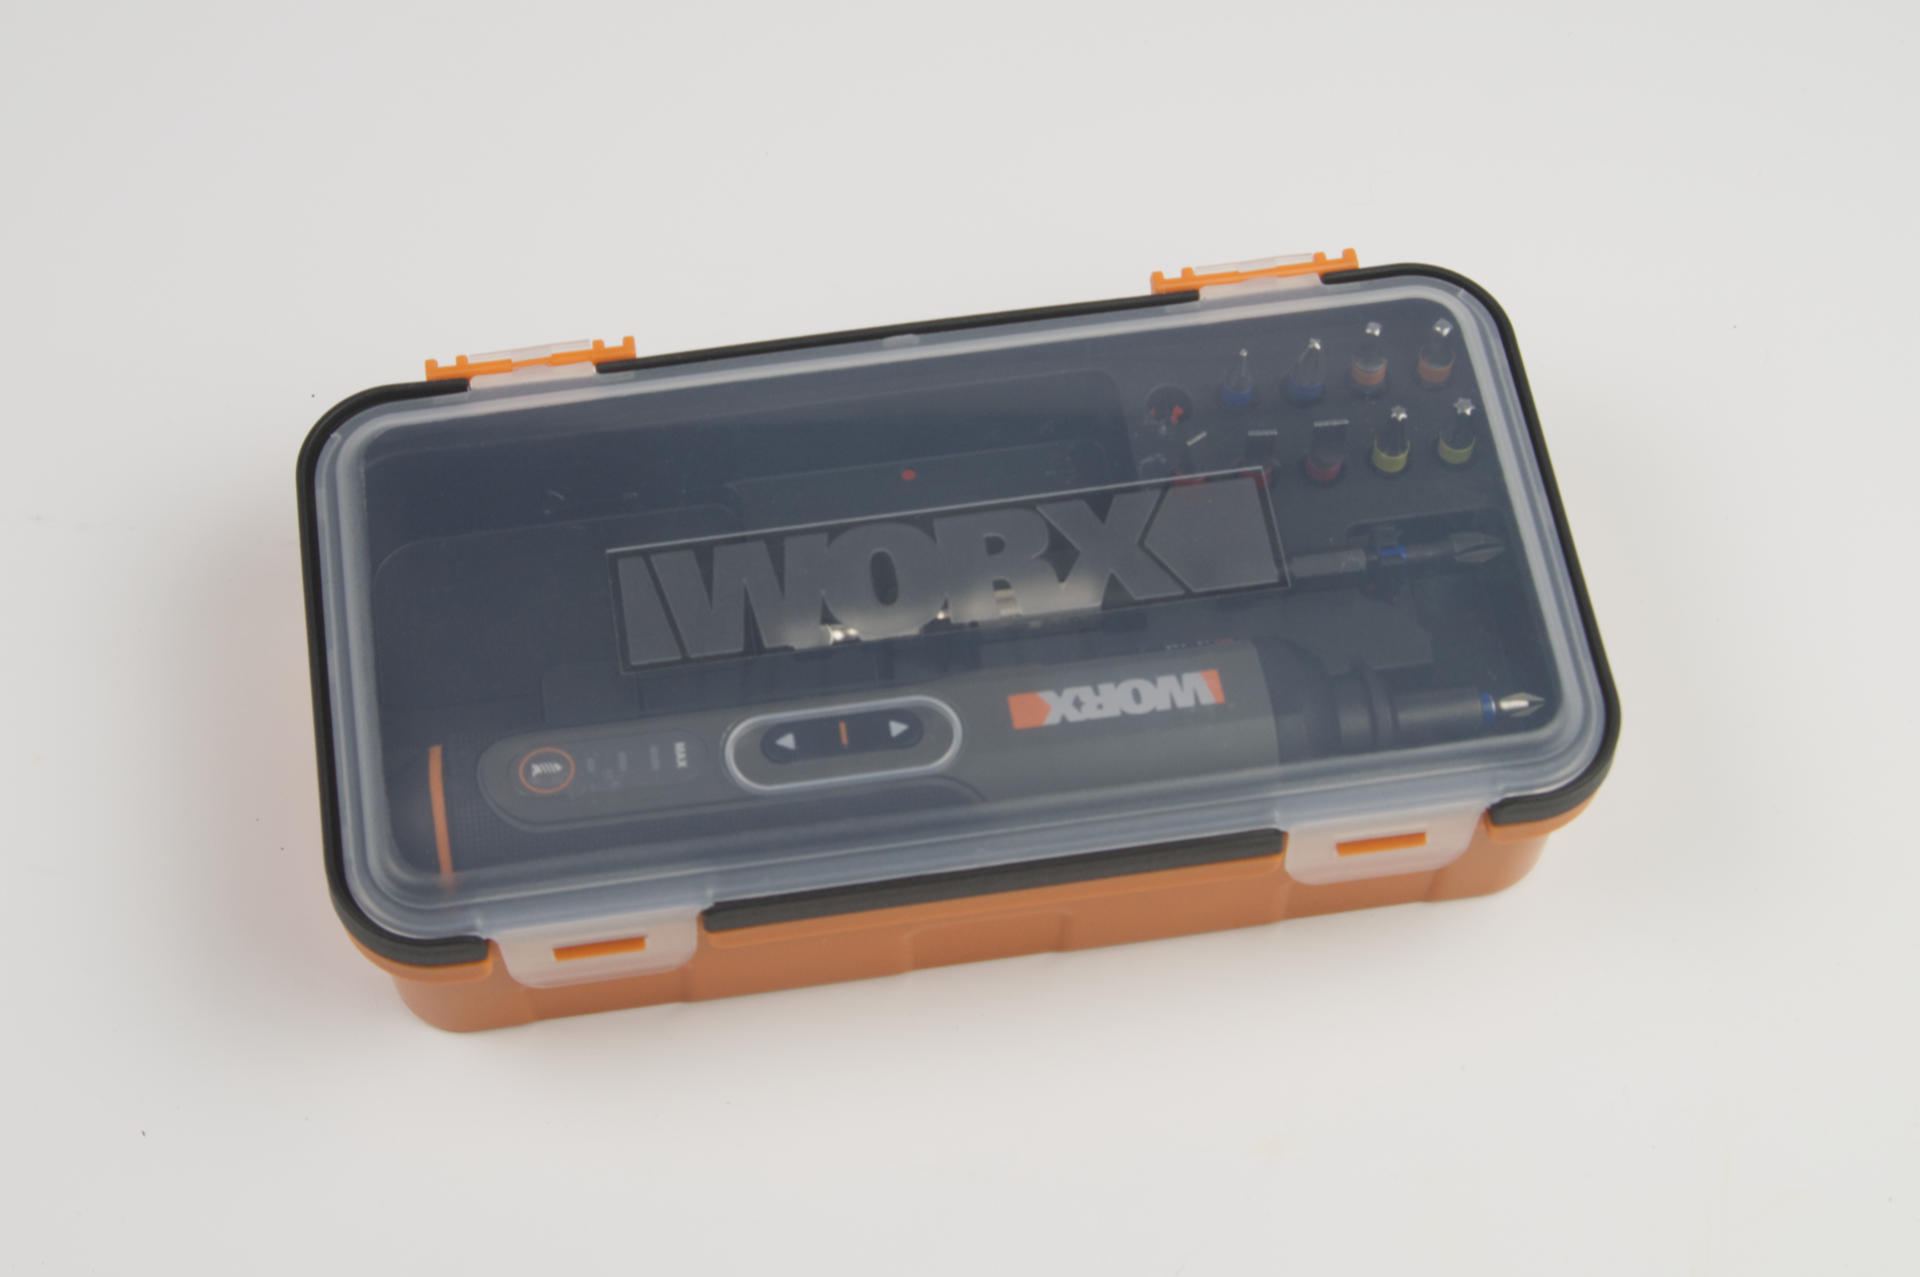
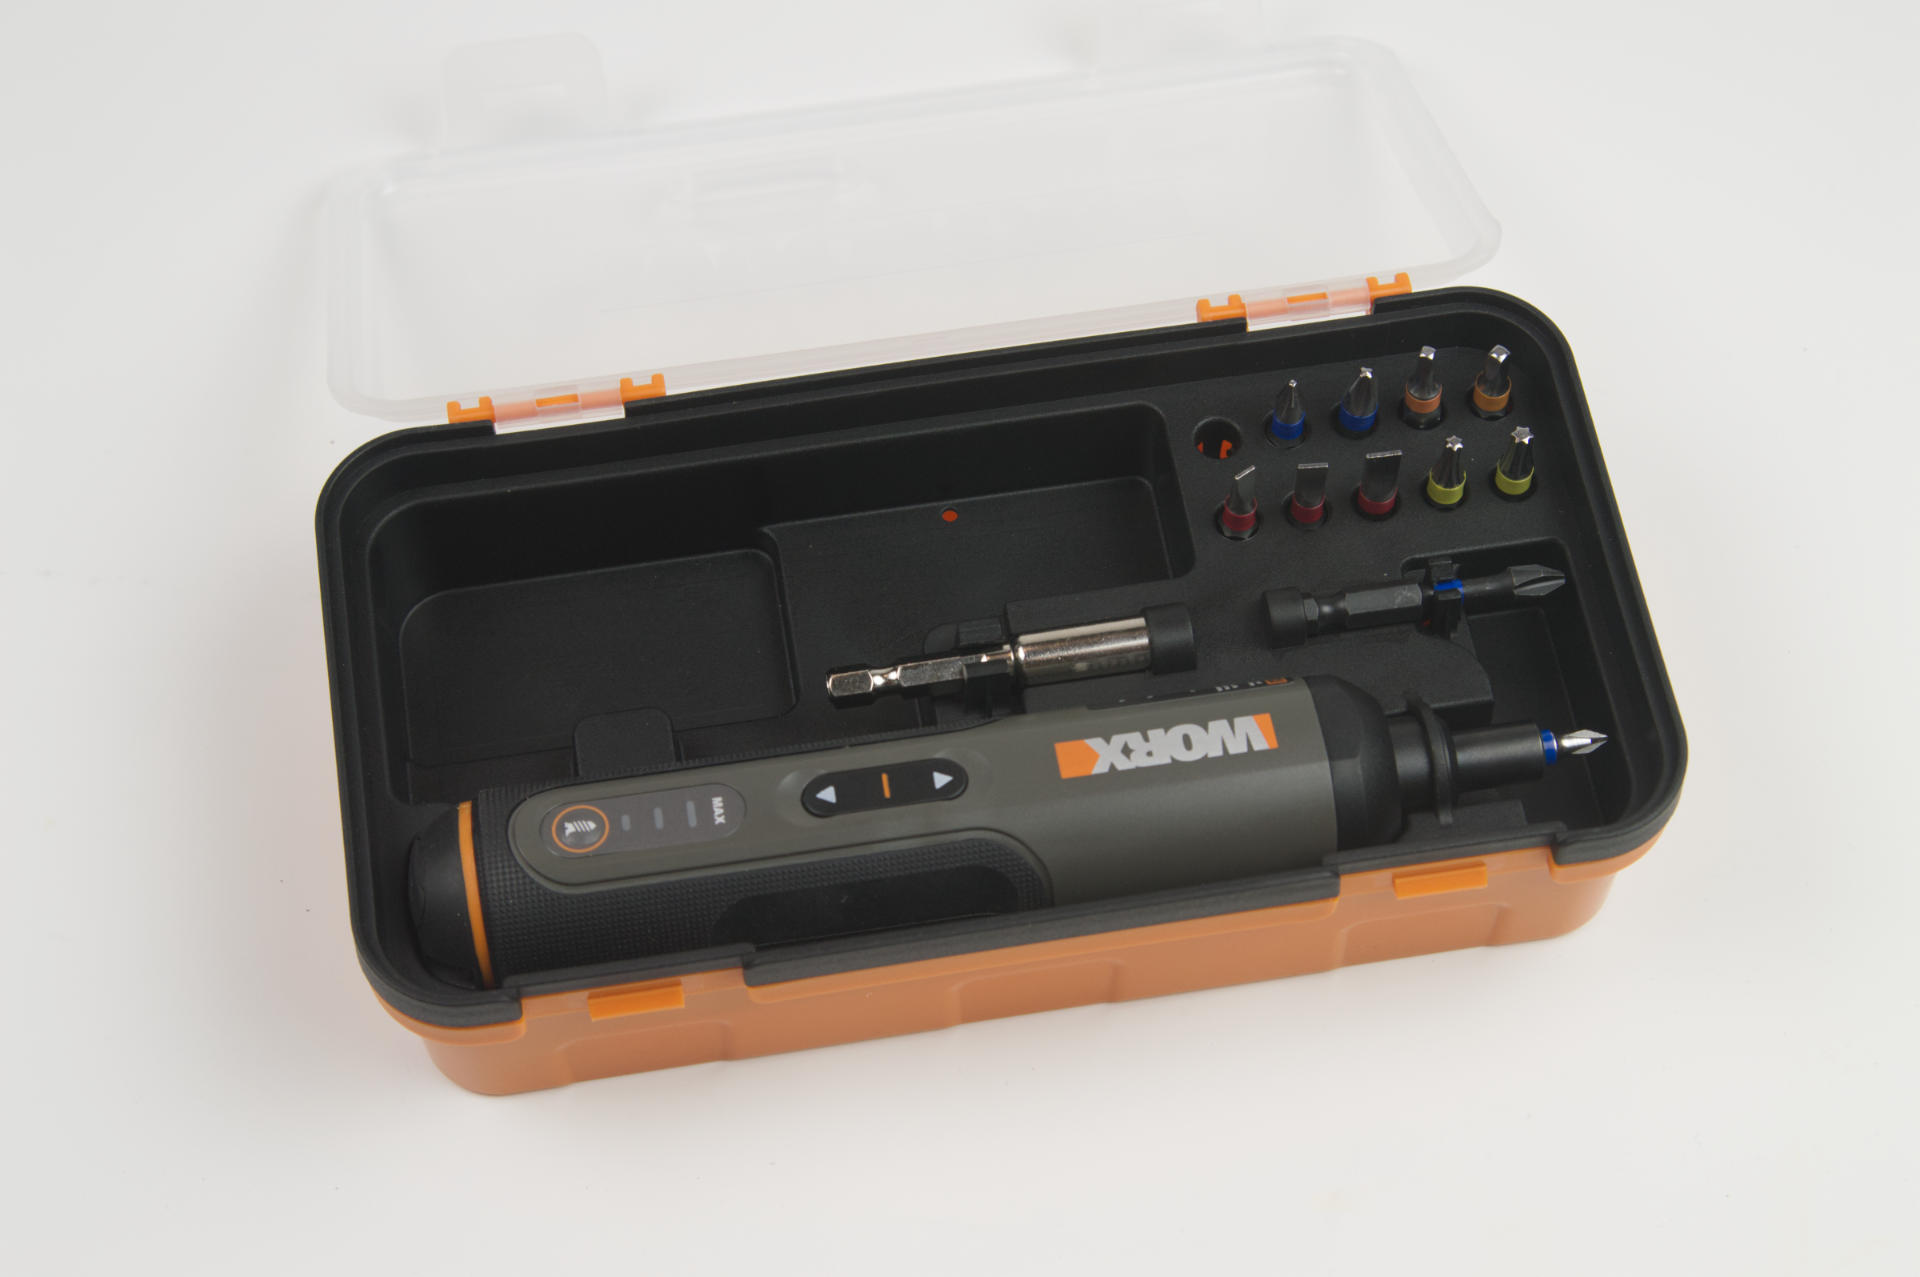
It comes in this box, and I do appreciate a nice enclosure. The fact that the top lid is transparent is awesome. You can see if it’s in there! If you’ve ever opened a tool box to grab a tool and it’s not there… well, this solves that problem.

Okay, this one is subtle. Did you know that 90% of the population is right handed? This case appears to have been designed for left handed people. My natural inclination (as a right-handed person) is to grab the tool with my right hand and remove it, but it’s facing the wrong way. How can I tell it’s facing the wrong way? Look at the logo… it’s upside down.

I do like the fact that you can leave a bit in it while it’s in the case, and the small retaining ring that prevents the tool from falling out is also a nice touch. And, there are bits, which is great. There is also some extra empty space. The charging cable was originally in the cavity, but you could throw more bits in there, or screws, or… design and 3D print something that fits in there perfectly, and maybe holds even more bits! (Yeah, I might do that.)

If you remove the insert, the printed manual is below. Another nice touch. And as mentioned, you can fit the charging cable down there. You could probably fit more bits or other things down there as well.

Just for comparison the General screwdriver was about $20, and the Black + Decker was also about $20. The Worx is around $30, which isn’t too bad. But what if you want to spend a lot more? Well, there’s the Mini ES121.

Here’s a Mini ES121 on Amazon for $268 which seems insane. Oh wait, an ES15 is less than half that price. Still too much? There’s a Wowstick for under $50. You can probably find them (or knockoffs) cheaper on AliExpress or other Chinese web sites…

To be honest I don’t know that I need any more screwdrivers right now. NotEnoughTech has a good review of the ES121 and the Wowstick if you want info on those.

Happy Screwing!

Categories
Uncategorized

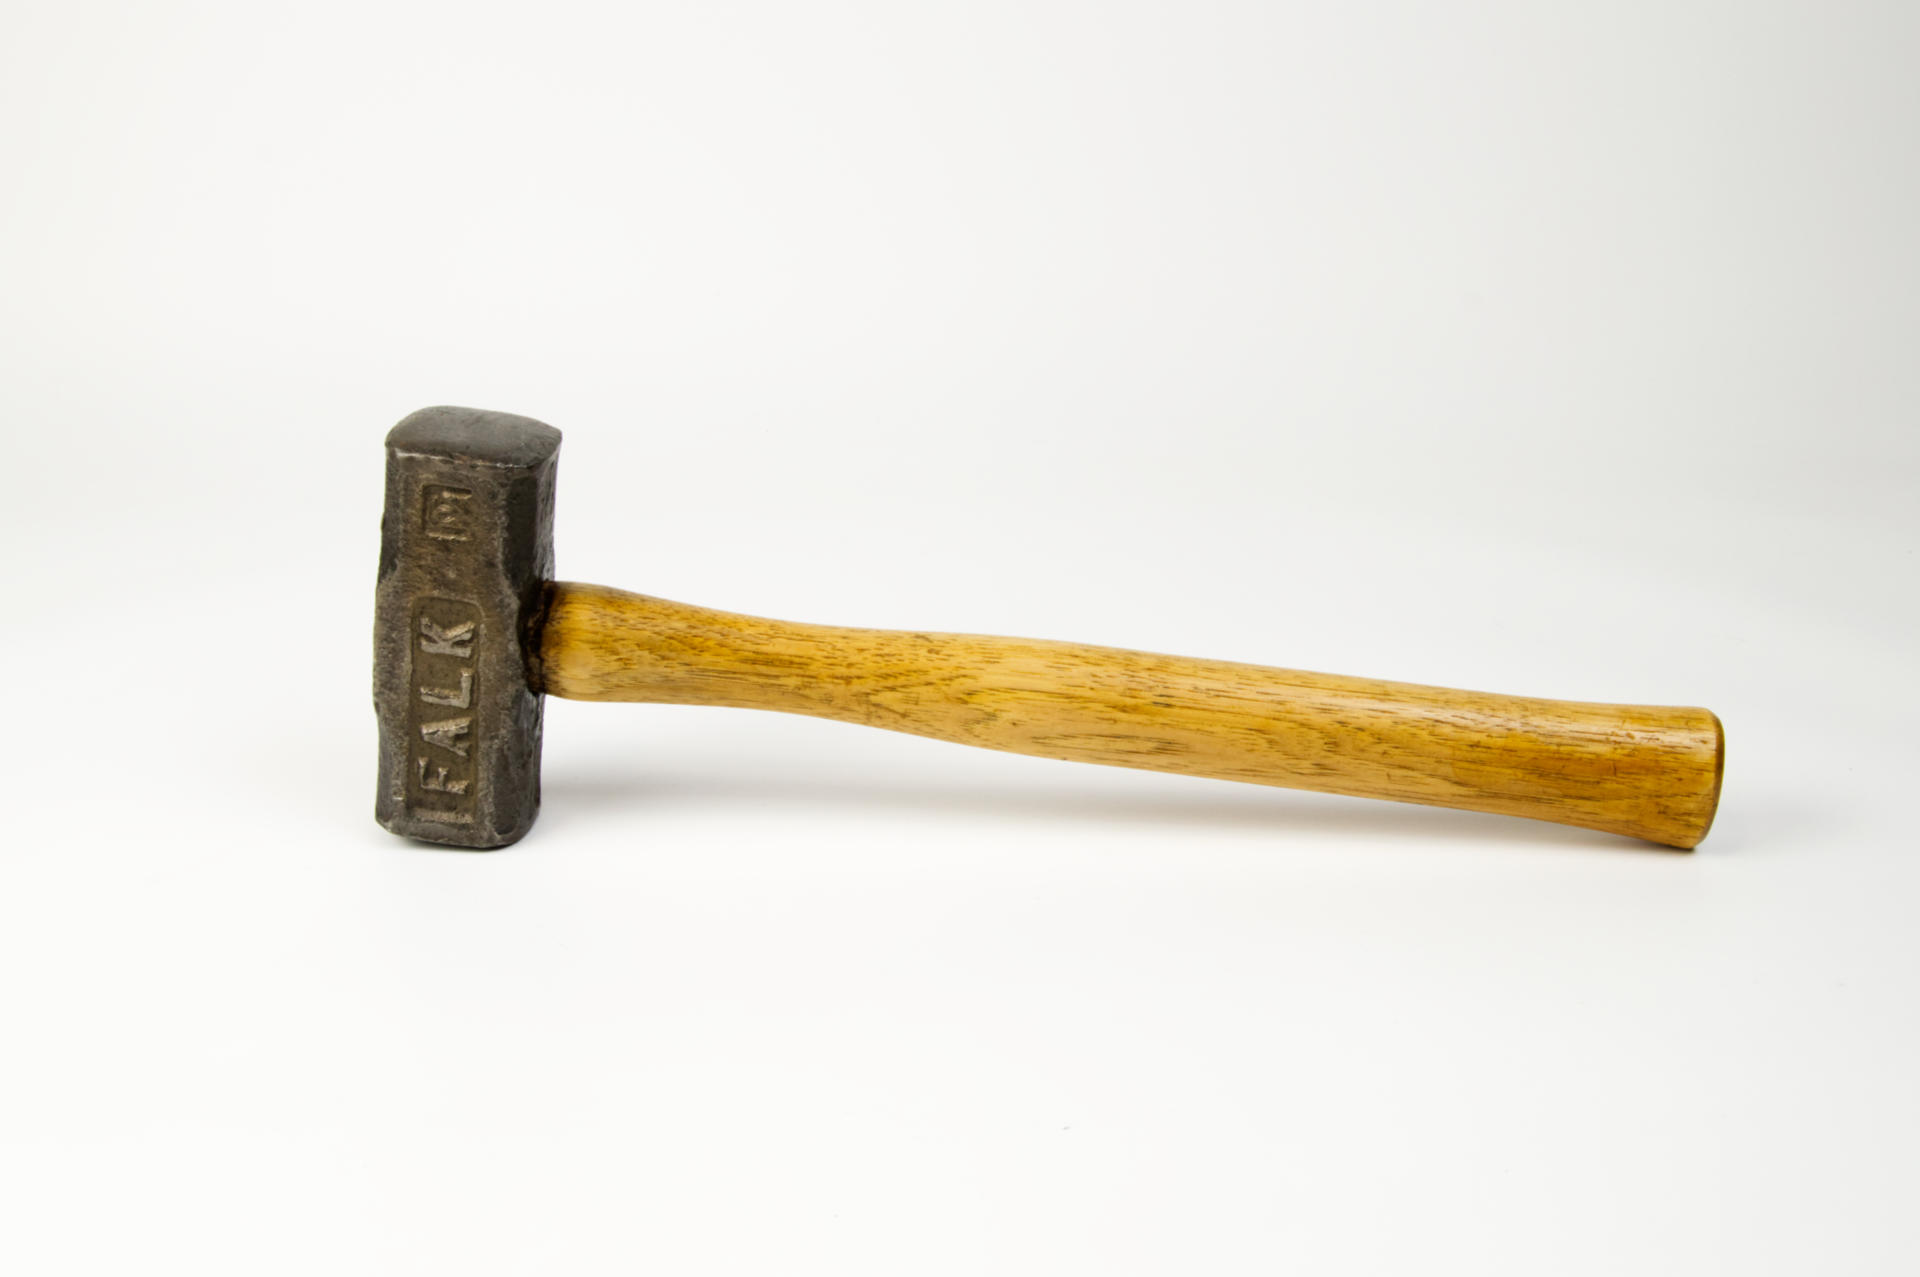
Falk Hammer

You may remember the Falk Corporation (they were a “good name industry” and part of what made Milwaukee the “machine shop of the world” many years ago.) My father (and my grandfather) also worked there. Anyway, I’ve got this hammer, see…

I must have got this from my dad’s old workshop after he passed away, and it was sitting in my basement in a state of disrepair for many years. Sometimes it’s just difficult to deal with old things, but we can’t just dispose of them, because of sentiment and feelings and memories…

So the handle and head sat around for years untouched, until I decided to do something. I took the head and polished it up on the buffing wheel (which also once belonged to my father) and then I sanded the handle down to bare wood and coated it in shellac to give it a nice surface and shine.

Finally, I cut a wedge of wood and used the band saw (also one of my dad’s old tools to clear out the old wedge so I could pound in the new one. With that, the hammer was cleaned up, repaired, and ready for use.

And it’s sort of beautiful, but not too beautiful to use. It’s a tool, and tools should be used. I honestly don’t know if my father ever used it, though I imagine it did see some use years ago. It’s probably 40 years old or more… maybe 50? I don’t know. Tools well care for can last a long time.

I hope one of my children keeps this hammer after I’m gone. They could use it, or display it, or just leave it in the basement for years, untouched…

Categories
Uncategorized

The Blower that Blows Air

I picked up this Air Duster (as it says on the tin, or as Amazon calls it “Compressed Air Duster, New Generation Canned Air, 33000 RPM Electric Air Can for Computer Keyboard Electronics Cleaning, 6000mAh Rechargeable Battery, Reusable Dust Destroyer”).

Right, “Reusable Dust Destroyer” is good… Anyway, I got this tip from an exhibit shop pal of mine. He said they stopped buying cans of compressed air and just got one of these instead.

Interestingly enough, I too was using cans of compressed air in my home shop, and I really don’t like buying them just to use them up and throw them away, so this thing is a good replacement. (I do not have a need in my shop for a large compressor, so a small handheld device is much preferred.)

This thing works well for my needs. I have just a few minor gripes. The first is that, at least compared to a can of compressed air, it takes a second or two to deliver a full power blast of air. The blower motor takes a bit of time to spin up to full speed. This is pretty minor, and I can live with it, but if you need immediate satisfaction of blowing air when you pull the trigger, you may be disappointed. If you can wait a few seconds, you’re all good.

It comes with two attachments, a normal nozzle and one with brush bristles. I really only use the normal one, but I guess if I want to clean out a mechanical keyboard, the bristle version could come in handy. It may also work well for cleaning dust off flat surfaces with aid of the bristles.

There is a place to store the one you are not using, but… then you can’t use the device, as it blocks the trigger!

I think the way it’s meant to be used is that you can remove and store the nozzle when you are not using it, but you can’t really keep the other one there since it acts as a trigger guard. This is probably a good solution for portability and travel.

One more way it is different from compressed air cans is that it does not get cold. If you’ve ever purposefully used a can of air to freeze something, this will not do that. If cans of air getting cold always annoyed you, this does not have that problem.

The nozzle is quite large compared to the tiny diameter “straw” that a can of compressed air has, so if you’re going into a tight space, that might make a difference. (I may experiment with 3D printing more nozzles, which should not be difficult.)

Of course you also have to charge up this one before you use it. Honestly I’m not running it that long when I use it, so I’ve probably only charged it twice since I got it four months ago. It comes with a short Micro USB cable which I probably binned because I have dozens of them around already for charging things.

So yeah, the “Reusable Dust Destroyer” has been a nice tool for the shop, and I’m pleased to not be purchasing cans of compressed air once or twice a year anymore.


Note: This post may contain Affiliate Links. Read More.

Categories
Uncategorized

Hex Driver Handle

I’ve seen a few handles that convert a hex key into a “screwdriver” style tool, so I figured I would make one. (I’m sure there are better ones, but this one is mine!)

This one is two pieces. The main handle has a slot so you can insert the hex key, and then a piece to put into the slot. (Which I call the “Slot Filler” of course.)

When I printed this on the Prusa (not pictured) it came out perfect, and the slot filler filled the slot… perfectly.

When I printed it on the Maker Select Plus (the red version in the photos) it… well, fits, mostly… sort of. Hmmm. I had to X-ACTO knife away the blobs on the end. (Sorry, but the Prusa just prints better!)

You could always glue the slot filler into place I guess. It’s a wedge so it should “wedge” in place. In theory…

The first version had no slot filler, and no hole for the short end. I just smashed it into the slot. I figured making it removable might be a better option though…

Maybe it’s not a god idea? I don’t know. I did widen the slot a bit and added the slot filler. I just like designing these things and testing them out.

You can get the STL and .scad file from Printables.com – Hex Driver Handle (2mm). Print it if you need it!