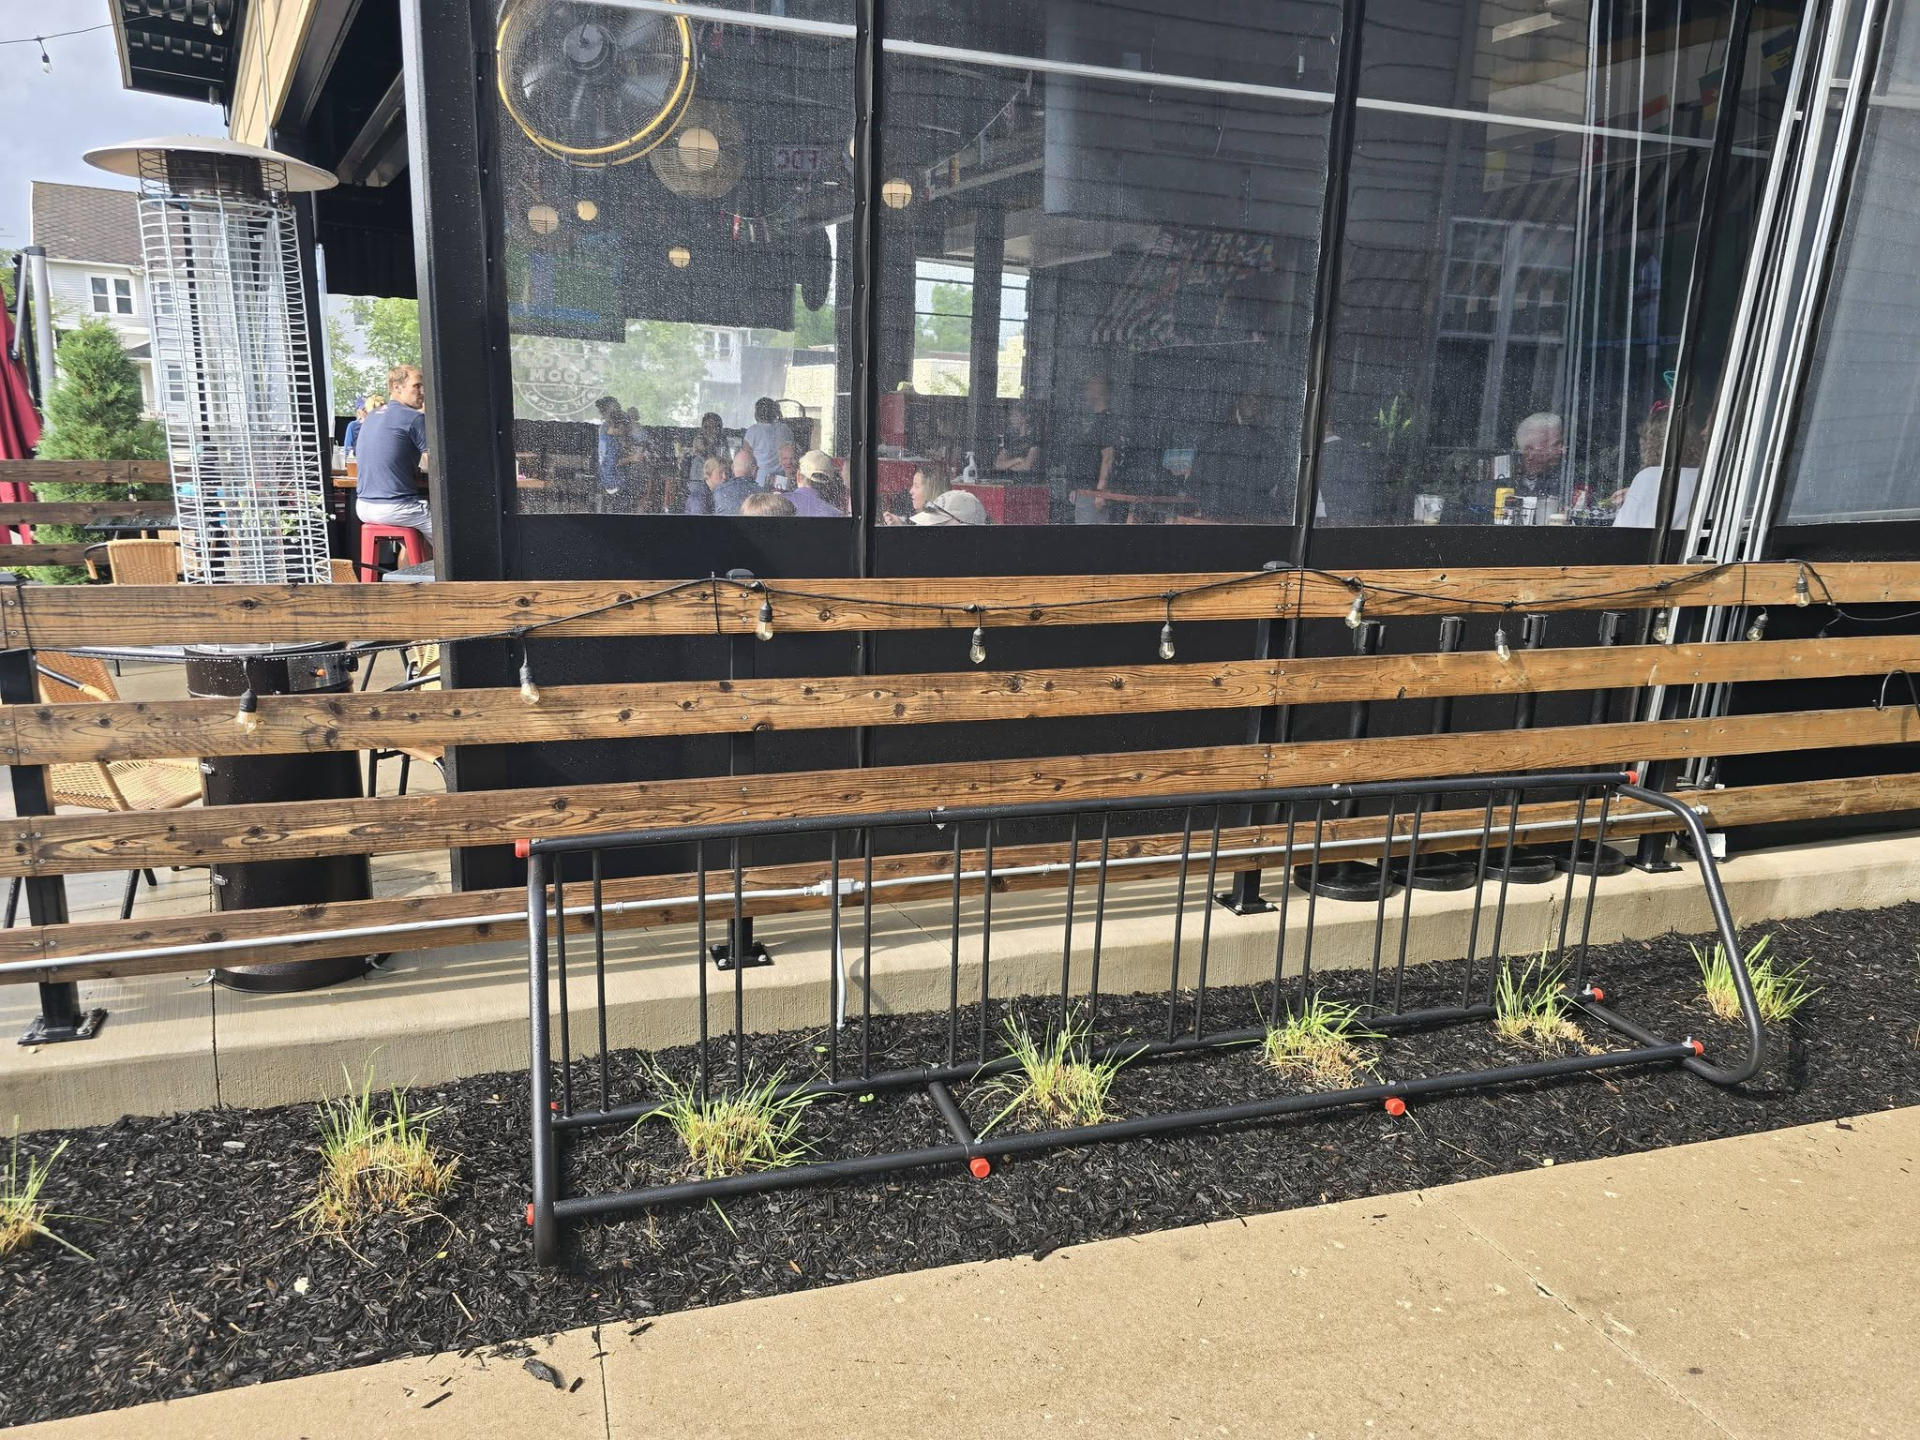
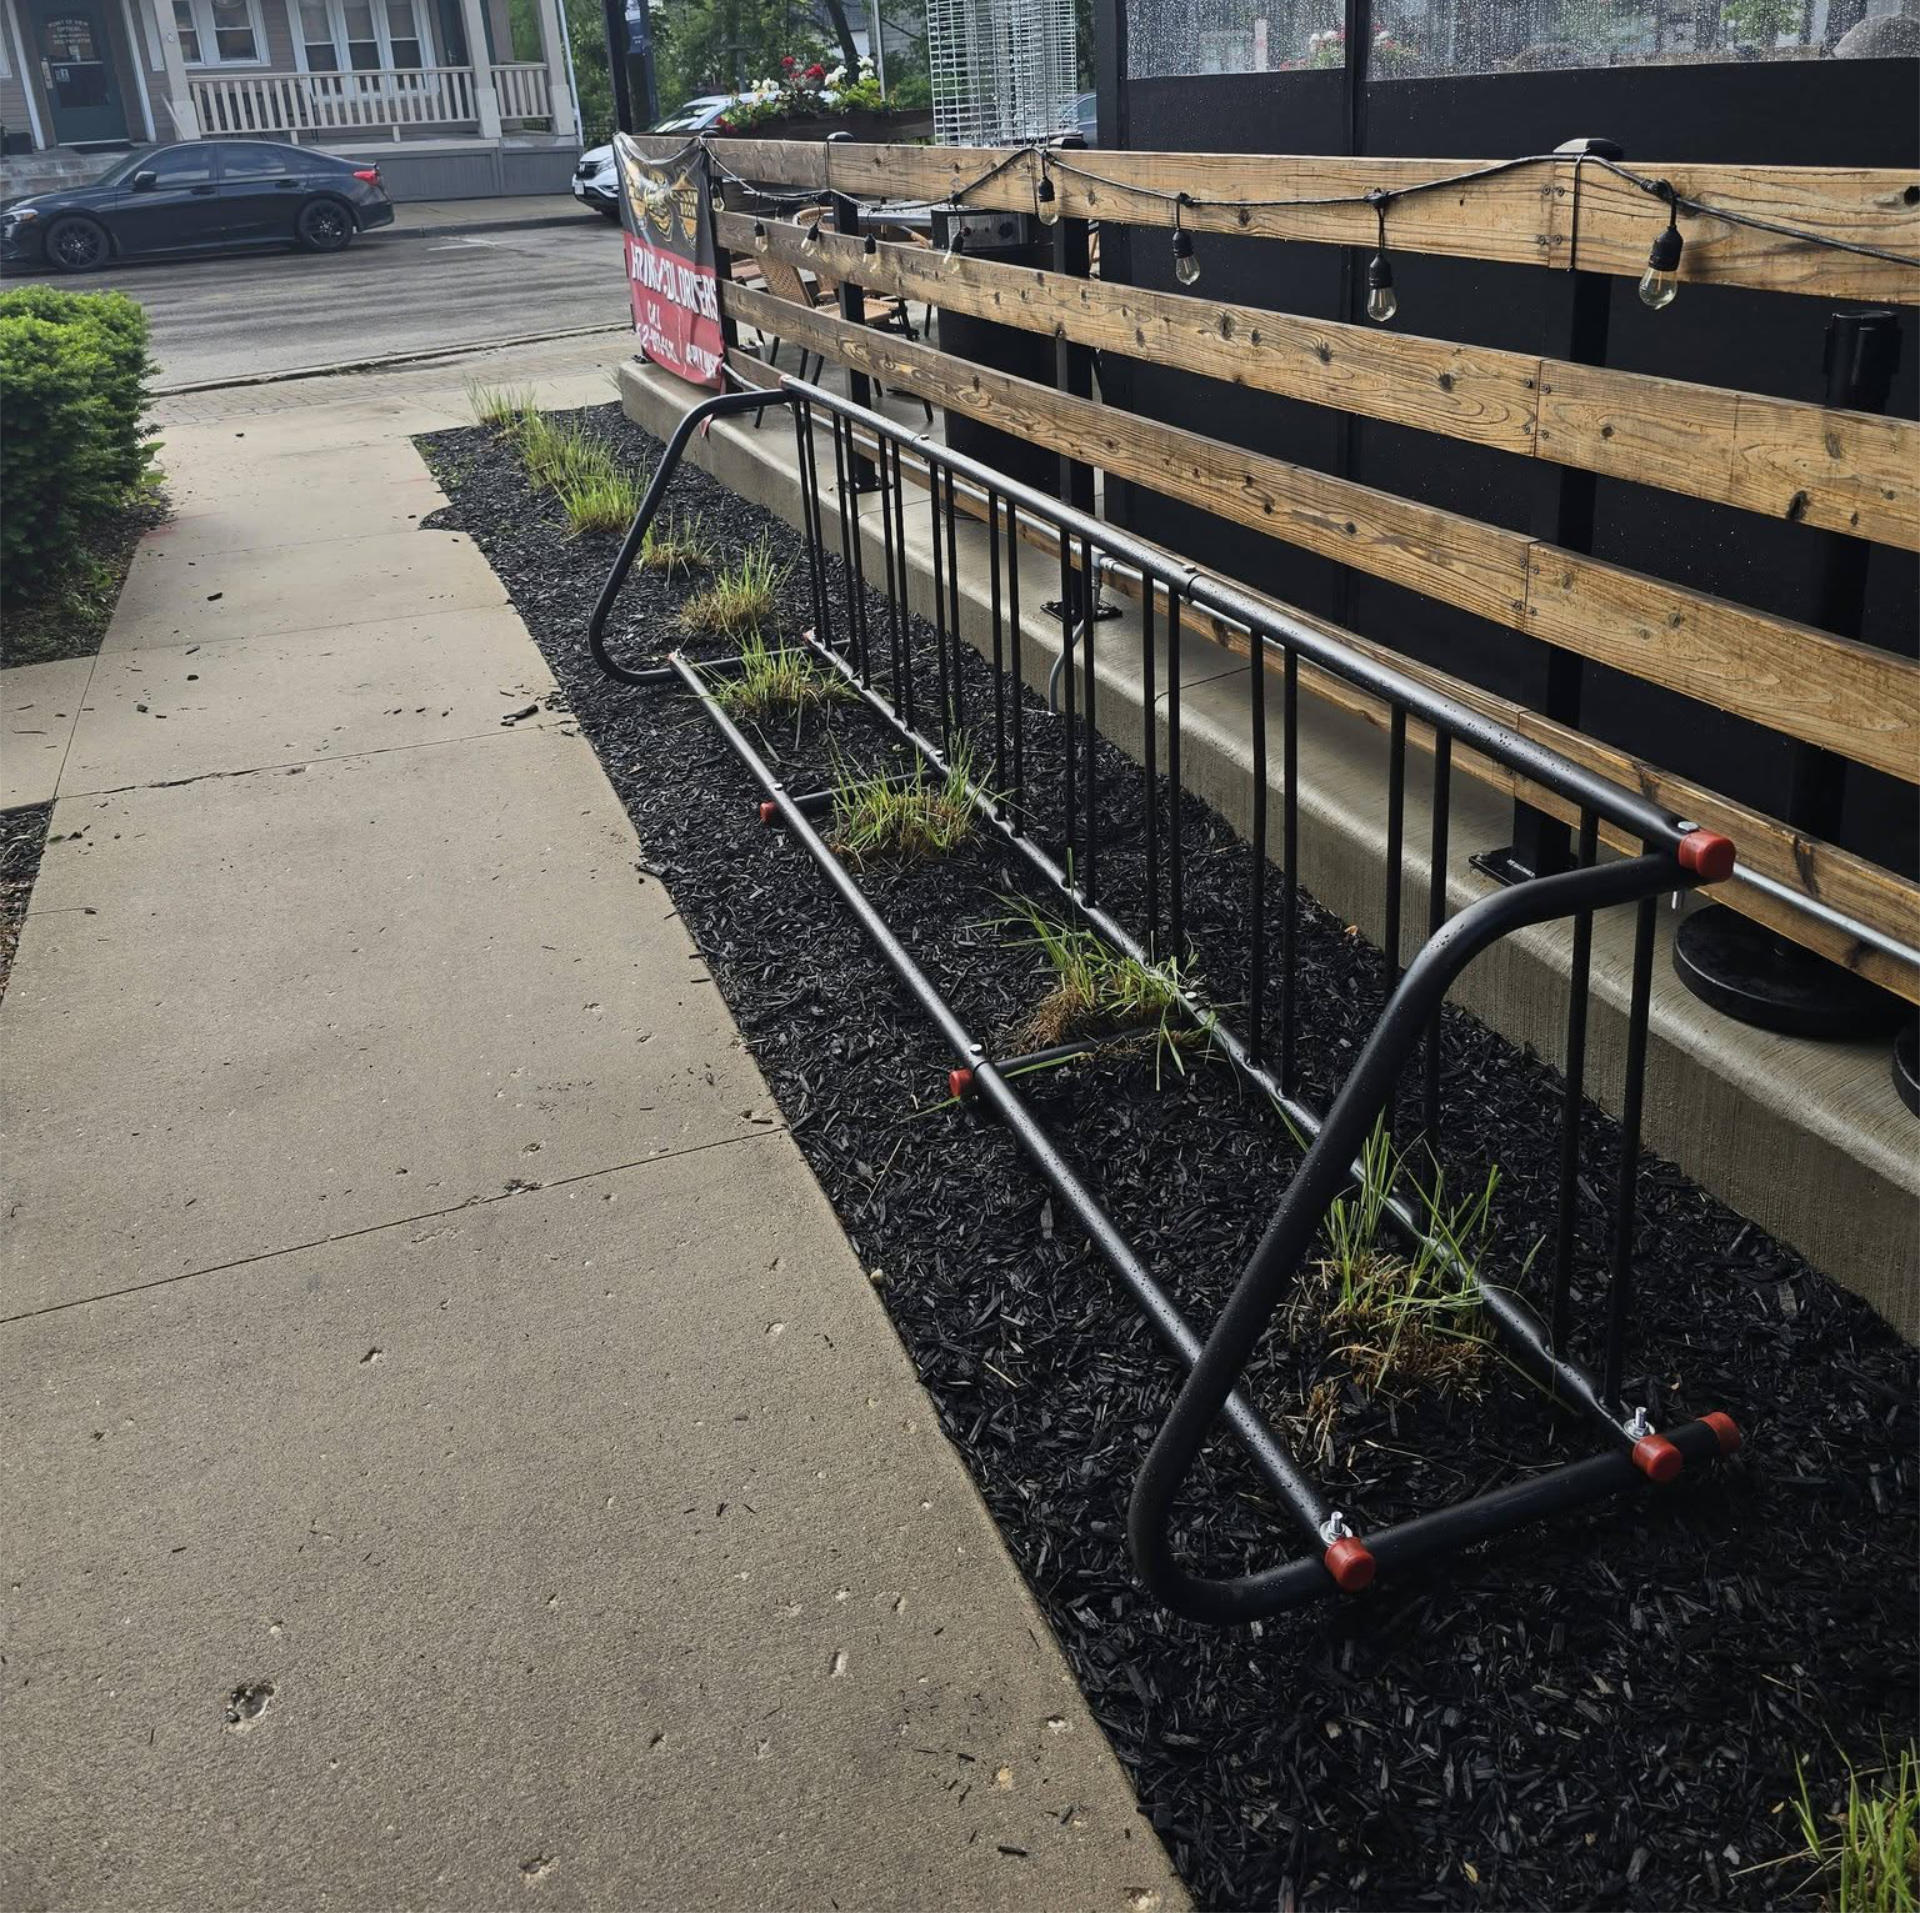
Categories
Uncategorized

50 Bike to Work Days

On Thursday, August 7th, 2025 I (e)biked to work using an ebike I borrowed from my friend Matt… and I was hooked.

Less than a month later I got my own darn ebike and kept biking to work. In fact, one of the primary reasons I got the ebike was to bike to work. (I mean, I am also old, have knee issues, and do not like going uphill.)

It’s now the end of November and I’ve rode to work (and back home) 50 times. That’s 50 bike rides to and from work in less than four months. That’s 25 hours fewer hours I spent sitting in a car in traffic, waiting, dealing with aggressive drivers, and just… being bored. (Driving can be pretty boring.)

That’s 25 more hours I spent outside, and probably another 25 hours in addition because while the ride is a little bit longer by bike, I also would leave early or come home late because I just wanted to keep riding.

That’s also 650 miles I did not drive my car, and instead, was on a bike, outside, often on the Oak Leaf Trail, seeing nature at a slower pace. I ride next to the river, I see rabbits and deer and people leisurely walking their dogs or kids playing soccer or runners or other cyclists.

Money-wise it’s probably still under $100 USD in gas that I’ve saved, but that’s fine. There’s also less wear and tear on the car since I didn’t drive it the days I biked.

Driving would normally take me 15 to 20 minutes depending on traffic, stop lights, etc. Biking takes me about 24 minutes if I really pedal hard, and 28 to 30 minutes if I go more leisurely or have to wait to cross busy roads.

And, none of that even mentions the good it does in the way of mental health or physical fitness. Granted, I am riding an ebike, so I can take it a little easier if I want, and sometimes I do, but other times I will pedal hard and get a good workout… but I also won’t kill myself. My knee doesn’t like that, and ultimately, I’m commuting, not racing.

My bike thinks I’ve burned 12,253 kcal and saved 231 kg of carbon emission. Cool! I’ve got my winter gear mostly sorted and I’ll see how much longer I can keep riding during the cold winter months.

Categories
Uncategorized

Hello Fastmail, Goodbye Google Workspace!

Back in May of 2025 I switched from Google Docs to CryptPad. It’s been working fine for my (specific) needs. CryptPad is not the fastest, and there are some quirks if you are used to Google Docs, and I can see someone who is a heavy user of Google Docs who really likes Google Docs not liking CryptPad at all, but I’m different.

So in my continued quest to De-Googlify my life I dumped my Google Workspace (formerly G Suite, formerly Google Apps) account and got my email and calendars out of the Google ecosystem. I still have one “free” Gmail account that I mainly use for mailing lists, but never through the web interface, only through an email client. I’ve also killed off the calendar in that account.

I’ve gone back to Fastmail. Yeah, I was a Fastmail user in 2004… I should have stuck with it! According to my blog post I could have paid for a one-time membership for $15 USD!

It’s not free, but I don’t mind paying $5 per month to not be the product. It’s less than what I was paying for my Google Workspace, which raised the price earlier this year because… AI. Yeah, they added “Google Gemini” AI and I wanted no part of that. A free Gmail account wasn’t an option because my emails are using my own domains. (Supposedly the Google Workspace price went up again since I first wrote this post!)

I actually put off moving to Fastmail for a bit because I was worried about the migration, but it went really smooth with both of my email accounts… no complaints! I was not using calendars with my Google Workspace account because I was just using my free Gmail account calendar, but I’ve replaced that as well.

So I no longer use Google Workspaces for email and I no longer use Google Calendar. (Well, I do at my day job, but not for my own business or personal use. You can’t win ’em all!)

The web interface for Fastmail is pretty good, but again, I tend to just use email clients and calendar applications.

I’m quite pleased to have less Google in my life. In 2025 they’ve become a much worse company for freedom-loving people, and I do not support many of their policies so bye-bye Google!

Categories
Uncategorized

Bike Light – Downtube – White LED Strip

I’ve previously posted about a bike light I made and while I am working on a more complex, programmable, and controllable set of lights, I needed something quick because it got pretty dark last week. I found this LED strip in the shop, which I think I got from the junk-pile at work. It may have been an under cabinet style light… I don’t know or remember, but I do know it has a Micro USB port and runs just fine from a USB power bank.

You can see the bare LED strip in the photo above… that’s how I found it. I was able to 3D print a sleeve for it to slide into. The Micro USB port is just at the end, and it’s not exactly waterproof, but I could just hot glue the heck out of everything if needed.

Besides the strip and 3D printed parts, there’s a 3 foot long Micro USB cable and some hook & loop straps. (I got a roll of 1/2in x 100ft Hook and Loop which someone said might be a lifetime supply.) There are also a few O-rings holding things together and they sort of work to help hold the strip in place on the bike. (I got a cheap O-ring set years ago.)

The 3D printed parts are taped together with clear tape, but Silicone Rubber Bands could also work.

I designed the sleeve / sheath thing in 5 parts. Two “outside” pieces and three “inside” pieces. I figured two and three would be good so the seams between the inside and outside parts didn’t all line up.

And here is what the pieces look like laid out so they are the length of the LED strip. I printed these with transparent PLA, which isn’t exactly clear, but it’s a thin print and the light shines through just fine.

If I were to make another one of these I’d probably use some COB LEDs. I’ve used these White 6000K LEDs bu you can also find cheaper COB LEDs. COBs are pretty bright, and some of them are also (mostly) waterproof.

To power the LEDs I have a USB power bank in my handlebar bag which I already use to charge my phone, so I just plug it into there.

Here’s how I attach it to the downtube of the bike, which is where the battery is. The one little thing is that the strip could be about 3cm shorter and then I wouldn’t have to slide the whole strip up a bit to get to the charge port. (Maybe that’s a reason to make a new COB version?)

But hey, I think it works well! The above photo was taken on the Oak Leaf Trail, where there are no lights around, so it’s pretty much pitch dark there. The light definitely lights up the ground below and in front of the bike!

I commute home at 5pm and this time of year it is… dark. So anything I can do to light up me, the bike, the road, etc. and hope that drivers can see me is a good thing.

Many of the COB LED strips are just plain white (especially the cheap ones) but taking a note from Ryan it would be easy to 3D print a sleeve with colored filament to make lights a specific color. (And yes, I have one of Ryan’s lights! I just need to find the time to install it.)

Note: Well, I managed to find my extra strip of COB LEDs and it’s actually got an 18″ long USB cable built into it. So making another one of these lights would be pretty darn simple… I might just do that since it would fix the 3cm issue I mentioned above.

Hey! It also looks like you can cut COB strips! So by cutting a COB strip I could make a shorter strip, a wider strip, etc. so yeah… I’ve got a few ideas now!

Categories
Uncategorized

My (First) NeoPixel Bike Light

You may have seen a sneak peek at this project in the post Aventon Level 3 MIK Adapter Plate, because I used the plate to attach this Sheffield Ammo Storage Box to the rack on my bike.

But I didn’t talk about the box or the light, so I’ll do that now.

I’ve got a bike bag on the back of my Trek, and while I can easily move it to the Level 3, I find it a bit wide and it gets in the way of the panniers, so I was looking for a less-wide thing, and this box looked right. I wanted to keep a few things in the box instead of putting them in the panniers for easier/quicker access while riding… and I figured since it was on the back of the bike, why not add a light?

Years ago I got these WS2812 RGB LEDs and they actually came as one unit, where you break off each PCB from the rest. I left them together and soldered all the connections in place… instant NeoPixel Matrix! I played around with programming it a bunch to do lighting effects, but never really used it in a project. Since it would fit perfectly on the back of the box, I designed and printed a few parts to make that possible.

The clear plastic sheet is 0.04″ thick PET. I didn’t even bother to fire up the laser cutter, I just used an X-ACTO knife to cut it. Sometimes being lazy works! And there’s a $4 Raspberry Pi Pico in there as well, which I’ll just power via a USB power bank. (I have at least a dozen power banks around the house. Most are a decade old, but still work well enough.)

I drilled a few holes in the box to feed wires through (just three wires, for VCC, GND, and Signal) and four more holes to bolt the outside plate into place. I later taped the Pico to the side of the box. there’s some foam padding in the bottom to cover the bolts and I keep a few other things (hat and gaiter) in the box as well.

The maiden voyage did not go well… See, I made mistakes when I printed the MIK Adapter Plate, and the whole thing flew off the rack less than 0.5 miles from home, busting the hinge for the lid and breaking a piece of the mount. I did manage to repair it (zip ties for a new hinge and one new 3D printed part in the correct orientation) but now I bungee the box to the rack, which isn’t great, but I’ll work on that.

As for the actual light, it’s great!. It is very bright, and right now is just red, but I can see doing some silly programming for events, and maybe working on some solid/flashing red modes as well. The USB power bank provides plenty of power for the Pico and NeoPixels.

I called this post “My (First) NeoPixel Bike Light” because I’m working on some other ones as well, so subscribe to the RSS feed!


Note: This post may contain Affiliate Links. Read More.

Categories
Uncategorized

Aventon Level 3 MIK Adapter Plate

Remember when I got an ebike? It came with a rear rack, which is handy. I added one (along with a bag) to my old Trek, and I used it all the time. I found that commuting to work often required me to move things, and a milk crate on the back worked well, but the zip ties meant it was a pain to put on and take off, so a quick release mount is a good option.

And guess what? The Aventon Level 3 might be MIK compatible. I say “might” because it’s tricky…

I asked Aventon for specs on the rear rack that ships with the Aventon Level 3 and they could not (or would not) provide them. I ended up modeling a version of the rack so I could virtually model something for it. (Note: The model is not perfect, but worked for my needs.)

Meanwhile I found this MIK adapter plate on Printables so I thought I would give it a try. (I loaded the STL file with the rack model I created and it looked it would fit.)

Does it work? Yes, but… But it’s 3D printed. This means you can make one for a very low cost as compared to buying one. (Here’s the real thing, at $40 USD.) I used ASA filament and a roll is $30 USD so I can print about a dozen adapter plates…

The first one I printed was actually PLA to make sure things worked. I used it with the milk crate on my bike rack and it did work. I destroyed it when I grabbed the crate to move the bike. Bad idea! The ebike weight over 65 pounds. I just ripped the adapter apart.

I printed one in ASA and that one broke as well, so I modified the model to make it stronger, but that one flew off my bike when I took a fast corner. So I learned a few things. First, I am riding an ebike, often going over 17mph on rough Milwaukee streets. I can’t always avoid potholes or other street damage so I bump and bounce occasionally. On a heavy bike with a heavy rider on bad streets the 3D printed version might not hold up.

The most recent failure involved the little part that uses a spring to click into place. I realized I should have printed the part sideways instead of flat. I re-printed, and with more shells and infill and it’s held up so far, but I’ve added a bungee cord to be safe.

I may go back to printing with PLA modifying things a bit. maybe creating a better locking mechanism than a spring loaded wedge part. I really think that’s the failure point, and it shouldn’t be too difficult to figure something out. The next alternative after that is to scrap this whole idea and come up with my own mounting solution. In theory it should be quick and easy to install and remove something from the rack, but it should hold well enough to not fall off… how hard could that be!?


Note: This post may contain Affiliate Links. Read More.