Categories
Uncategorized

Roundy’s Milk Chocolate Almond Bar

roundyschocolate01

It’s been quite a while since I’ve done a candy review, in fact, I may have last done one in an issue of Psychotherapy zine published (on paper) back in 1993. No matter…. you’re here for a candy review, and that is what you shall get!

Today we’ll be looking at the Roundy’s Milk Chocolate Almond Bar, and we’re going to try our best not to make too many direct comparisons to the classic HERSHEY’S Milk Chocolate with Almonds Bar.

But who am I kidding? The “Roundy’s Milk Chocolate Almond Bar” is a direct competitor to the “HERSHEY’S Milk Chocolate with Almonds Bar” in every respect. Think of the Roundy’s version as the “generic equivalent” that is cheaper, and maybe not quite as good…

Roundy's Milk Chocolate Almond Bar
Here’s an image courtesy of our desktop (candy) scanner.

Besides the design, which I find a bit uninspiring, you’ll notice that between the 3 samples, the amount and distribution of almonds varies wildly!

The first bar has 5, while the second has 4 1/2, and the third is the jackpot with 4 1/2 almonds on each side! This is the one you’ll want to break in half to share with a friend. Doing so with number 1 or 2 would leave either you or your friend seriously lacking in almonds.

As for the chocolate itself, I’d rate it as “ok but not great” and if I compared it directly to the chocolate from the fine folks at HERSHEY’S, I’d probably be more disappointed.

As for the actual ingredients and the “Nutritional Information” label? I don’t even look at those, because if I did, I wouldn’t be eating either of them.

Categories
Uncategorized

A MakerBot Adventure

Drew's MakerBot
Drew’s MakerBot

We had a great demo at the Milwaukee Makerspace last week when Drew demoed his MakerBot Cupcake, and if you don’t know by now, the MakerBot is an affordable 3D printer that squirts out hot plastic based on 3D design files you feed it. If you’re not much of a 3D designer, you can browse Thingiverse for some good stuff.

Holder
Holder in 3DTin

Our old pal Pehr was also there, and he brought his MakerBot too, and when we were talking about 3D design software he said “Just go to 3DTin.com” and then we did…

The interface was a bit confusing at first, though admittedly I’ve never been able to get very far with 3D software. I did manage to design this thing I’ve called a holder.

Holder
Exporting Holder from 3DTin

Once I was done with the design, I was able to export it as an .stl file to my desktop. (There are other export options as well.)

3DTin itself is a simple to use 3D design application that runs completely in a browser. You can use it for free, or for $4.99 you can pay for the “premium” version, which gives you a few more features and hides the ads. I can see playing with this a bit more, or even having the kids give it a try. Meanwhile, I still need to dig into tools like Sketchup, or maybe Blender.

Holder
Holder in ReplicatorG

After exporting an .stl file, I loaded it into ReplicatorG to take a look at it. Once in ReplicatorG you can scale, rotate, and move the object as desired. Once I had it centered and scaled properly, I saved the file to an SD card and handed it to Drew to stick into the MakerBot. (As I understand it, you can also just print directly to the MakerBot via USB cable.)

Holder (raw)
Holder (fresh from the MakerBot)

Once the holder was complete, it looked like this. You can see the strands still in place left from the printing process. These are from the print head moving between the two sides.

Holder (clean)
Holder (cleaned up)

Here’s what the holder looked like after I trimmed off the strands with an X-ACTO knife. This is obviously a simple object, but so far the process of designing it and printing it was well under an hour.

Holder (close-up)
Holder (close-up)

Here’s a close up showing the strands from printing. Commercial 3D printer have much higher resolution, so you don’t really see these lines in the objects they create. Supposedly the MakerBot can be tweaked to run slower for better resolution, but for many purposes, this is still good, and pretty darn impressive.

I’ve got some idea for other things I’d like to design, but for now, you can grab this Holder from 3DTin, and while I had no clue what it would be good for when I designed it, it does seem to work to hold an iPhone in landscape mode, or even as a business card holder.

Big thanks to Drew for the demo and the help in getting started on the MakerBot. I can’t wait to get some serious time with it at the Makerspace.

Oh, it sounds like we’ll also have some good 3D printer action at BarCampMilwaukee6 if you want to come and check it out.

Categories
Uncategorized

Semantic Web

BarCampMadison This is a session by Dustin Cote from MadCamp (aka BarCampMadison the 4th) titled “Semantic Web / Web 3.0”

Dustin mentioned that you can see the Semantic Web Meetup site for the slides.

You can also download an MP3 file if you’d like. (And for our freedom loving friends, enjoy an Ogg file.)

Also, if you want to get all of the audio automagically downloaded podcasting style, subscribe to the feed.

Categories
Uncategorized

MadCamp ReCap: Sessions

Duct Tape Crafts

(This post is Part 2 of my MadCamp ReCap. See the first post as well. In this one I’ll cover all of the sessions I attended)

How to make duct tape crafts
The first session I attended was led by Quinn, the 9 year old daughter of Andy Lester. She showed us how to make a pen and some duct tape into a flower. So in a room of 9 adults, none of us could make one as awesome as hers. This was a fun session, and would be perfect for KidsCamp at BarCampMilwaukee6.
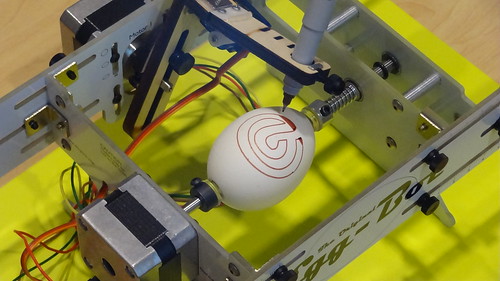
Egg-Bot
Photo by tronathan

Introduction to the Egg-Bot
Hmmm, I don’t know that I can review this session, as I was the one who led it. I basically gave an Egg-Bot demo, and talked about what it does, and what I’ve learned, and showed some designs I’ve printed, and I threw some eggs. I then attempted to print a Bendyworks logo, and an Athmapolis logo. I guess this session went well, people seemed interested, but hey, who doesn’t love an Egg-Bot!?

Jason asks... What's Next?

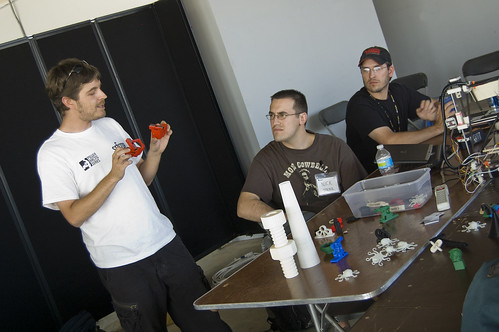
How I made a CNC laser with junk from the basement
I got to know Jason earlier this year, and he may be Beaver Dam’s most prolific maker. (But hey, it’s Beaver Dam.) Anyway, I think I helped convince him to attend, and even lead a session at his first BarCamp. He walked us through building a CNC laser device out of scrap (mostly old CD/DVD drives) and some parts that had to be bought. Great session! I love hearing makers talk about their projects.

Greg Tracy

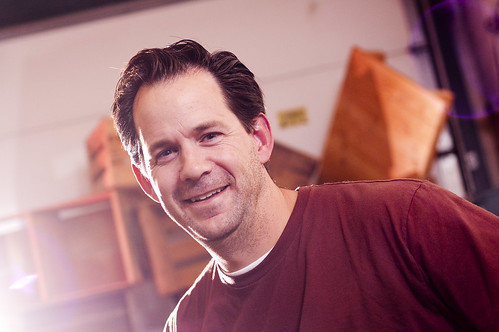
Twilio Magic – building phone apps with a simple web service API
I actually only attended a few minutes of this session, which almost didn’t happen until I pointed out to Greg that the flyer mentioned a Twilio session. Well, I caught some crap from Greg because I cut out of this session to hit up the Hackerspaces talk going on 10 feet behind me. (To be fair, I finally got around to digging into Twilio the day after MadCamp, and I’ve already written some fun sample code.) Anyway, I’m familiar with Greg’s Twilio projects, and we even used one during the day, the MadCamp Notifier. (Note that the photo above is not from MadCamp, but a photo I took of Greg at BarCampMilwaukee5 last year.)

Chris from Sector67

An Introduction to Hackerspaces, Makerspaces, and Coworking
This one was interesting. It was so interesting I left the Twilio session (sorry Greg!) because I was pulled in by what I was hearing. My disclaimer: I’m a member of Milwaukee Makerspace, but I am not an officer, or a founder, or in charge of anything. Anyway, the Sector67 guys led this, and talked about how they run their space. I brought up a few points about how Milwaukee Makerspace does things (or at least how I understand they are done) and I sort of felt like there was a little tension about the differences between how the two places operate. In talking to other later, people were not surprised, stating that almost every space will operate differently, and often one space will thing they are doing it exactly the right way. :) I’m really hoping that at BarCampMilwaukee6 we can have a talk with people from Milwaukee Makerspace, Sector67, Pumping Station: One, and Twin Cities Maker, since all groups will have people present. I should probably propose this to all of those folks. It could be a great learning experience.

Joe from Sector67

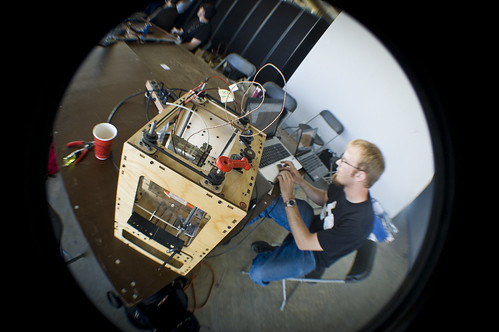
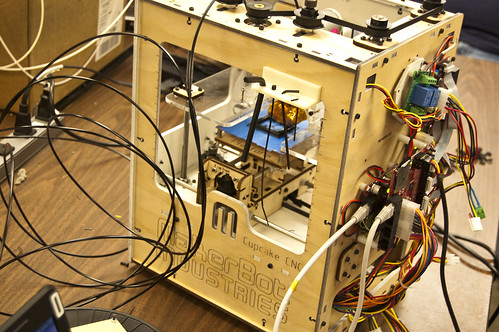
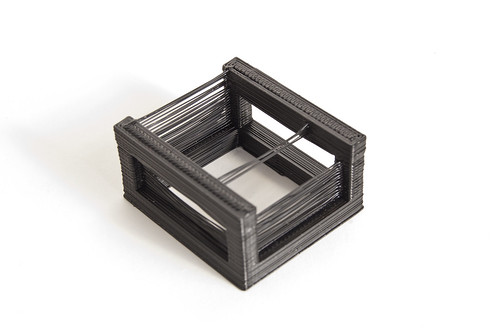
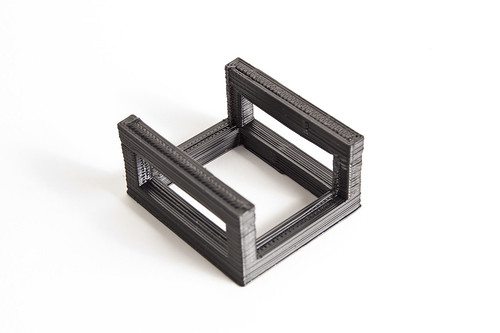
Introduction to 3D Printing (MakerBot/RepRap)
This one was simply awesome. I’ve been in love with the MakerBot for some time now, and wanted more info. Joe from Sector67 gave a great overview of 3D printing, and also talked about (and had present) a RepRap machine. We saw a bunch of samples that had been printed, and at some point Chris did get the MakerBot talking to the laptop he had and we got some printing done. It sounds like Joe and at least one printer might also make it to BarCampMilwaukee6 as well, so get ready for more 3D printing fun.

DSC_4760
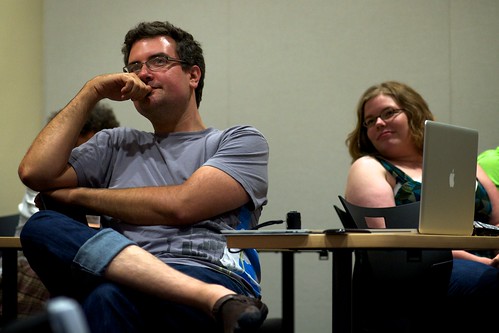
Photo by Clint Thayer

Lightning Talks
The Lightning Talks, just like last year, were a lot of fun. I just wish more people would do it! I think if you didn’t lead a session, you should jump at the chance to do a Lightning Talk. If they didn’t stop me, I’d probably do 5 of them. Seriously. It’s just 5 minutes, talk on any subject, I tend to go pretty fast, so I hope it’s not boring. (I did the Time Lapse Bot again, and showed the raw footage from earlier in the day.) I have some favorites, but I also have an audio recording of them all to publish, so I’ll wait until I do that before I get into those…

So that was MadCamp (aka BarCampMadison the 4th.) I enjoyed it, and I await the next one. In the meantime, BarCampMilwaukee6 is coming up soooooon.

Categories
Uncategorized

The Robot You See…

The Robot You See...

It’s inevitable!