Categories
Uncategorized

3D Modeling Update

3D Model

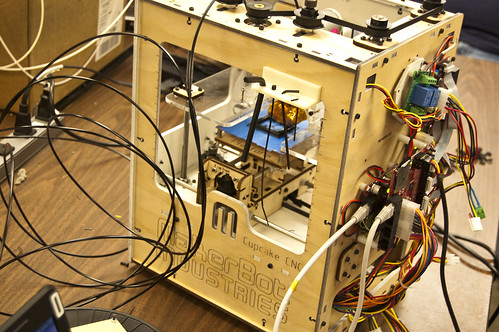
In the last month I’ve made some progress in my 3D modeling education, so I thought I’d provide an update. (Besides my last post, I got some good feedback on Google+) Oh, and just a reminder, my interest in 3D modeling all has to do with creating objects I can produce with a 3D printer like the MakerBot or the RepRap.

So what am I using (or not using) now? Here’s the list:

Google Sketchup
I’ve made some good progress with Sketchup. A few tutorials (and a lot of playing around) has me creating actual 3D models. You’ll want the STL Importer and STL Exporter to deal with STL files. Sketchup is nice, and I’m sure I’ll end up using it more as time goes on, but it’s not the end of my 3D quest.

Blender
Urgh… I’ve made no progress with Blender. Haven’t even tried. I may just wait until we do a Blender class at Milwaukee Makerspace.

123D
Still no Mac OS X version.

3DTin and Tinkercad
I talked about 3DTin last time. I haven’t used it since, but it still seems like a great way for kids to get into 3D modeling. As for Tinkercad, it seems like a more advanced version of 3DTin. Make: Live covered Tinkercad in Episode 17 if you want to check it out.

Inkscape
Say what!? Inkscape is a 2D drawing application. I’m still using it. I’ll often open vector files (SVG) and export them to DXF files and then extrude those to 3D files. Here’s a great Inkscape to OpenSCAD dxf tutorial that explains it all.

OpenSCAD
I’m still just barely using OpenSCAD, mainly in conjunction with Inkscape as mentioned above. I need to dig in a bit deeper, as time allows.

So what else is there? Well, I found Pleasant3D, which isn’t exactly modeling software, but it’s what ReplicatorG might look like if it were a full-on Mac OS X application. I’ve found it useful on a few occasions.

The other one worth mentioning is MeshLab, which may have some uses when it comes to converting or transforming files. I haven’t created anything with it yet, but it sure looks impressive.

So that’s my 3D modeling software update… Anything new to report from your desktop?

Categories
Uncategorized

3D Modeling Applications

3D Modeling Applications

Well, the time has come… For years I ignored the third dimension, working only in 2D. Even then, I typically favored raster graphics in Photoshop over vector graphics in the likes of Illustrator. Of course the Egg-Bot brought with it the need to dig into Inkscape, and I’ve done well enough there, finding it useful enough for my vector-based tasks… but now comes…. 3D!!!

Now that I’ve got access to a MakerBot, I have this need to deal with 3D modeling software, starting out with converting formats, and eventually designing things on my own, and actually output STL files. So begins my journey, and a look at some of my options:

3DTin
I mentioned 3DTin.com in my last MakerBot post, and while it’s a great way to get started and have something usable in less than 10 minutes, I don’t know that it will be a serious tool for what I’d like to do. It seems to have no concept of converting formats. It’s still a great (although limited) tool, for what it is…

Google Sketchup
Our pals at Google have Sketchup (the free version) which seems pretty darn popular, and thanks to a few awesome plugins, I’ve been able to import and export STL files. (I haven’t tested the printing of any yet, but that will happen soon.) Sketchup confuses me. I should probably spend some time with a tutorial and figure it out. Is the free version limited? I know that they took out the ability to export DXF files in the latest version, and to get that back you’re expected to buy the pro version for $495. Yikes!

Blender
I must say, that without a doubt, Blender is one of the most confusing pieces of software I’ve ever used, and I’ve used Windows… at a large corporation even! I know Blender is powerful, and in the hands of @knellotron or another skilled operator, great things can be done. But even just trying to import and export a file was too difficult. The “File” menu kept disappearing!

123D
From the folks at Autodesk comes 123D. Windows only. I won’t even look at it unless they create a Mac OS X version.

OpenSCAD
Well, there’s always OpenSCAD, the “Programmers Solid 3D CAD Modeller.” But it’s all codey and programmey, and not visual, which may be cool for some things, but it’s probably not the best to start out with…

I even went so far as to fire up Processing and write code to output STL files via the unlekkerLib library, which is outdated anyway and I should be looking at the ModelBuilder library. Argh…..

So that leaves me with a “???” which should be obvious is a question to you: What do I do?

Categories
Uncategorized

A MakerBot Adventure

Drew's MakerBot
Drew’s MakerBot

We had a great demo at the Milwaukee Makerspace last week when Drew demoed his MakerBot Cupcake, and if you don’t know by now, the MakerBot is an affordable 3D printer that squirts out hot plastic based on 3D design files you feed it. If you’re not much of a 3D designer, you can browse Thingiverse for some good stuff.

Holder
Holder in 3DTin

Our old pal Pehr was also there, and he brought his MakerBot too, and when we were talking about 3D design software he said “Just go to 3DTin.com” and then we did…

The interface was a bit confusing at first, though admittedly I’ve never been able to get very far with 3D software. I did manage to design this thing I’ve called a holder.

Holder
Exporting Holder from 3DTin

Once I was done with the design, I was able to export it as an .stl file to my desktop. (There are other export options as well.)

3DTin itself is a simple to use 3D design application that runs completely in a browser. You can use it for free, or for $4.99 you can pay for the “premium” version, which gives you a few more features and hides the ads. I can see playing with this a bit more, or even having the kids give it a try. Meanwhile, I still need to dig into tools like Sketchup, or maybe Blender.

Holder
Holder in ReplicatorG

After exporting an .stl file, I loaded it into ReplicatorG to take a look at it. Once in ReplicatorG you can scale, rotate, and move the object as desired. Once I had it centered and scaled properly, I saved the file to an SD card and handed it to Drew to stick into the MakerBot. (As I understand it, you can also just print directly to the MakerBot via USB cable.)

Holder (raw)
Holder (fresh from the MakerBot)

Once the holder was complete, it looked like this. You can see the strands still in place left from the printing process. These are from the print head moving between the two sides.

Holder (clean)
Holder (cleaned up)

Here’s what the holder looked like after I trimmed off the strands with an X-ACTO knife. This is obviously a simple object, but so far the process of designing it and printing it was well under an hour.

Holder (close-up)
Holder (close-up)

Here’s a close up showing the strands from printing. Commercial 3D printer have much higher resolution, so you don’t really see these lines in the objects they create. Supposedly the MakerBot can be tweaked to run slower for better resolution, but for many purposes, this is still good, and pretty darn impressive.

I’ve got some idea for other things I’d like to design, but for now, you can grab this Holder from 3DTin, and while I had no clue what it would be good for when I designed it, it does seem to work to hold an iPhone in landscape mode, or even as a business card holder.

Big thanks to Drew for the demo and the help in getting started on the MakerBot. I can’t wait to get some serious time with it at the Makerspace.

Oh, it sounds like we’ll also have some good 3D printer action at BarCampMilwaukee6 if you want to come and check it out.