
Previously on… the Fediverse! I posted about this springy thing I was designing, and I said:
I’m trying to come up with a good way of creating this in OpenSCAD… I have something using a bunch of hull’d cylinders but I’m wondering if there is a better/easier way to do it.
First of all, I love OpenSCAD. I also love sharing. I was really pleased to see people coming up with ideas. Hey, maybe we should make a weekly OpenSCAD Coding Club!
deshipu suggested Inkscape for a 2D vector and then importing.
Bryan Fink suggested rotate_extrude which I often forget about. I would have never thought to use it for this. See Bryan’s example.
Makerblock came through and wrote a whole post about this thing!
Alistair Buxton also wrote some code you should check out and used the 2D parts of OpenSCAD I usually ignore.
And oh yeah! Here’s mine:
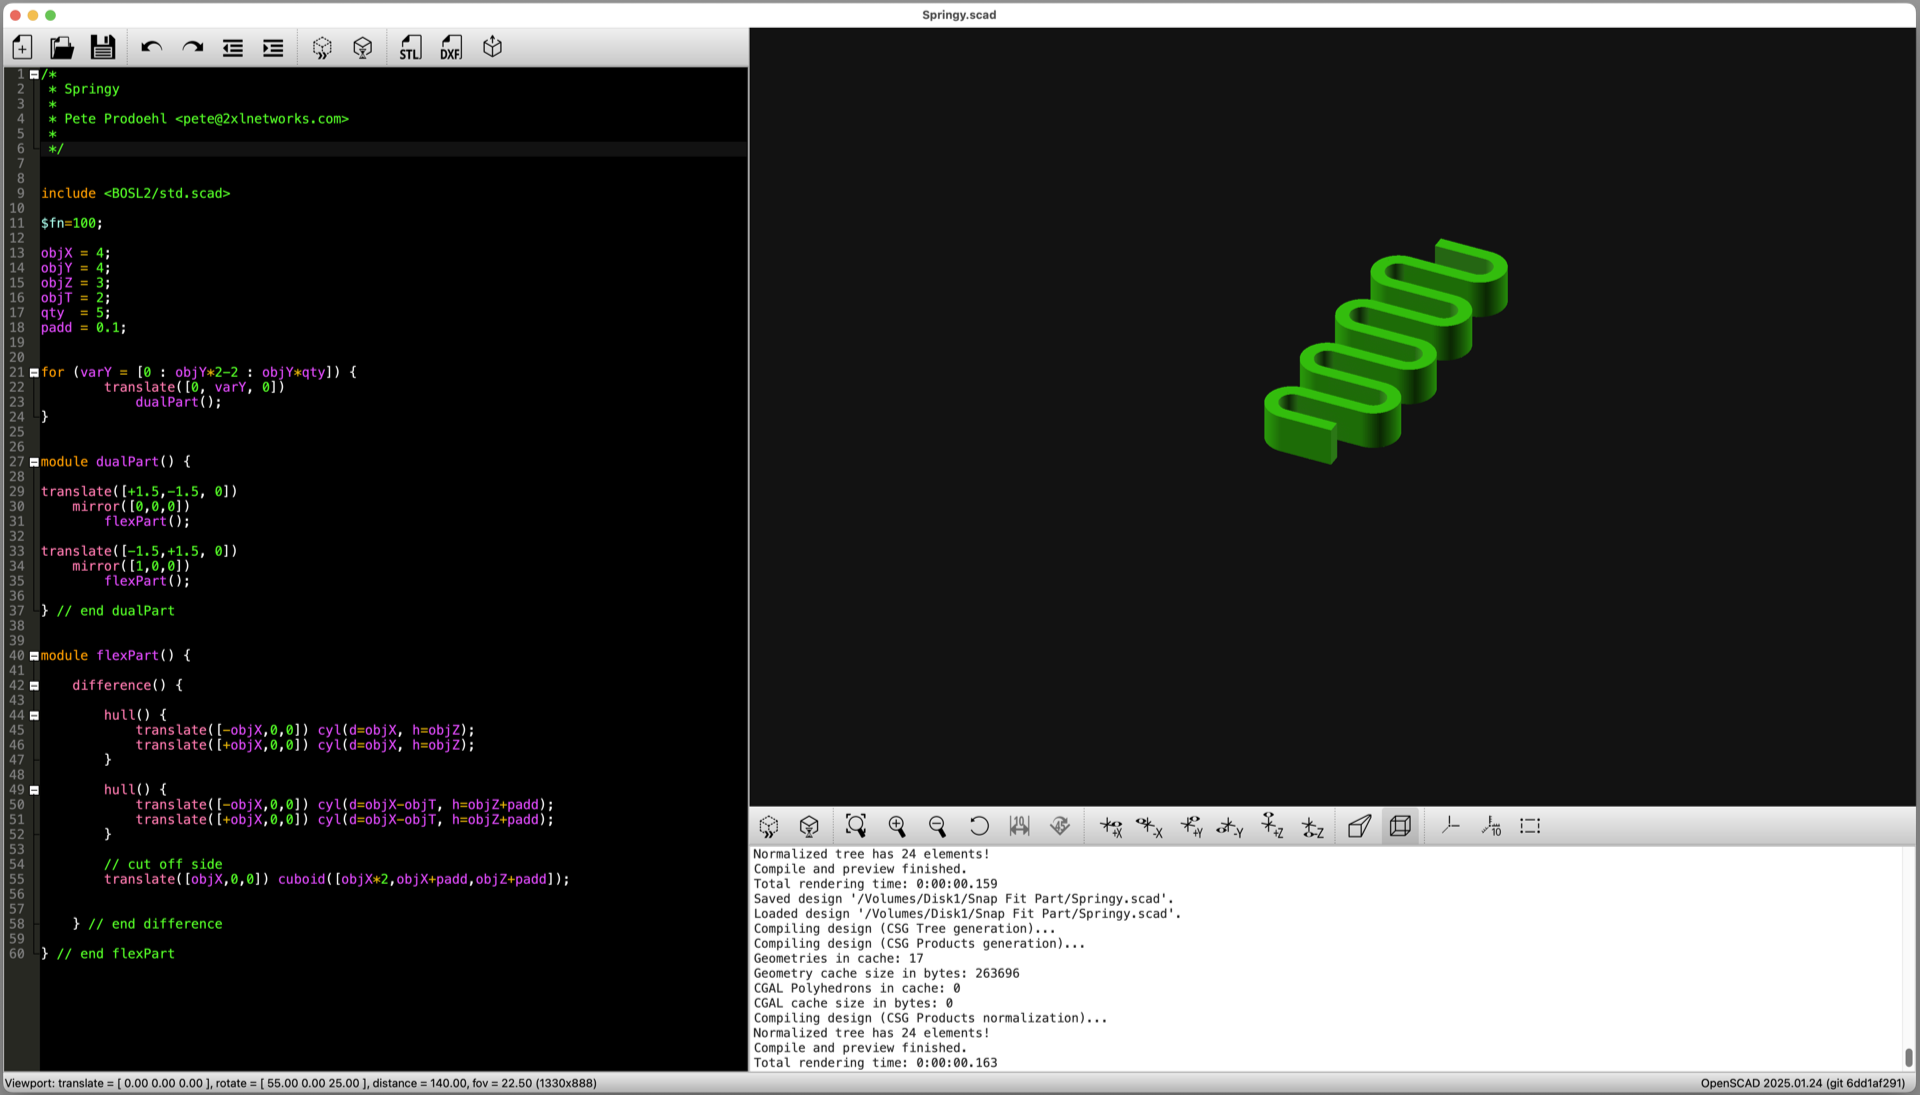
See the code here! This also spurred me to finally make that OpenSCAD repo on Codeberg. I’d like to fill it with bit and pieces of things. I already share a bunch of designs on Printables but this repo will be more code focused and have things that are not finished projects. (Though I may also add finished projects.)
Basically I only know how to do these things because others did them and were willing to share. I’m doing my part… are you!?