Categories
Uncategorized

Reflect-O-Scope

The Reflect-O-Scope was an interactive museum exhibit I worked on a few years ago. It was a fantastical machine that allows users (typically children) to slide materials under a microscope and examine them. The materials were from the sponsor of the exhibit and consisted of specialty tape materials adhered to plastic boards.

One of the original ideas was to allow for focusing, but that got scrapped. We figured kids would put almost anything under a microscope, their hand, their little sister, etc. Focusing meant a moving mechanism, and it was deemed to complex at the time.

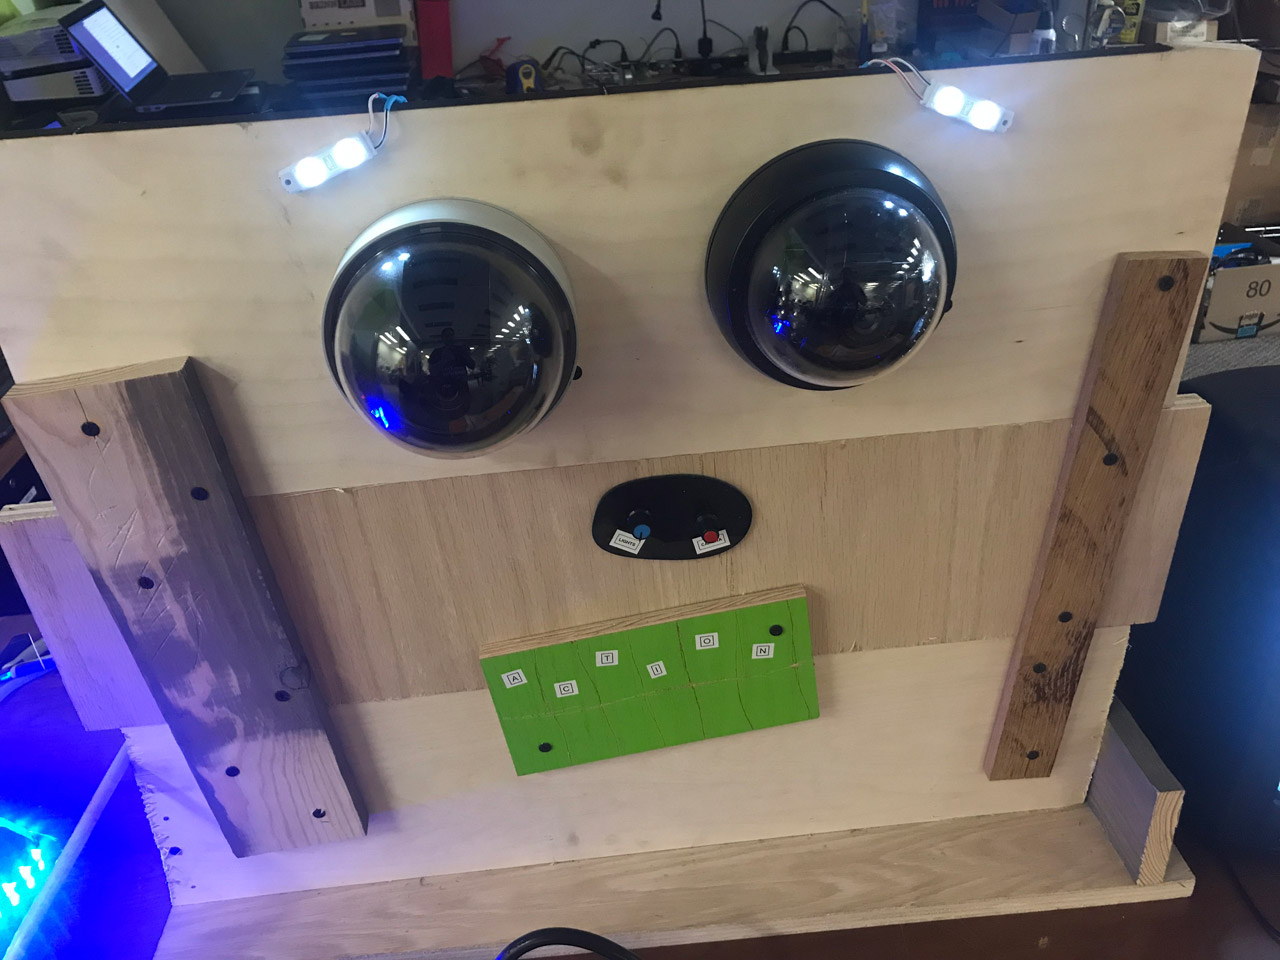
The sculptural build was done by John McGeen and Austin Boechler. My focus was on the hardware and software. There’s a USB microscope connected to a computer and then a small HDMI display in the “goggle” shaped piece that the user looks into. It’s all a bit “periscope” like in design.

The original design also had a secondary monitor (a large TV) that would be mounted further away, so people could see weird things on the TV and it would draw them over. Lots of features got killed due to lack of time or other reasons. Most of what you see on a museum floor probably started out a lot more complex when originally designed, and then simplified as time goes on.

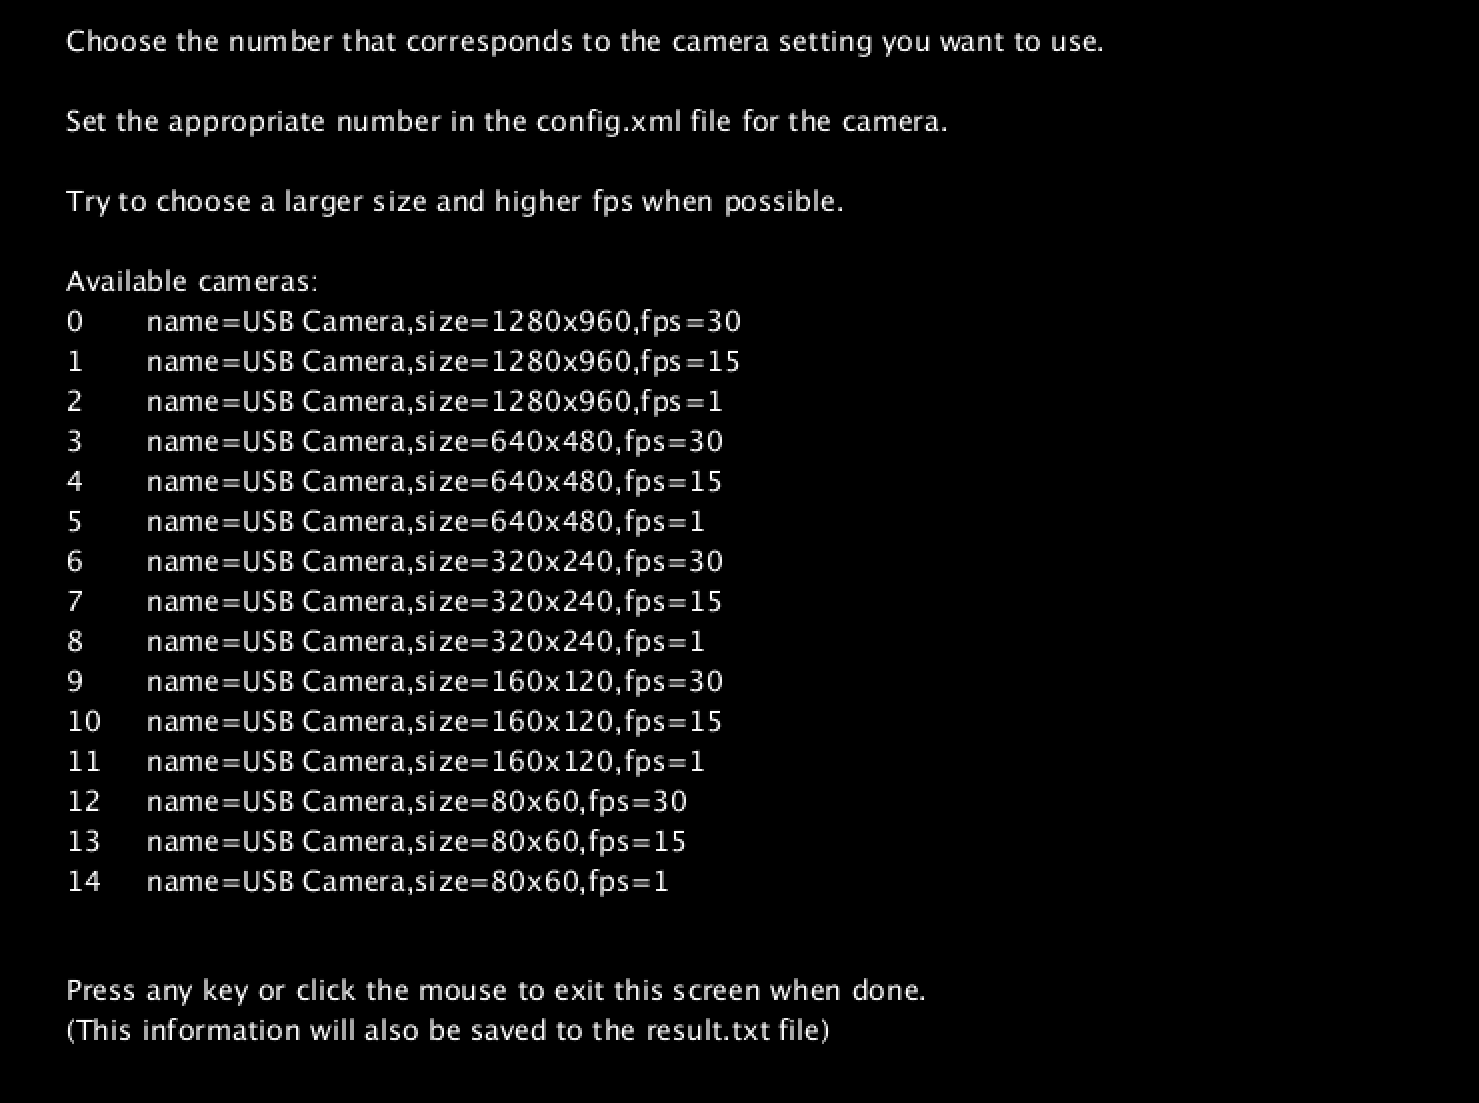
I wrote the software, which is just an application written in Processing that automagically launches at boot up, runs full screen, and shows the output from the USB microscope. There’s also a companion application called “List Cameras” that can display all the connected USB cameras and all of the possible resolutions they support. This is there in case the USB microscope ever needs to get replace. The exhibit tech just needs to run the application and then edit a config file. No recompiling of the application is necessary.

One more fun addition was a white plastic tube running along the outside with some NeoPixels in it featuring some funky color runs to add to the fantastical nature of the piece.

One of the nice things about this component was that the software was created in-house, so the component could be replicated easily without additional license fees. (We had an amazing software partner we used for the complex things, but simple stuff was done, when possible, in-house by the tech team, which was basically me.)

Categories
Uncategorized

VIDEO FACE [AVM-312]

video-face-01

One of the projects I built for Maker Faire Milwaukee in 2019 was VIDEO FACE [AVM-312] which is a companion piece to AUDIO FACE [APC-320].

This piece came about because my sister gave me a box of old security cameras. Specifically, analog video cameras. I brought them to Brinn Labs and hooked them up to one of my displays, and they worked fine. They just need a 12 volt power supply and they have composite video out. If you mix the two signals from two cameras together into one output you get a garbled and mixed signal, but if you add in a resistor and potentiometer, you have a way to control the amount of signal that the second camera leaks into the stream to mix with the first camera! (It’s an analog video mixer.)

video-face-02

I considered adding resistors and potentiometers to both cameras but for a standalone exhibit that would have allowed people to dial it down too much and the projector that was connected would probably have gotten confused and lost a recognizable signal and just shown “NO SIGNAL”, so I went with one camera full strength and the other variable.

Construction of this was very slapdash, using scrap wood I found at Milwaukee Makerspace one night. As yes, it’s supposed to look like a face, I mean, it’s in the name, it’s got two eyes looking at you, a nose with controls and a mouth, sort of…

video-face-03

During Maker Faire I had it hooked up to a projector that had analog video input. (Yeah, those are probably getting harder to find, but I have some interesting old equipment.) For other events I just used one of the small television sets I have on hand.


I loved doing these quick and dirty interactive projects, back in the old days, you know, before the pandemic.

Categories
Uncategorized

Campfire Badge

If you loved the Rocket Badge they you’ll probably like the Campfire Badge. And of course if you do like the Campfire Badge you can grab it from the Brown Dog Gadgets Project Database.

I started with this campfire from SVGRepo and with a few modifications, I think it works well for the badge. Above is the top part of the badge, and below is the bottom part with the circuit. You print both parts and do a bit of folding and taping to create the two layers.

The circuit consists of a red LED, a CR2032 battery, and Maker Tape to connect it all together. There’s also a paperclip that can hold the paper switch closed to keep it turned on.

This one has an extra illustration to show the layer assembly. I’ll admit, I’m not the greatest illustrator, but I’m getting better. Most of my work doing vector illustration in the past 10 years has been for technical drawings used for digital fabrication, not for… art. Creating these illustrations is a lot of fun though, and I’m glad I get to do it.

Like many other projects for Brown Dog Gadgets, we provide a full-color template and a black & white version if you want to do all the coloring and decoration yourself.

These are fun projects that can be done at home or in a workshop setting using cheap materials. More badges are coming…

Stay Tuned!

Categories
Uncategorized

Rocket Badge

This Rocket Badge is a follow-up to the Rocket Card I posted recently. It’s another Brown Dog Gadgets project that you can find on their project site.

I started with this illustration and made a number of changes, then designed a badge with it.

The badge has a front and back part, with the circuit between the two. The LEDs shine through the paper as well as out the sides. A paper switch with conductive tape and a paper clip is used to turn it on and off.

This badge uses a red LED, blue LED, a CR2032 battery, and some Maker Tape. There’s a full-color version as well as a black & white version you can color and decorate as you see fit.

I’ve got a few more badge ideas in the works, but if you’ve got an idea for one, let me know!

Categories
Uncategorized

Cupcake Sans WiFi

Josh at Brown Dog Gadgets has a saying “Don’t add WiFi to a cupcake”, which sounds weird, but what it means is, don’t over-complicate things. A cupcake is delicious all on its own, and you don’t need to add WiFi to it. Lots of products have WiFi that probably don’t need it. (See @internetofshit if you doubt me.)

Anyway, I grabbed this cupcake and modified it a bit for some laser cutting fun using some stiff felt. I cut three different pieces then layered them and stuck them together with spray glue.

The letters were not cut out, but instead I used a “stitch” effect by outline them using LightBurn‘s Perforation Mode. (And yes, I’ve tried etching felt… it does not really work.)

You can set the length of the cut and then the gap between the next cut. It’s a handy feature for sure. (Yes, you can do this in your vector editing application before you load your file into LightBurn, but it’s helpful to tweak it to exactly what you want when you send the job to the laser.)

Of course I had to add a red LED to one of them, along with a CR2032 and some Maker Tape to complete the circuit…