Here’s another project for Brown Dog Gadgets. I’ve been making a lot of paper circuits lately, including cards, and this is another template you can download and print, it’s a Rocket Card.
This one started with an illustration of a rocket from SVGRepo that I modified a bit. I changed the color scheme, modified one of the fins, added some thick outlines, and a few other embellishments.
I created two version, a flat version and a cut-out-and-stick-on-top version to add some dimension and allow for the LEDs to go under the rocket. (Besides the LEDs you’ll need a CR2032 battery and some Maker Tape if you want to make one.)
Each of the two versions also comes in full-color that you can print on a color printer, and an alternate version you can print on a standard black & white printer and then color or decorate as you see fit.
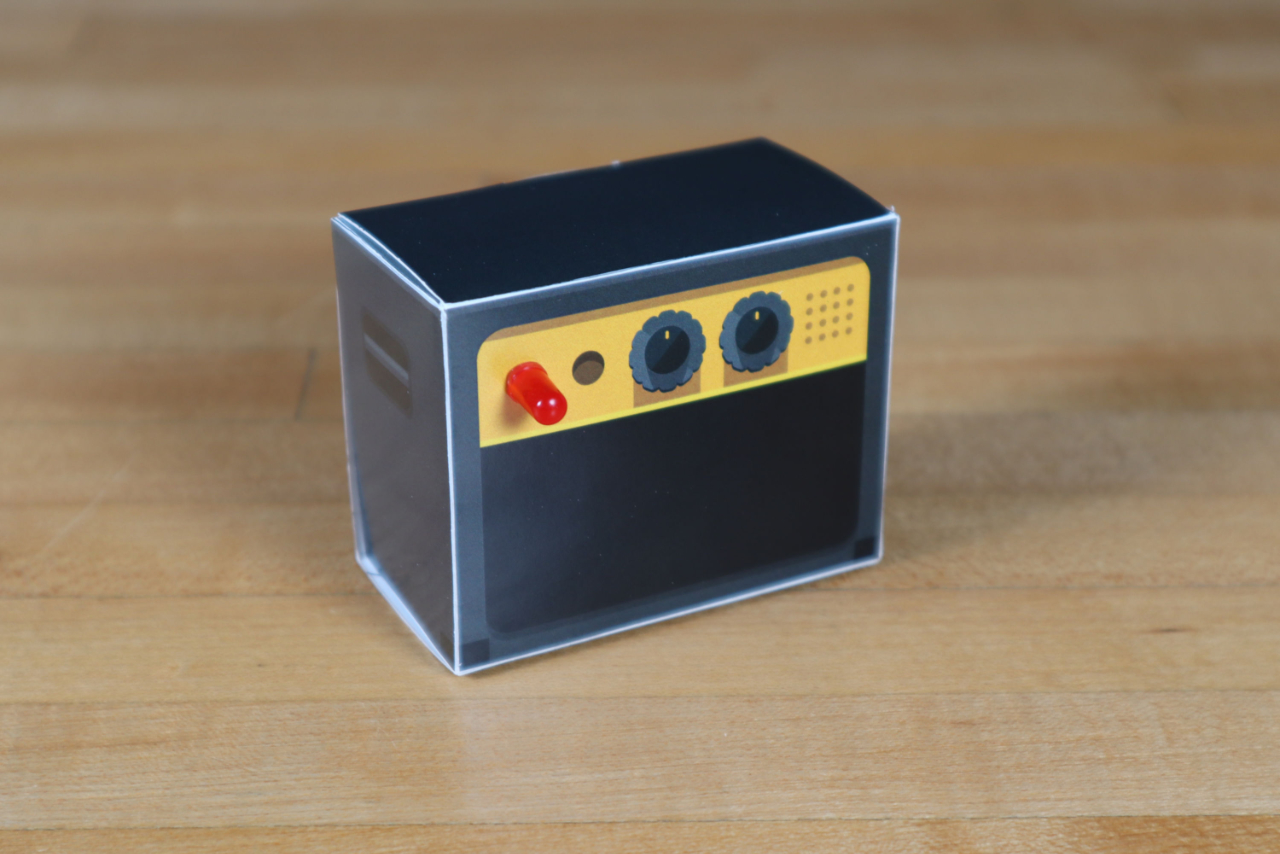
One of the fun projects we have at Brown Dog Gadgets are known as Vibrobots. I made one I call the Rockin’ Amp. These are fun little bots made with simple paper circuits and Maker Tape.
We provide free templates that can be downloaded and printed by anyone, and you can make these projects even if you buy the components from elsewhere. (Though you’ll need to modify things if you try to use copper tape, as it’s very thing & fragile and only conductive on one side.)
These projects tend to be a cross between arts & crafts and simple electronics. There’s some cutting involved, some taping, some learning, and if you prefer to do more decorating you can print the black & white version and color it yourself.
Credit where credit is due… I started with this basic 2D illustration of an amplifier, and changed a few things, and added in the other five side so it would fold up into a 3D object.
As I continue to move away from Adobe products (I mentioned Affinity Photo a few months ago) I’ve still been using Adobe Bridge because it’s installed and it works fine, but will break in the future, so… replacement time!
I looked at a few Mac OS X based image browsers and found Spect. There’s a free trial so I gave it a whirl, and then shelled out $4.99 for it. So far I think I’ve got my money’s worth. I like that it can browse a top-level folder and also do a deep scan into sub-folders and show them all in one view.
My only concern is that it may not see updates and may die. There’s a bug where it does not seem to know about Recent Folders, it doesn’t really show any metadata, and the author is probably a little busy with other things.
Still, it works well for now… until I find something better.
My laser cutter has an air assist, which is really just a small air pump that runs when I am cutting or etching with the laser. The nice thing about LightBurn is that it adds the commands M106 and M107 to the start and end of each job so it will automatically trigger a pin on the Cohesion3D control board so that it can turn on and turn off the air assist.
Disclaimer: I’ve done a lot of projects using AC power controlled by relays using an Arduino or Raspberry Pi, and I’m comfortable working with 110VAC, but if you are not, I’d recommend you just get an Enclosed AC Relay System. It’s basically a power strip that can be controlled with two low voltage wires. Quick, easy, and safe.
Onto the project! Above you’ll see two parts loaded into LightBurn ready to cut. I tend to design my own enclosures rather than use any of the online generators, because I’m weird like that, and I enjoy it. You’ll notice the small part is only one piece, so I cut four of them, and they go on the sides. The top piece (to hold the outlet) I just cut another one, without the red parts getting cut, and I’ve got the bottom.
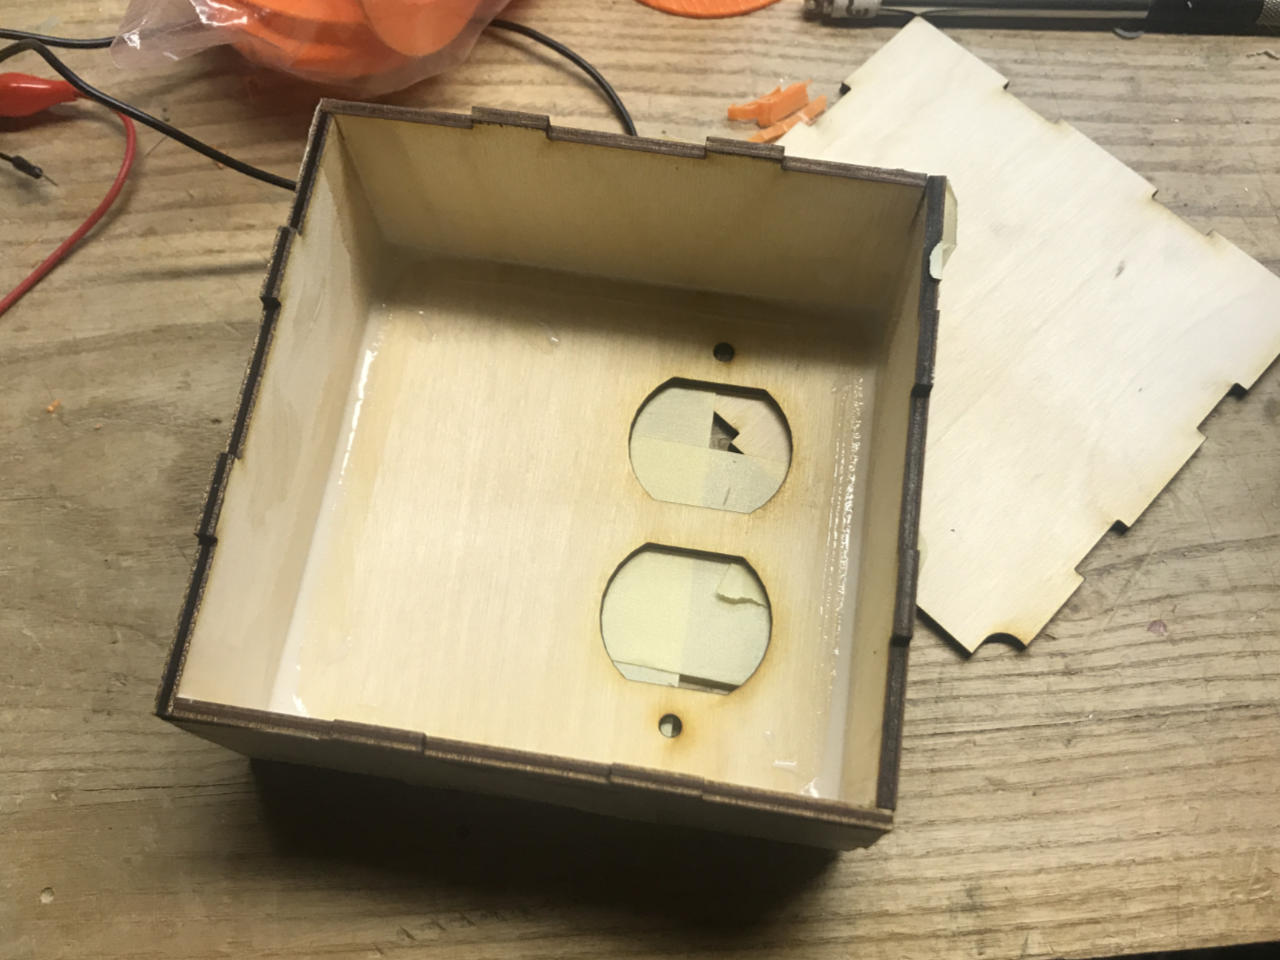
Hey look! All the parts cut from 3mm Baltic birch. Besides the holes for the AC socket I didn’t bother to add any other holes for wires, etc… I’ll just knock those out a with drill and/or file.
But first, we gotta glue things up… and to hold things together, why bother with clamps if I can just tape it up. (Rubber bands would also work. This is small, thin, lightweight wood.)
Basically, add glue… let that glue dry, add more glue. It’s just got to hold together when it’s all done…
Jam the electronics in there. The socket gets held in like a socket does, thanks to the holes on the top. For the relay board I typically use #4 screws to screw it down, though 3mm is a little thin, so I just glued a piece of scrap 3mm in place so I could screw into it and into the top piece a bit if needed… Oh look, I did add some corner supports.
You’ll also notice the wires leading into the enclosure. I probably just drilled holes and ran a round file across them until the wires seemed to fit so I could put the bottom piece on. Quick… and… Dirty!
Boom. Don’t even bother with screws or magnets or other fasteners for this thing… just add some black gaff tape to hold the bottom in place and we’re good.
Wires? Yeah, there’s a bunch of Dupont connectors going to the relay board. We need 5V, GND, and Signal. Simple. That’s all you need to trigger the relay. No microcontroller needed. The Dupont connectors plug into another set of Dupont connectors to change the gender (because I couldn’t find the right kind) and then into some Wago connectors. (Those things are nice!) From there I think I cut up and old 4 wire phone cable. Snip goes the RJ11 connectors!
Here’s the top, it looks not completely terrible, and prevents me from shocking myself with 110VAC, so that’s good.
Hey look, it works! You’ll see a weird switch on the top that the air assist pump plugs into. It’s just an illuminated on/off socket switch I had in the shop and used to confirm that the thing worked properly. I’ve probably removed it by now and put it on my workbench where it’s buried under three other unfinished projects.
Also worth noting: Laser cutting things for your laser cutter is akin to 3D printing things for your 3D printer.
I designed and printed a simple focusing device for my Full Spectrum MLE-40 4th Gen Hobby Laser Cutter. You can find it at FSL Focus Device on PrusaPrinters.org
The manual for the laser cutter shows a focus device cut from 3mm acrylic, which I originally used, but a thin piece of plastic isn’t really easy to stand up at 90 degrees properly (and won’t stand up on its own) so you couldn’t really tell if the focus was correct.
So instead I designed a triangular piece that could stand at 90 degrees much more easily. I chose a triangular shape rather than cylindrical or a rectangular cuboid so that I could easily slide one point of the triangular shape under the lip of the laser head.
Right now when it’s not in use it is stuck to the top of the laser cutter using some tape, but I’ve considered making a new version with embedded magnets so I can ditch the tape and stick it anywhere to the body of the machine.