
I just finished reading Mutations: The Many Strange Faces of Hardcore Punk, by author Sam McPheeters. It’s a great book, and I recommend it. And I don’t recommend a lot of books! (Because I don’t read a lot of books…)
Besides being a great storyteller, I share this odd kinship with Sam, though it may be one-sided. I’ve always admired his work, and we’ve crossed paths a few times. Now, in the book he mentions interactions with people and failures (perceived or real) throughout his life. I thought I would share a few times I encountered Sam.
Disclaimer: It’s been over 25 years, and I may not get everything right, but I’m going to do my best to be accurate, If I’m wrong about something, let me know.
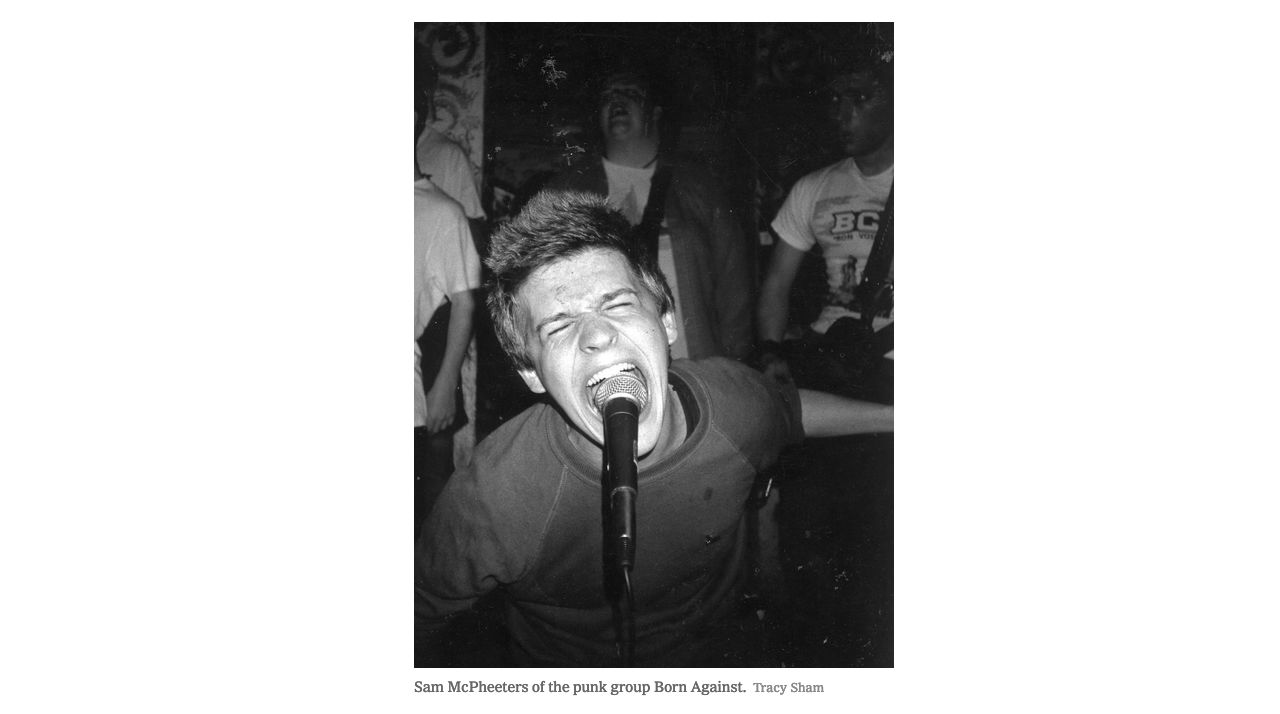
I first met Sam when Born Against played a show in Waukesha, Wisconsin. The local Waukesha punks booked them to play a bowling alley. Somehow I rented the PA for the show or something. (I would have got it from Lincoln Music on the South Side.) I remember meeting Sam when setting up the mics and I said “Hey, you’re not gonna stick this mic in your mouth are you? I rented these…” and he looked at me and said “No, I’m not gonna stick it in my mouth.” and that was good enough for me. But… there was this hint of mischief when he said it, as if he was saying “I’ll tell you I won’t do it, but yeah, I’m totally gonna do it.”
Now, why the hell I would I ask him such a question? I’m pretty sure I had seen a photo from a zine (maybe MRR?) where he had a mic shoved in his mouth. I remember it being a great photo, but I was also concerned I’d return the gear to Bob at Lincoln Music and he’d be like “What the hell happened to this mic!?!”
I am reasonably sure he did not shove the mic into his mouth. It’s been a long time, and since I don’t remember, I’ll take that to mean it did not happen, because it seems like something I would remember. I’d probably have said “What the hell, man!?! You said you wouldn’t shove the mic in your mouth!” and Sam would probably have shrugged or something.
The next interaction was in Madison, and I don’t know if this was the same Born Against tour or another one. Maybe it was a year later? (Hell, I don’t even know what year some of these things happened.) Anyway, I think we were near State Street somewhere and Sam saw me and (maybe) Milt, and said something like “Hey, do you guys have Z-Rock in this town?” and I told him we did not, but maybe WORT would work. He then asked where a laundromat was and we may have been able to point him in the right direction. Yeah, this is weird, but Sam is weird, and I am weird, so whatever. I’ve also been know to just randomly ask people if they have Z-Rock in whatever town I’m in. (I never bothered to look up Z-Rock until right now. Huh.)
And then on the Buried tour in 1993 we played in Washington D.C. at Club Heaven with Born Against, and it seemed like somehow there was a small crowd, or like no crowd or I just can’t remember but I do remember watching Born Against play and Sam was Sam and at some point he wandered off during a song and went into the women’s restroom and I think he came back at some point but it’s all a little hazy.
There’s one more interaction I had with Sam but it wasn’t in-person, it was across a computer network where he was asking me questions about something and I remember I felt honored that he was asking me. I’m not even sure I had any great answers for him, but now that I think about it maybe I’ve never had any great answers.
I did a search for Sam with a mic in his mouth and found this photo from ABC No Rio Fondly Recalls the Saturdays of Its Gritty Youth though I’m not even sure that’s the photo I remember seeing.
Sam also makes (or made) art, some of which I find interesting or amusing, and some that makes me worry about his sanity. See the art of Sam McPheeters, Artist. (Try this link or this link instead!)


