Categories
Uncategorized

RepRap Report #3

MG Plus HotEnd

It’s been quite some time since the last RepRap Report. I guess 2013 was pretty smooth as far as 3D printing goes. But don’t worry, things went wrong eventually, so here’s another update.

I hit a problem with extruding, as in, filament would not extrude, which was a new thing for me. I know a lot of other people with printers, either at Milwaukee Makerspace, or through the Milwaukee 3D Printing Meetup, and I hear stories of extruder jams that require taking everything apart, torching the nozzle, soaking things in acetone, etc. I managed to go over 18 months with no issue. And then I had an issue.

Filament would not extrude. I raised the temperature, and still no luck. I moved the RepRap to a warmer room, and still no luck. It looked like the thermistor on the nozzle was a bit loose, so I reattached it. Still no luck. Finally I decided a teardown was in order. I pulled things apart, and eventually cleared out the barrel and the nozzle with some help from a torch and some acetone. I made sure I could see light through the nozzle. All good, right? I put things back together and was about to push some filament through when… the high temperature wire that was embedded in the ceramic broke off. That was the end of that!

There was pretty much no way to reattach it. I asked around online and people were like “You’re still using a MakerGear hot-end!?” And yeah, I was, because it just worked. For 18 months it worked fine. People kept telling me to get an all-metal hot-end from E3D, I didn’t feel like plunking down $75 nearly $100 USD for one, especially since I assumed it was really just a new heating element I needed.

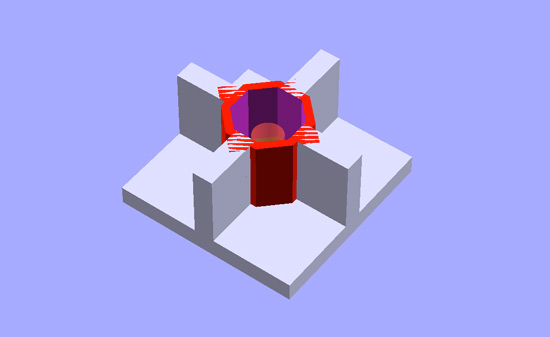
I ended up finding the MG Plus HotEnd on Thingiverse, and just ordered the Heater Block Assembly from the ebay shop of RP One Labs for about $20. I managed to do a minimal amount of damage getting it installed but… it worked! I was extruding again! (After I had to solder together the thermistor wires I accidentally sniped. Oops!)

RAMPs

Once everything was back together in it’s proper place, I was ready to print, except that the z-axis then decided to have a mind of its own. Telling z to home made it go up. Then down. Then up. Then up and down. Hmmm. I ended up swapping the x and z axis Pololu drivers. The z axis was back to normal then. Test print. Hmmm. The x axis was missing steps, and I got the old problem of your entire print shifting to the left (or right) mid-print. A bit of Pololu pot adjusting and eventually all was good. (Come to think of it, it took a bit of adjust on the z axis driver as well. Things seem dialed in now, and I can print.)

I secured the RAMPs board down, and… wait, nope. Crazy stuff again. I thought perhaps a noise issue? Hmmm, it seems perhaps the connector that plugs the z motors into the RAMPs board is a little wiggly, so for now the RAMPs board is just hanging there. Sigh… I’ll fix that connector. Eventually.

The important thing is, I can print again. One of the reasons I leaned towards building my own printer was that I figured I would be familiar enough with the machine that I could easily repair it when the time came. That’s seemed to prove true so far.

I’ve spent the weekend calibrating things again. I’m still using Slic3r and Pronterface. I know there are lots of other (and newer) options out there, and I should explore them a bit, but for now, there are things to print!

Categories
Uncategorized

Derby Wheels

If you remember Milwaukee’s last Nerdy Derby, we tried to supply lots of pieces for people to build cars with. I ended up laser cutting a bunch of wheels, as well as 3D printing some wheels… take a look at the junk car post from last year.

Well this year I started printing wheels, and then decided that plain old boring wheels just wouldn’t do, so here I present a progression of wheels I’ve designed so far. I’ve only printed about 1/4 of them, but I’ll probably give them all a try before the big Nerdy Derby event at Milwaukee MakerFest on October 19th, 2013.

wheel001
The plain old boring wheel from last year.

wheel002
Speed holes… should use less material, but may not actually print any faster.

wheel003
Indent, for no particular reason.

wheek004
More speed holes, this time done using a proper for loop.

wheel005
Reverse spokes?

wheel006
Howdy partners! It’s a wagon wheel!

wheel007
And a steering wheel!

wheel008
And an Aperture wheel?

wheel009
Wheel wheel wheel wheel wheel…

wheel010
Tri-force wheel?

wheel011
Weird wheel?

wheel012
Starting to do some hull action for more 3D-ish wheels.

I will say this, I am no expert at designing wheels, but it’s been a lot of fun and a great design challenge, and I really do enjoy tinkering with OpenSCAD to create things.

Oh, and then I wanted to do a spiral wheel, and did some searching, and found this great wheel library, so use that if you really just want awesome wheels and don’t care as much about screwing around with code to learn things on your own. (Or, us the Highly-Configurable-Wheel library and learn from it!)

Categories
Uncategorized

Foot Fixing

Projection Screen

With the recent move of Bucketworks, Milwaukee Makerspace found a (slightly damaged) large projection screen in its possession (which you can see in the photo above.) So for the recent Fix It Milwaukee event, I went to work trying to repair it.

Notes

I started by getting out the digital calipers and making some measurements, as well as sketching some views on paper and writing down the dimensions. (I guess all those years of Drafting classes paid off!)

OpenSCAD

Modeling this in OpenSCAD was a little tricky, only because I often get in over my head in OpenSCAD. It’s a fun challenge though… Some people play video games, I like trying to model difficult objects.

G-Code

Because my primary goal with the first print was to do a test fit, I used only a 10% infill. I started the print at 9pm and didn’t want to stay up too late to let it finish. (Yeah, in theory the hot bits should all cool down when a print is done, but RepRaps do start on fire occasionally, so if I can avoid leaving it on all night long, I will.)

3D Print

It definitely looked how I imagined it should look. I did not model the holes for the pins, as I figured I could do that later, or just drill them out. Again, my main goal was to test the fit of the Aluminum pole into the hole.

Foot

The Aluminum pole fit great! It fit so well in fact, that I couldn’t get it out, and resorted to breaking it apart. Snug is good, but too snug is not good. I’ll increase the size a bit and try again. It might actually be good to have a snug fit and avoid the pins for the replacement. Once I get the hole right I’ll do a print with more than 10% infill, which might be strong enough to not break apart.

Oh, and since I did this at Milwaukee Makerspace where we like to over-engineer things, I had at least two people tell me we could easily cast these in Aluminum. :)

Categories
Uncategorized

Printing Violations (Part III)

3D Printed Cookie Cutters

You loved Printing Violations, and you tolerated Printing Violations (Part II), so we’re back again with another episode of Printing Violations, this time looking more closely at the health issues surrounding 3D printed cookie cutters.

Licensing issues are one thing, but there is a safety concern with 3D printed cookie cutters. Here’s a look at some of the issues. (All assume you are using a home 3D printer like a MakerBot, RepRap, Printrbot, etc.)

Is ABS or PLA plastic filament food-safe?
The answers range from “probably not” to “maybe” in most cases. If you use natural filament it will be free of coloring agents, which is a step in the right direction, but unless you are specifically buying “food-safe filament” don’t expect it to be food-safe. (Keep in mind that “food-safe” is something that will be determined by local health departments, and will vary depending on where you live.)

Then there’s the printer itself, and the environment it runs in. My printer lives in a basement where I do other crazy things like run a drill press, spray glue and paint, and generally make a mess. Would you want your cookie cutter manufactured in such an environment? What has the filament come into contact with before it goes into the machine, and what else has been introduced into the extruder as far as foreign materials? If you’ve ever read up on what it takes to make food in your home and sell it commercially, you’ll have some idea of the restrictions involved. (Wait, we aren’t selling food, right? We’ll get to that, be patient!)

Can 3D printed items be treated to be safe(er?)
If you’ve ever looked at a 3D printed object, you may notice the ridges. Since it’s built up layer upon layer, there are spaces into which food could get stuck. Of course you can try to clean your 3D printed cookie cutter, but don’t put it in the dishwasher! For PLA prints, the heat will either melt it, or deform it, or do some other nasty thing to it. ABS may be better, but you will still need to heat it enough to sterilize it, and hope you can get the crevices clean. It’s been suggested that acetone vapor finishing might be helpful. Helpful enough? Not sure.

Of course you could use your printer to make a mold and then make a food-safe cutter out of another material, but that’s not really a 3D printed cookie cutter. You could also try to coat your printed piece with a food-safe coating, but that’s a lot more work.

So why does all this matter? Because right now, there are people printing cookie cutters and selling them, and there are also people 3D printing cookie cutters, making cookies with them, and selling the cookies.

(In the interest of full disclosure, I should mention that I love cookies. OK, with that out of the way…)

As mentioned, selling food you make yourself is regulated in most areas, and if you want to start up a business baking in your kitchen and selling the goods, you’re in for a lot of work. I know, I know, it’s all in the name of safety for the public, but there’s a crap-ton of regulations and rules you’ll need to follow. Many places require you to have a kitchen physically separated from your home. As usual, I am not a lawyer, I’ve just done a bit of research. From a maker perspective, we just want to make things! From a public health perspective, let’s try not to make anyone sick, okay?

And yes, I have indeed used 3D printed cookie cutters to make cookies (at least twice) and then gave those cookies to people to eat. No one died yet (that I know of.) I didn’t attempt to re-use the cutters though, so they were a one-time use item, which is probably safer than trying to clean them.

Advice: If you’re going to 3D print cookie cutters, use them only once!

Let’s say you create custom 3D printed cookie cutters and sell them on Etsy or some other site, you should probably include a disclaimer that they should be used only once, since cleaning them is an issue. (Safer yet, tell people they are NOT food-safe, and let them decide if they want to use them. Again, I am no lawyer! Consult your own lawyer!)

Now, as for 3D printing cookie cutters, and then using them to make cookies and sell the cookies, well… This may be worse, since you’re selling actual food that has been created using materials that are questionable as far as being food-safe. Once again, I am no lawyer, but you may need one after selling those cookies.

In conclusion, be safe, people. Many folks are fine with the idea that a piece of ABS plastic touches cookie dough for a second or two before it’s baked at 450 degrees for 10 minutes, and others are convinced it’s insane to do such a thing. As with everything, there’s probably some middle ground.

Thanks for reading this, and keep making cookies!

(Big thanks to all the G+ers who helped me out with this. See the thread for more info.)

Categories
Uncategorized

Liberating the 3D Printed Gun

The Liberator

Yes, yes, we now have 3D printed guns, and our world has changed because of it, right? Right.

I’ve written about 3D printed guns before, and I’ve talked about 3D printed guns before, and now they are (somewhat) possible. But don’t be frightened, as there is little new here.

Andy Greenburg at Forbes has been leading the pack on the story of Cody Wilson and Defense Distributed and their attempt (and success?) at 3D printing a gun. And OH NOES! Now other people are printing guns! And some of them are even improving them, but this should be no surprise. Hackers and makers see something that needs improving, and they improve it. When I saw the files for the Liberator the first thing I thought was that it needed work. After I talked to someone who is well versed in 3D printing and gunsmithing, they agreed.

I want to toss out this quote from HaveBlue again:

The one point I try to make (and that they generally fail to grasp) is that if it eventually becomes possible to download a file from a website, feed it to a printer, and have a fully operable handgun a few hours later, the technology will have already impacted our lives in far more incredible ways.

So has our world changed? Yes, I think it has… As I mentioned recently in Your 3D Printed Future, people have created open-source designs for mechanical finger prosthetics. Yeah, that’s pretty amazing. We’re not talking about medical companies charging thousands of dollars for mechanical finger prosthetics, we’re talking about a couple of really awesome people working together on this, and creating something you can 3D print yourself with a sub-$1000 3D printer.

What else is there? Well, bioprinting is progressing nicely. Boprinting sheets of skin for skin grafting procedures, bioprinting a replacement bladder, bioprinting replacement for missing bone for a human skull, and even bioprinting part of a face!

(The joke is that you’ll be able to print out a replacement hand for the one that gets blown off by your 3D printed gun. It’s only half of a joke, because it’s pretty close to being true.)

Now, back to the gun issue. I highly recommend the Hackaday post: The first 3d printed gun has been fired, and I don’t care. Right now the Liberator is little more than a zip gun, which is a simple (single shot) gun that anyone with access to a local hardware store could build. But don’t worry, you’ll be safe:

In late 2000, British police encountered a four shot .22 LR zip gun disguised as a mobile phone, where different keys on the keypad fire different barrels. Because of this discovery, mobile phones are now x-rayed by airport screeners worldwide.

Sigh… more security theater. Just what we need. Do we need regulation on 3D printers? No, just like we don’t need regulation on lathes and mills and hardware stores. So here’s the deal. I have the file for the Liberator, and I’ve held a Liberator, and I’m not a bad person, and I hope to never, ever shoot another person in my life. Why? Because that’s not the type of person I am, and that’s not the kind of world I want to live in.

As for the Liberator, it’s a crappy gun, and if you want a good gun for cheap, there are dozens of ways to get one, both legally, and illegally. And if you want to make one, there are also better ways to go about it than 3D printing one. If the novelty of a cheap, crappy, plastic gun intrigues you, go ahead and print one. Try not to blow your hand off in the process. Guns are dangerous, and even a well made gun can malfunction.

3D printing is all the rage right now, and the media loves hype because it means more attention, more page views, and more dollars. So yeah, go 3D print something, maybe a gun, maybe some mechanical finger prosthetics. Just follow this one simple rule: BE EXCELLENT TO EACH OTHER.

Be Excellent to Each Other.