Categories
Uncategorized

3D Printed Printing Plates

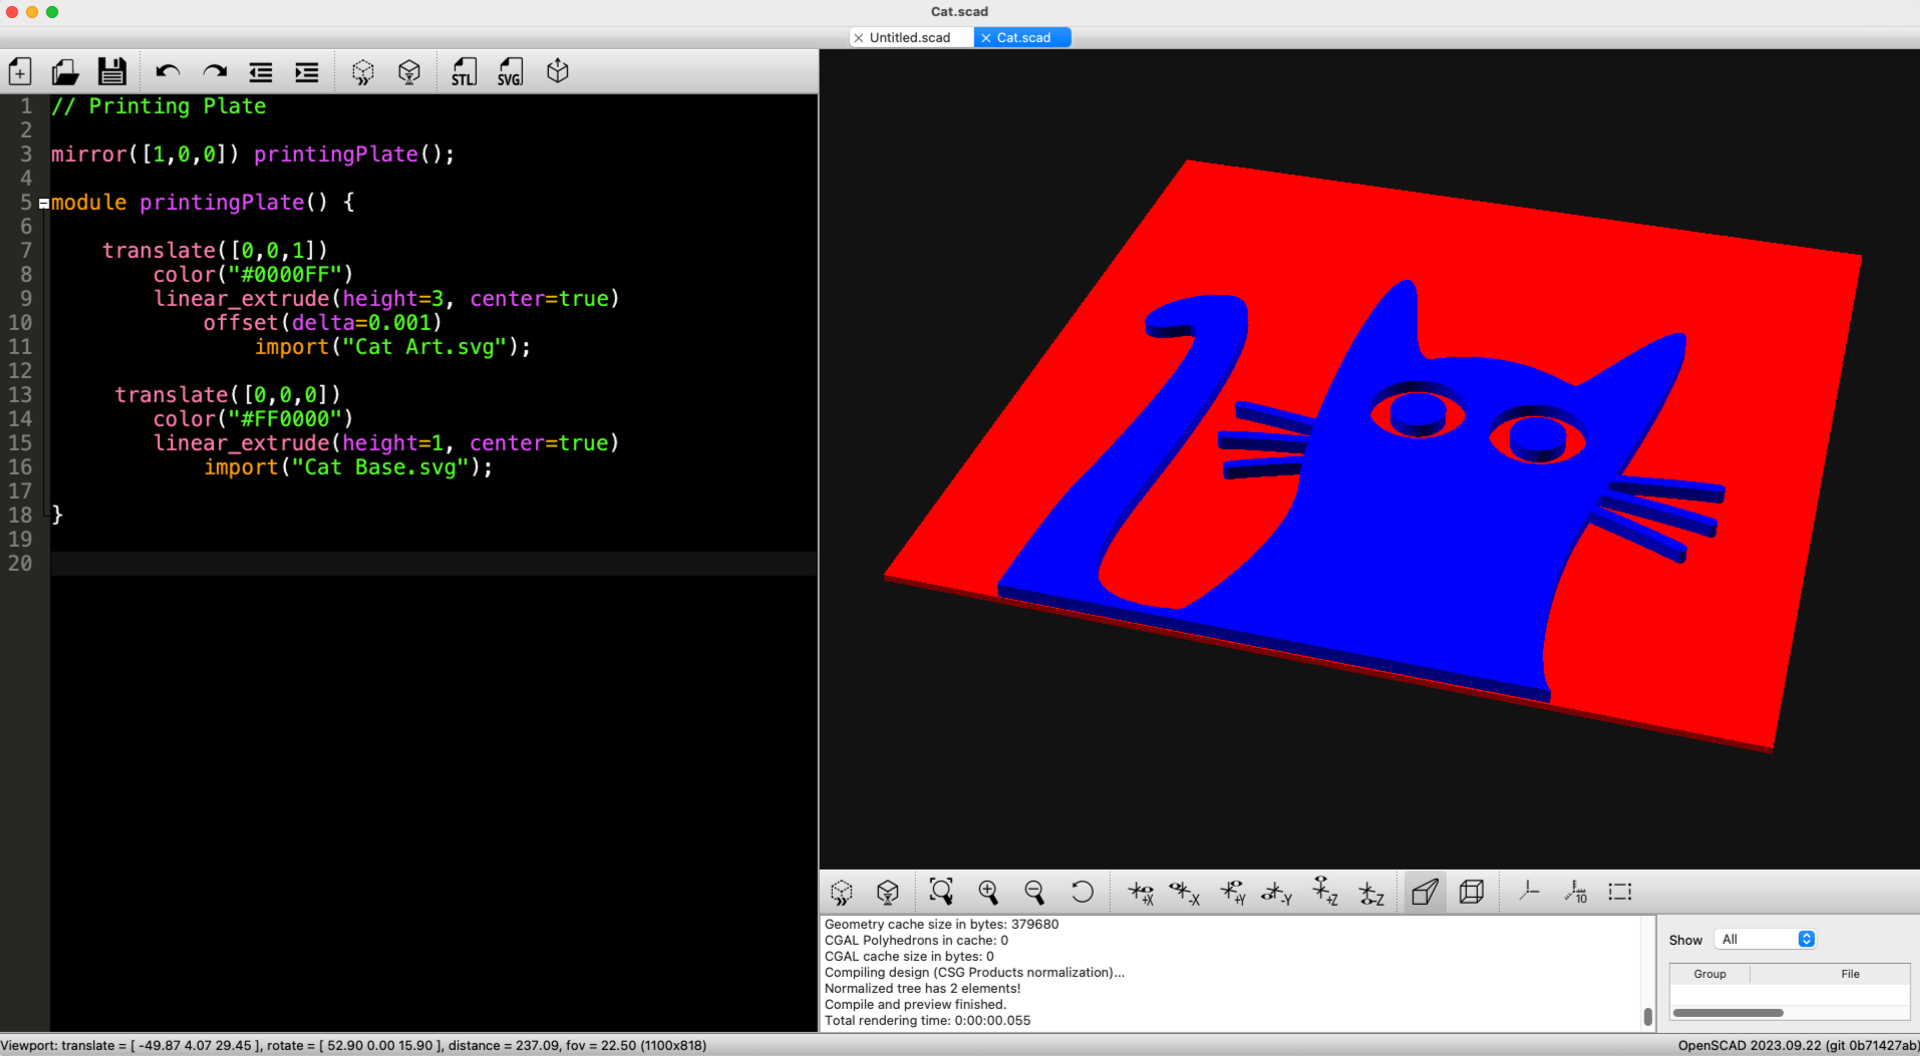
I used to make plate for relief printing by laser etching wood. When I got the Provisional Press I basically set it up optimized for working with 3mm plates, since I used 3mm Baltic Birch wood to make plates. Well, a decade ago I was playing around with 3D printed plates, so I figured it was time to revisit that idea.

First, a few advantages to 3D printing versus laser etching. Since the plates are only 3mm tall they print fairly quickly (at least compared to much taller 3D printed objects) and using the laser cutter involves being there watching it and running the (noisy) water pump, air assist, and exhaust fan. While the laser cutter is (usually) faster, you can just hit “Print” on the 3D printer and walk away. Come back later and you’ve got a plate!

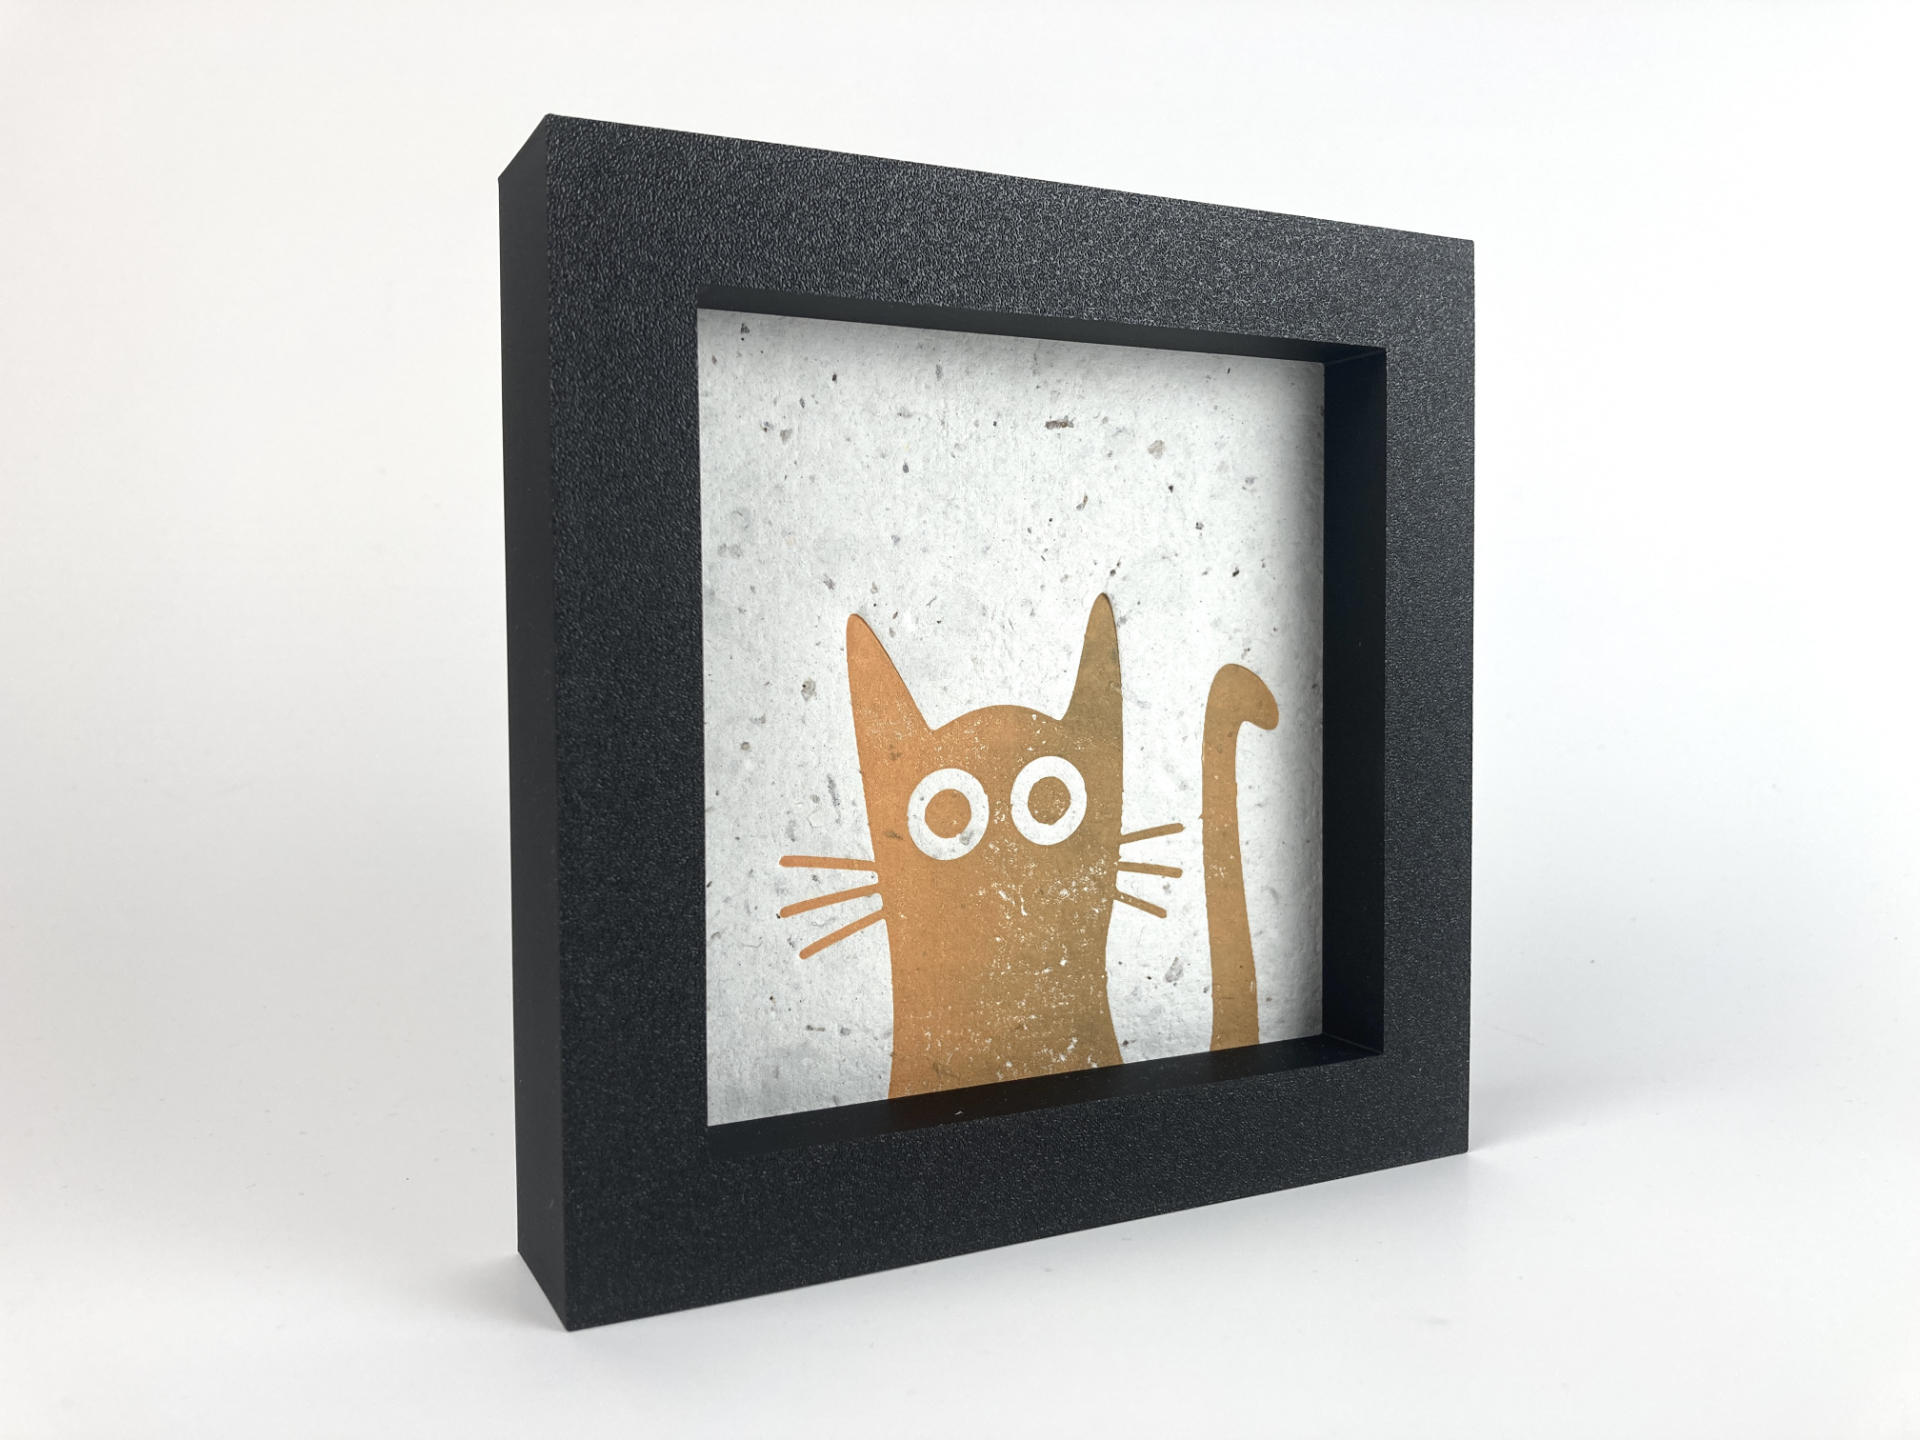
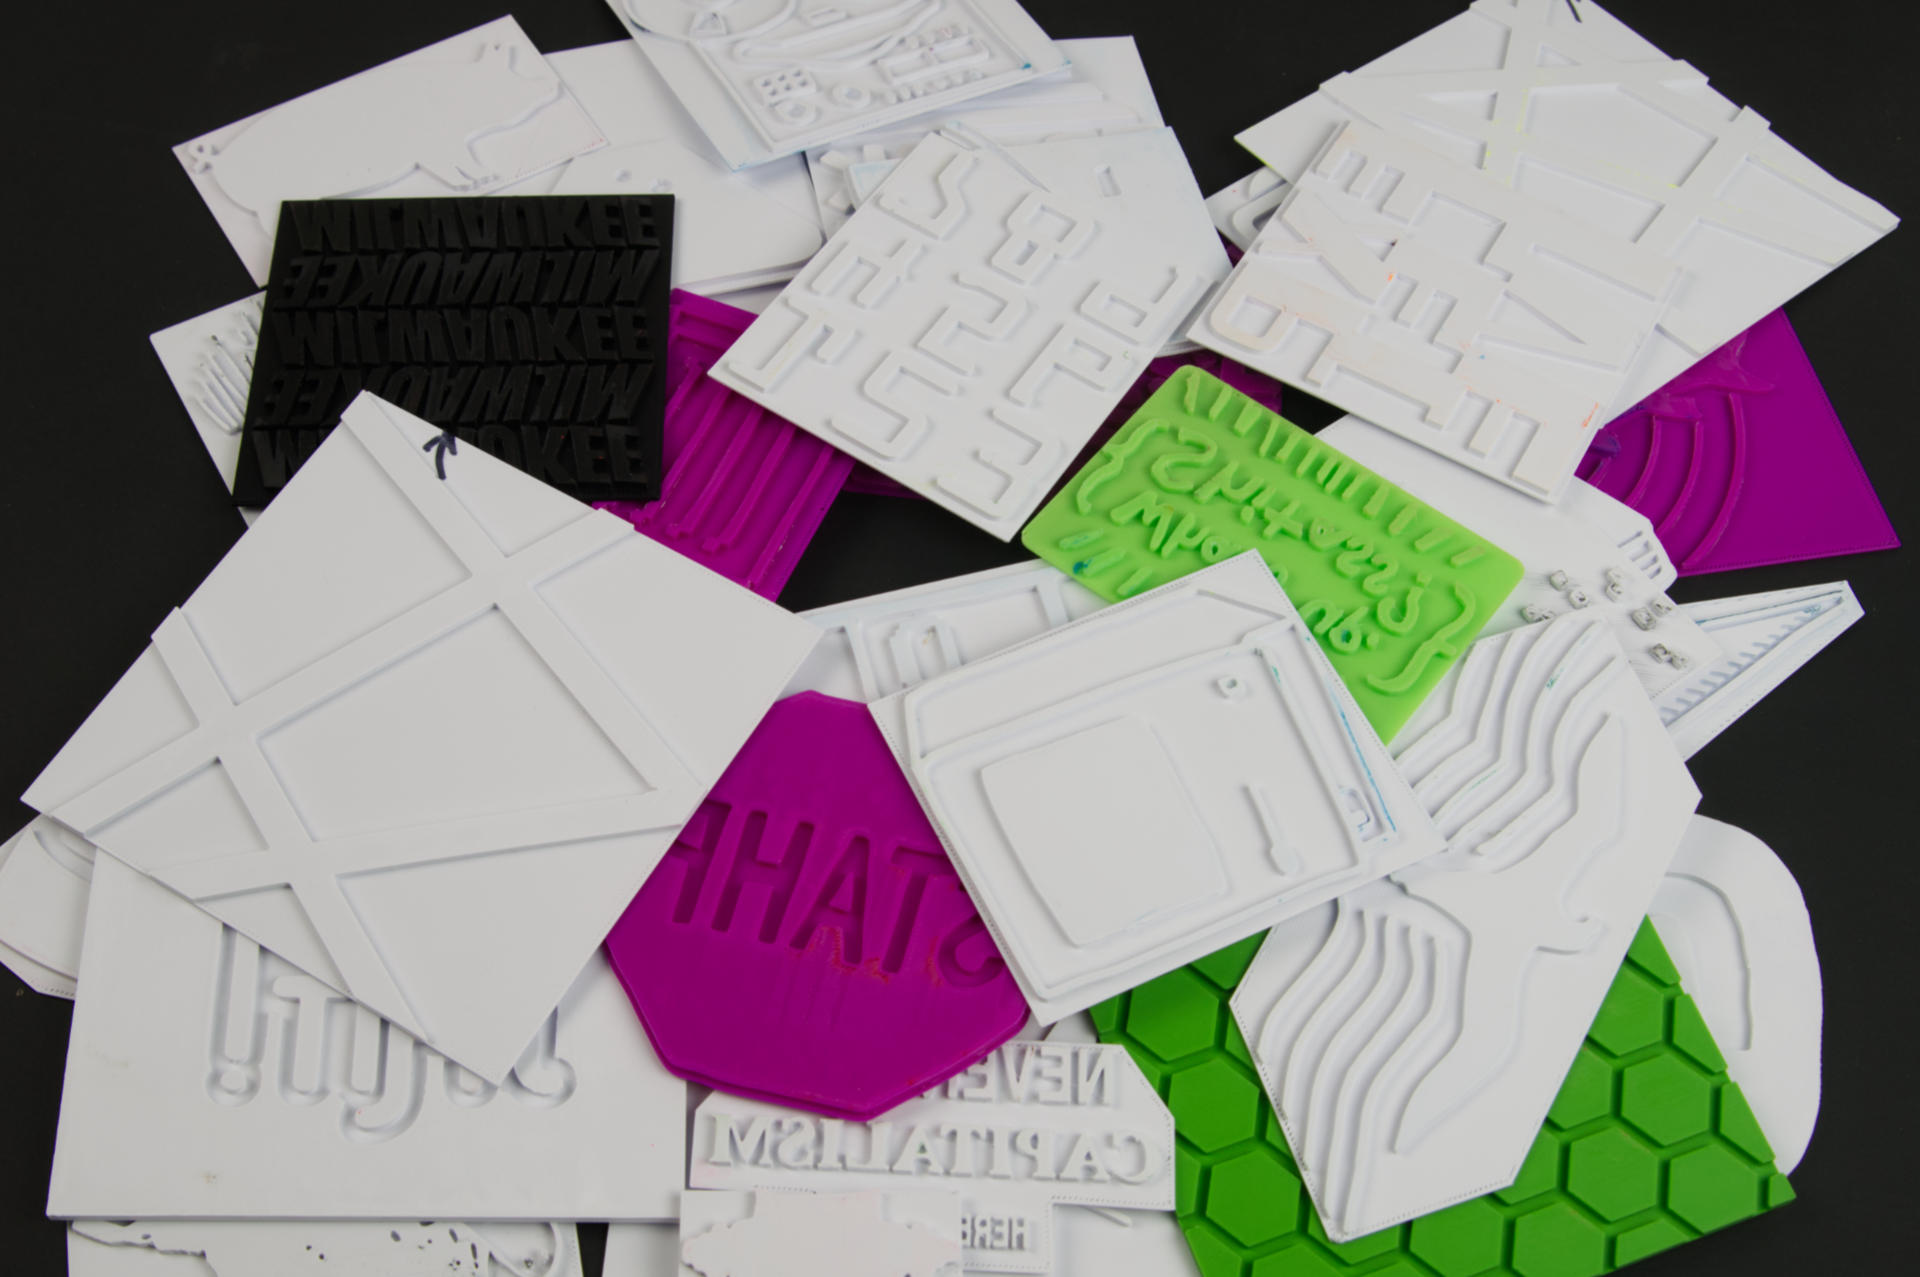
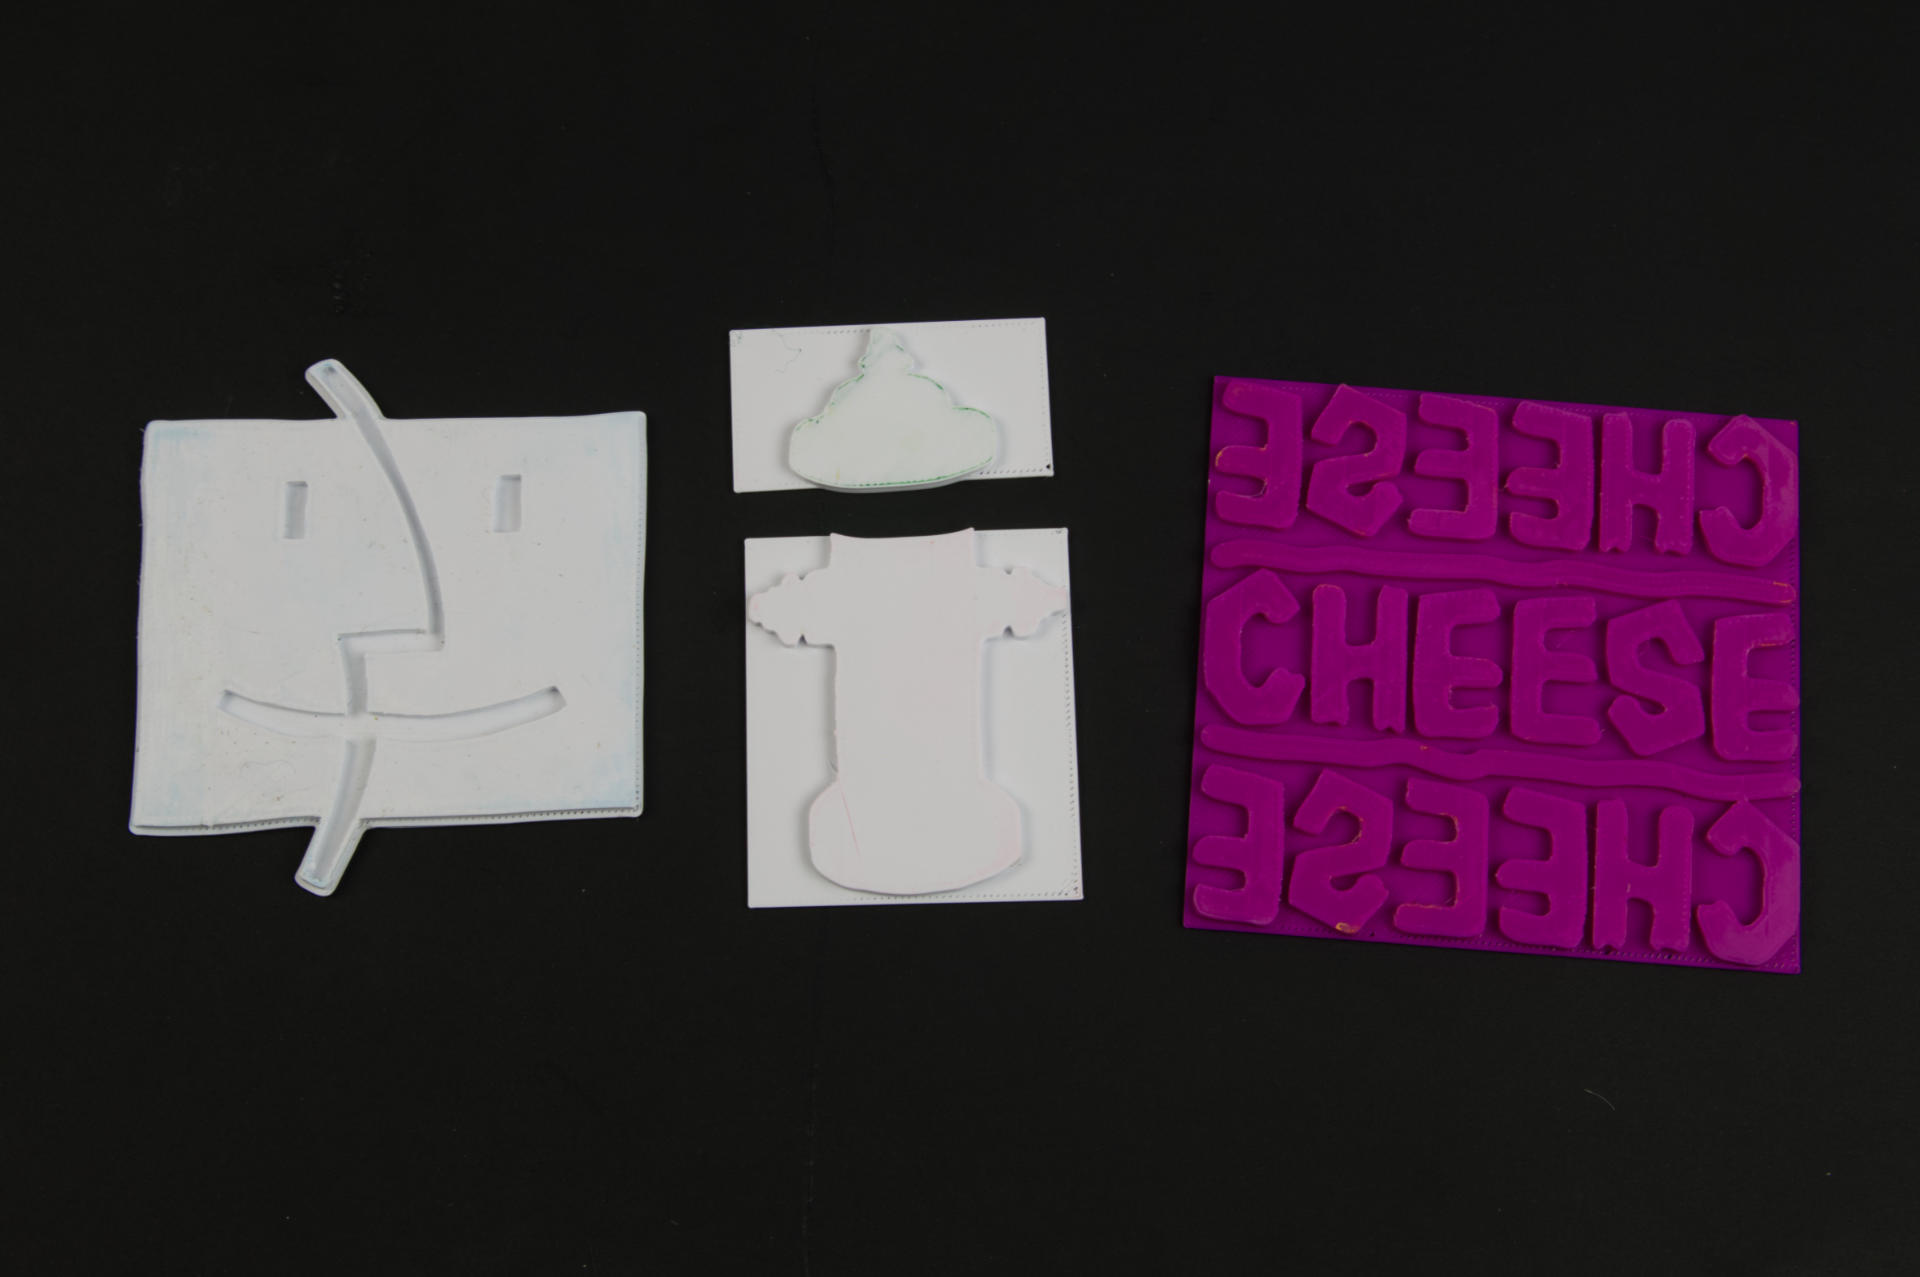
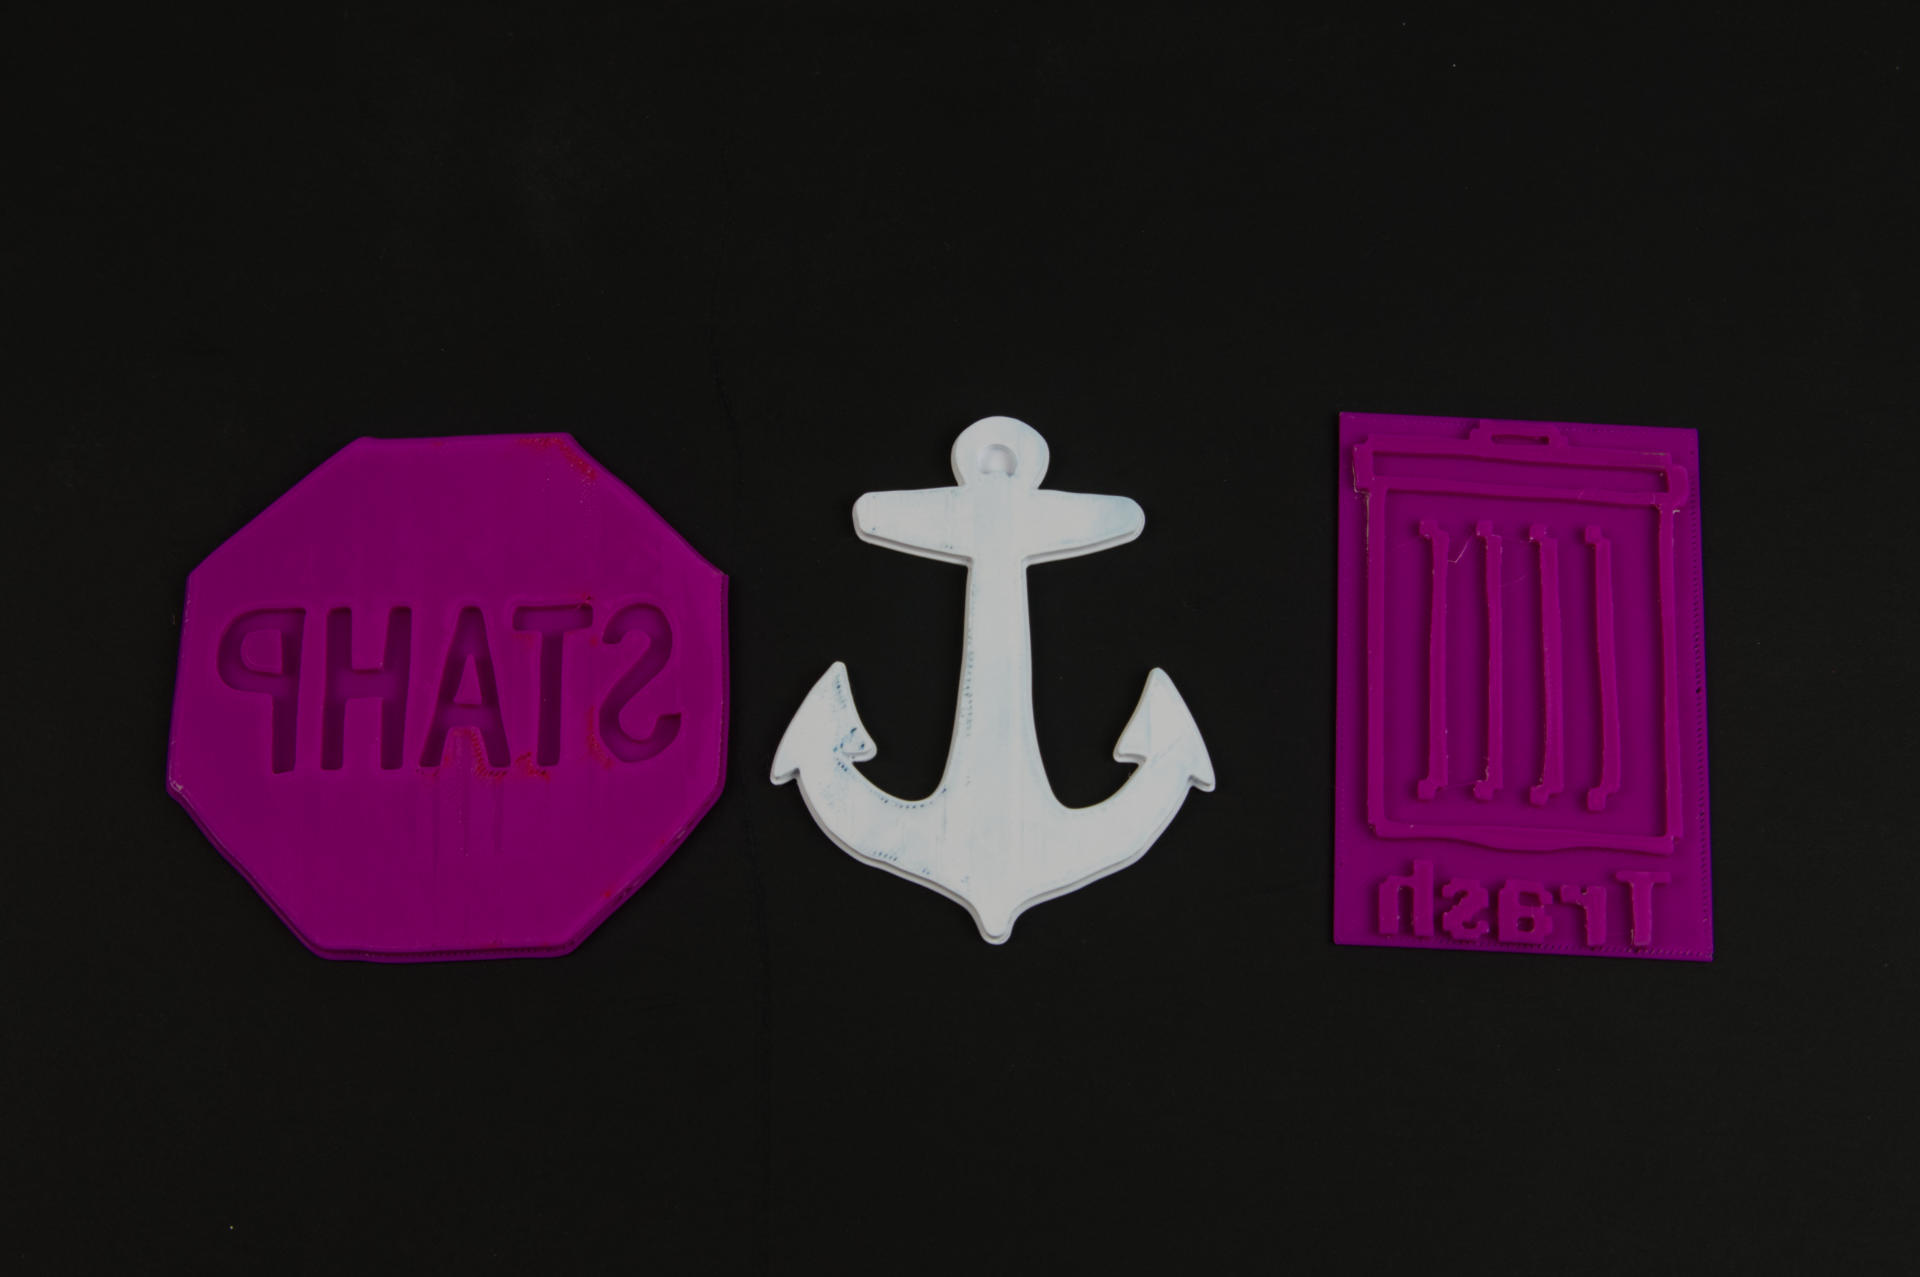
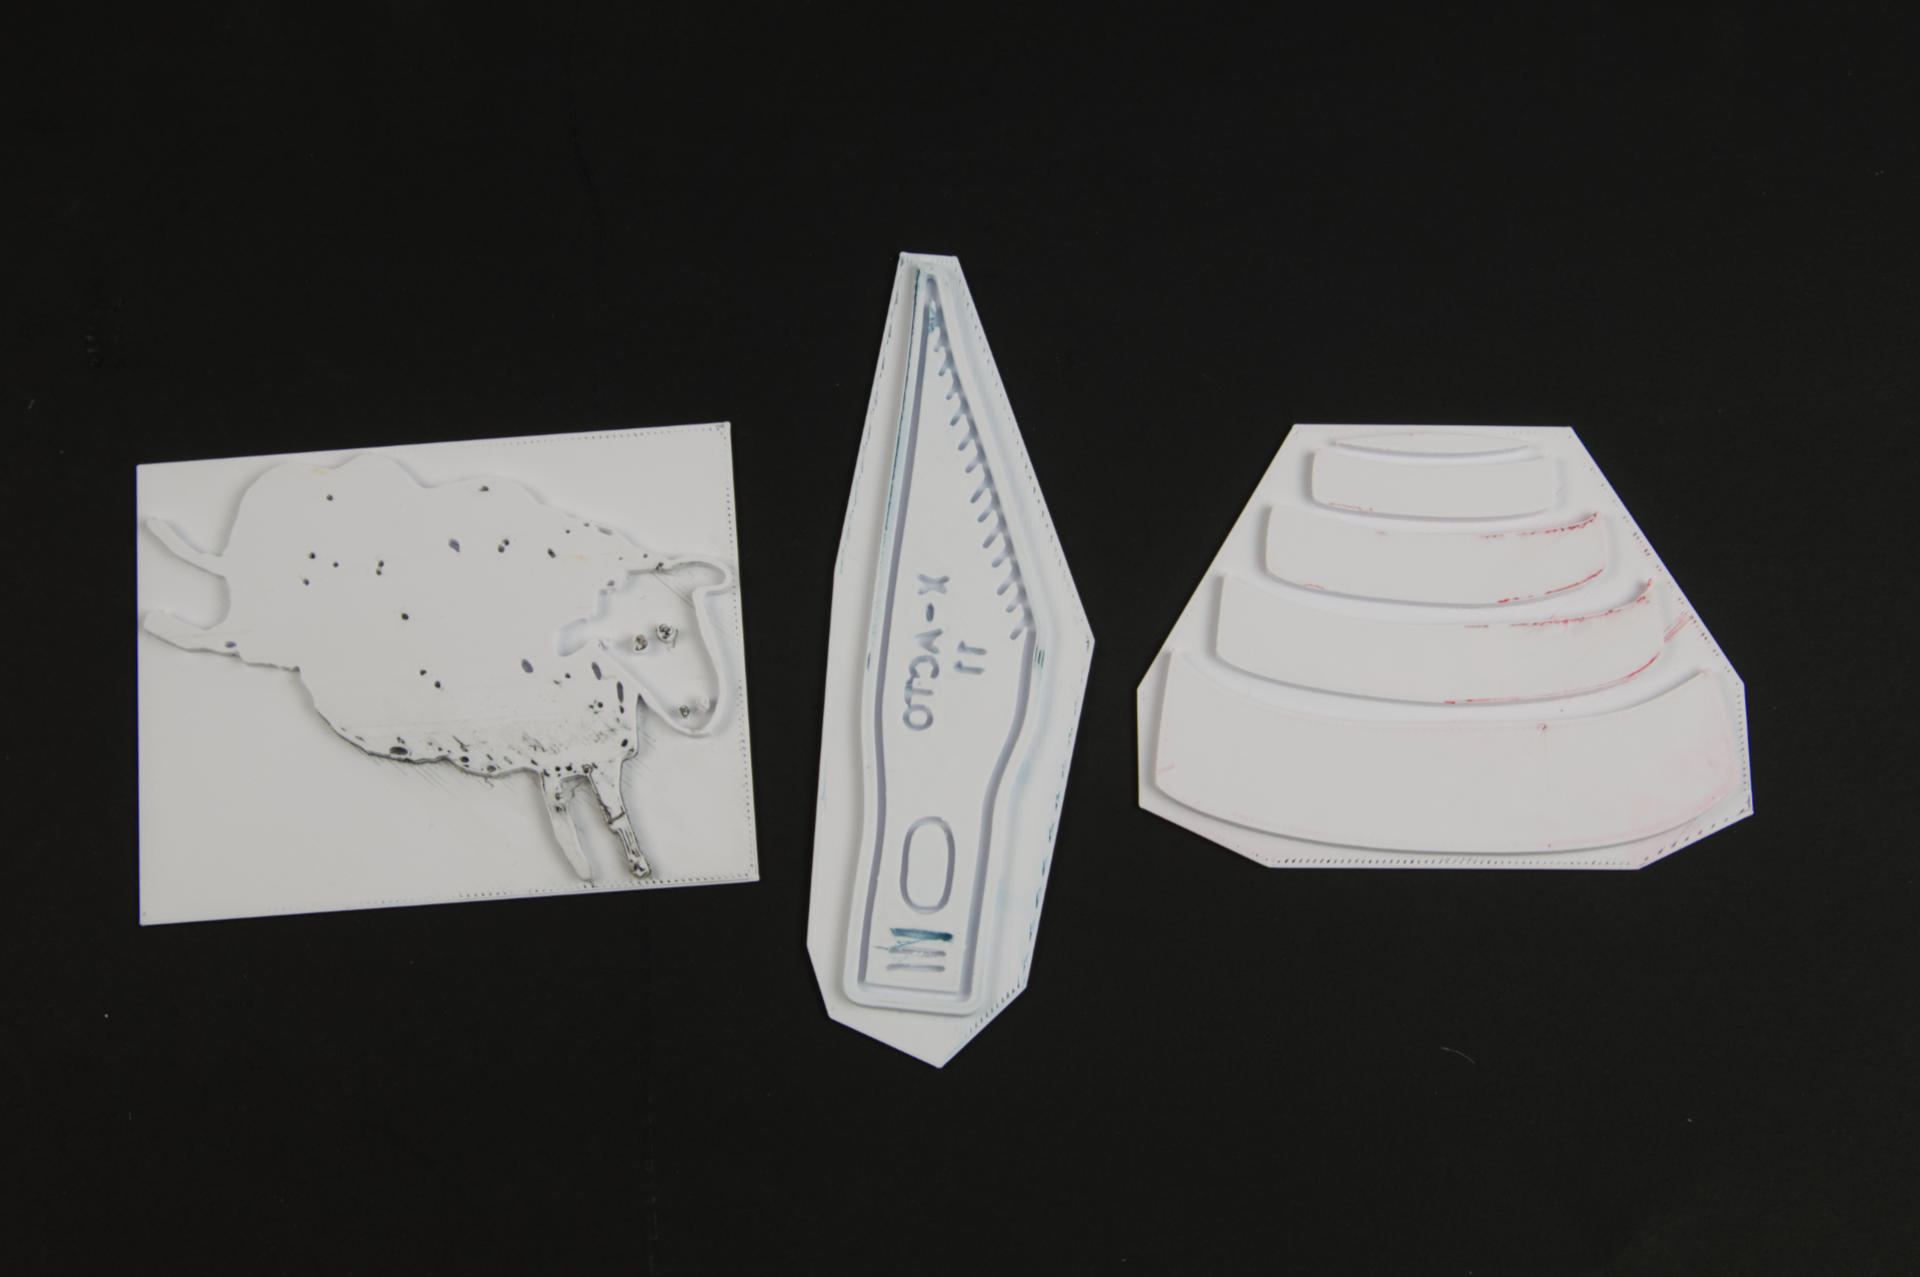
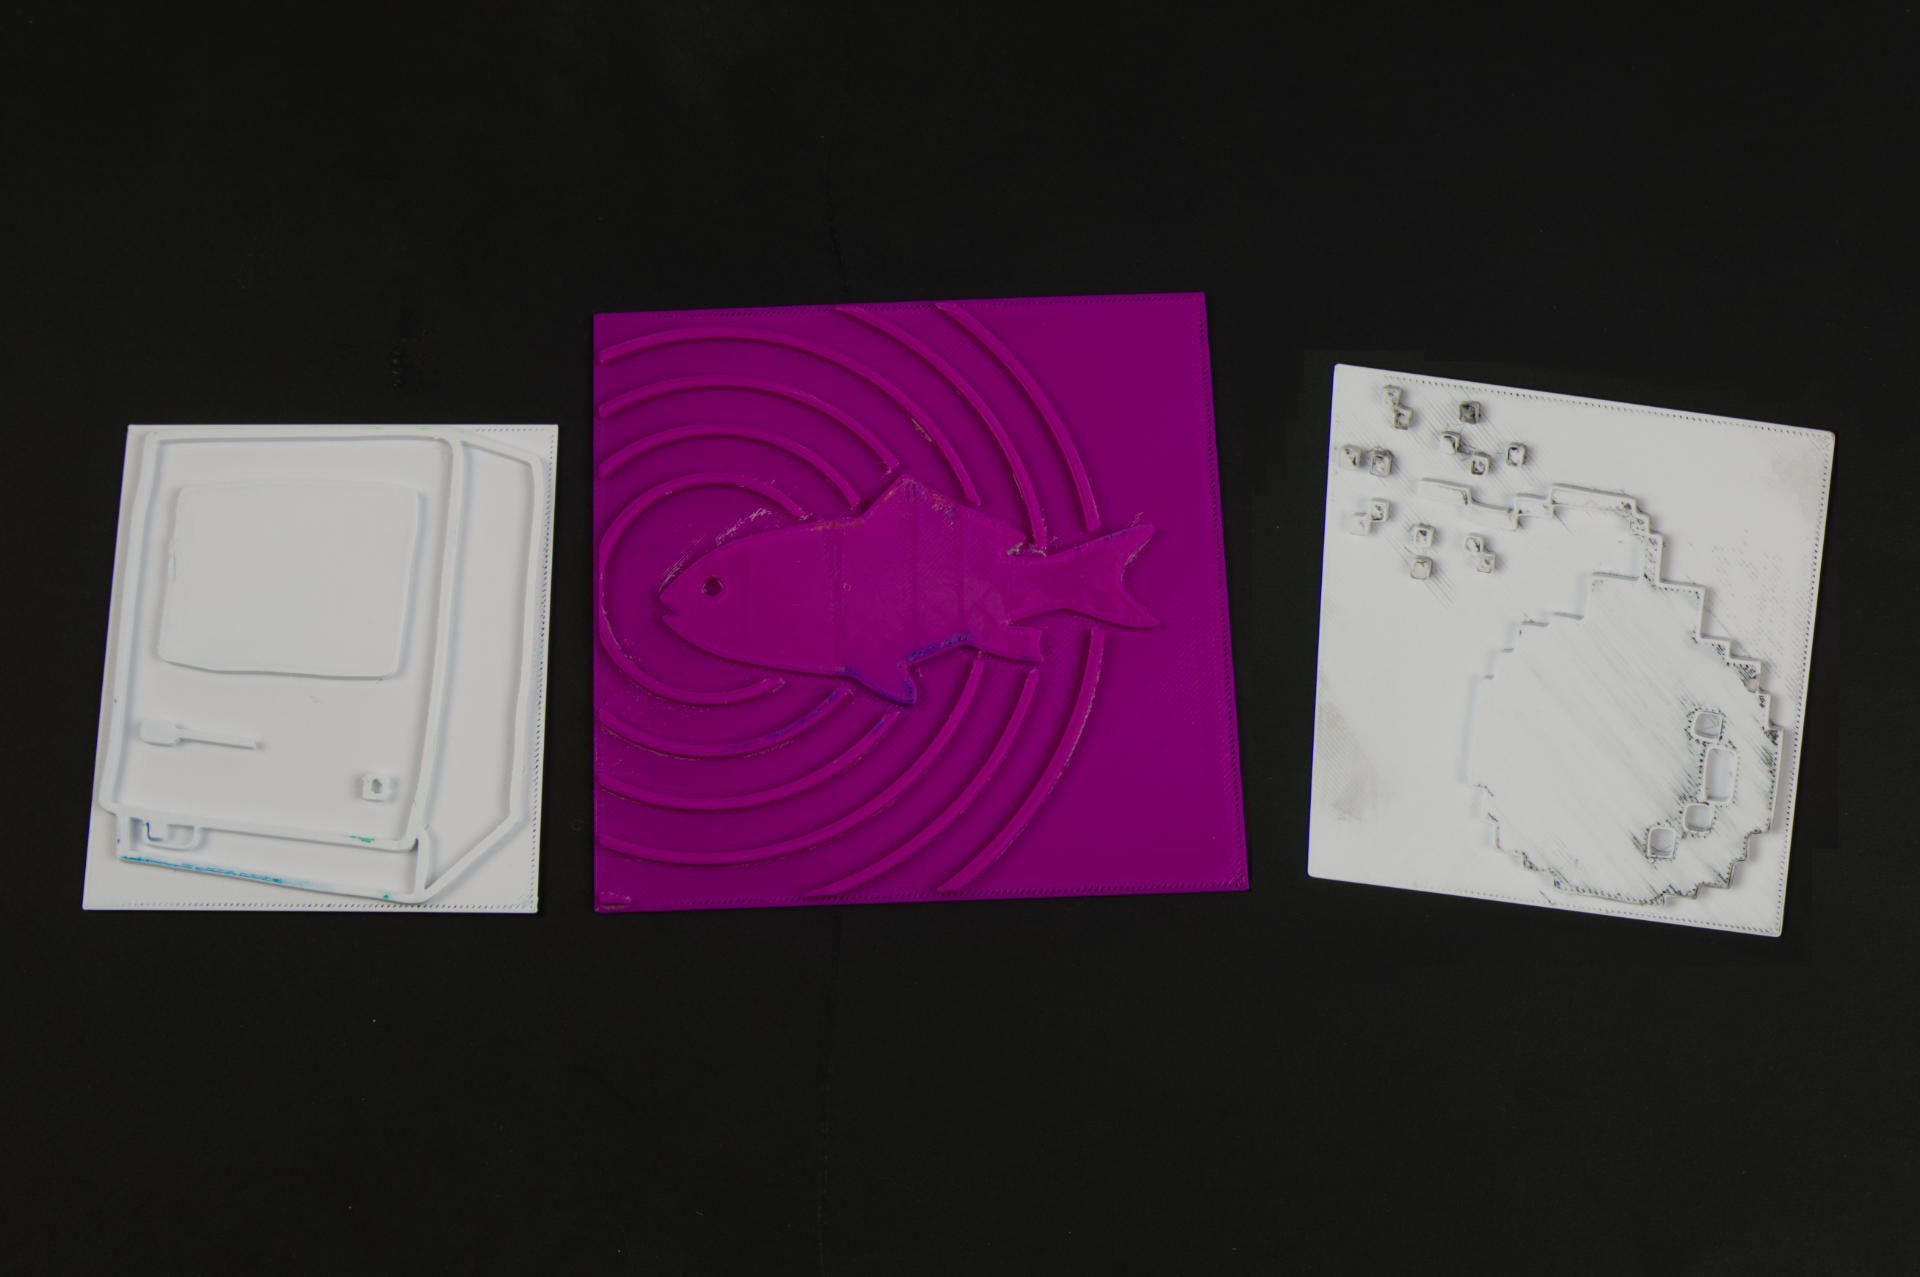
Every plate I used for my January 2024 prints (over 40 at this point) was 3D printed.

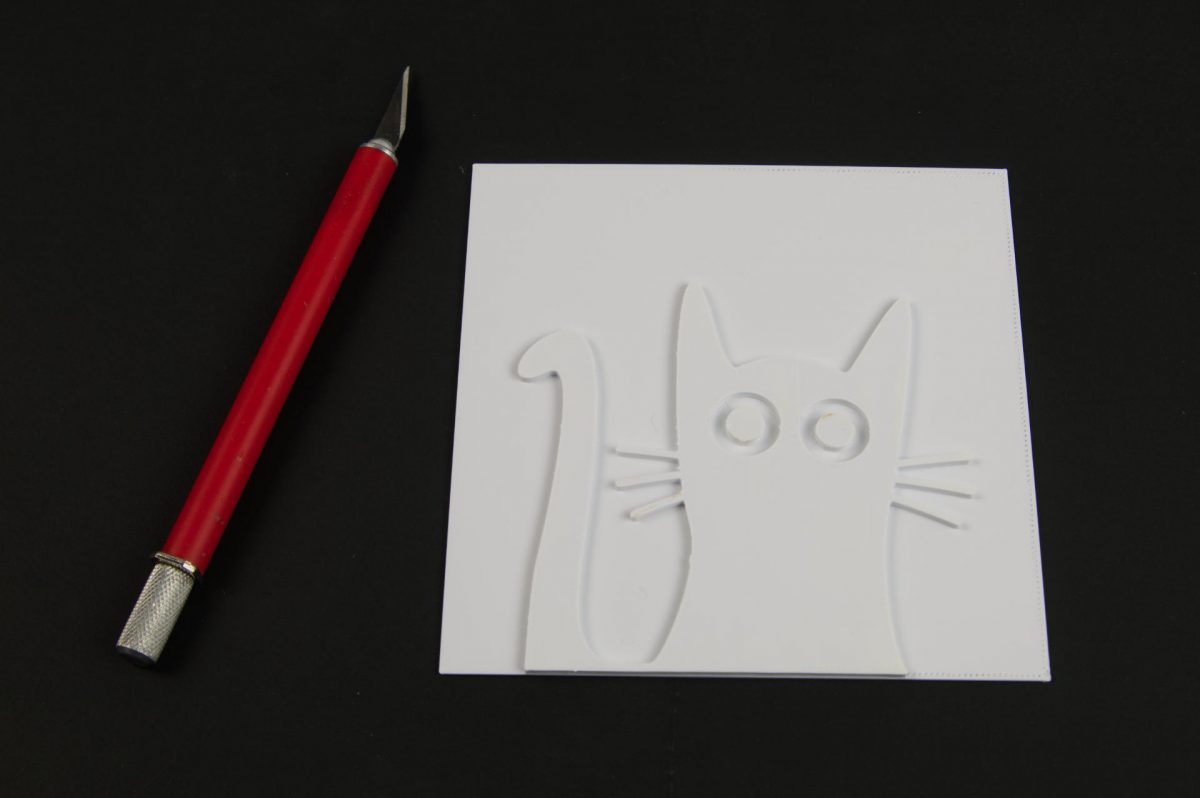
For wood plates I would typically sand them and then coat with shellac, which is not completely necessary but can help with the top surface. With 3D printed plastic plates I turn on the ironing feature in the slicer software to give the topmost layer of the print a nice smooth surface. I do tend to sand the plastic plates as well, typically less than a minute with 400 to 800 grit sandpaper.

Ironing doesn’t always work perfect, so the sanding helps knock down any little imperfections on the top surface. Again, it’s not a lot of sanding, just enough so the surface looks smooth with no (or very few) imperfections. Of course the imperfections might be what you are going for! The one thing you’ll see in linocut prints is chatter. (Chatter is the unwanted printing caused by areas that were not cut away enough in a linocut.)

I think chatter adds character and sometimes it adds a lot to a print. Since 3D printing is an additive process there is no natural chatter like in linocut, but sometimes you do get a sort of reverse chatter where a print doesn’t have a perfect surface and you get interesting artifacts when using a 3D printed plate. I am 100% fine with that and I embrace it.

Now, 3D printing doesn’t always work. For small fine detail it can be tricky, especially depending on your 3D printer and how well tuned it is. Simple designs tend to work best, at least for the smaller plates I’ve been making. The laser cutter still wins for “thrown any image file at it set to etch” and it’ll probably work. For 3D printed plates you’ll also have issues with really fine lines. (Granted, fine lines can also be an issue with the laser cutter but they seem easier to fix.)

One more advantage of 3D printed plates is that I feel like the plastic will last forever (oh, maybe that’s a bad thing?) while the wood plates do seem to wear after repeated use and washing. Remember, the wood I use is thin Baltic Birch, not hardwood like letterpress.

As for the filament, I use plain old PLA. Often it’s MatterHackers MH filament, but I’ve used PolyMaker PolyTerra filament as well. Really any regular PLA should work just fine. Color doesn’t matter, but I ended up using white for a lot of plates because I had white filament loaded, and it is pretty easy to see the ink on the plate, unless it’s white ink of course.

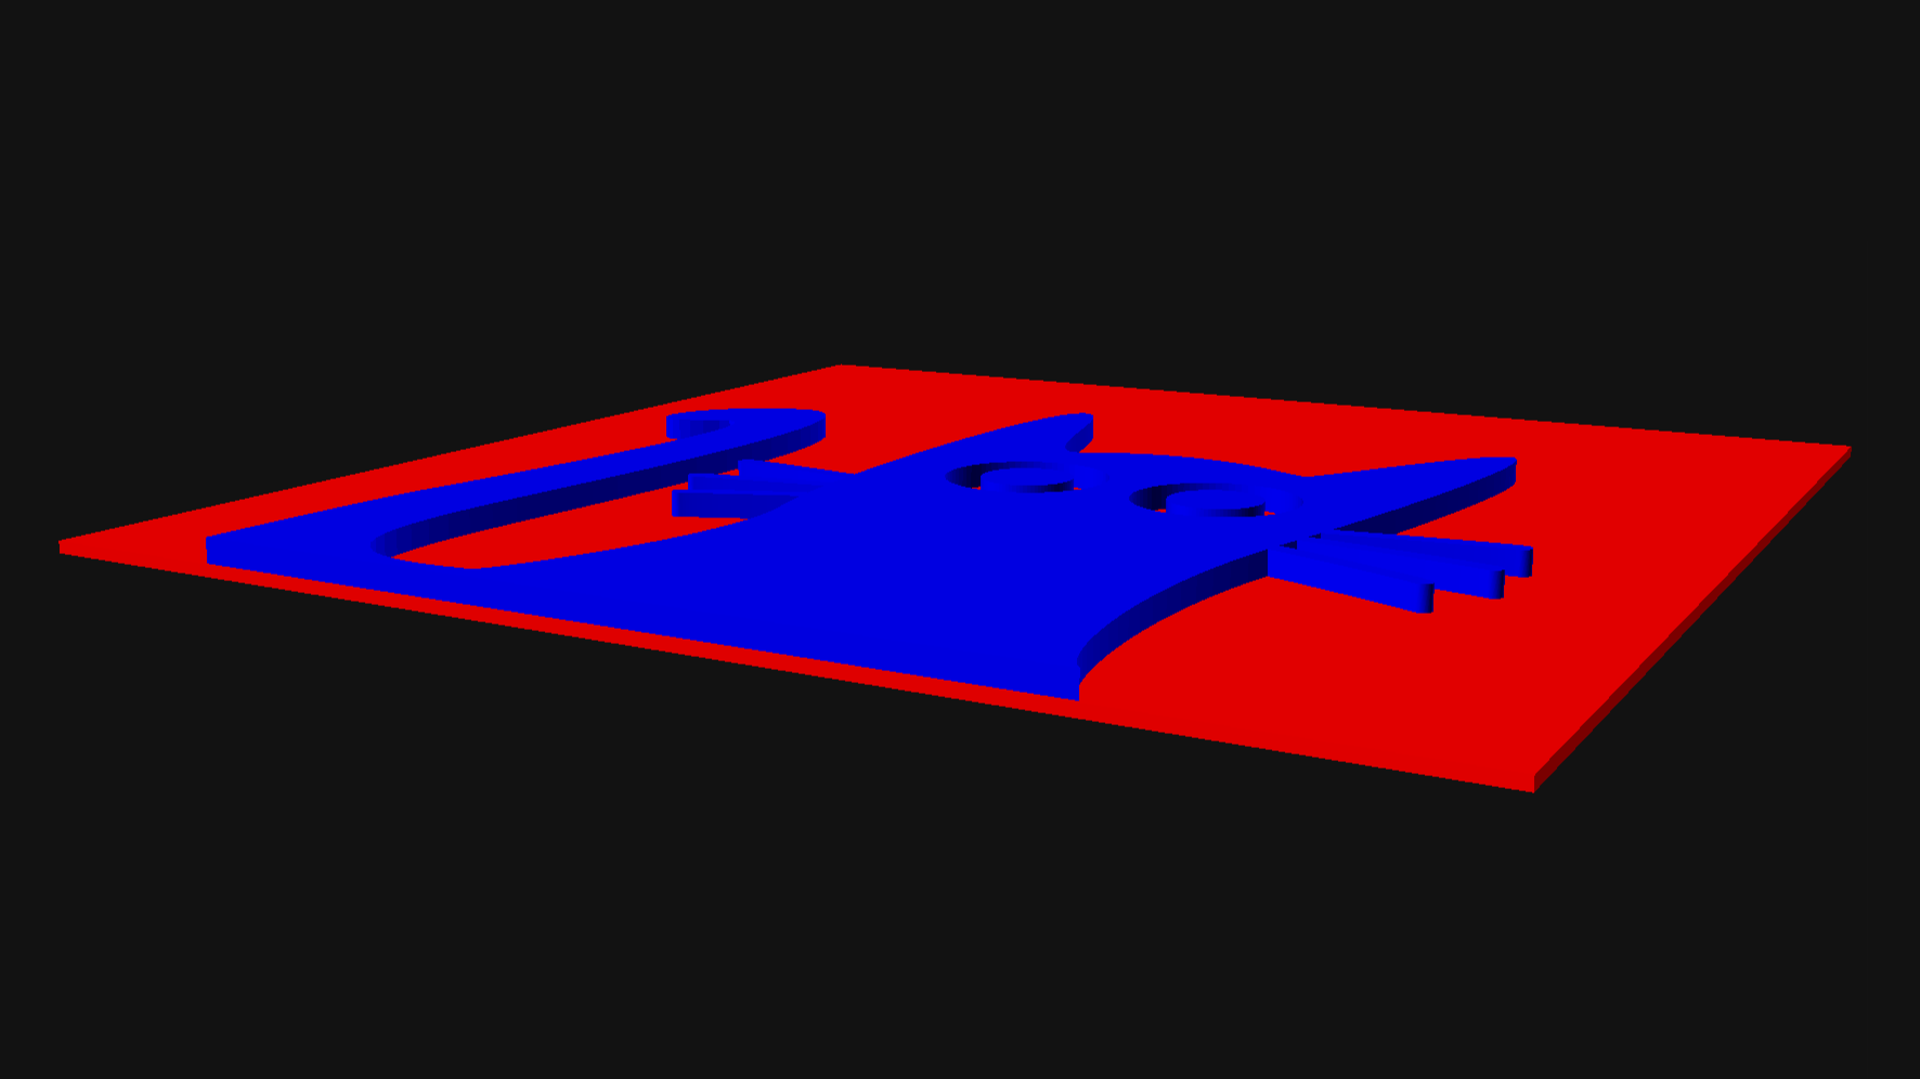
I should note, I am very much about making things easy because that means I am more likely to do it. If making plates is a pain then I won’t want to do it. Laser etching the plates was a little bit of a pain, but not too bad. The thing I like about 3D printing the plates is that I can create the file and then send it to the printer and in about an hour I’ve got a plate. I don’t have to babysit the 3D printer the way I do the laser cutter, and I can easily make the back part of each plate exactly 1mm tall, unlike with the laser etched plates.

So right now I 3D print my plates, and have well over a dozen prints made this way, and they work quite well, which means I will keep doing it. Stay Printing!

One more thing… since we are using digital fabrication to create the plate not only can we make a replacement plate, but we can change the scale quite easily. This is an advantage over analog plate making methods where you create a plate by hand.

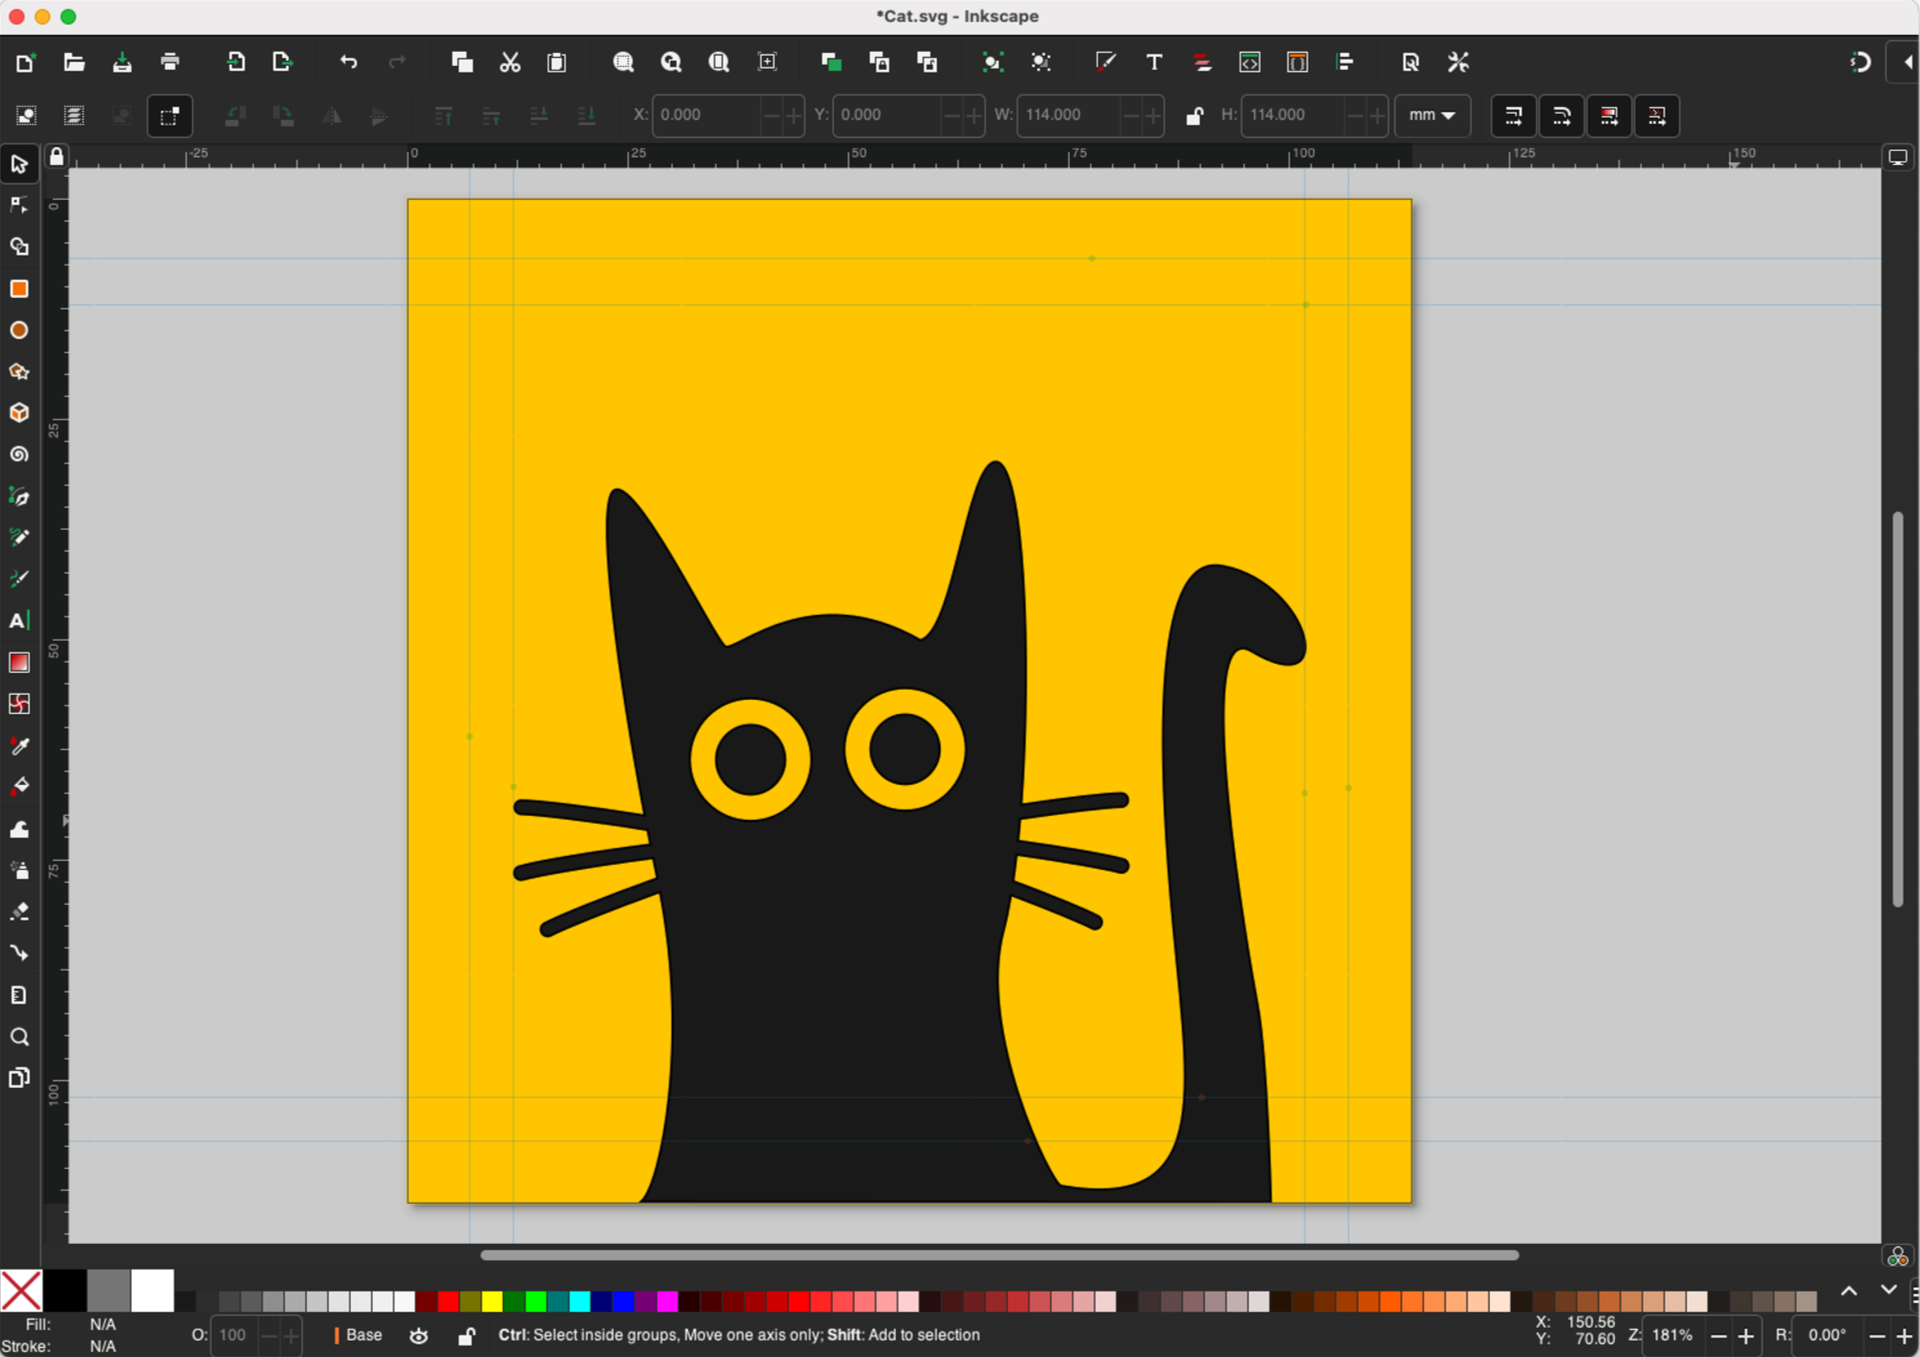
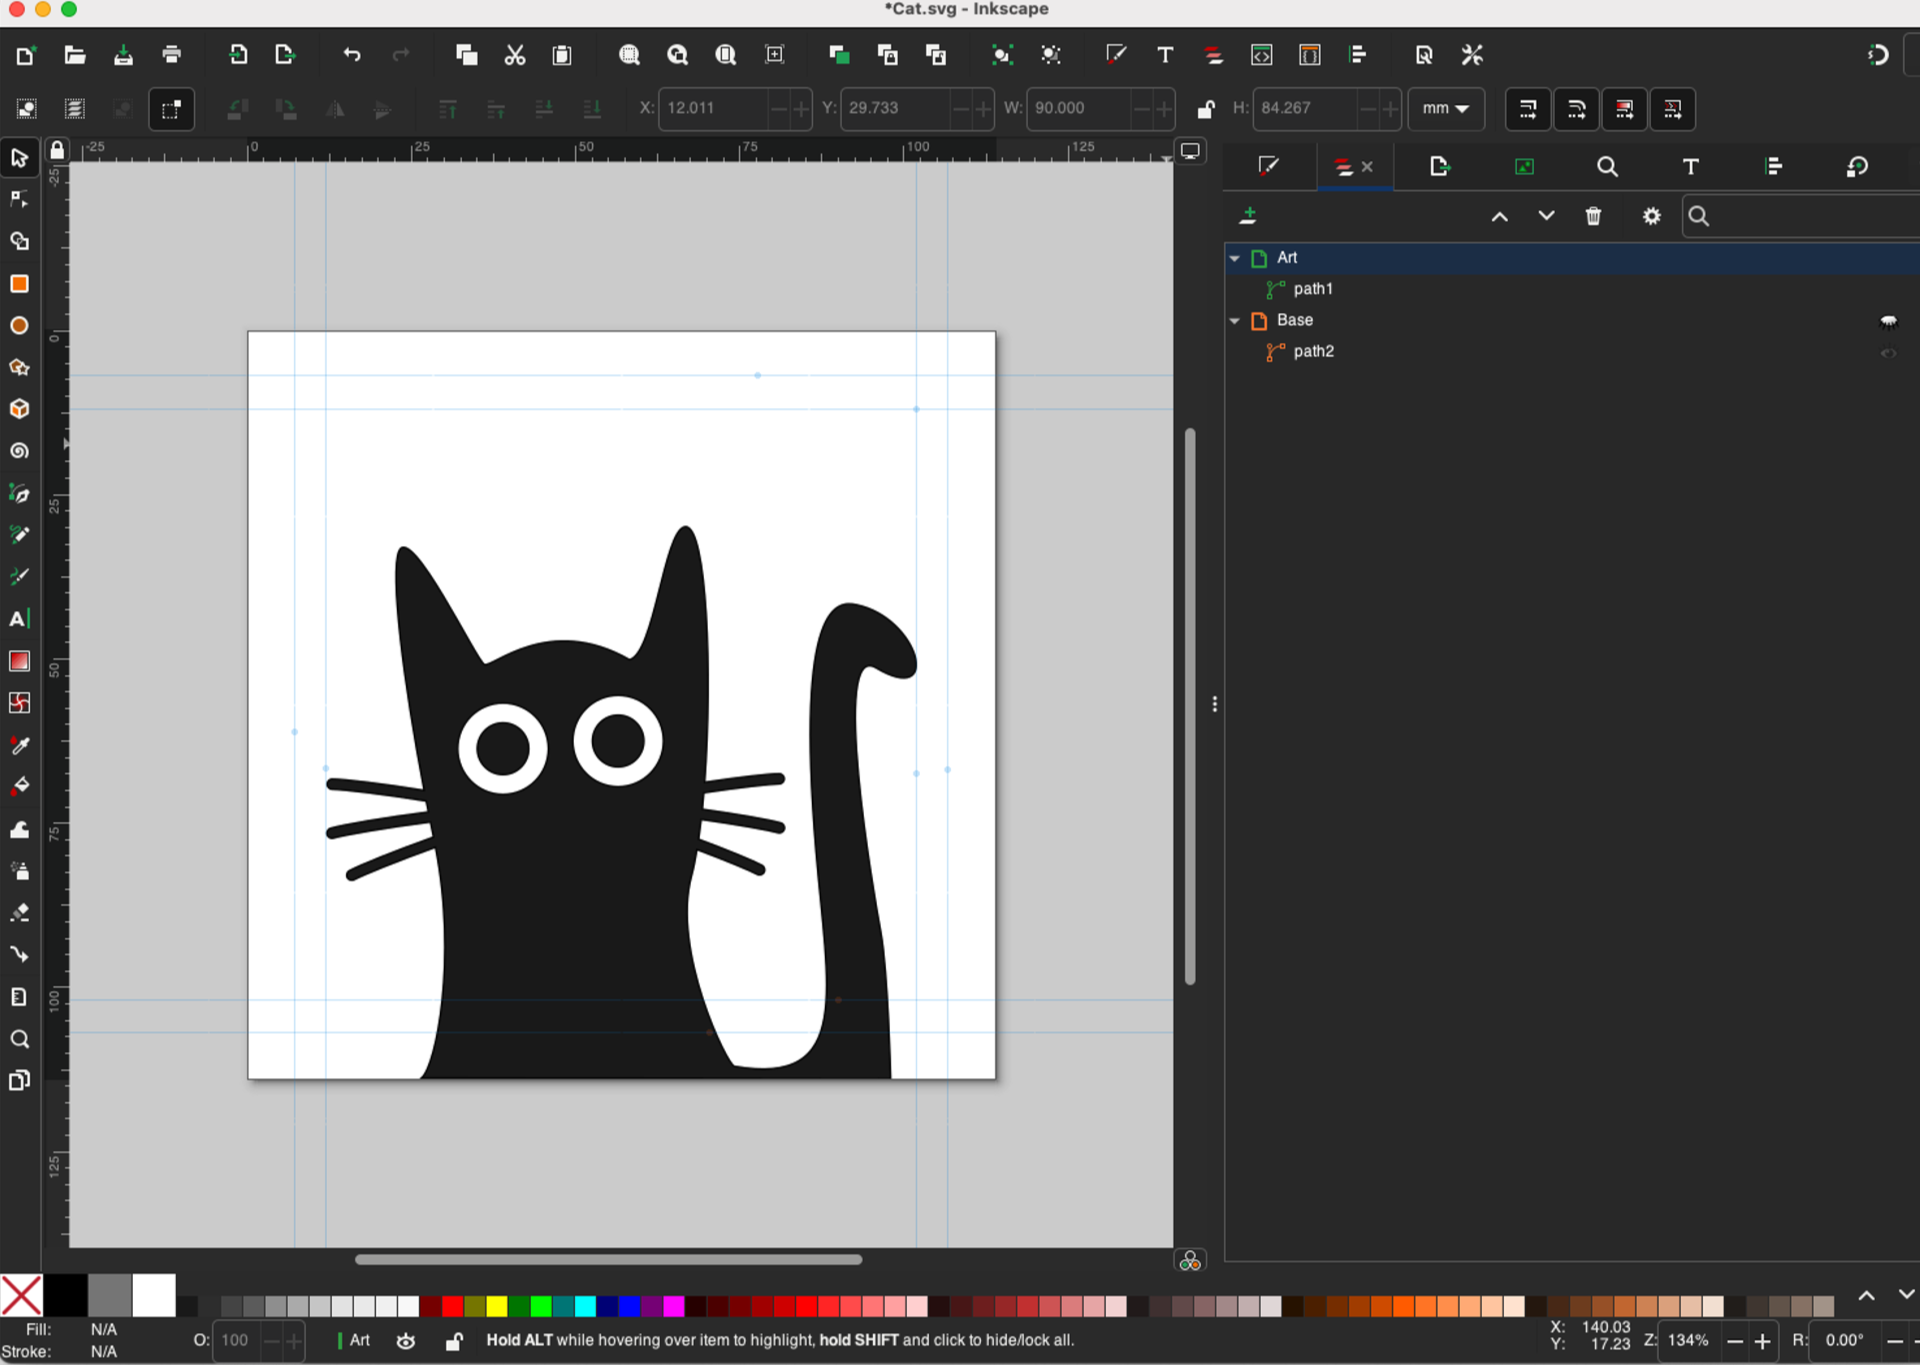
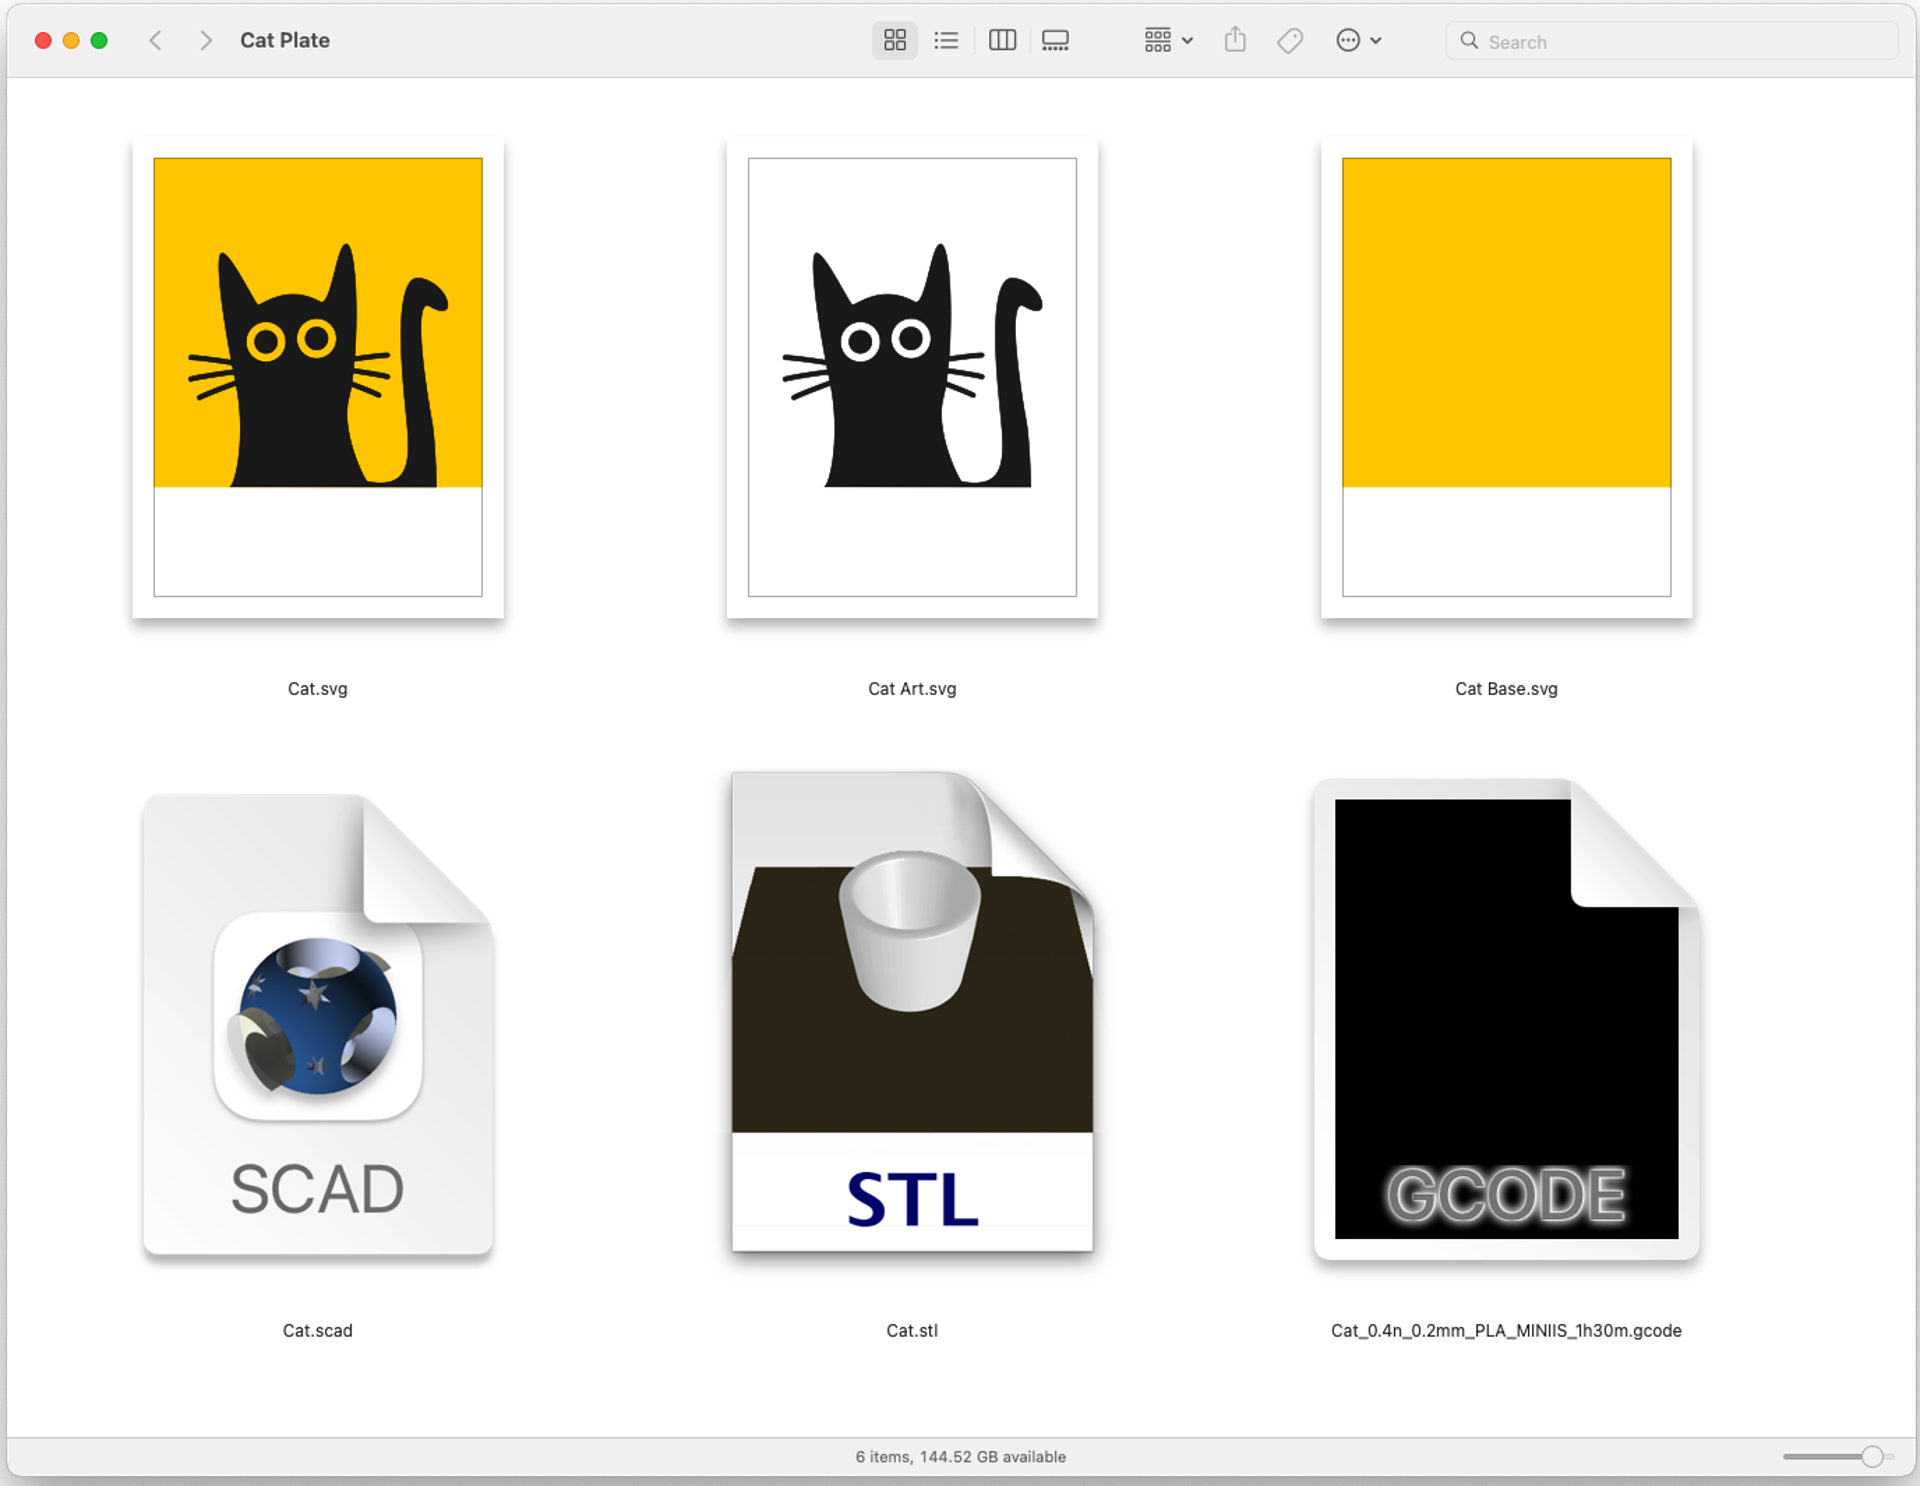
There’s another post that is more of a “How-To” for making 3D Printed Printing Plates using Inkscape and OpenSCAD, so check that one out as well.

Update: Someone asked if the plates are easy to clean. I use water-based inks so I just scrub in a sink with soap and hot water. Sometimes voids in the plate will get some ink in them that doesn’t come right out, but scrubbing with a toothbrush can help. Absolute worse-case since this is digital fabrication you can print a new plate.

Categories
Uncategorized

Speedball Brayer Holder

It’s a bad idea to store your brayers laying down on the roller, as they can flatten due to, you know, gravity (or mavity depending on your timeline) and since I don’t have a good place to hang mine I made a little holder that stores them standing upright.

Also, as I mentioned recently I use water-based inks, so that means I clean up my brayers with soap and water, so this holder makes a nice little drying rack for the brayers after a good washing.

The holes seem to fit all of the Speedball brayers I have, and others will not fit if the handles are a larger diameter (of course you can always adjust the OpenSCAD file to fix that.

So if you need to stand your Speedball brayers upright, and you have a 3D printer (or access to one) here ya go!

You can get the STL and .scad file from Printables.com – Speedball Brayer Holder. Print it if you need it!


Note: This post contains an Affiliate Link. Read More.

Categories
Uncategorized

Gallery 69 – Tyler Tork

Hello and welcome to yet another installment of the highlighting of an artist whose work is featured in Gallery 69! Tyler Tork is actually a VIP in the world of Free Little Art Galleries as he runs the web site freelittleartgalleries.art, and that’s how I met him. I listed Gallery 69 there and then he got in touch with me saying he’d be passing through town and was interested in stopping by!

And he did, and he brought some art for the gallery! He also had books, and I bought a copy of The Goodnight Agency for my partner, who happens to enjoy and teach literature. Tyler also makes art and other interesting/strange things, so check that out as well.

Some of Tyler’s things are 3D printed, and I’m pretty sure you remember that I’ve been 3D printing things since around 2011 or so. The chain pulls and light switch plate are 3D printed! The earrings are from another book Tyler wrote titled “The Deep End”. (I also really like the “Sad Computer Guy” magnet.)

I had a bit of a hiatus curating the gallery in the past month due to some health issues, but I’ve also been making a lot of prints and just did a refresh of all new things! Tyler’s stuff is going in there today and I’ll be digging through the archives for more art and asking other artists I know to contribute in the new year so keep an eye on the gallery for more! I often posts photos of the gallery’s new stuff on Facebook, so go be my friend there maybe.

Oh! You can also find Tyler on Facebook and Instagram, so check those out!

Gallery 69 is a Free Little Art Gallery located on 69th street just north of Locust street in the Enderis Park neighborhood of Milwaukee, Wisconsin.

Categories
Uncategorized

Fancy Sanding Blocks

About a year ago I “designed” (ha ha!) and 3D printed the Super Boring Sanding Block which has served me well for sanding miscellaneous wood in the shop, but I found a nice parametric sanding block for OpenSCAD so I thought I’d give it a try.

You can adjust the length, width, and height, and basically make it any size you want. I made mine to fit the sheets of sandpaper I normally buy. I’ve now got six of them with various grit for each one so I can just grab the right one and get to work. (I also added labels to each using the Niimbot.)

My one complaint (which someone else also had) is that you can’t easily figure out the size needed to fit a specific length of sandpaper. I don’t know if there is some OpenSCAD wizardry or maths that would do this for you, but my solution was to print a really thin version (repeatedly) and adjusting the numbers until it properly fit my sandpaper, then I made full width versions. Things like sanding blocks are a perfect match for 3D printing.

Categories
Uncategorized

3D Printed Mould and Deckle

NOTE: STL files are now available. Scroll to the bottom of this post.

Back in May 2023 I 3D printed a mould and deckle in an attempt to make my own paper. It worked, but was not optimal. I tried again, and wanted a slightly larger mould and deckle to make larger paper. It worked, but I didn’t love it since I had to print it in two parts and glue it together. Design is about iteration, right? I think I’ve got a good one now…

For this version I got the model just right. I did a number of test prints to make sure the wall thickness for the inside grid was correct, and I spent some time getting the magnet holes right. Yes, the magnets. Lots of mould and deckles are just two wooden frames you hold together in your hands, but I figured since I was designing my own I would add in magnets that would tightly hold the mould and the deckle together with a piece of metal screen between them.

So I added magnet holes in the four corners of each part and press-fit magnets into place. This time I made the pockets deeper so the magnets press in further down, which means they have really good holding strength when put together. You’ll notice the holes aren’t just holes, but have some little ridges, or “crush ribs” as well. The idea being that with 3D printed parts it can be difficult to get a perfect hole, so instead you just make the hole a little wider than needed, and add in some ribs so the magnet (or other round thing) just needs to slide against those, and if needed, can crush them a bit.

Hey, I guess I’m not the only one who likes the magic of magnets! Check out this video of Stephanie Hare and the mould and deckles she made with… magnets! (Or see them on her site.)

Of course you can always just glue the magnets in place. Since I’m now on my third fourth mould and deckle I wanted a way to remove them easily if I ever retire one and want those 8 magnets back.

I’ve mentioned before that you can do much much more than a simple square or rectangle, and you can 3D print a mould and deckle in any shape. I still want to experiment with that, as well as some other neat stuff. I like a plastic mould and deckle because (besides being easy) you don’t have to worry about warping like you do with wood, or having to use spar varnish or polyurethane to waterproof the wood. (I’ve talked about 3D printing versus using wood before.)

Oh, I should note one more thing. The reason I use window screen material is because I have a bunch of it from our old windows that we’ll never use for anything else. But, using a flexible screen material also makes it easy to remove the paper from the mould and deckle during the couching process by just pulling the screen off (after removing excess water with a sponge). (BTW, it’s pronounced ‘coo-ching’ not ‘cow-ching’.) I’ve found this a simple method of couching, though there are other methods and some special tools to assist with it if you want to explore other routes.

3D printing is a good fit for papermaking because it’s one of those things where you may need to build your own tools, and being able to rapidly iterate through ideas is handy. Okay, time to go make more paper!


Update! Files are now available.
Grab the STL files to print your own at Printables.com – Mould and Deckle.