Categories
Uncategorized

Game Show Buzzer System V3

Game Show Buzzer System

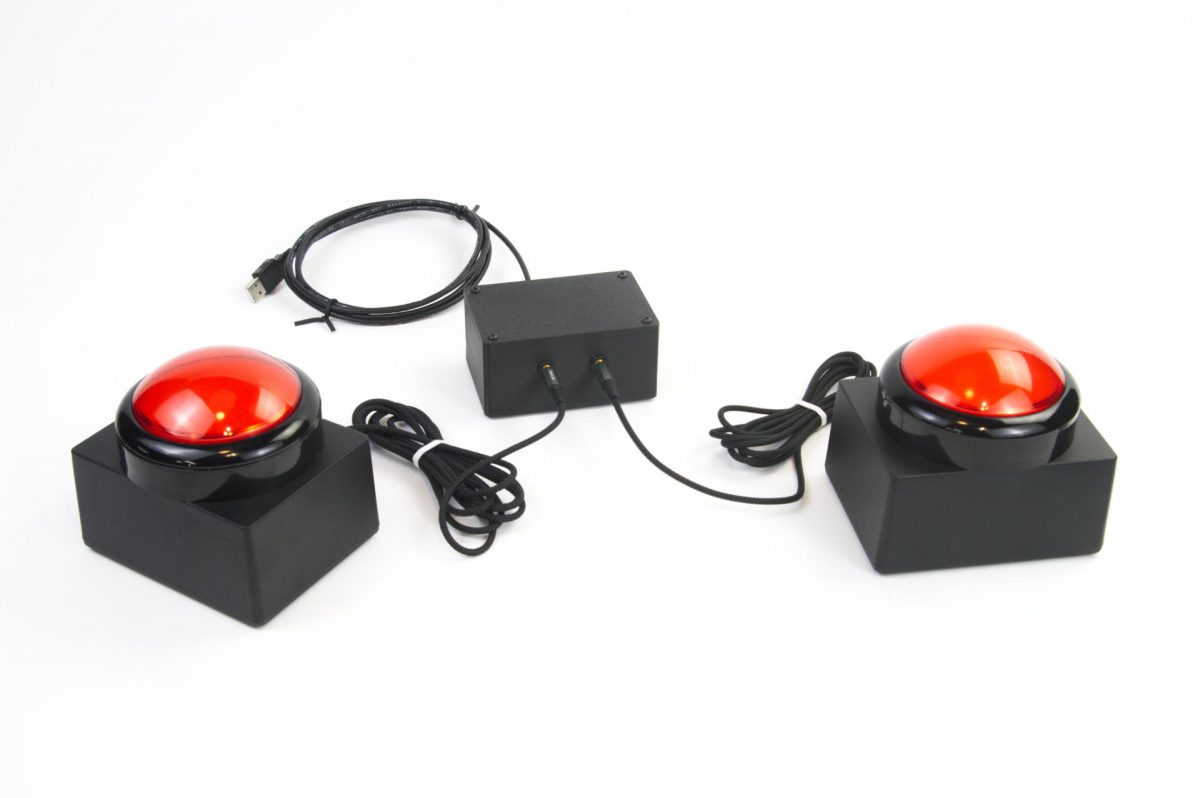
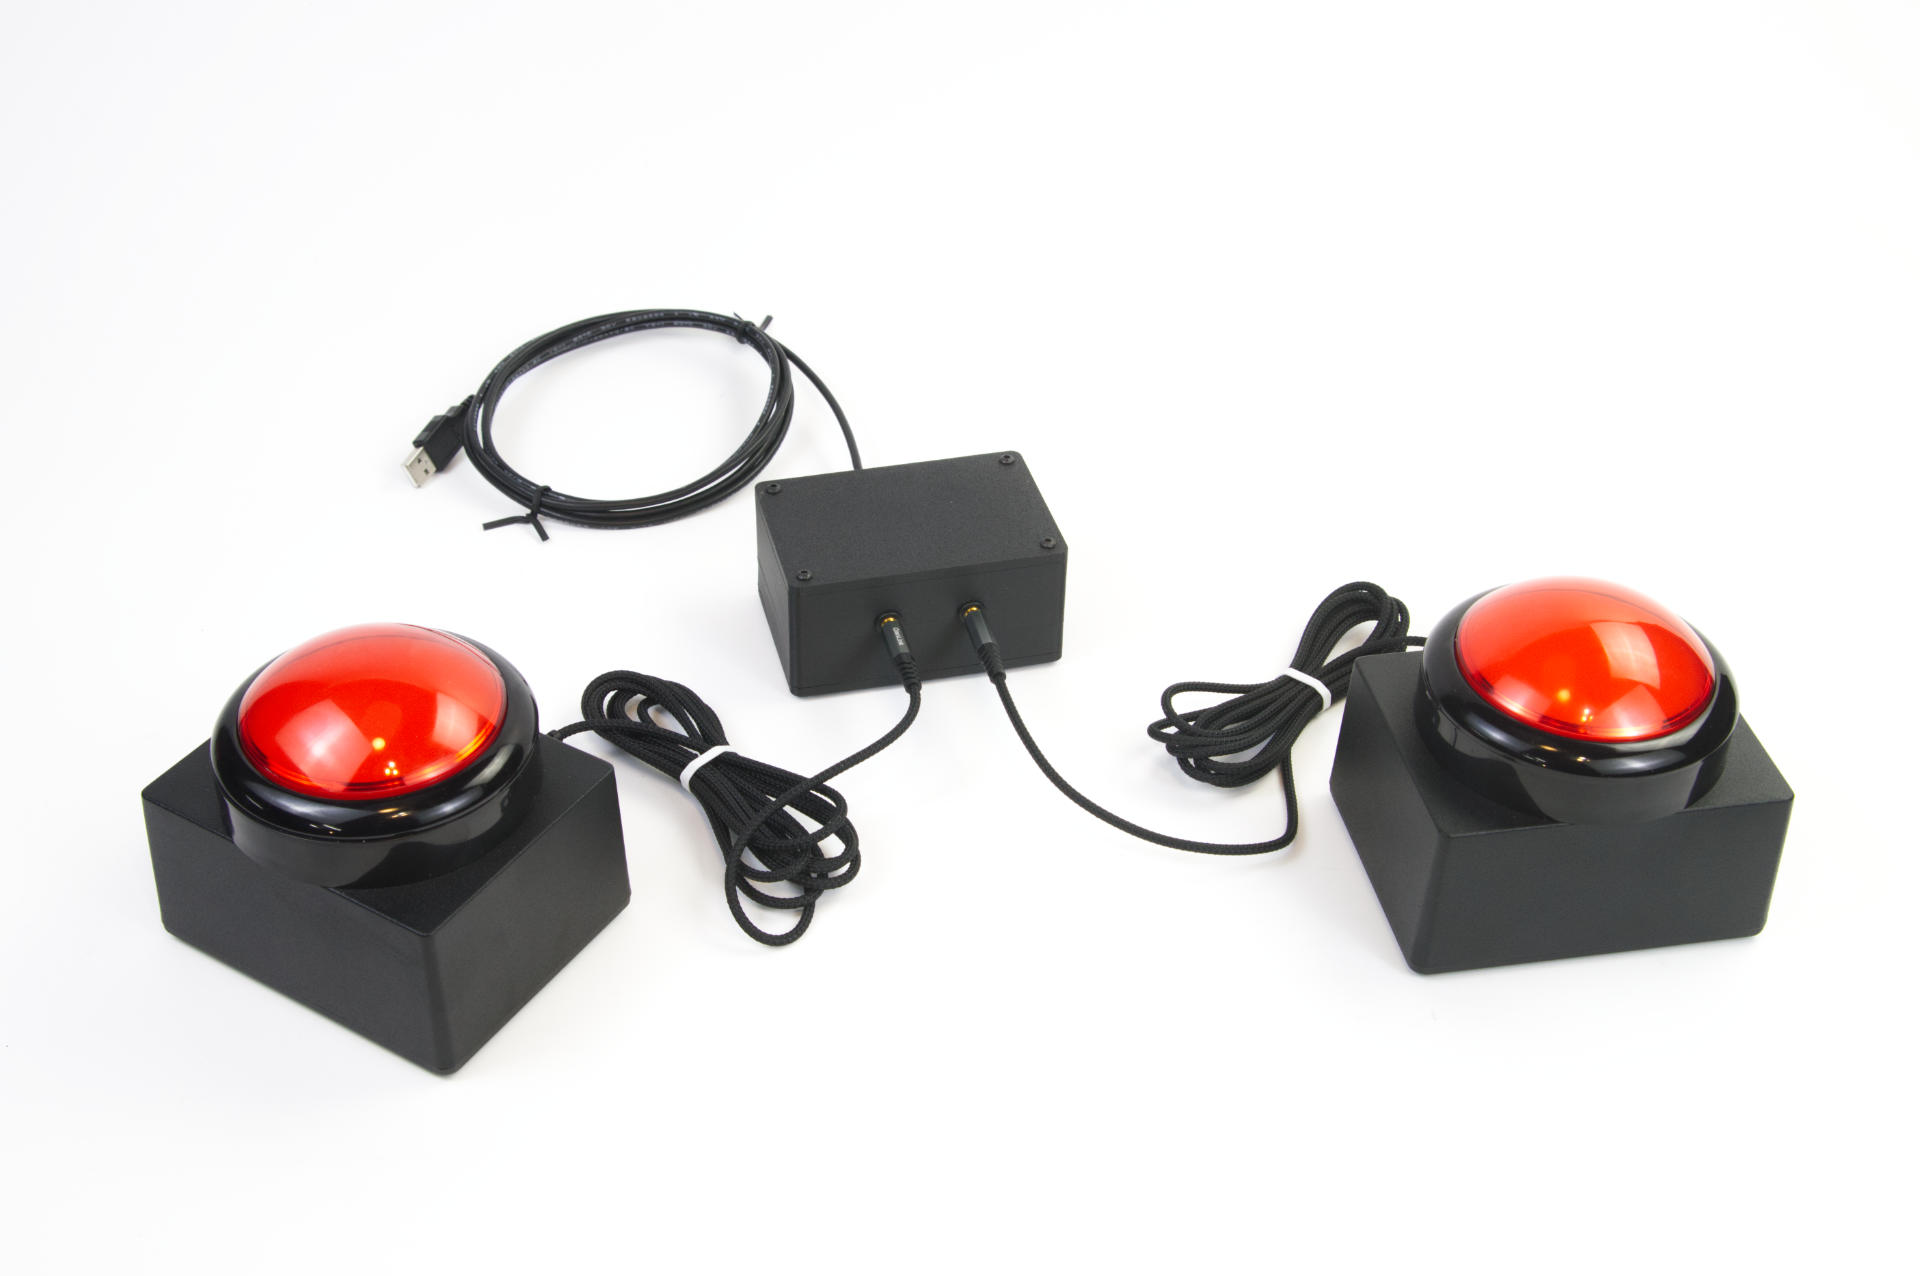
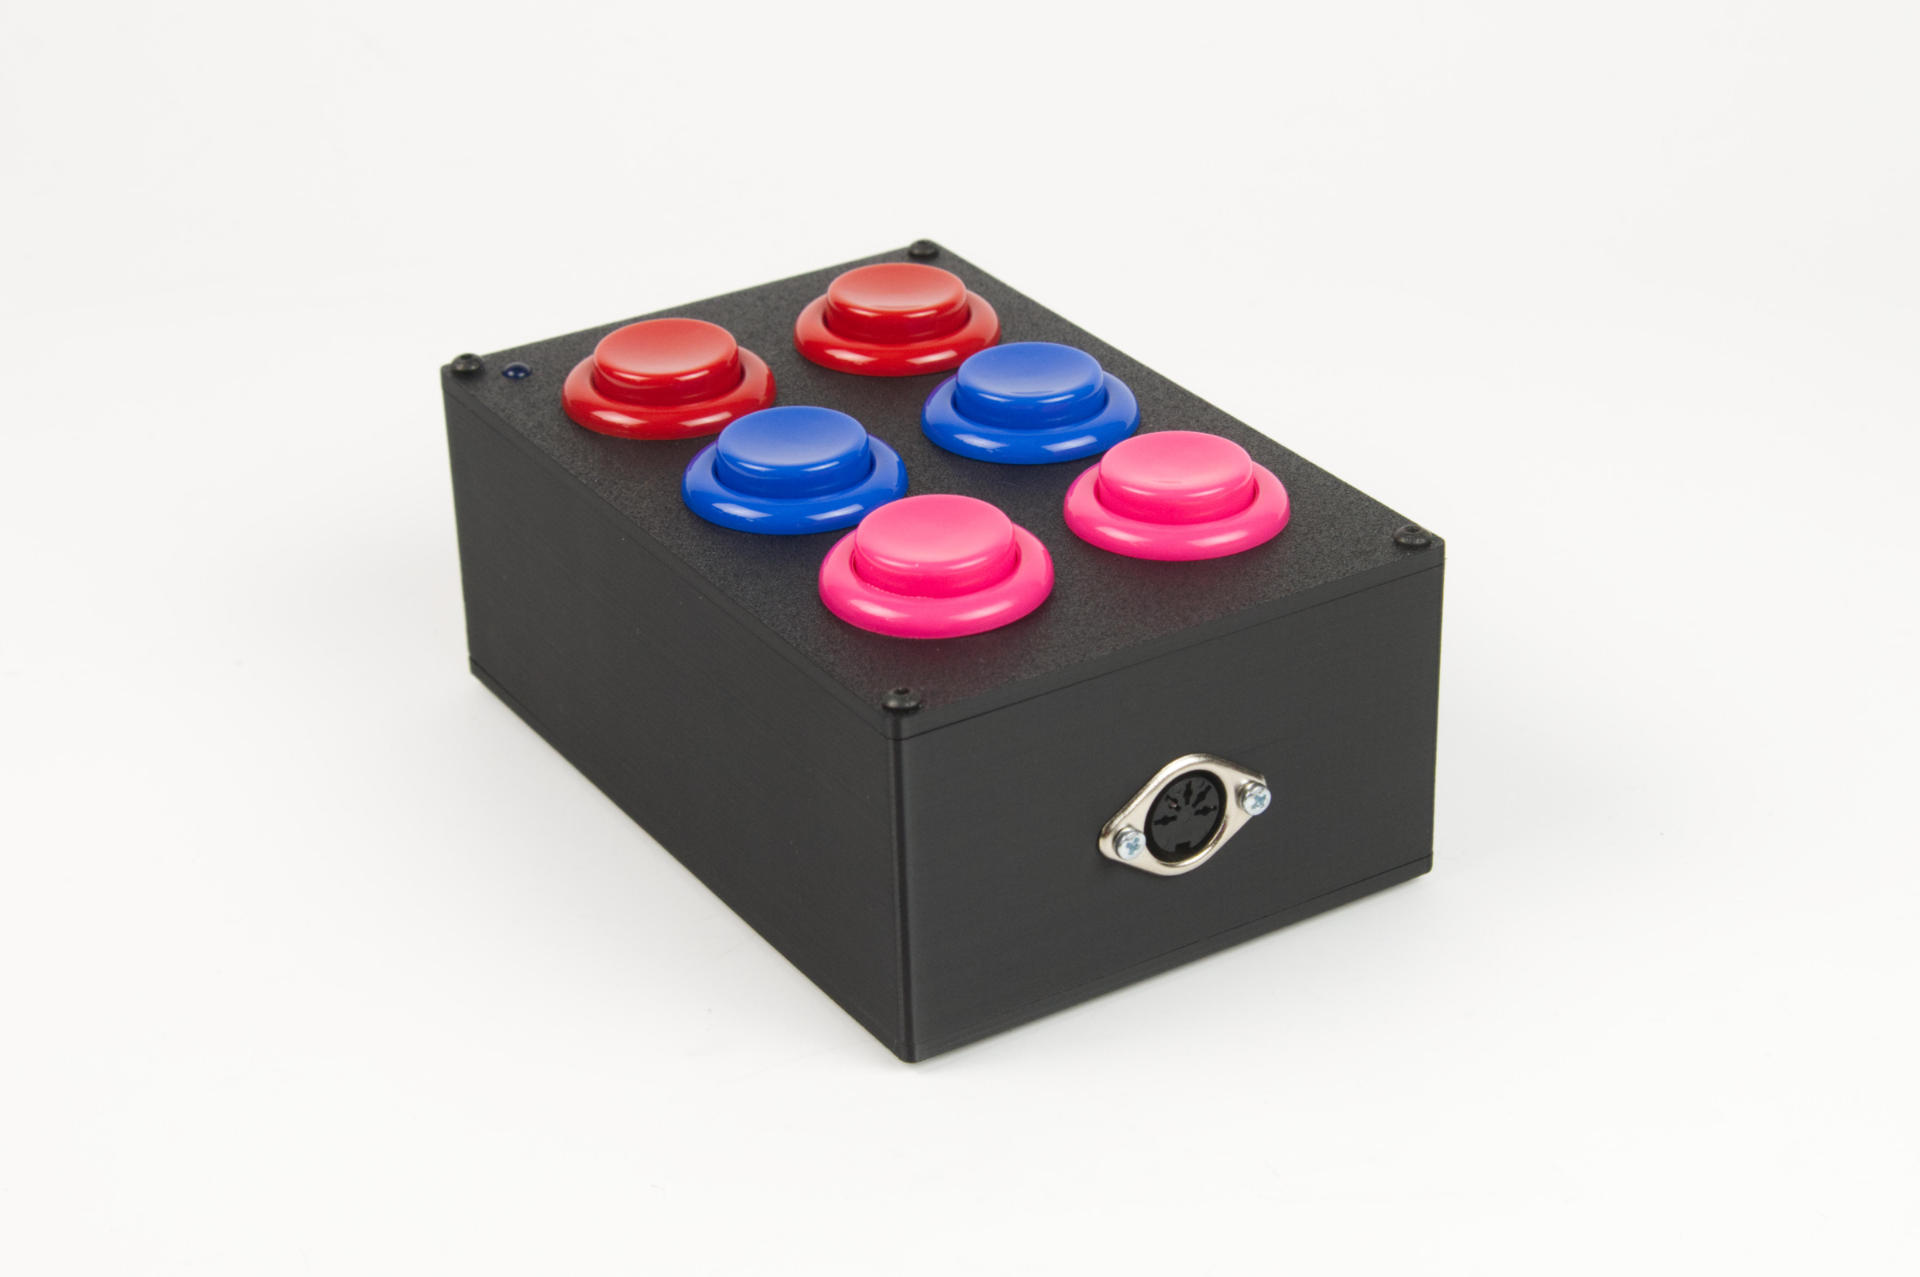
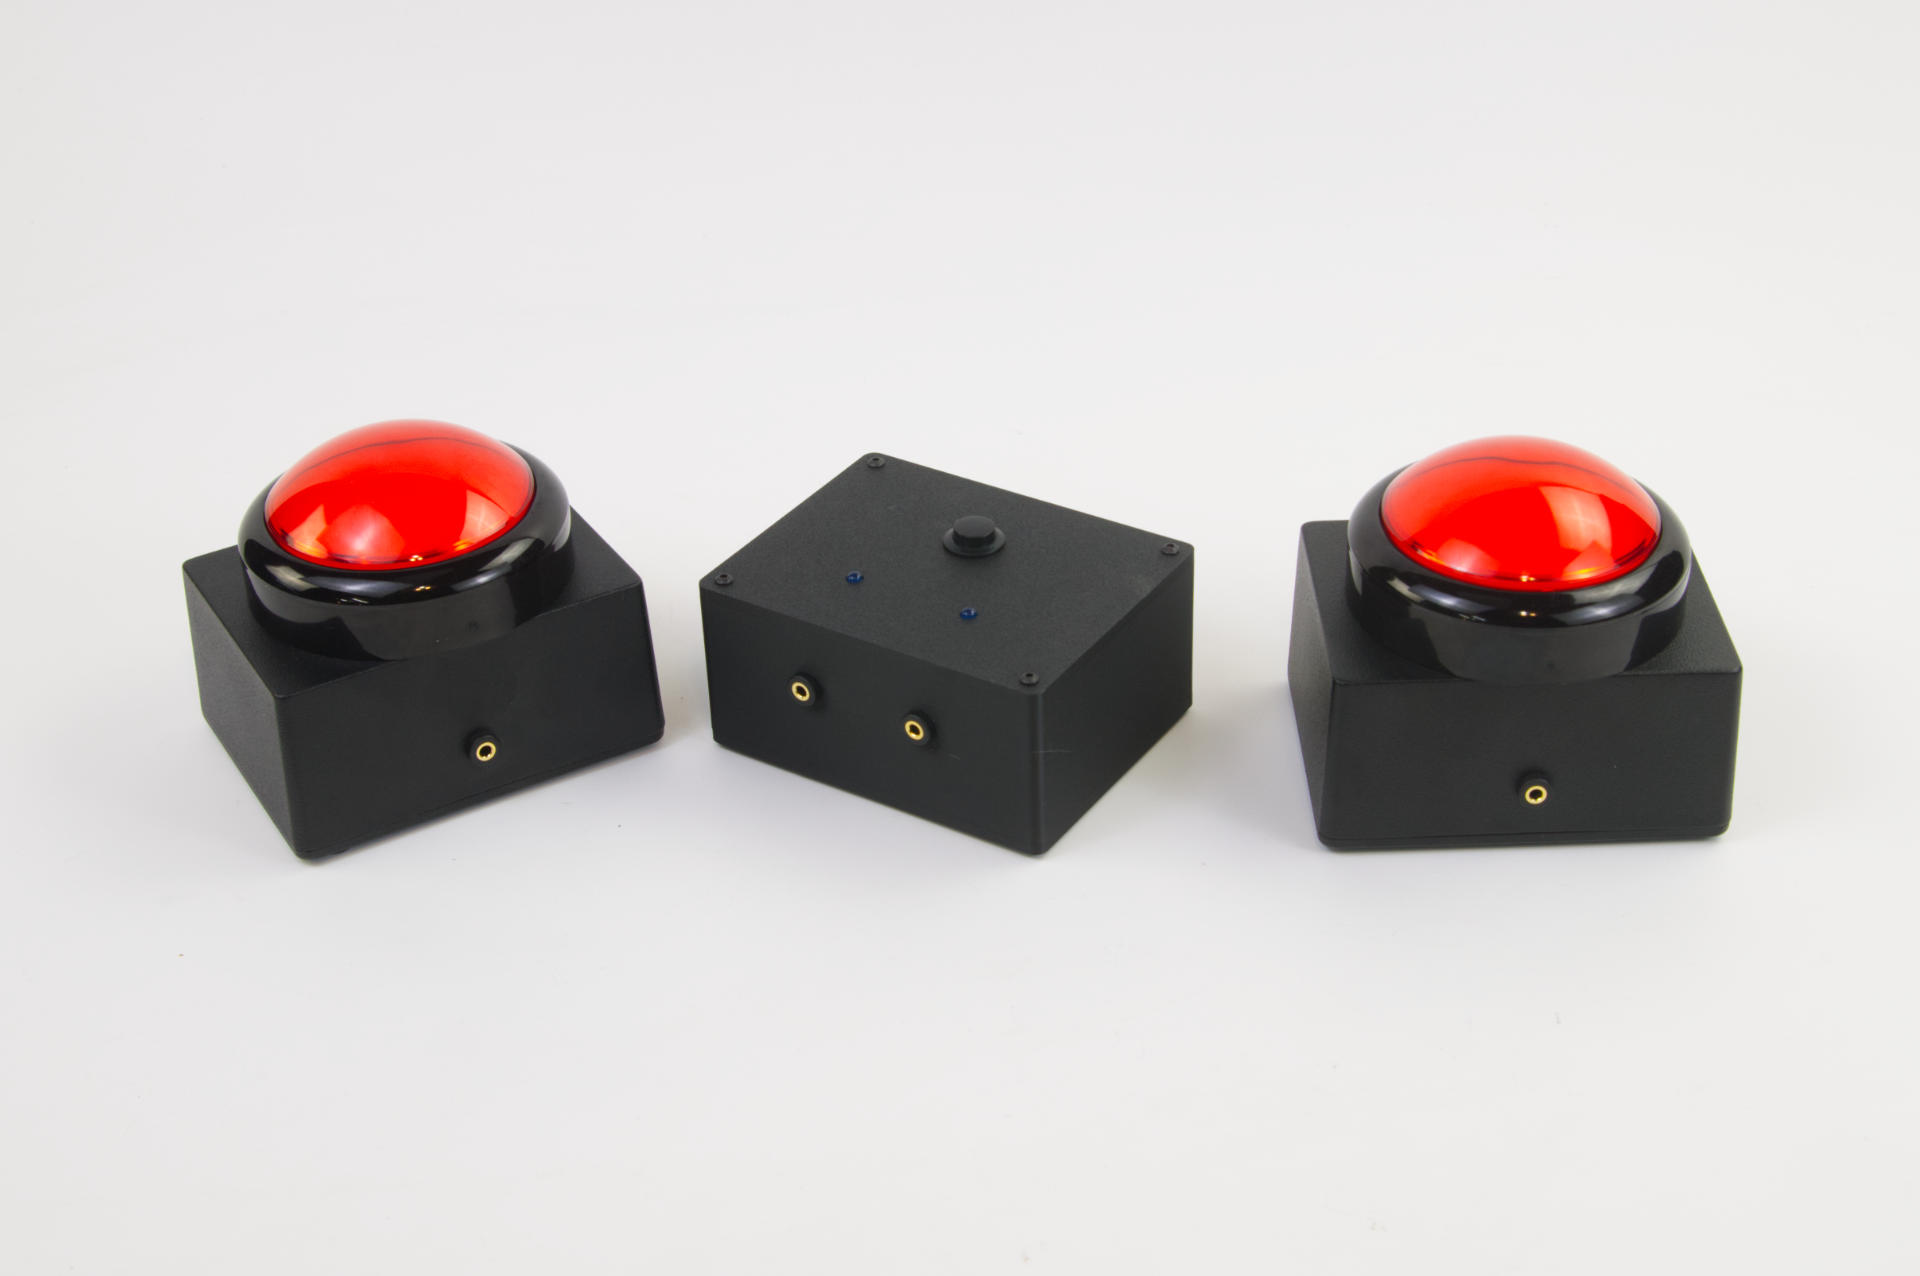
I built Game Show Buzzer System V2 earlier this year, and I had someone who wanted basically the same thing, so this is Game Show Buzzer System V3 with a few very minor tweaks. I’ve added LEDs into the control box so the host can see which player buzzed in.

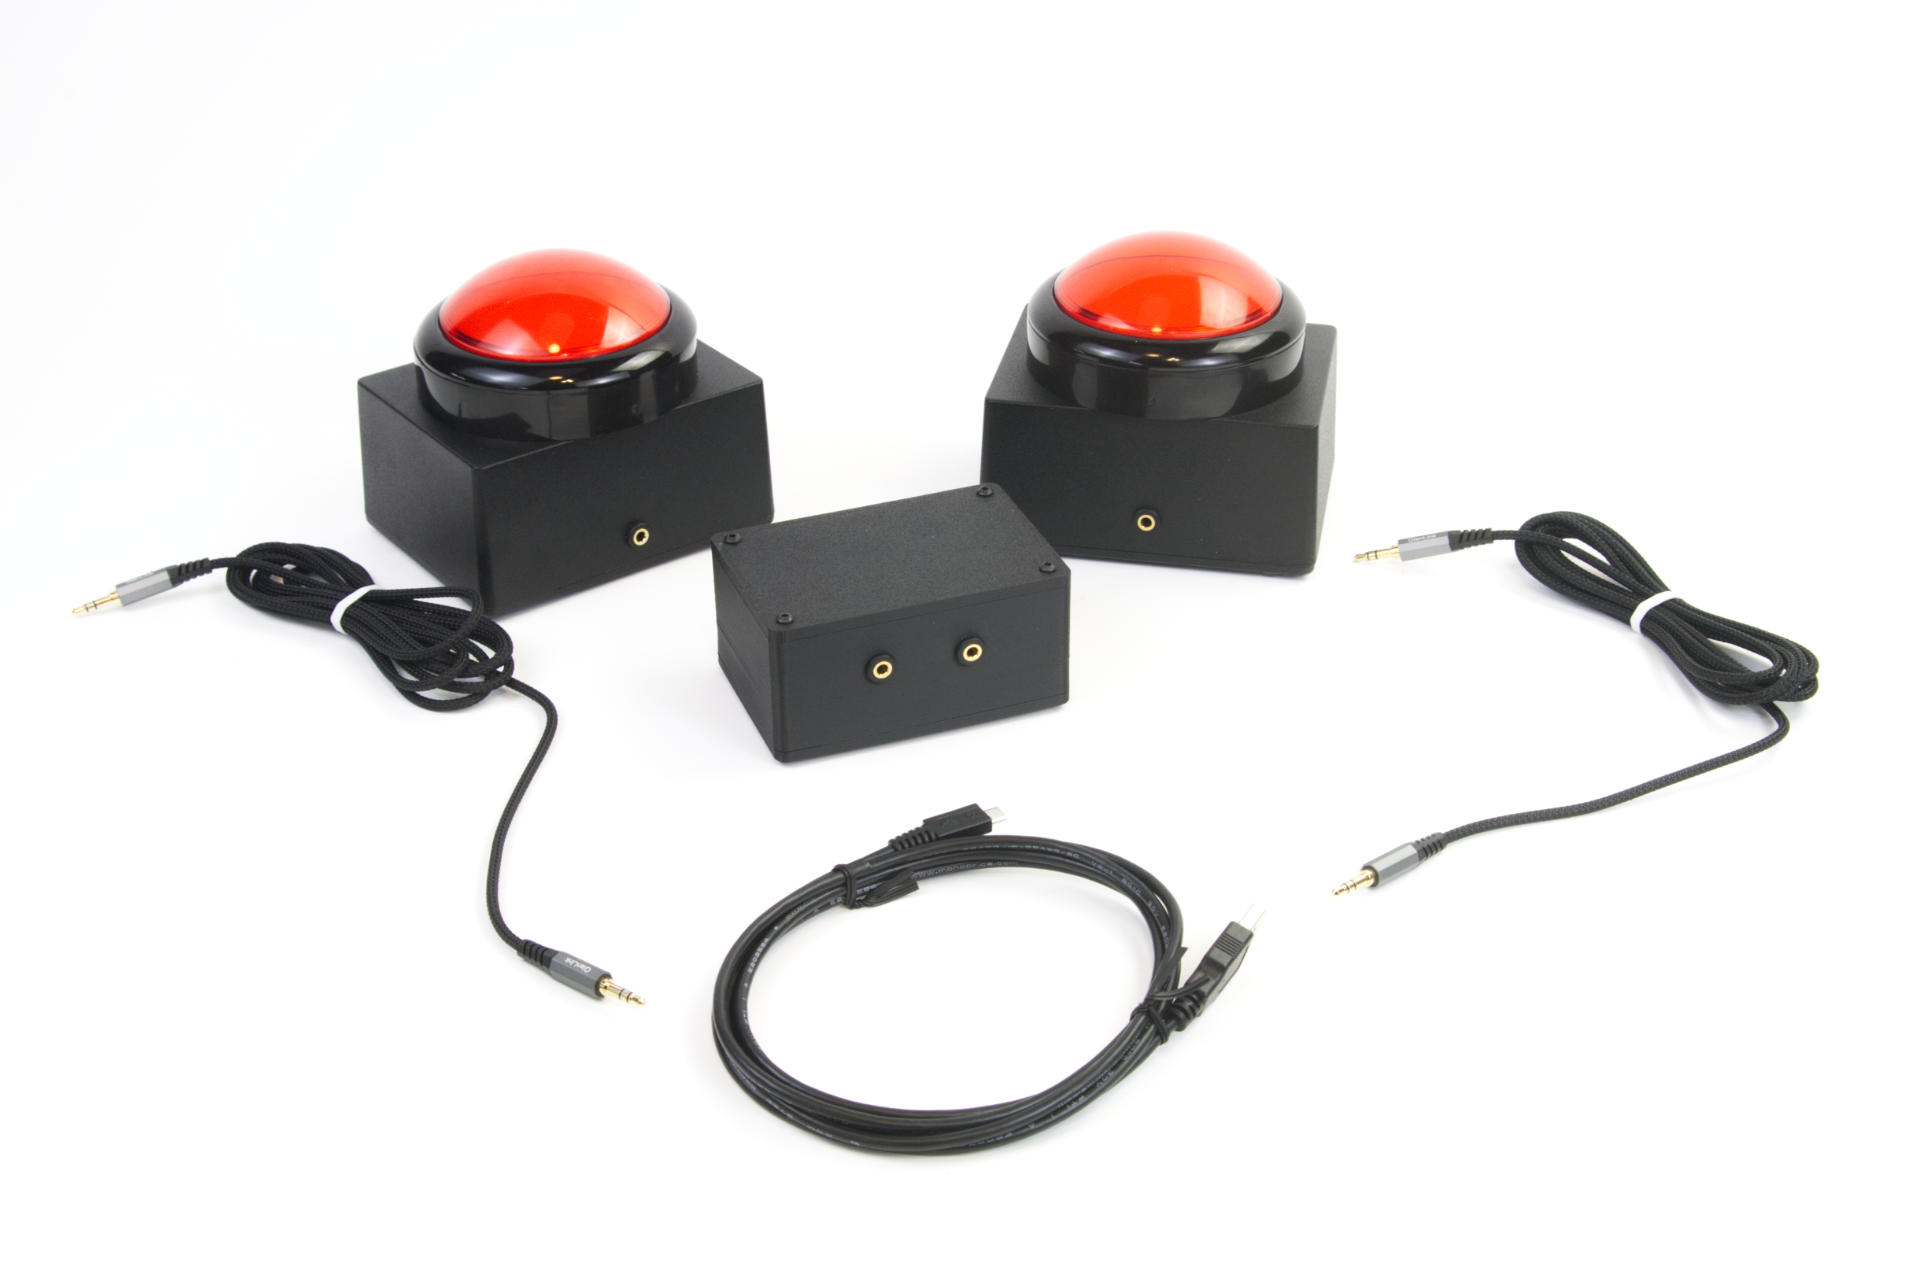
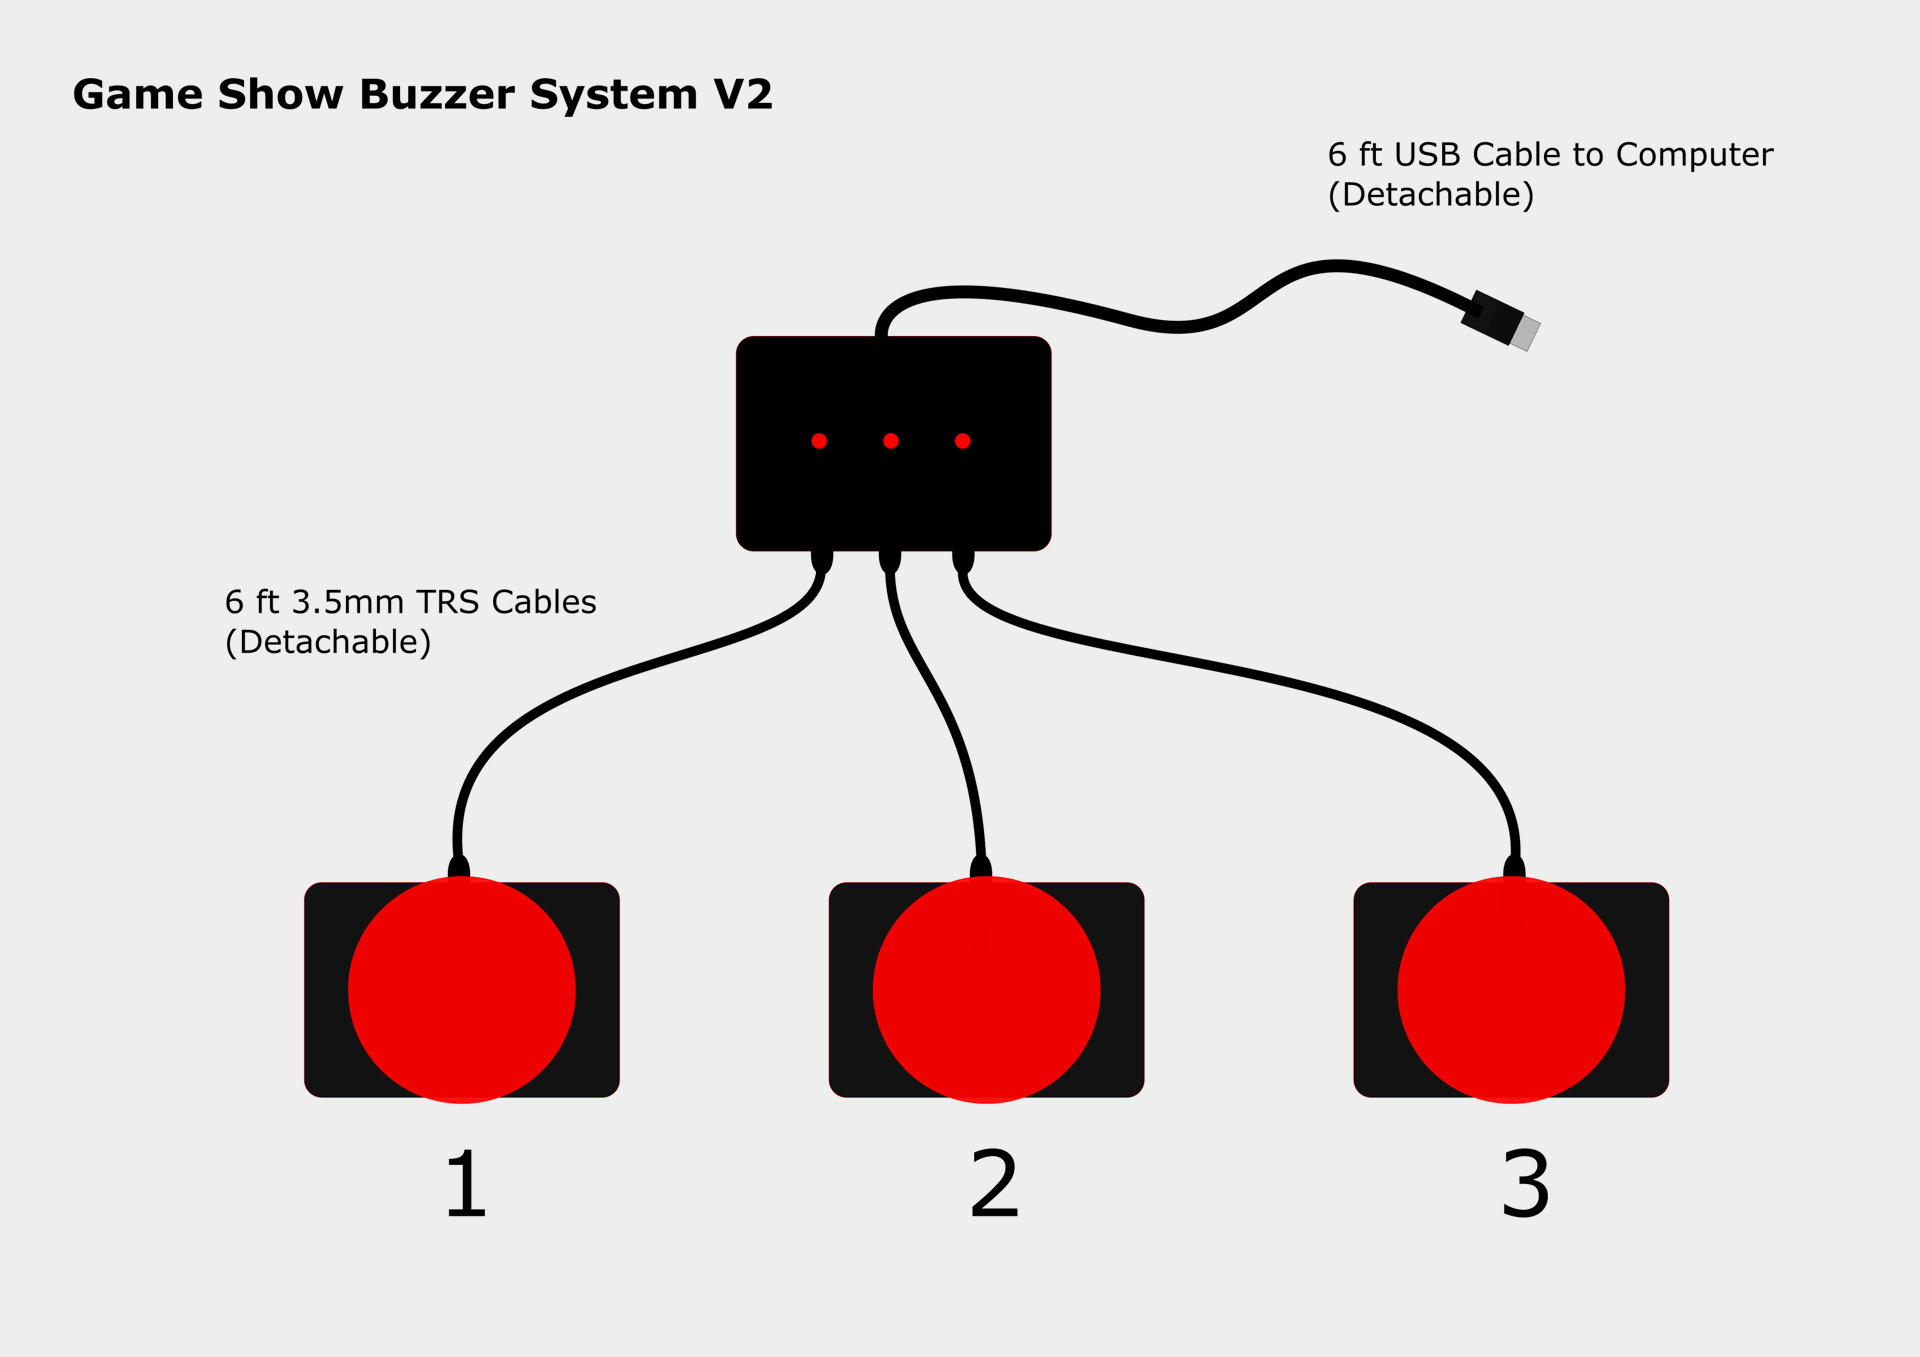
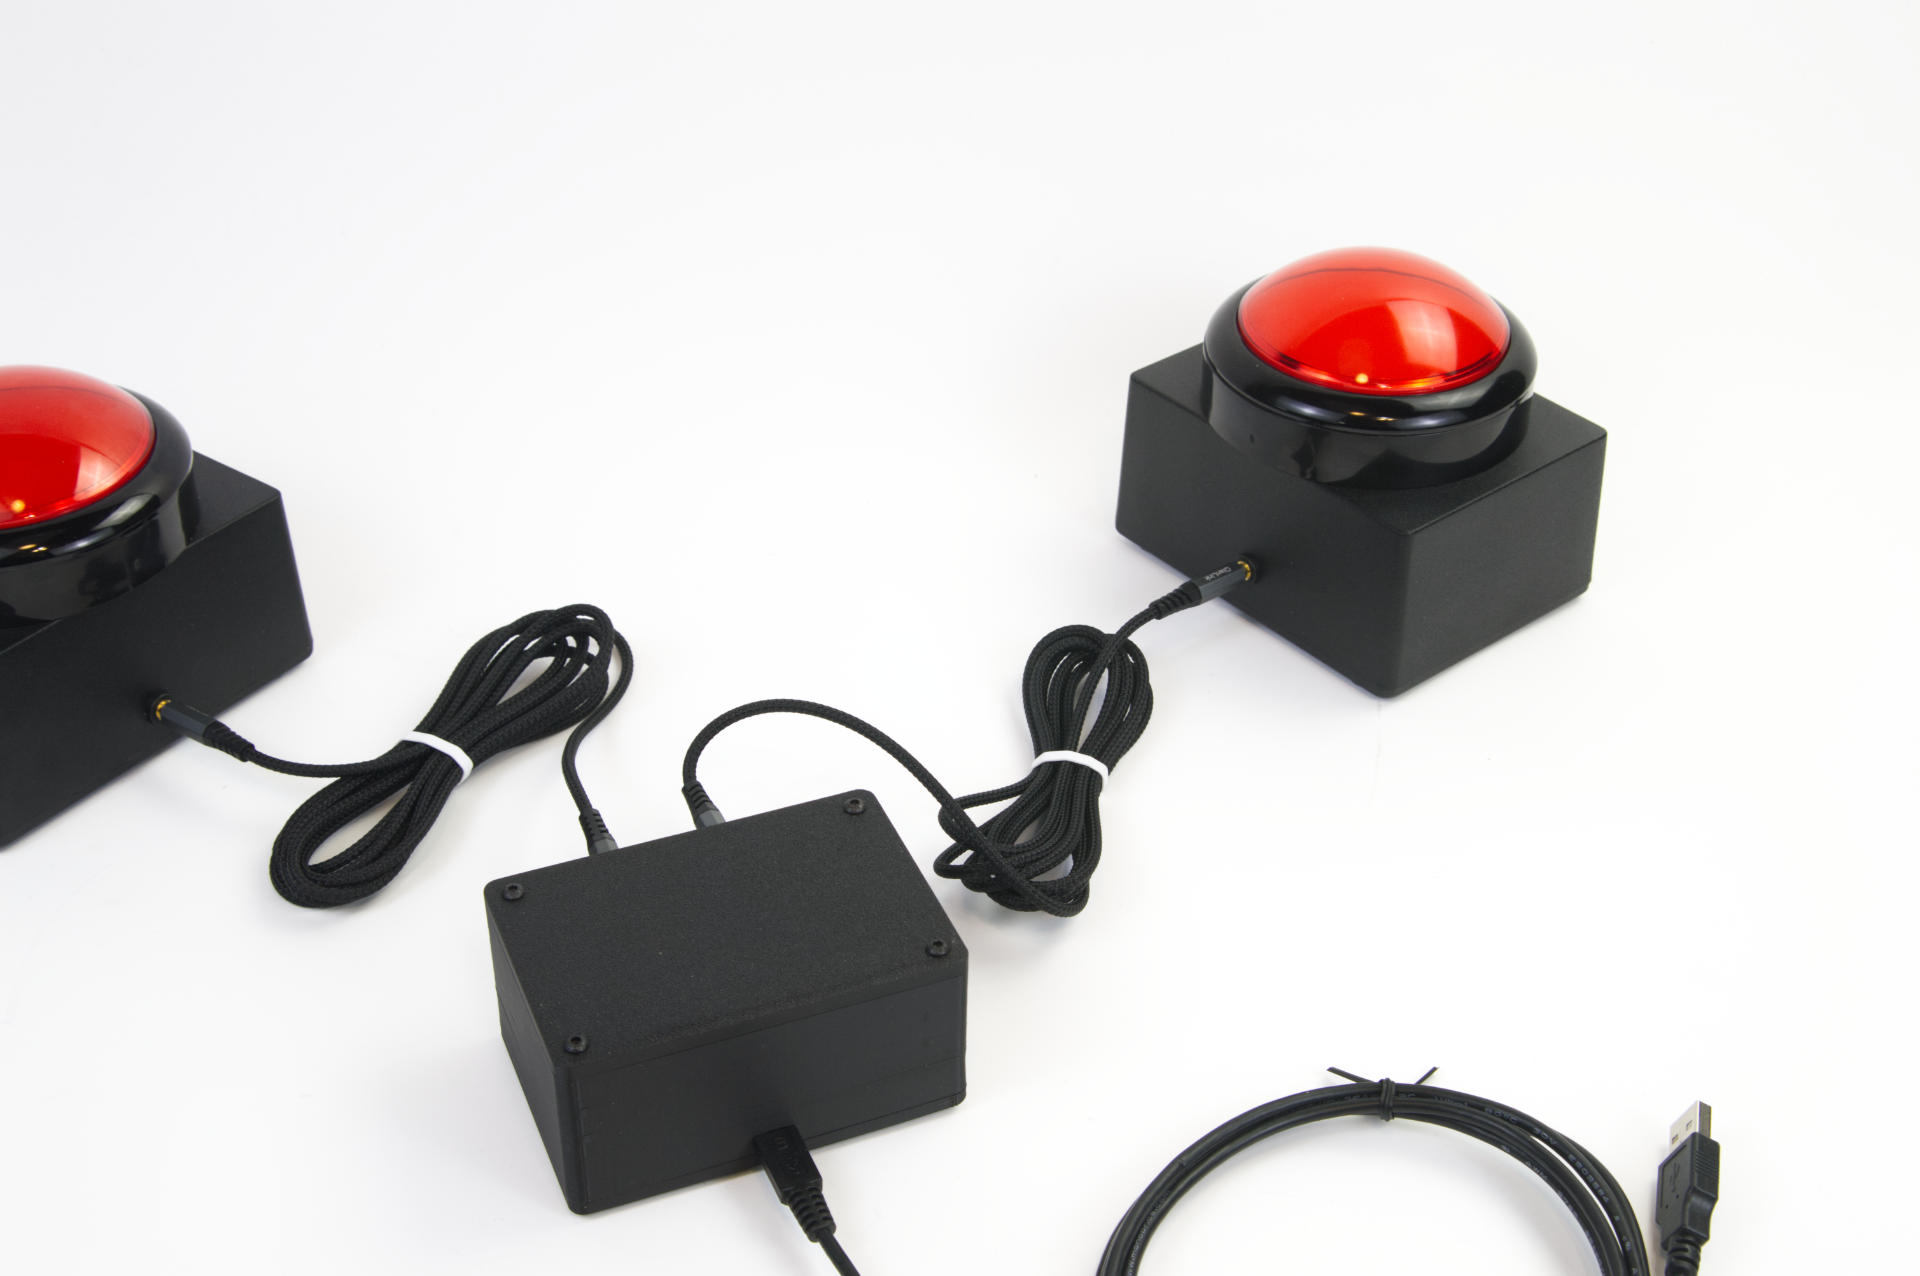
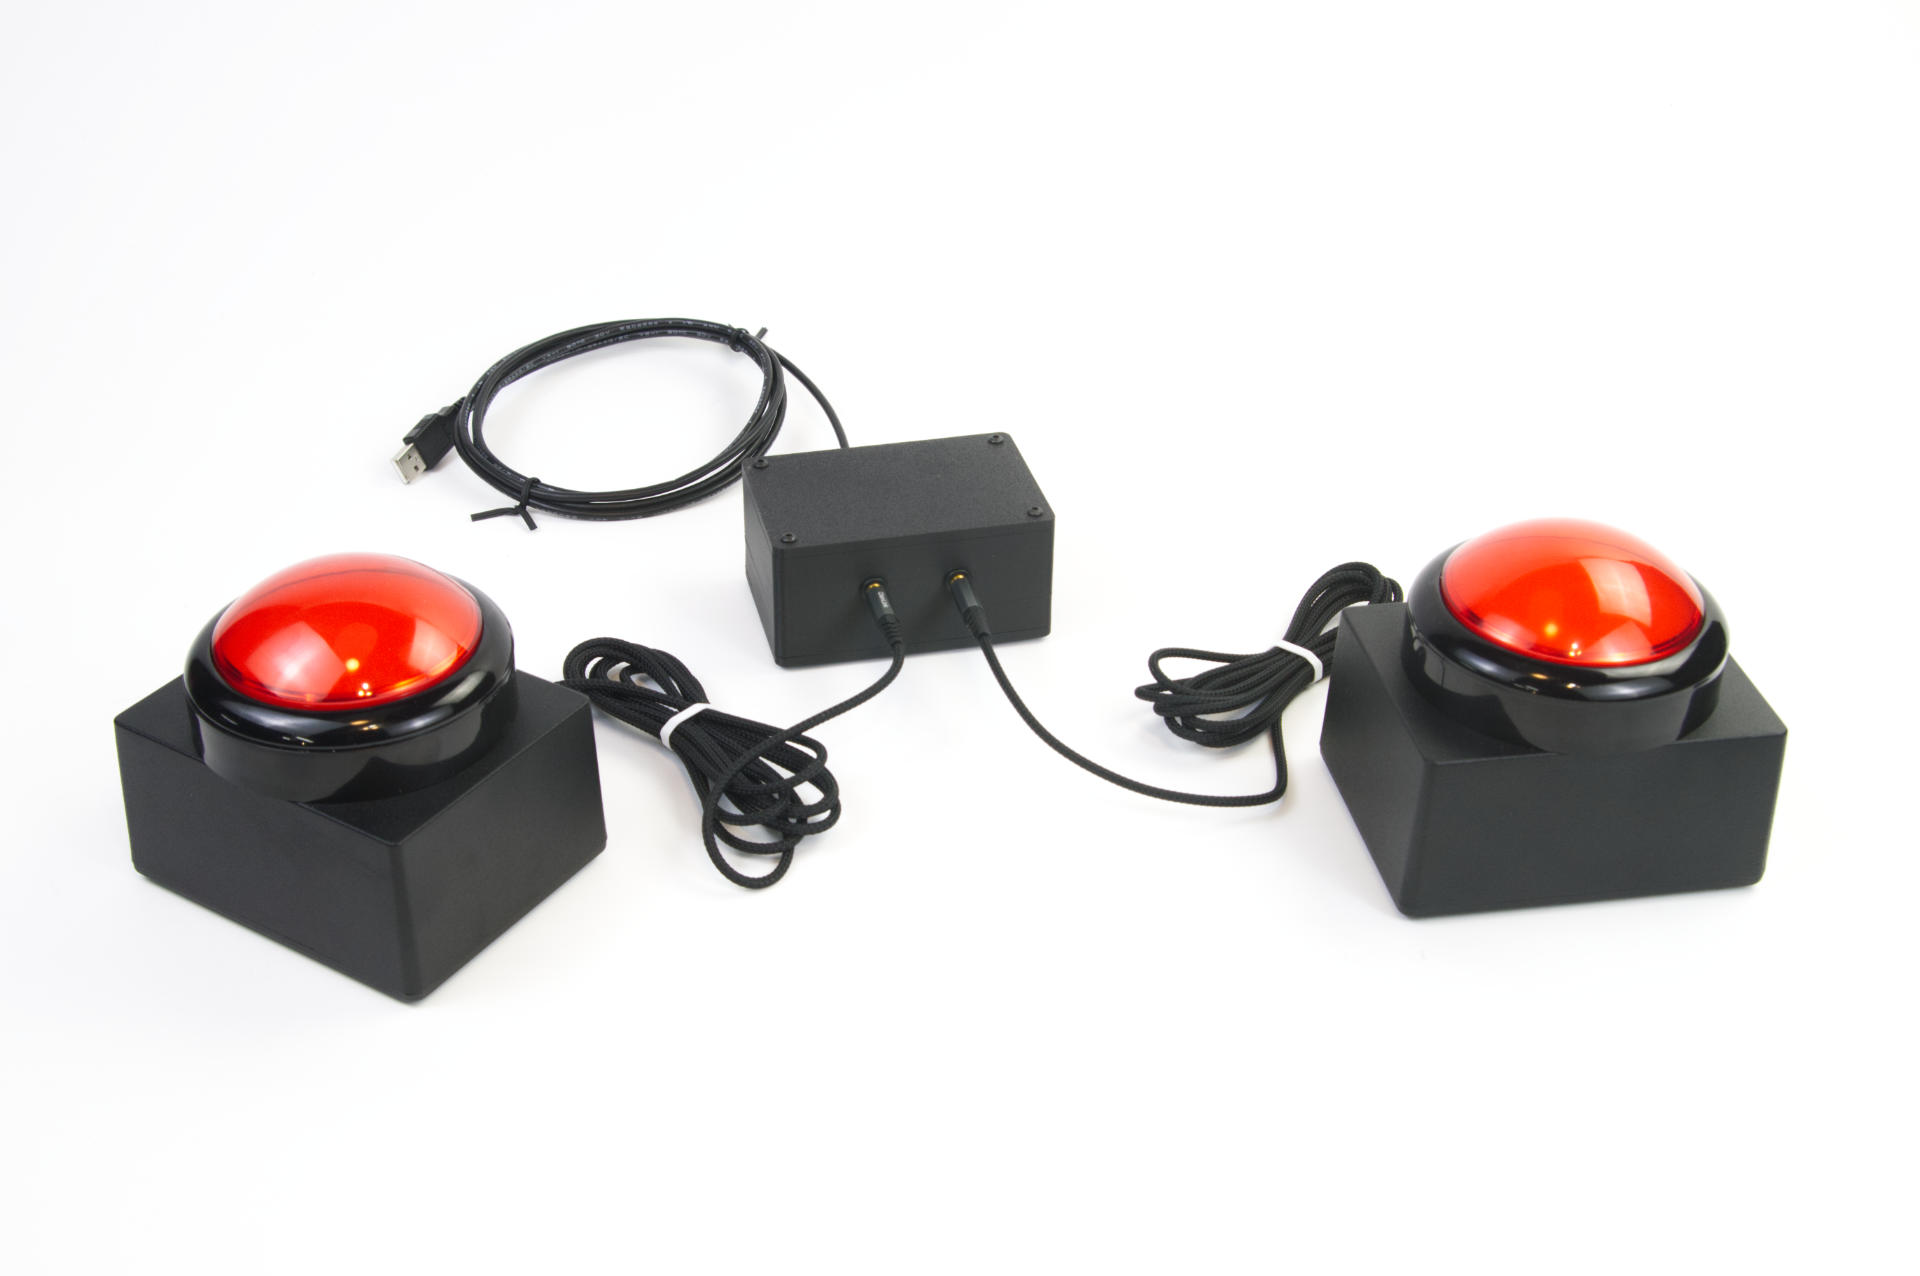
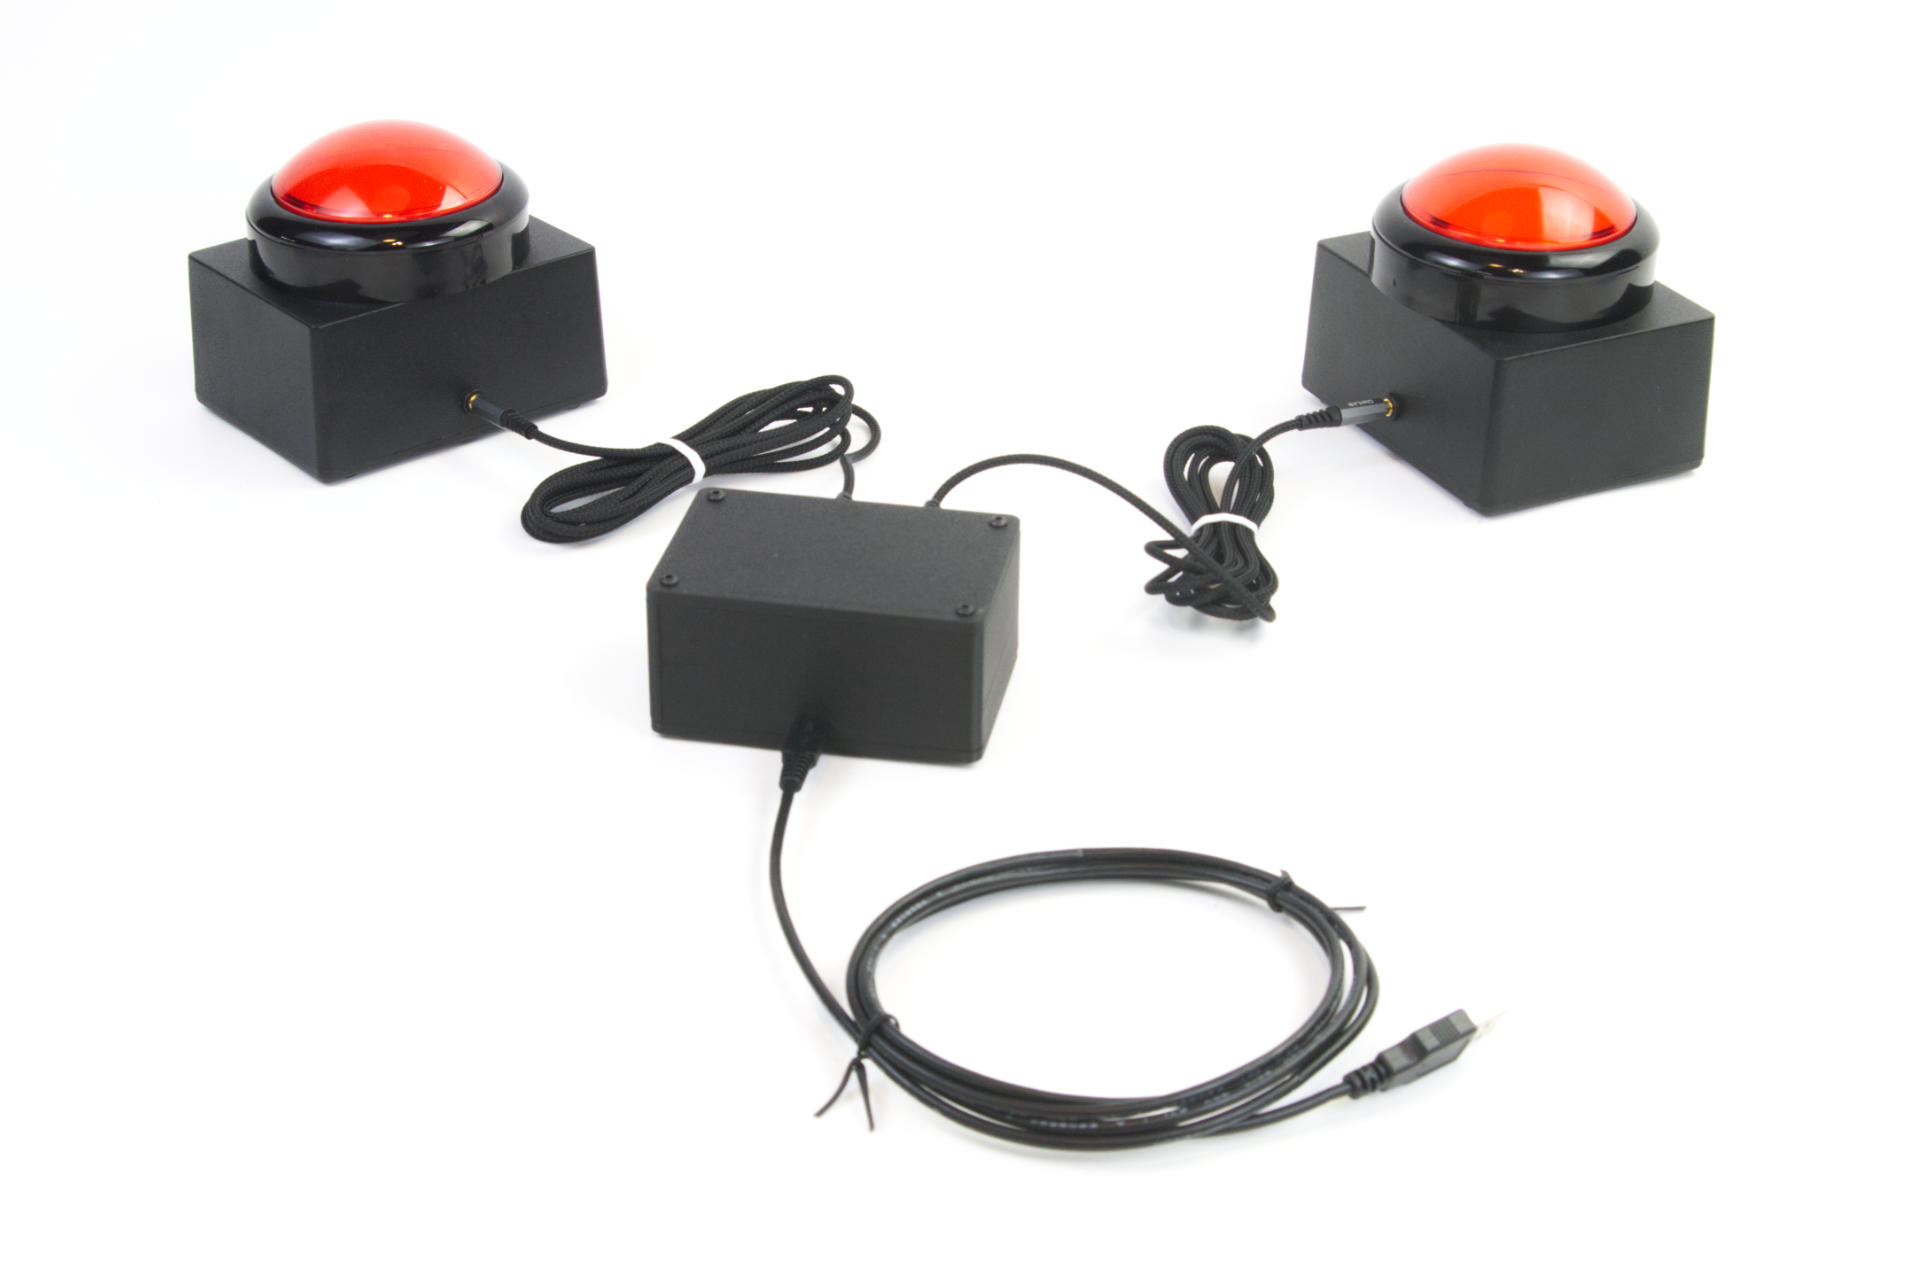
Once again the control box plugs into a computer via USB and can send keys, keystrokes, USB MIDI data, or serial data. Each button plugs into the control box using a TRS cable. We used 6 foot but you could easily get 10 foot or longer if needed.

Game Show Buzzer System

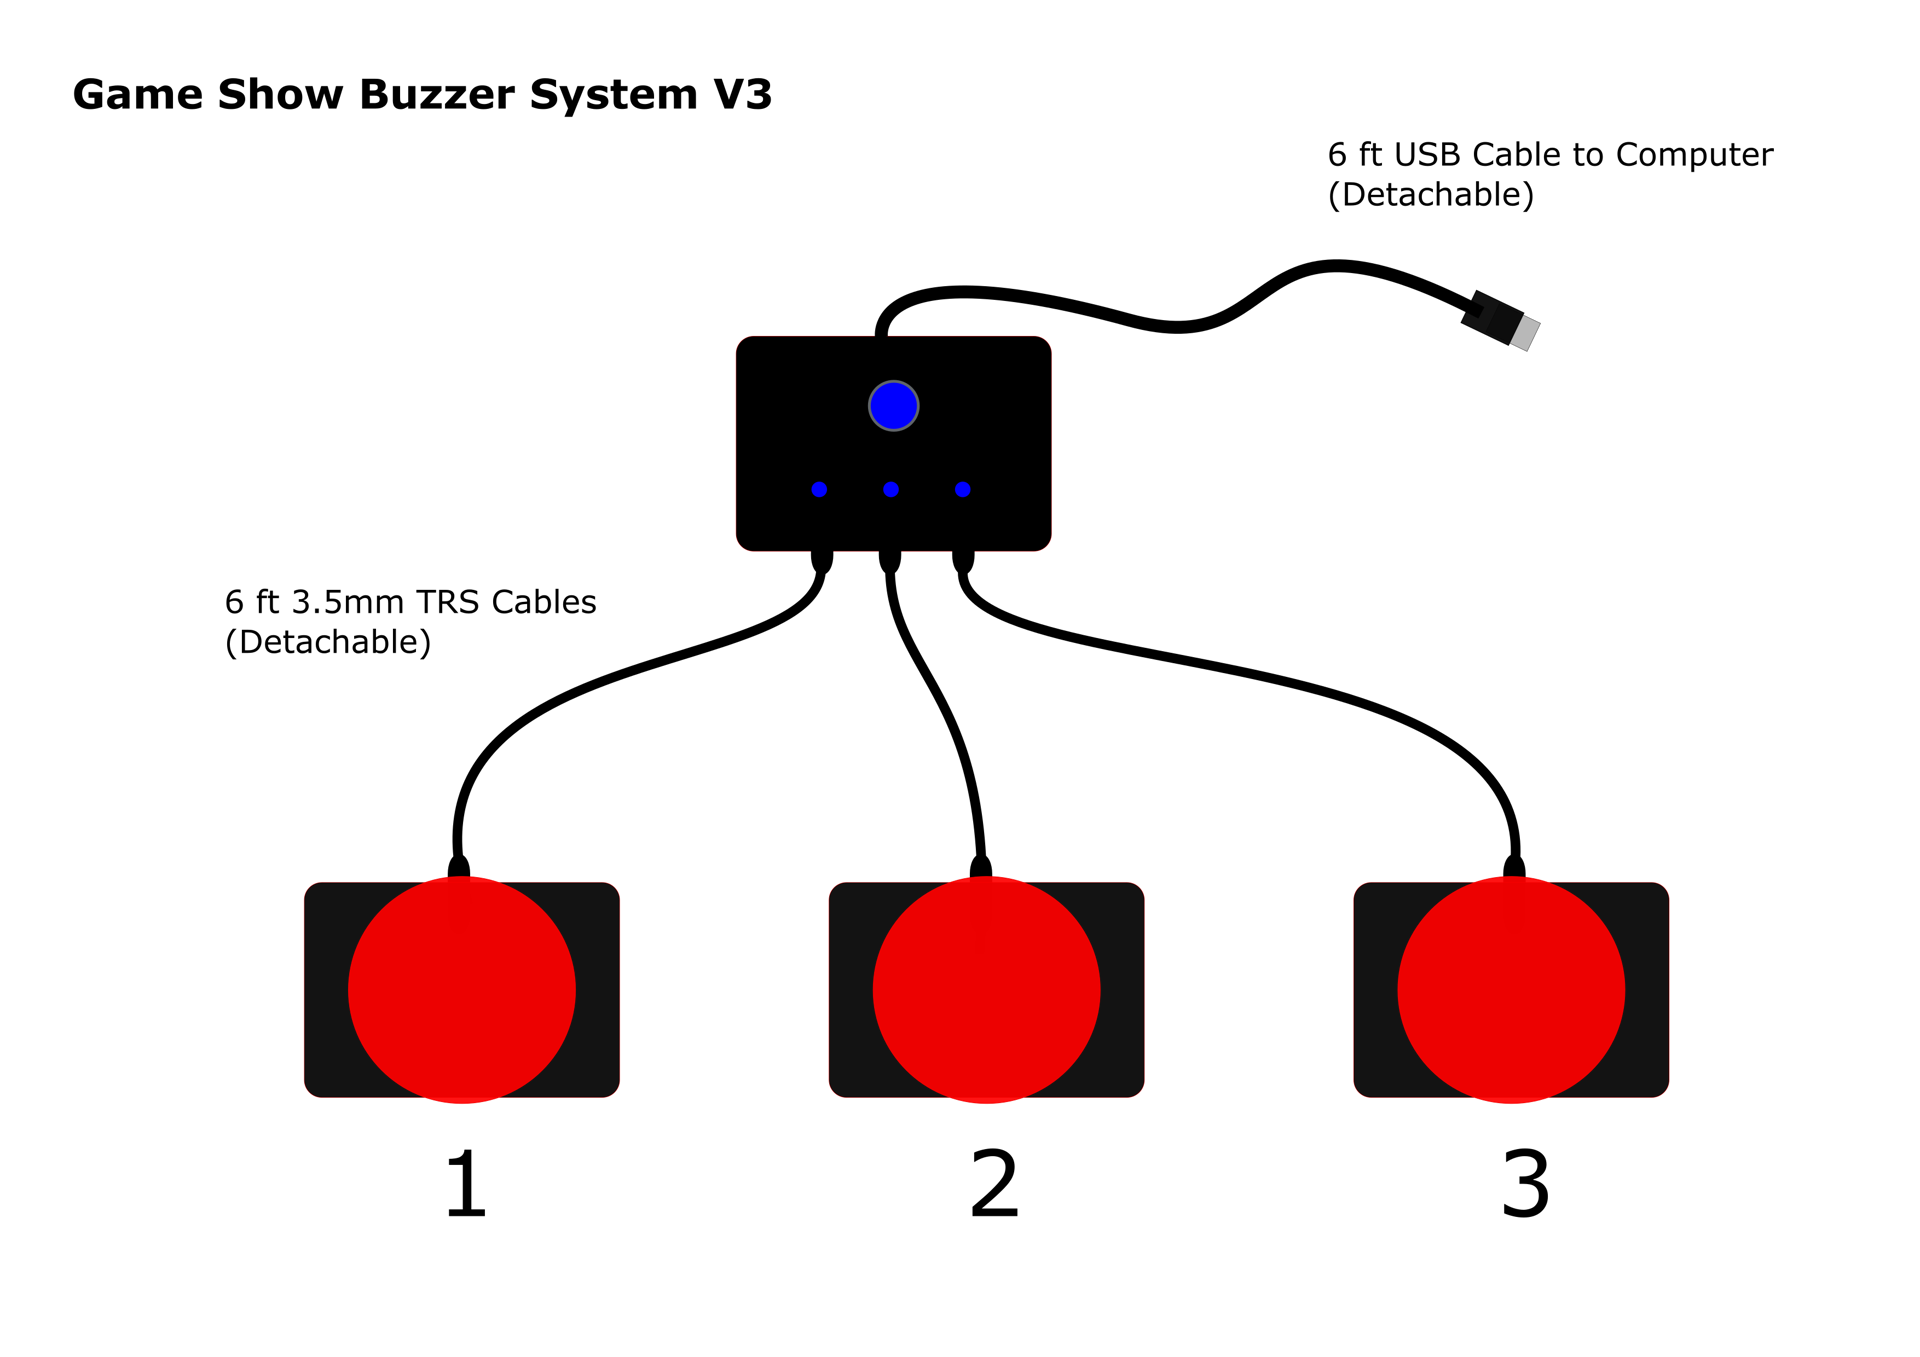
For this one the client will be using Resolume VJ Software & Media Server and each button is set to send a different MIDI noteOn signal to trigger a video to play. Like any game show if you hit your buzzer first you get to answer the question! In discussing functionality I explained how we usually have a “lock out” time before another button press will be recognized. The client thought a three second delay would be fine…

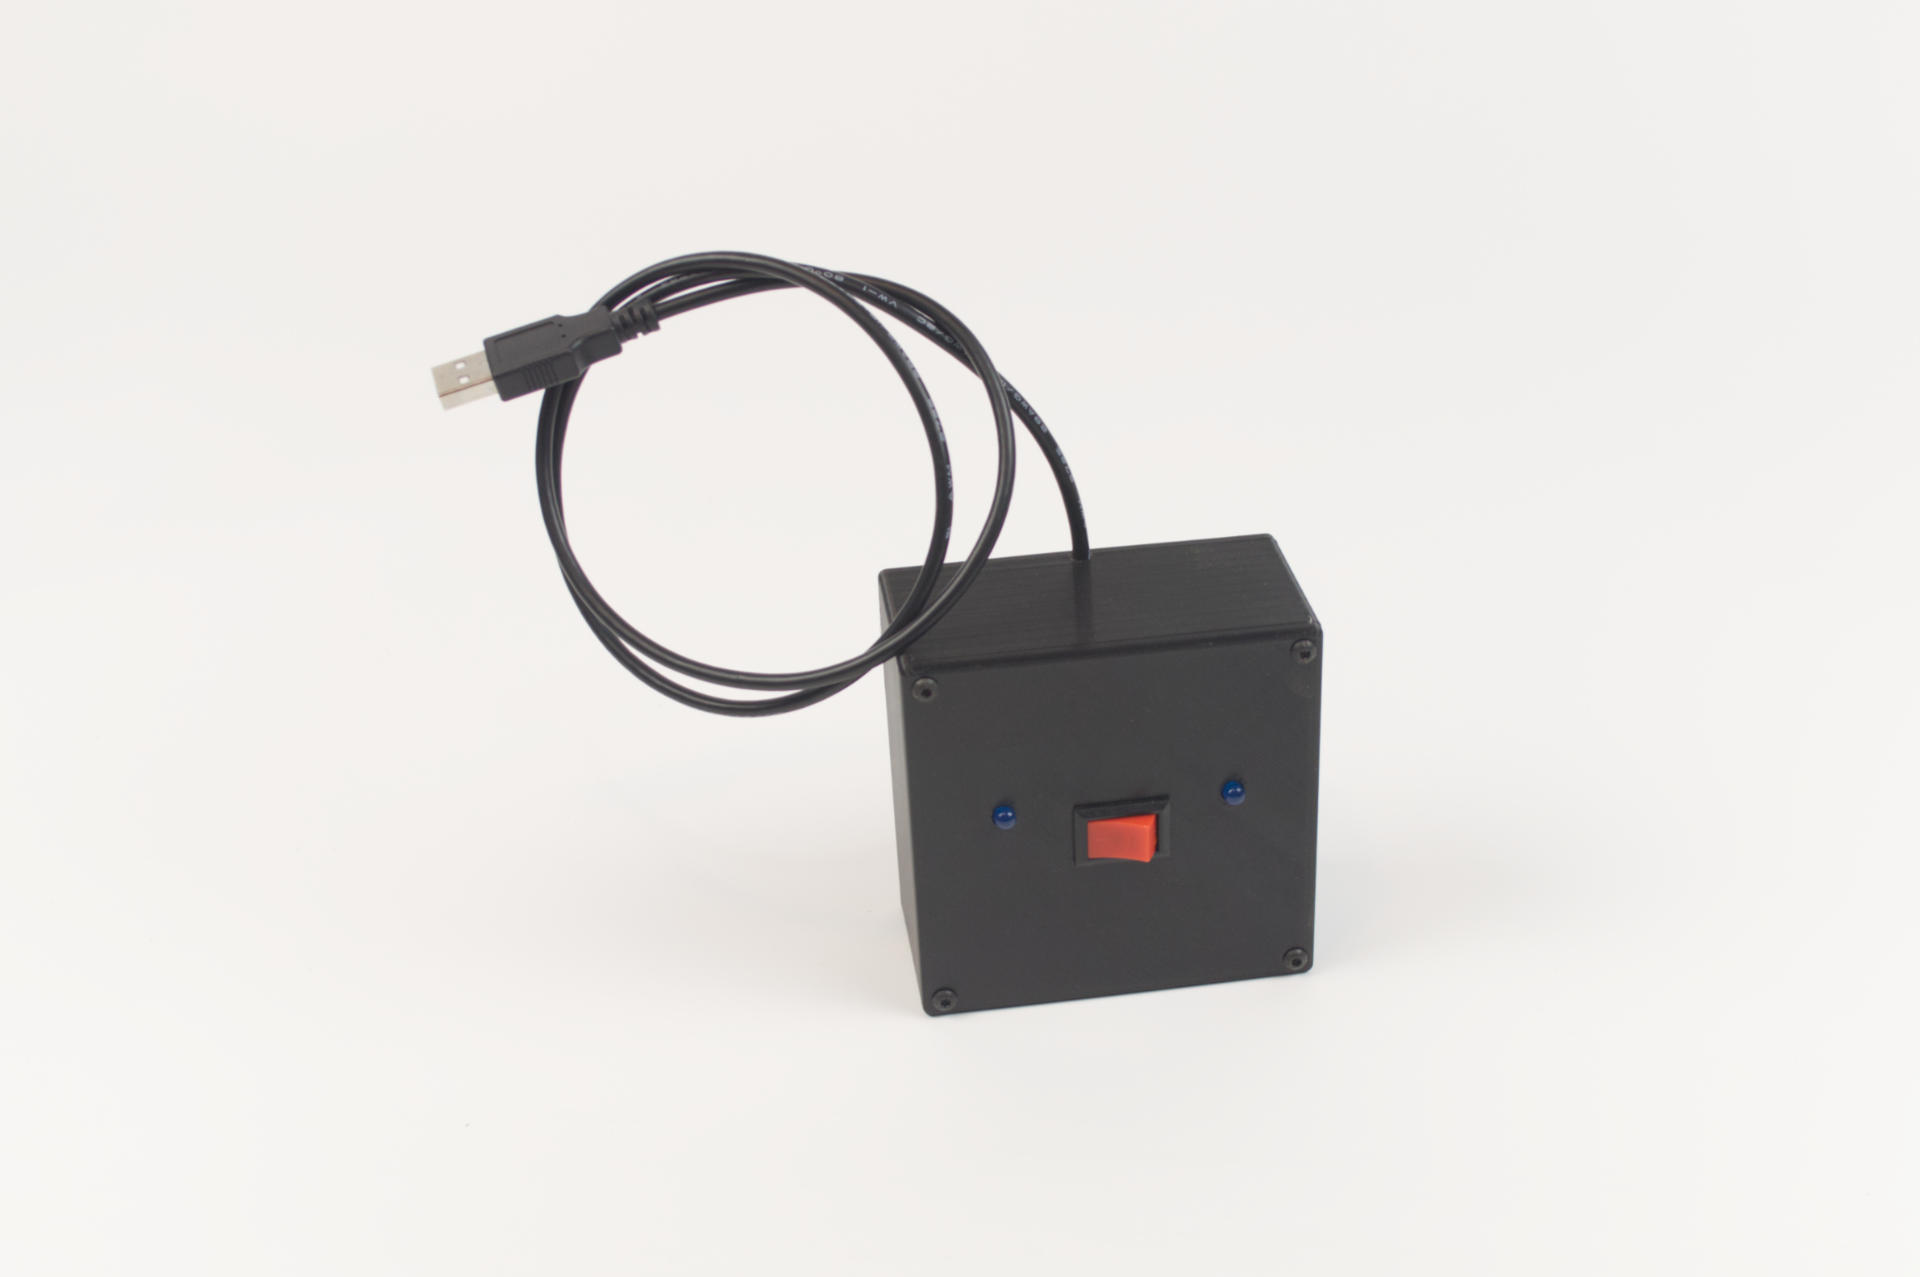
But! I mentioned we could always adjust that in the firmware later if needed… Also, I added a reset button directly on the control box. This would allow the “host” to press the button to end the lockout period. This is sort of a future-proofing feature.

Game Show Buzzer System

I think if I were building a deluxe version I would add a control to set the lockout time… something like what I did for the Tradeshow Video Player Controller perhaps. But also, am I getting ahead of myself? Since I haven’t built it yet I will say “No” but then…

Game Show Buzzer System

Also, this could be used as a standalone system without a computer. It’s less exciting, as there is no sound or video triggered when the button is pressed, but as a bare-bones quiz game system, it would work fine. If you do want sounds it would be trivial to plug into a computer via USB and use QLab or LeMIDI for those.

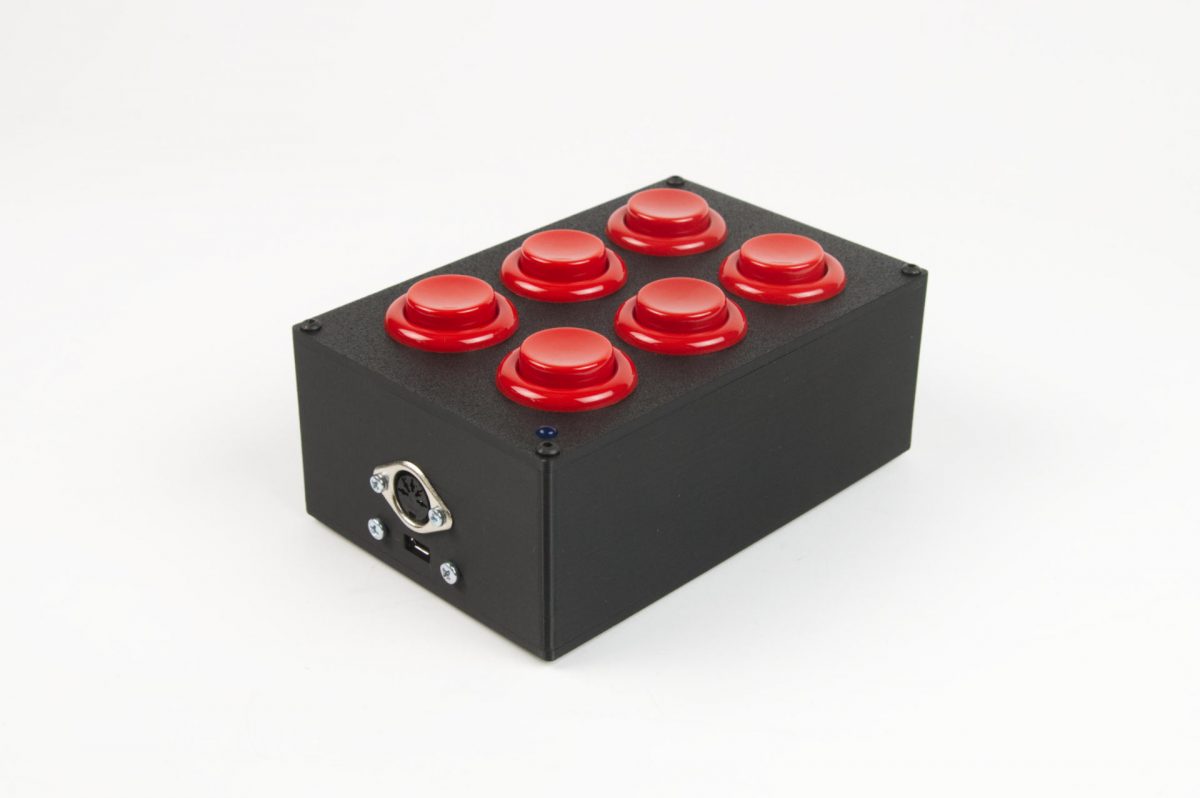
I started working on a four button version of this, but now I’m thinking I might want to just build the deluxe version and hope that someone might want to purchase it in the future.

I’m also considering different button options, as these are nice and big but they’re also fairly expensive. We could use The Button or any other button for triggering things. (But yeah, people certainly like hitting that big button!)

Categories
Uncategorized

Game Show Buzzer System V2

A set of game show buzzers

The name “Game Show Buzzer System V2” is a misnomer but I’m gonna go with it… See, I’ve built more than one “Game Show Buzzer” type of system since the original post but they were not documented here for various reasons… Anyway, this is a system I designed quite a while ago but just recently had someone actually want, so I built it.

A set of game show buzzers

See, typically I sell one (or more) of the Big USB Buttons or even these Survey Says Buttons, but this system doesn’t use multiple individual self-contained buttons, but a control box you can plug multiple buttons into. This specific system has just two buttons but the original design had either three or four, though doing up to six (or even eight) buttons would be trivial.

A set of game show buzzers

The control box plugs into a computer via USB and can send keys, keystrokes, USB MIDI data, or serial data. Each button plugs into the control box using a TRS cable. (That’s a 3.5mm Stereo Cable for you non-nerds in the crowd.) The TRS cable has three connections (Tip, Ring, and Sleeve) which is perfect for a button and LED.

A set of game show buzzers

The trick is in the code… meaning the programming is whatever is needed. For this specific build we did a USB MIDI noteOn for each button, followed by a five second lockout so no button could be pressed for five seconds. I’ve done systems where the “host” (using the control box) can reset the system, say for instance if the person/team who buzzes in first gets the quiz answer wrong, so that another team can try to buzz in and answer. Lots of possibilities, again, the magic is in the code.

A set of game show buzzers

I’ve built enough of these that I really should formalize things and come up with a system where you can choose the components and features and then place an order… It’s still sort of a custom thing (code always is anyway) but I think I have it down enough that a base system is in order.

A set of game show buzzers

Anyway, this was another fun project, though it was a bit rushed (got it built and programmed in a matter of days before it needed to ship) so there are a few small improvements I’ll be making next time.

Categories
Uncategorized

6 Button MIDI Controller

I was recently asked to build a 6 button MIDI controller. This will be used with a Midas M32R Digital Console by someone who runs sound production. They wanted (up to) six mute groups, so the MIDI Controller LC was a little short with only four buttons.

I ended up modifying the LC enclosure to fit two more buttons, and you’ll notice there’s actually a 5 Pin DIN MIDI output port on both ends. That was a request from the client, and fairly easy to do. Like most other MIDI controllers I build this one is powered via a Micro USB port. The nice thing about this is we can do USB MIDI output (if plugged into a computer) as well as standard MIDI out via the 5 Pin DIN ports. Alternately you can just power it via a standard USB wall wart power supply instead of a computer.

For the programming the client asked for something special as well. Instead of just sending a single MIDI command, it toggles between two different commands. I think the M32R expects one thing for mute and another for unmute. That was pretty easy to implement.

The bottom cover is removable in case the client ever needs a firmware update. Some of the devices I build have enclosures with small holes in the bottom to load the firmware without opening them up via access to a reset button. Not all devices have that, and it’s actually pretty rare that I do need to provide firmware updates, but it’s there if needed.

The client wanted all red buttons, though when I was sending in-progress shots I threw a bunch of other colors in for a quick photo.

As always, if you need some custom built MIDI or USB controller, get in touch!

Categories
Uncategorized

Simple USB Switching Device

I recently sold a USB controller to a large company and then the Experiential Marketing Team there had a few calls with me about what they wanted to do next, which was build a “very large” controller. I gave them a huge quote (because it would have been a huge project involving custom fabrication) and they eventually got back to me saying they found someone local who would do the fabrication, but wondered if I could still do the programming part of it. I said “Of course!” and we got going…

As we talked through the project I realized that if I just sent them a microcontroller with a bunch of bare wires it may not be the best experience for them, so I offered to build a prototype/testing unit that would be fully functional, and then also provide the “bare wire” version they could install into the custom fabricated unit they were having built.

One of the people asked if they should have a backup in case of failure, and of course that’s always a good idea so I said I would throw in a spare as well.

Projects like this tend to be pretty easy for me. I’ve got my own OpenSCAD library to easily create the enclosure with the holes I need, and I can easily add new holes as needed. I can choose to print the top lid integrated or separately (and attach with hardware) and I tend to do the lid separately now because it means faster printing, less support material, and I can easily iterate when needed.

The electronics for most controllers I build is the same, so if I don’t have code that does what someone wants, it’s fairly simple for me to rewrite existing code to do what is needed. I test things on macOS and Windows for every project, and Linux if that is needed. (It is sometimes, but it’s rare most of the time.)

Anyway, a project like this is actually pretty fun for me, which is why I keep doing them. I can get away with not charging a ton because I have my system down really well to produce what people want.

Categories
Uncategorized

Advanced Preferences & Settings in Arduino IDE 2

The Arduino IDE 2 has been out for a while, and I’ve gotten used to it. Surprise, it’s another piece of software based on Electron. If you don’t know what that is, it probably doesn’t matter. Just keep going…

The important thing is, if you’ve looked at the preferences for the IDE, you’ll see… not a lot. There are a few things you can change, but wait, there’s more! It’s just hidden.

On macOS hit Command-Shift-P (on Windows it’s probably Window Key-Shift-P, and Linux same, but whatever you folks call the GUI key there.)

Anyway, after hitting those three keys you should see a scrollable and searchable list of stuff. You can scroll and click on something or type in something to filter it a bit more. If you type “User Set” you’ll see “User Settings” and you can click on it.

And Bingo! You’ve got access to the full list of stuff you can change and adjust. Neat!

You can also search for things, like “font” or whatever. I seriously think the greatest advance in software in the past lustrum has been searchable preferences. Anyway, I hope you find this useful.

Oh, and one more thing… If you don’t like any of the (limited) themes in the Arduino IDE you can add your own. See this Personal Themes thread. You can find themes in the Visual Studio Code Marketplace because VSCode also uses Electron. Two words of warning though, some of the themes in the “marketplace” are commercial, or at least “nagware” and will bug you about paying for them. (Which is fine, just making note of it.) The other thing is, I can only assume installing a VSCode theme in something besides VSCode, or just using the “Visual Studio Code Marketplace” for non-Microsoft software violates some Microsoft terms of service or license or such. Because face it, Microsoft still sucks in many ways.