Categories
Uncategorized

Omni Wheel Robot (LEGO Build)

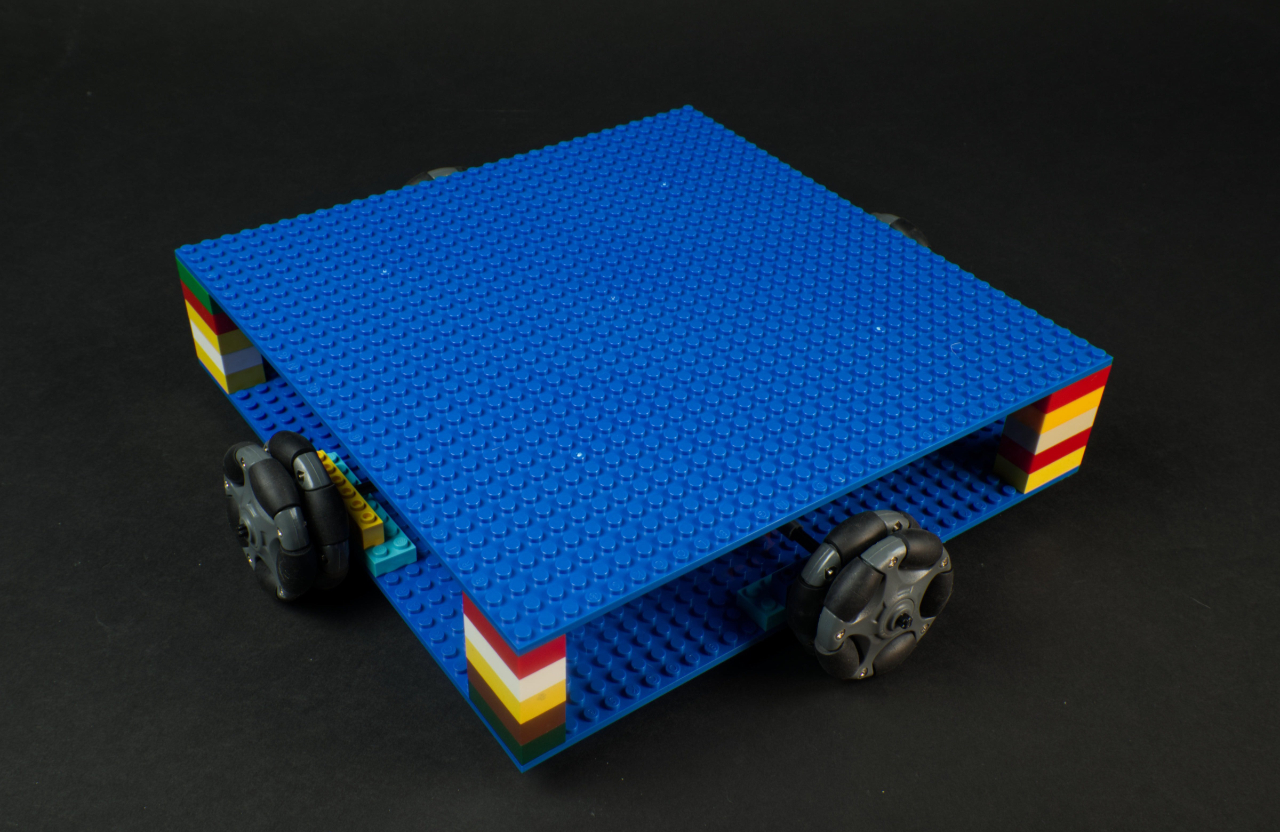
I’ve always found omni wheel robots fascinating. I even tried to design my own omni wheel (which did not turn out great.) But over at Brown Dog Gadgets I thought we should give it a try and build an Omni Wheel Robot. (And there’s a full guide and code available.)

This is a perfect use of LEGO parts. It is completely possible to fabricate all the parts needed to build this, either using digital fabrication (laser cutter, 3D printer, etc.) or by hand, if you’re the handy kind. But honestly, the LEGO aspect made the build super-simple, and the guide links to all the parts on BrickOwl (which are all pretty cheap.)

The other magic of this build is using 4 servos instead of stepper motors. While you do lose precision, this makes things much less complex and just simplifies everything. We’ve also got an Arduino and a battery pack. That’s it. Yeah, the goal was simplicity.

This is a beginner project in many ways, but it can also serve as a platform for code exploration. We provided the basic code for movement, but there’s room to expand on that, add sensors, etc.

And since it’s LEGO, it is by definition a platform you can build upon and add to. (We’ve even got 3D printed LEGO compatible parts for you.)

Check out the guide to this Omni Wheel Robot if you want to learn more.

Categories
Uncategorized

Crank Counter with micro:bit

I’ve got a new guide up in Brown Dog Gadgets Project Database. This time we’re using the micro:bit along with a 7 Segment Display and a LEGO-based crank circuit. I call it the Crank Counter.

We create these (free) resources in the hopes that viewers like you support our efforts by purchasing components from Brown Dog Gadgets because hey, that keeps the free resources flowing. Thank you for your support!

Typically the build guides are not a step-by-step LEGO building guide, but they don’t need to be. LEGO should be open-ended building, and we want to encourage that. Even the circuit layout with Maker Tape doesn’t need to be precise. The components must be connected properly, but where you place them, length of tape used, etc. is less important. Building a functioning circuit is the goal. (Things that need to be more “exact” like the crank connections, are called out.)

I typically try to explain the code a bit and cover a few other basic concepts that relate to the project. Some are more advanced than others, but we try to simplify and not overwhelm.

Oh, you might be wondering if we can made a version of this that counts down as well as up depending on the direction you turn the crank, and yes, that’s possible, and it’s in the works. :)

Categories
Uncategorized

Manual Crankable Larson Scanner

The most recent fun project at Brown Dog Gadgets is our take on the classic Larson Scanner. EMSL has an awesome kit, and many people who have experimented with an Arduino and LEDs have made a breadboard version.

Well, Josh and I made a LEGO version using Crazy Circuits parts, and instead of a microncontroller it’s controlled by a hand crank! Yeah, it’s an Analog, Hand-Cranked, LEGO-Based, Crazy Circuits Larson Scanner.

As with all of our projects, the instructions, files, templates and all that are available for free. Check it out! You can certainly use other components besides Crazy Circuits and Maker Tape for this, but as always, getting parts from us (or a reseller) ensures we can keep producing open source educational content and curriculum. And yes, schools, teachers, maker clubs, and other use these resources, and we incorporate their feedback into new designs and projects.

There’s a bit of an explanation about the cylinder and “coding” as it were, in the instructions. While this is a simple & fun project, you can expand upon the basic concept to talk about more advanced concepts. That’s pretty much our goal with these things.

Josh had a lot of fun making the video for this one, though I’ve heard that stock music way too many times in other videos! ;)

Perfect for your Knight Industries Two Thousand or Cylon!

Categories
Uncategorized

Crank Activated LEGO Circuits

The latest project for Brown Dog Gadgets is a LEGO-based, crank-activated circuit. This is a simple build that uses LEGO along with Maker Tape to allow a rotating cylinder to close a circuit.

The trick here is that Maker Tape is not just conductive, but it’s strong, and can be stretched just a bit against the cylinder to provide good electrical contact. Besides a few LEGO bricks on a baseplate we’ve got some round LEGO pieces for the cylinder, two bricks with holes, a long and short axle, and a beam with axle holes to make the handle. Overall, pretty simple.

This is one of those projects which really highlights what Maker Tape can do. There really isn’t an easy or reliable way to do this with wire, or with copper foil tape.

The video below shows the circuit in action, and if you want more, we also showed it off during one of our live video streams that we do each week.

As always, get the full details of this build on the Brown Dog Gadgets Project Site. And yes, we’ve got a lot more fun coming with crank activated circuits!

Categories
Uncategorized

Make: Lego and Arduino Projects

Make: Lego and Arduino Projects

Leave it to me to forget things! I forgot to mention that my Arc-O-Matic was mentioned in the book Make: Lego and Arduino Projects. Get to chapter 3 and you’ll see one of my photos.

I should mention that I have not actually read the whole book, I ended up loaning it to someone who is way more into LEGO and Arduino stuff than I am, but if you want more info on it, WIRED has a nice write-up, and you can buy it from Amazon or directly from O’Reilly.

John Baichtal (one of the authors) has another book in the works which I’ll have a hand in, but we’ll save that story for another time.