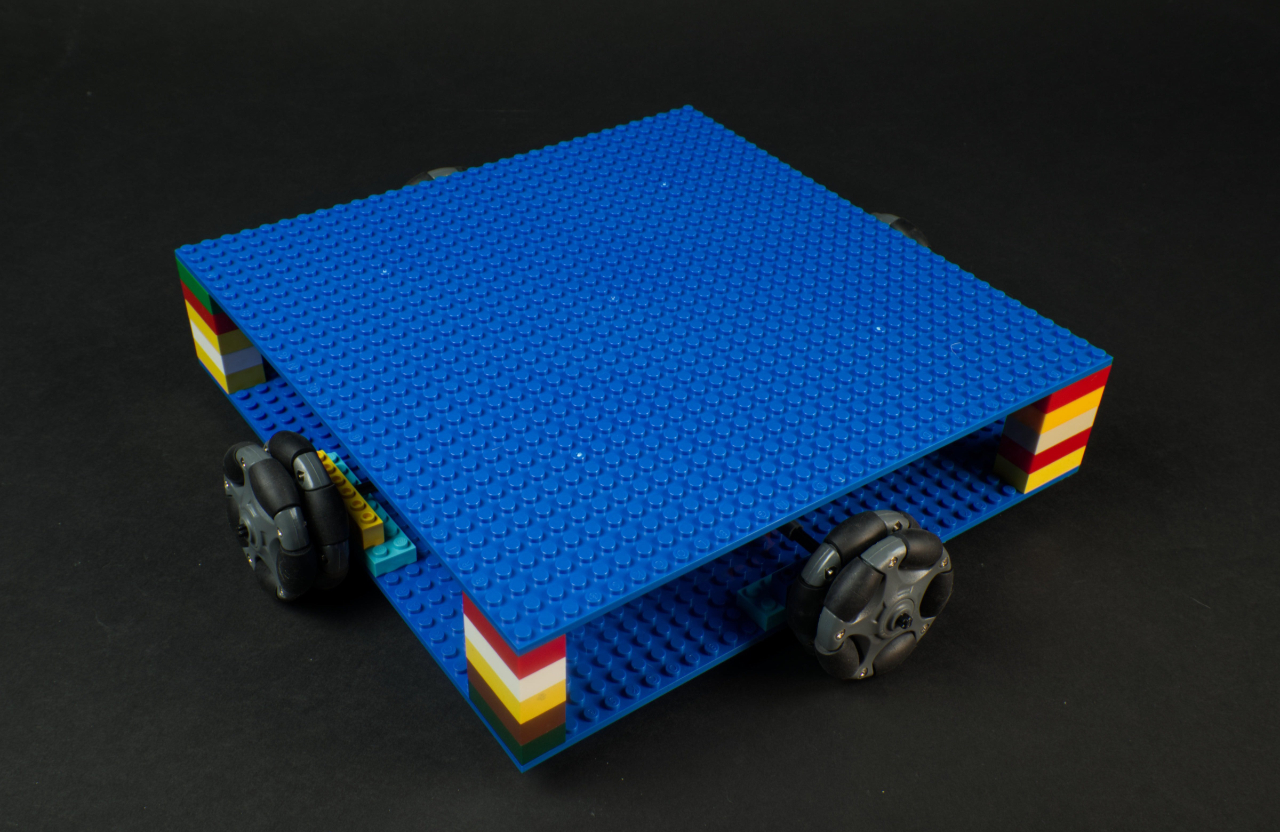
I’ve always found omni wheel robots fascinating. I even tried to design my own omni wheel (which did not turn out great.) But over at Brown Dog Gadgets I thought we should give it a try and build an Omni Wheel Robot. (And there’s a full guide and code available.)
This is a perfect use of LEGO parts. It is completely possible to fabricate all the parts needed to build this, either using digital fabrication (laser cutter, 3D printer, etc.) or by hand, if you’re the handy kind. But honestly, the LEGO aspect made the build super-simple, and the guide links to all the parts on BrickOwl (which are all pretty cheap.)
The other magic of this build is using 4 servos instead of stepper motors. While you do lose precision, this makes things much less complex and just simplifies everything. We’ve also got an Arduino and a battery pack. That’s it. Yeah, the goal was simplicity.
This is a beginner project in many ways, but it can also serve as a platform for code exploration. We provided the basic code for movement, but there’s room to expand on that, add sensors, etc.
One of the end effectors included with the uArm Swift Pro is a stylus which can be used with a tablet instead of a human finger, which is handy, because robots don’t have human fingers.
Over at Brinn Labs we’ve been trying to diagnose this problem we have with an iPad in a kiosk that seems to be going to a black screen. I’ve already done a few tests to diagnose it, but one of the tests I couldn’t easily do was stress test it by running through the app over and over again… enter our robot overlords!
In uArm Studio you can use a “Blockly” interface to program the movements. If you’ve used Scratch or another block-based programming interface, Blockly is one of those.
Blockly is easy to use, but can also be frustrating if you know how to write code. I wanted to walk through this exercise just using Blockly. Now for a non-coder, this is a great, easy to use interface… for someone who loves code, not so much.
And then I clicked on the Javascript view. Aha! Real code! But! You cannot edit it… it appears to be read-only, or just a rendering of the code you created using the block interface. That’s not fun.
But wait! There’s an XML view… featuring XML you’d probably never write. But the XML version is important because that’s how uArm Studio stores the file on disk… in XML format. I haven’t tried editing the XML yet to see what uArm Studio does with it, but it might be worth a try.
To be honest, I’m much more interested in the uArm Python SDK which looks like something I’d enjoy digging into. (Especially with my new-found love of Python.)
Anyway, here’s a video of the uArm Swift Pro in action touching the iPad to work through the app… and after that is a time lapse from a camera that was running over the weekend to make sure nothing went wrong.
We recently got a uArm Swift Pro robot arm at Brinn Labs and I’ve been putting it through its paces. It comes with software called uArm Studio that lets you do a lot of things, but for this post I’ll focus on drawing (or “plotting”) using a pen.
One of the tools I’ve used in the past with the Egg-Bot was StippleGen2 from our friends at Evil Mad Scientist Laboratories. StippleGen2 is a program written in Processing that takes an image and converts it into a series of lines, or more specifically, a single line, which is suitable for plotting.
Above is the image I started with, an “8-bit heart” as I call it. It’s a simple black and white image of a low-res heart. (Great for Valentine’s Day, right?)
After running the heart through StippleGen2 and choosing the appropriate complexity of the line drawing I wanted, I saved out the file as an SVG format vector file. Perfect for plotting. (In fact, since it’s a single line, the z axis never has to move up once it starts.)
I fired up uArm Studio and chose the Draw/Laser feature, and then loaded in the SVG file. I did have to scale it up a bit, as I still don’t have the exact dimensions I should use for artwork in uArm Studio.
Once the file is loaded, you hit start and there’s a step where you set the z axis so it know where the pen hits the paper. At this step, I wish there was a little more control over how the z axis moves. I think the smallest increment is one millimeter, and I think it should be smaller. (Most CNC software has some adjustment to how much you move things, so I can see adding in 0.5mm and perhaps 0.2mm as well.)
While the uArm Swift Pro is awesome, I’m still going to be a little critical… One of the issues I’ve come across in the Draw/Laser part of the software is that the speed seems to be hard-coded, with no way to adjust it to go faster (or slower.) As someone who understands G-code and how CNC machines work, I found this a little annoying…
So I set about to find a solution. I first posted a message on the forum, but then Chinese New Year hit and it seemed as though it would be two weeks (or more) before I got an answer. I had dug around and found that the G-code created by the Draw/Laser part of the software generates a file and drops it at ~/uarm/Temp/files/gcode/tmp_pen.gcode and I assumed that by editing the feedrate in that file, I could speed things up… I was right!
My first attempt was to connect with the arm using Universal Gcode Sender, which in this case was not universal, and failed to properly talk to the arm. I dug around a bit more and found simple_stream.py which is a Python script to stream G-code to a device. Sadly, it was not compatible with Python3, but luckily, I’ve been writing a lot of Python lately, so I fixed it.
After I got it working (that is, after much hacking at the original code) I found that I could easily speed up the drawing to half the time. In this case, 5 minutes with the Python script versus 10 minutes with uArm Studio. For TSP art, great precision tends not to matter too much, and I think I could speed it up even more.
I’ll work on cleaning up my Python code and seeing if I can get it online in case others want to muck around with it.