Categories
Uncategorized

HP Z420 Workstation

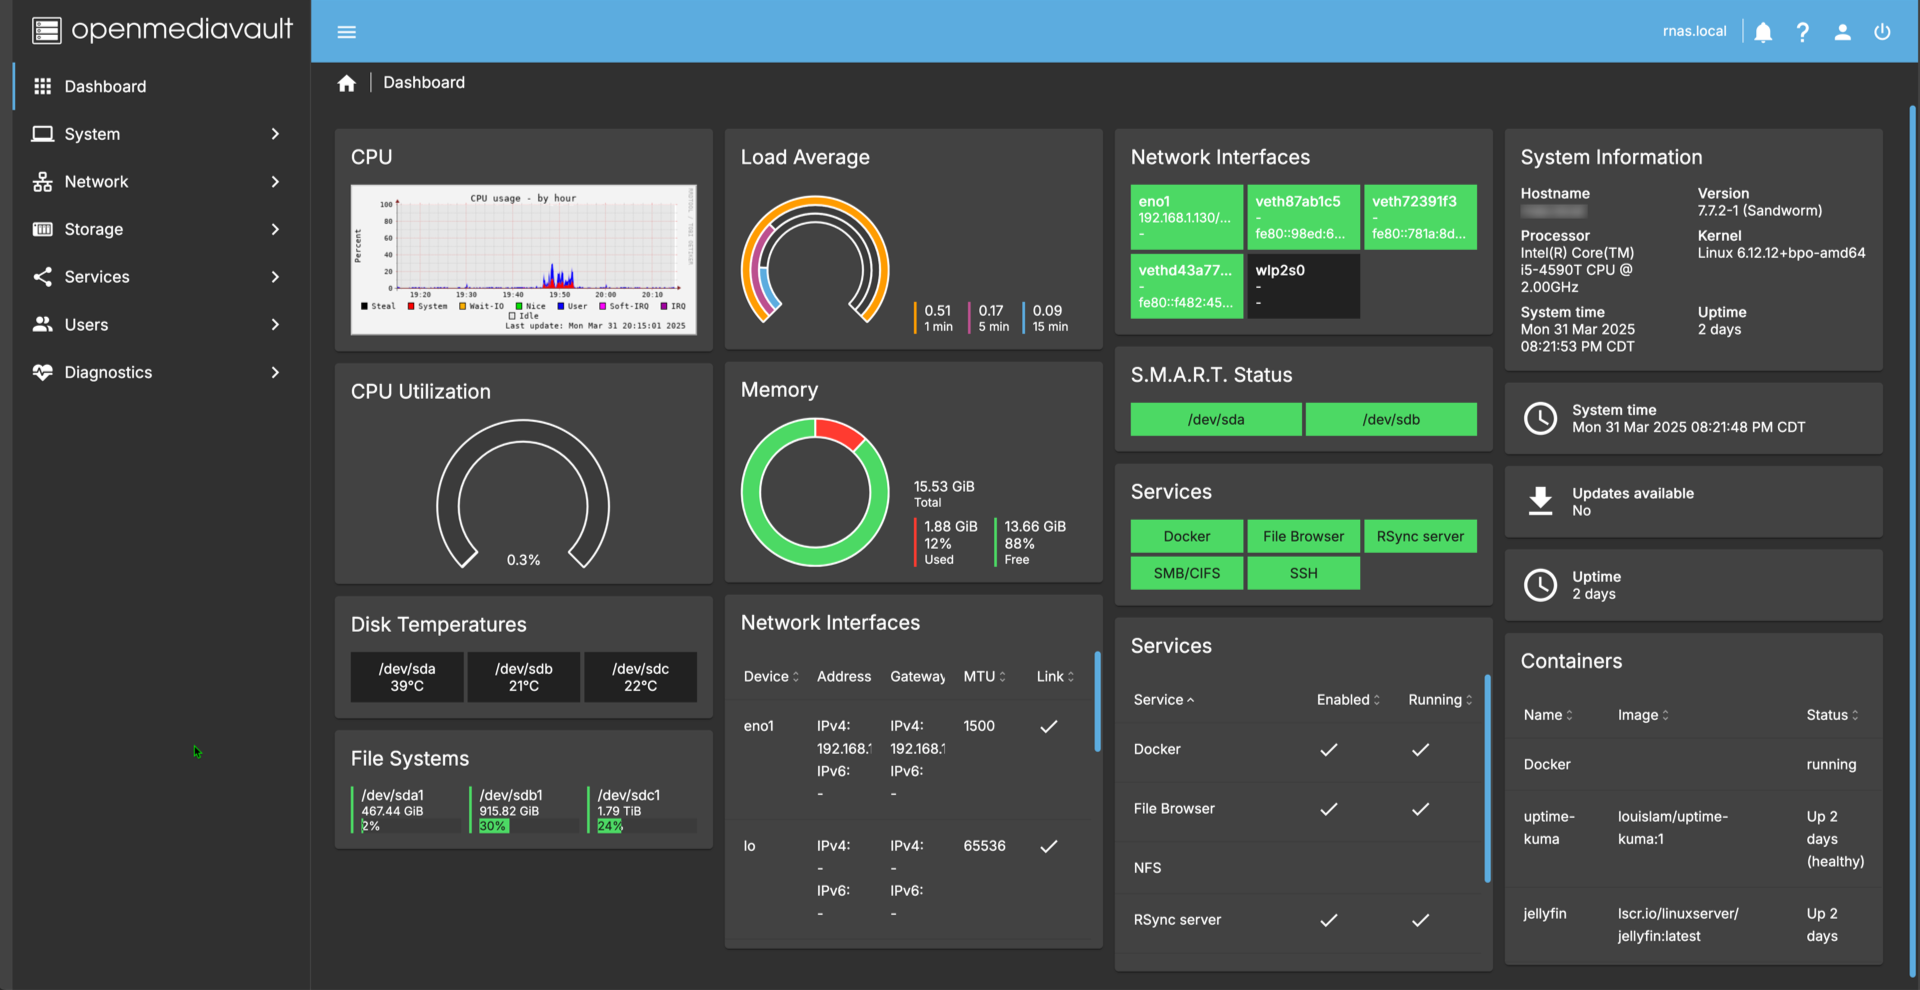
Even though I’ve posted about NAS devices as far back as 2005 I’ve never really run one at home until recently. I got OpenMediaVault running and it worked well, so when I was offered a free computer that could fit at least 6 drives I figured what the heck!? Let’s try the open source version of TrueNAS Scale.

Oh, I should point out that in 2007 I said “FreeNAS it looks like a cool solution, and something I may try to play with in the future” and hey, the future is now!? And honestly I still deal with some of the questions I asked back in 2007.

I should note a few things. First, the Z420 is a bit of a power hog but keep in mind I got it for free. So any extra energy cost can be traded for the fact this was zero-cost hardware, right? I don’t know if I will run this long-term but for now I can use it to learn TrueNAS.

The other thing is, you can easily just buy a Synology NAS and stuff it with drives. I say “easily” because they do a good job of building a ready-to-use NAS solution for most people… if you’ve got the budget. I like doing things on the cheap and learning the hard way though. You’re welcome!

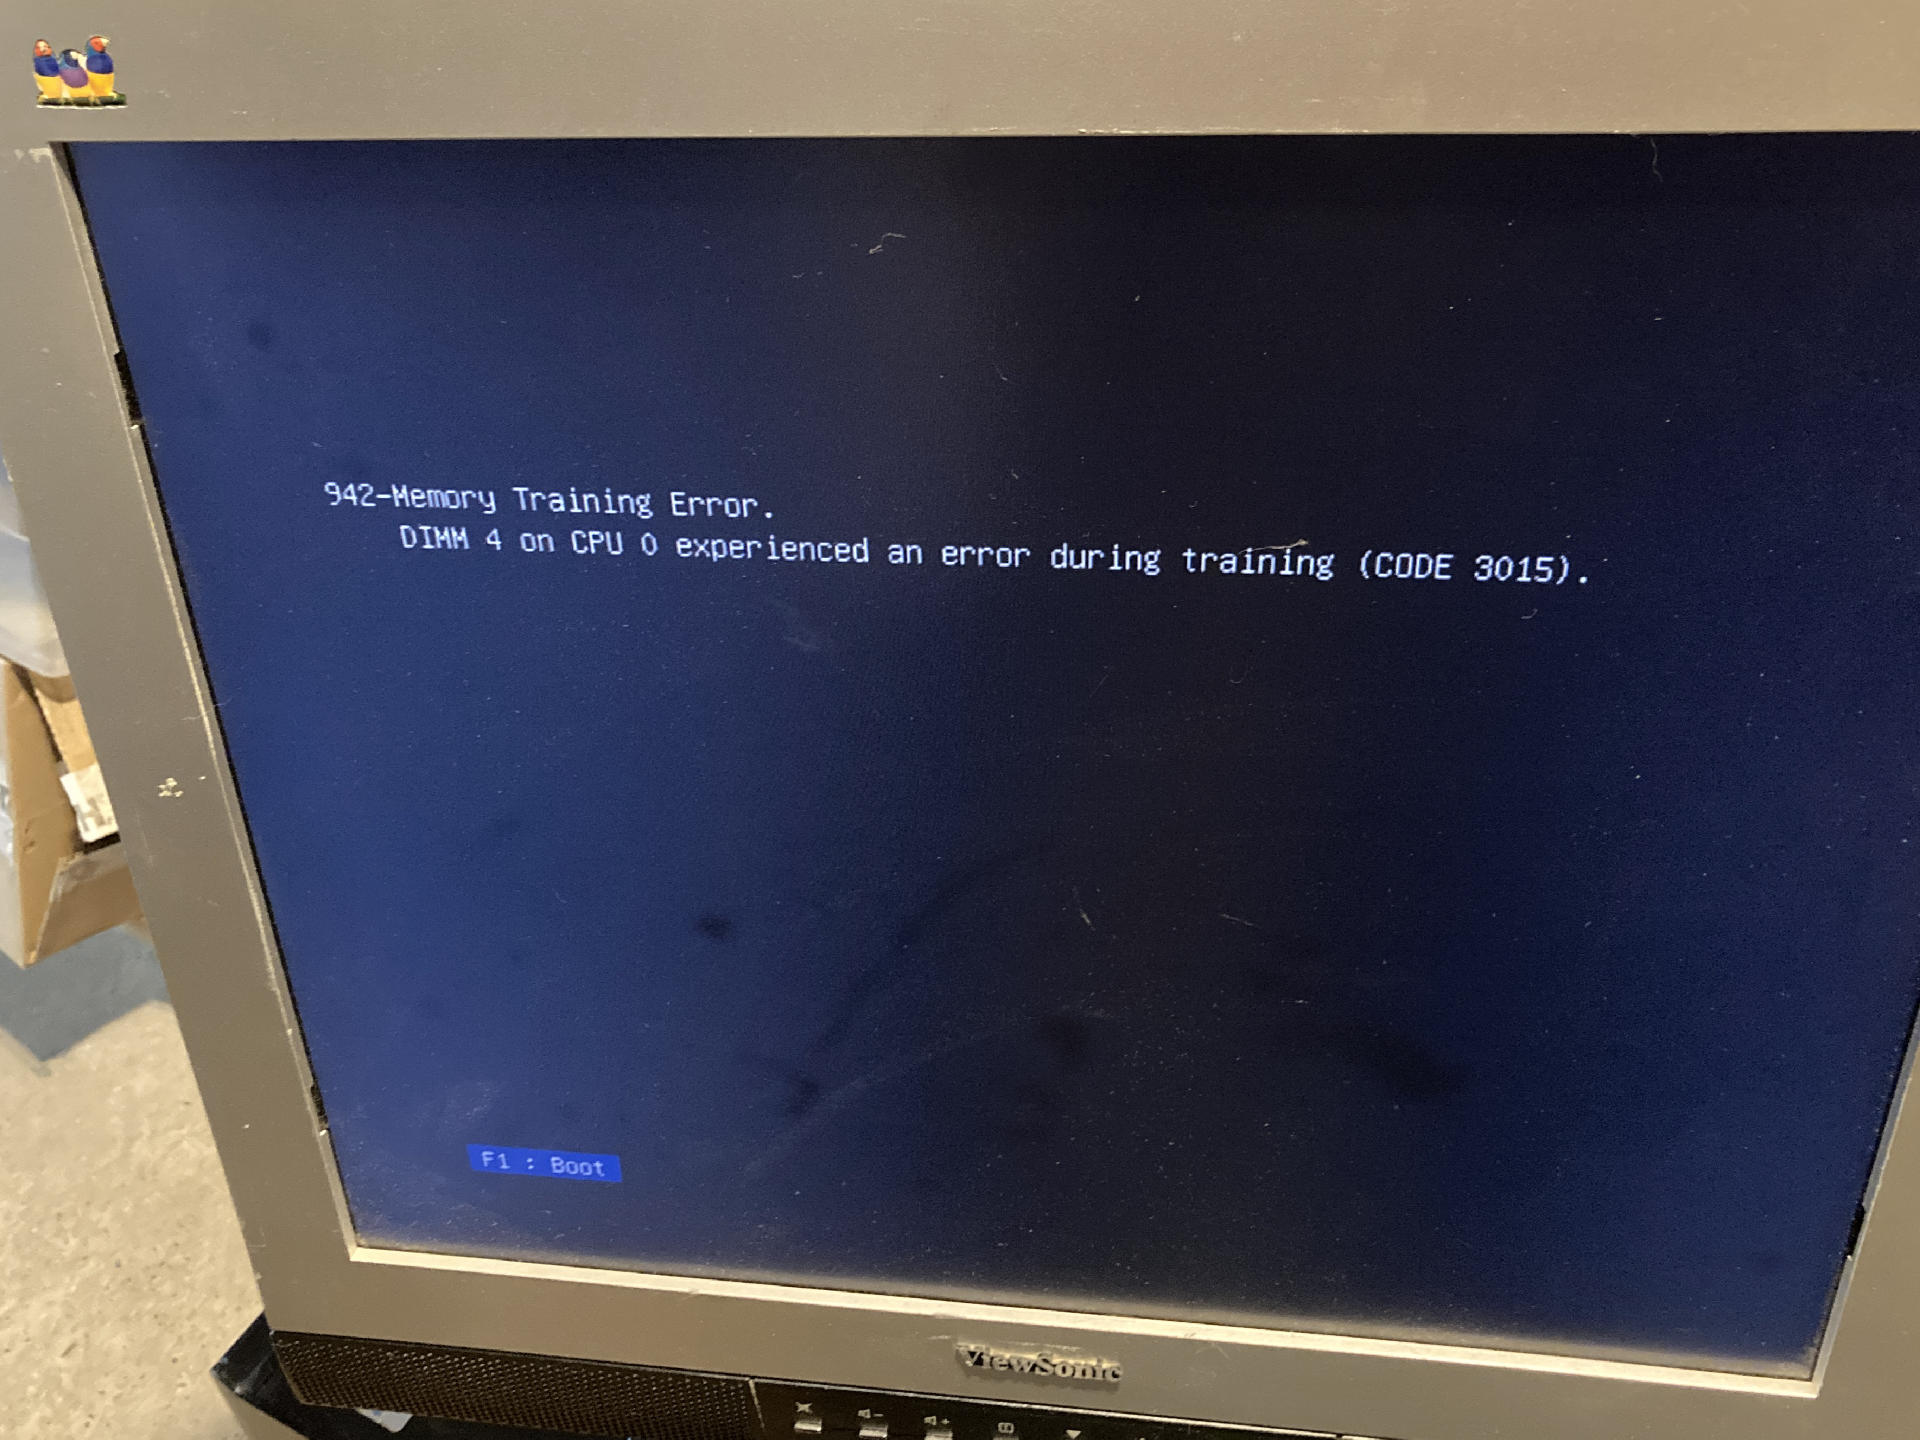
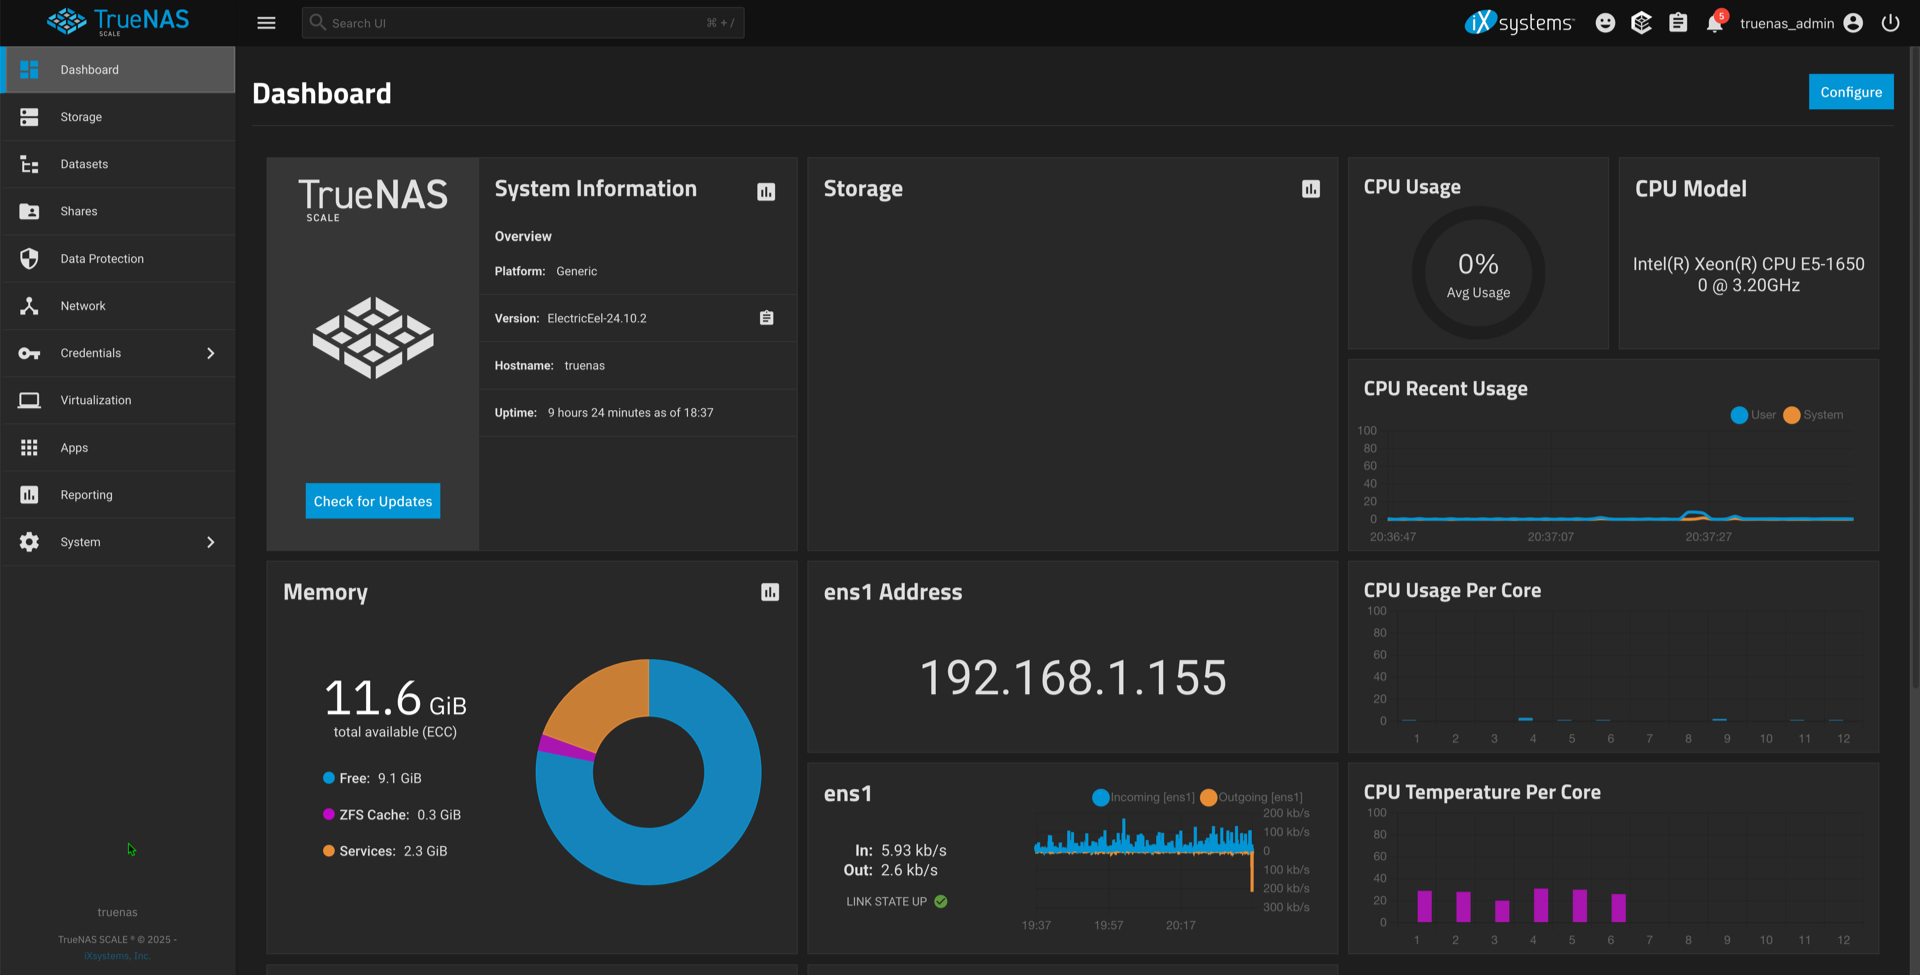
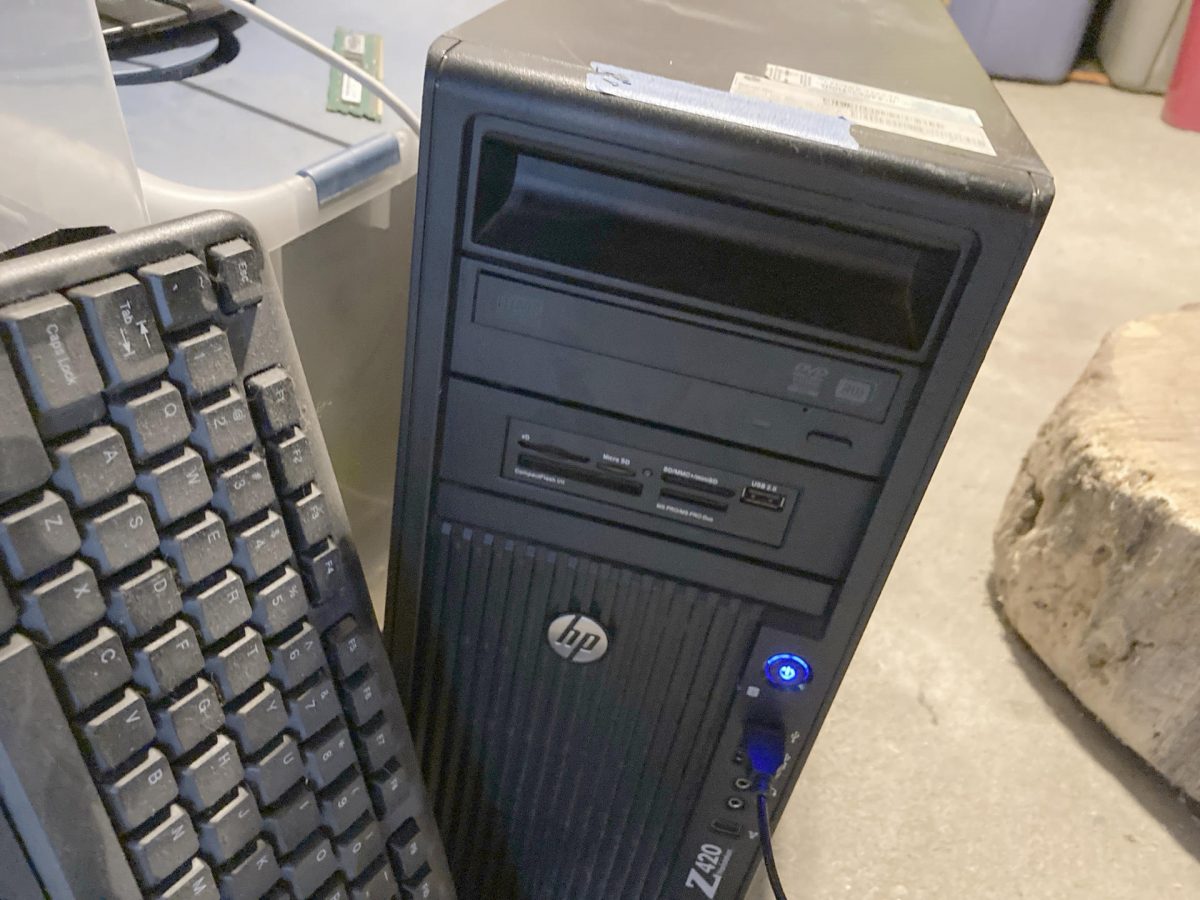
Anyway, this post will focus on the HP Z420 Workstation. I’m sure I will post more about TrueNAS, but the installation was pretty simple. I flashed the ISO to a thumb drive, dropped a 256GB SSD into the case, booted it up, and ran the installer. Oh, I did remove one of the sticks of RAM because it showed an error (on the monitor) when I originally booted it. There is now just 12GB of RAM. I may try to re-install the DIMM or maybe get more RAM. 12GB might be plenty for testing though. (I tried to reinstall the fourth DIMM and it didn’t boot. I may give up on the fourth DIMM.)

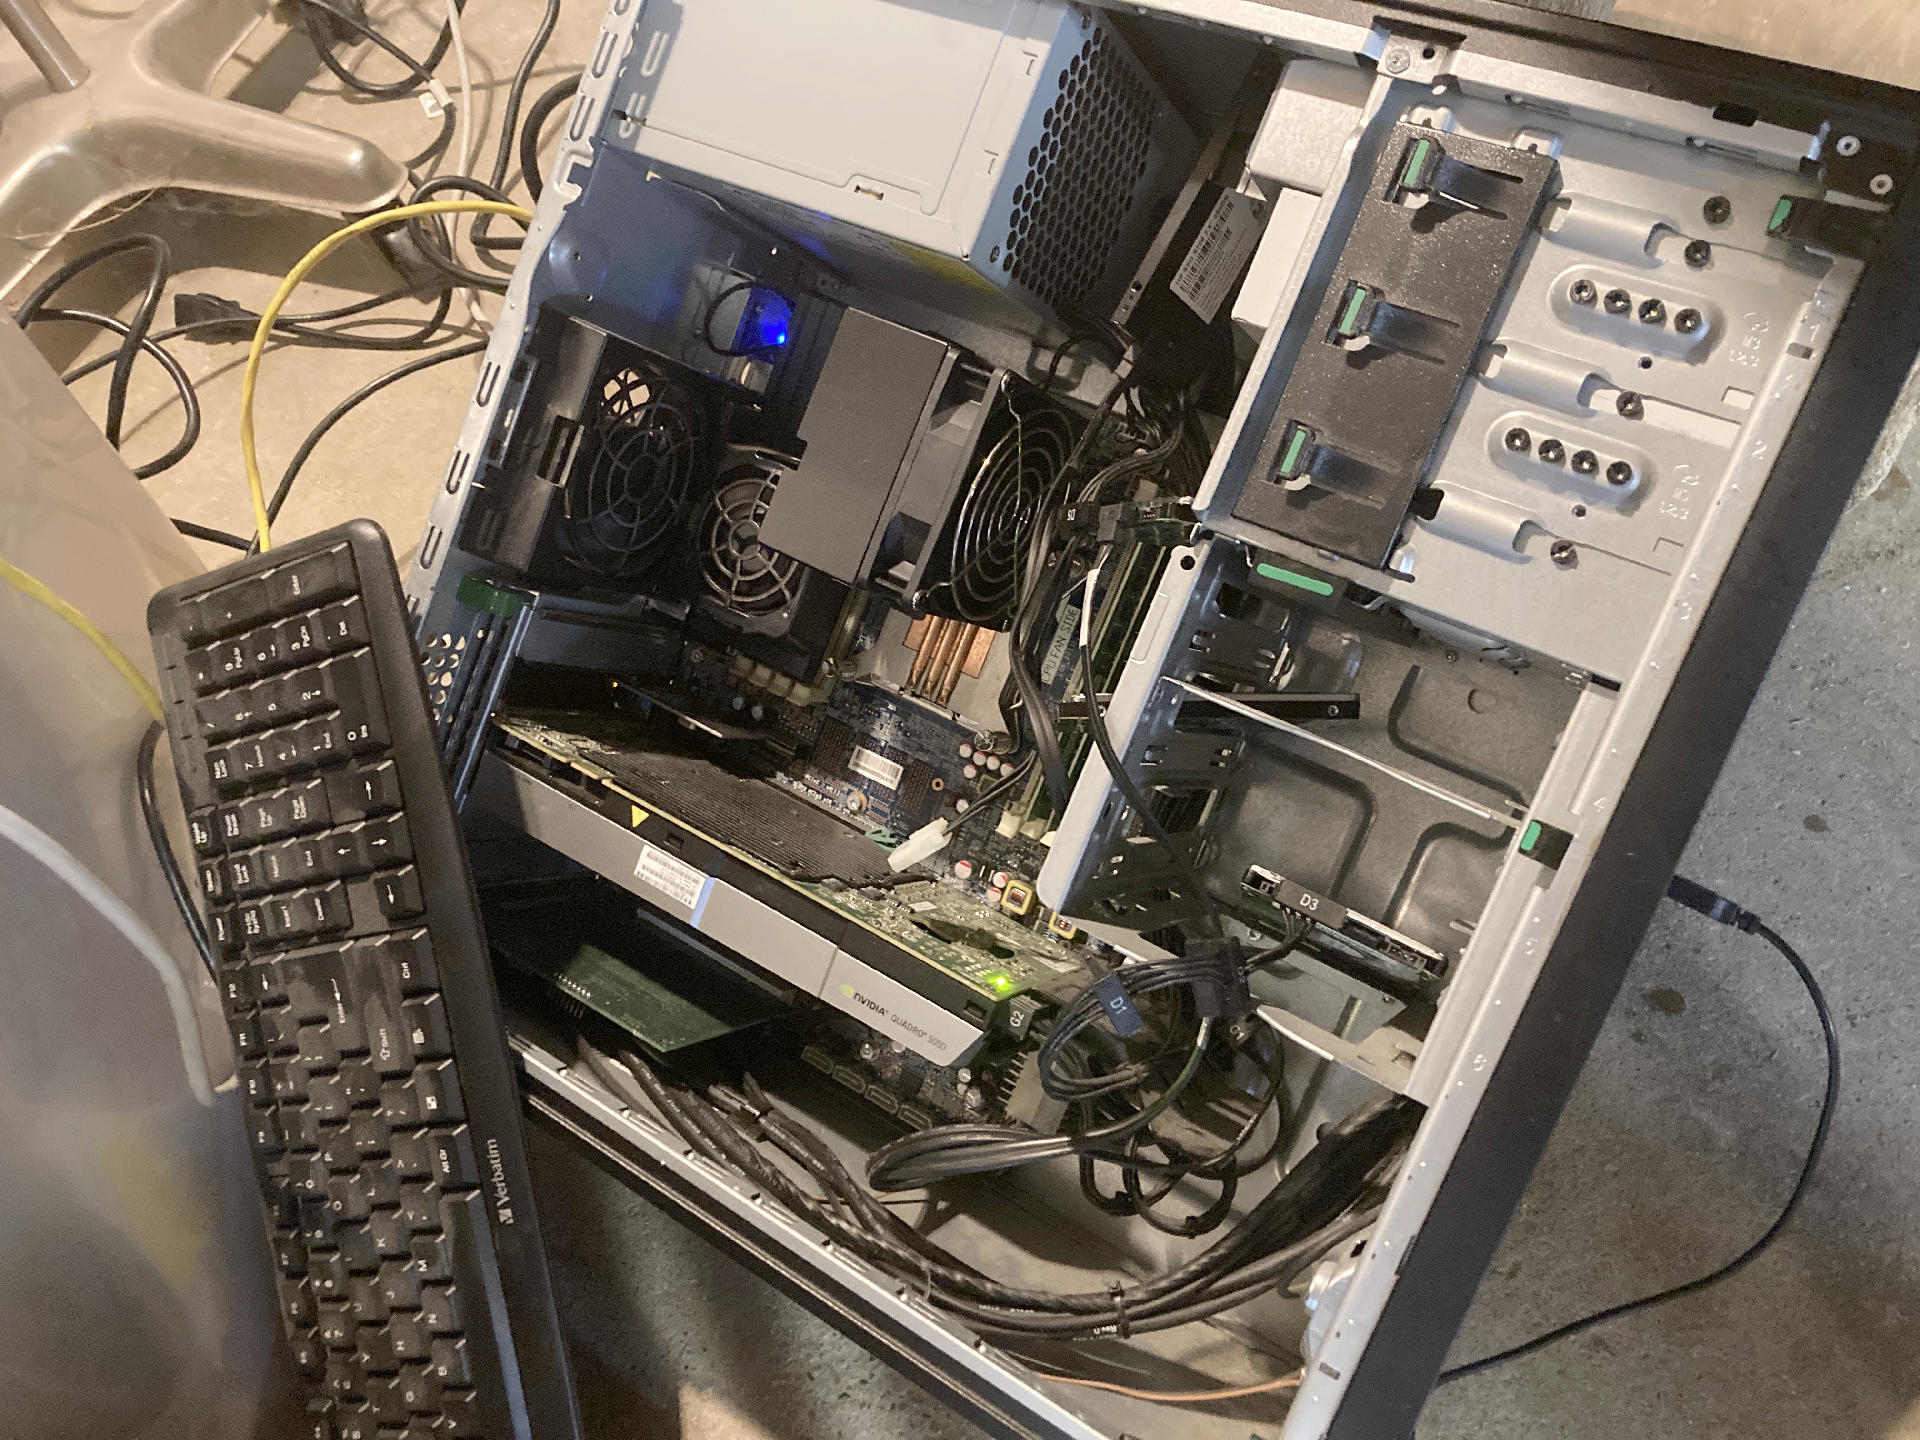
I got the case open to see what I was working with… I should note I am not a person who has ever “built a PC” though I’ve opened a lot of machines. Tons and tons of Macs, from desktops to laptops and models in-between. I’ve also opened lots of Windows laptops which eventually became Linux laptops. Still as far as “towers” go my experience is with Apple hardware.

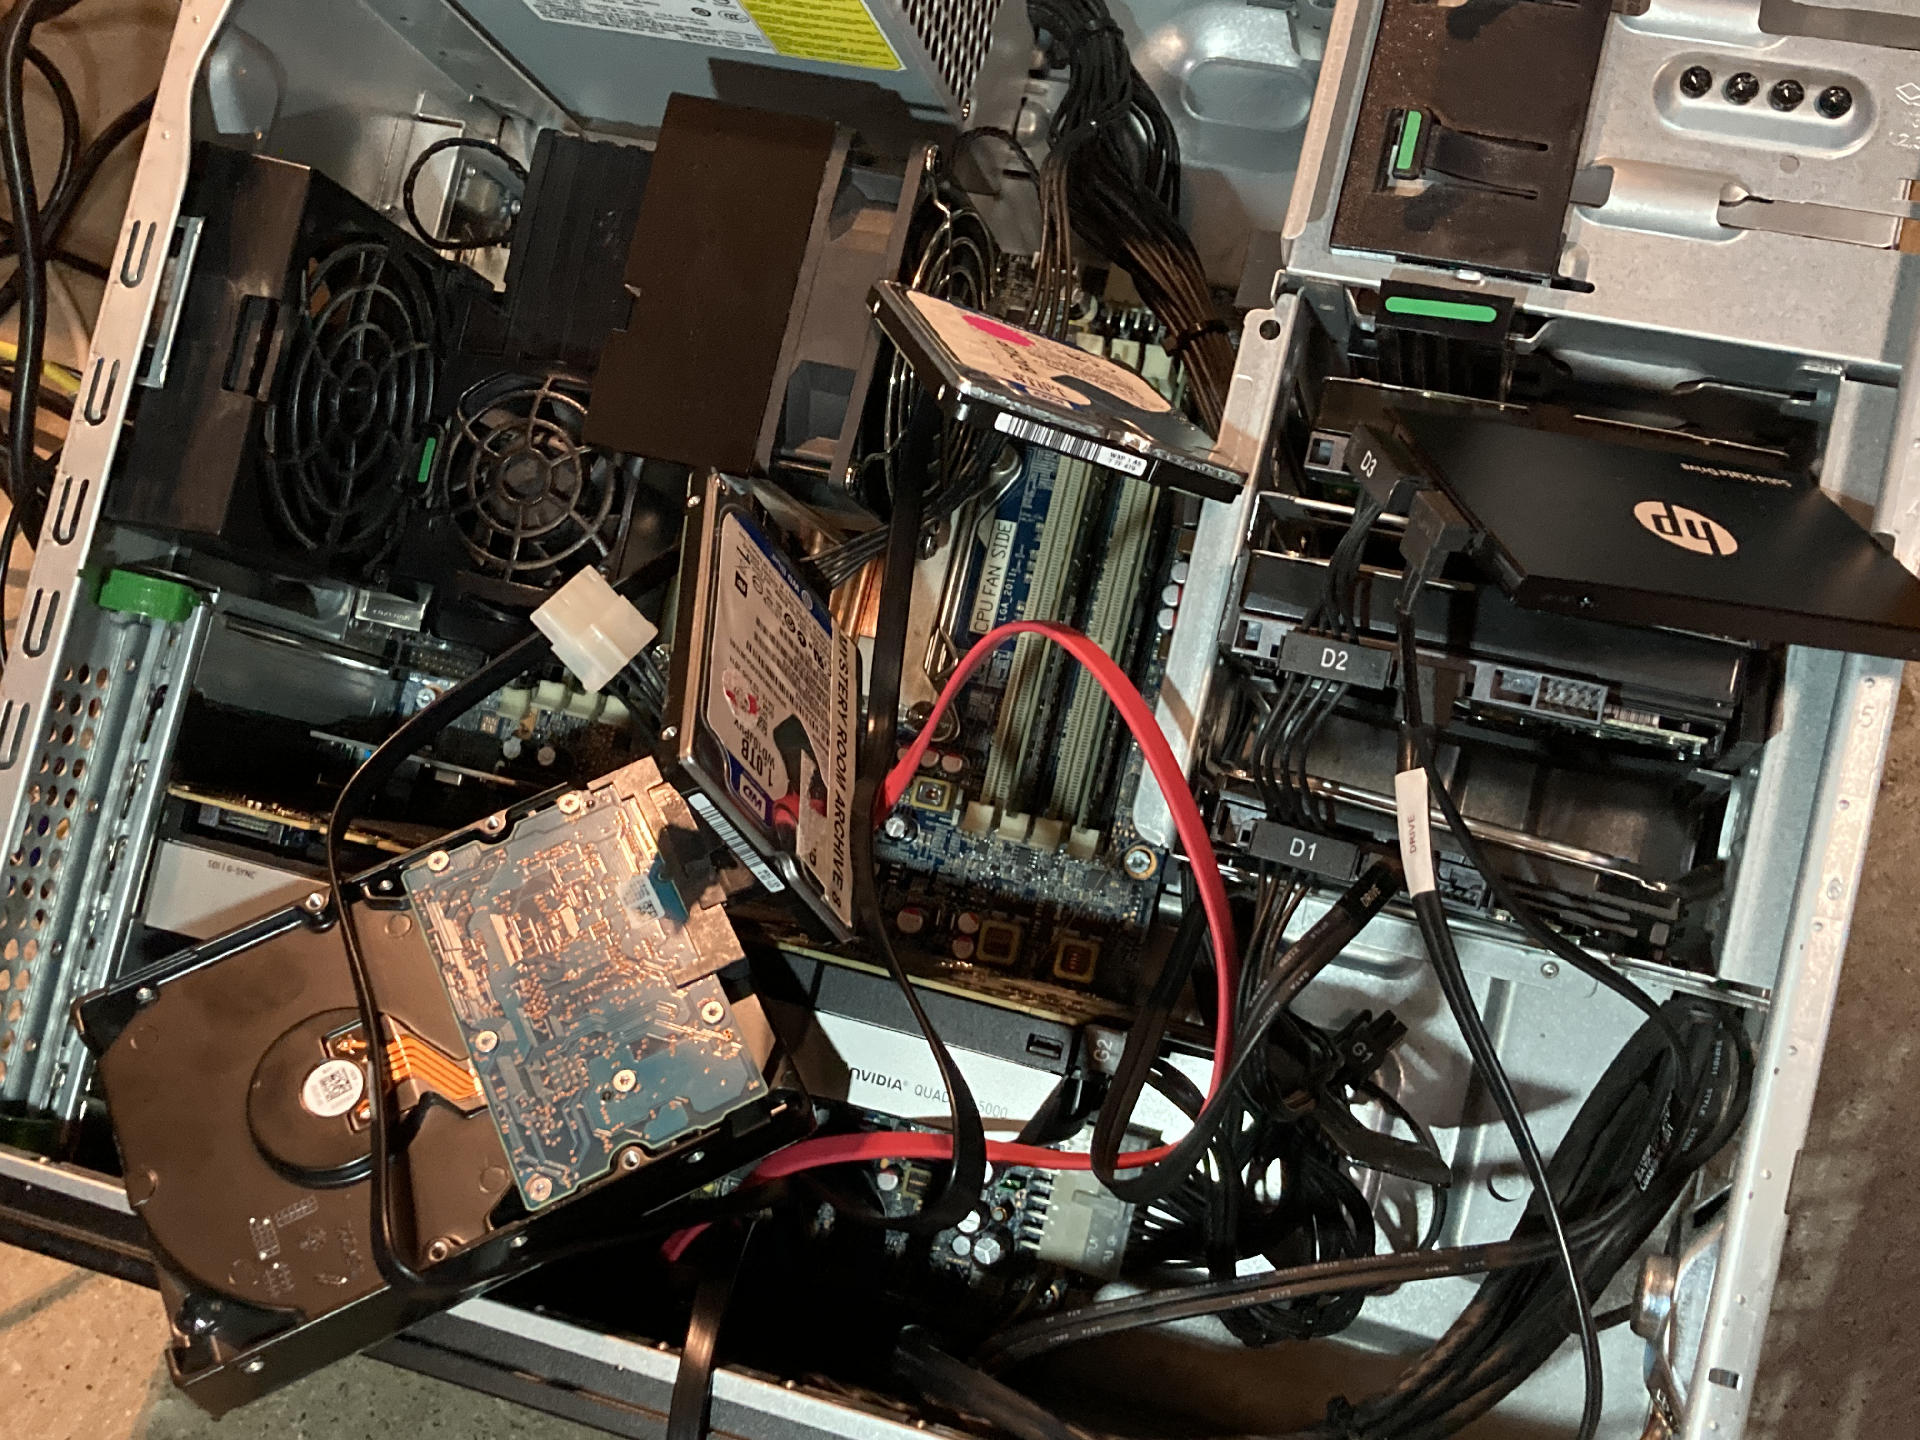
I had to procure three more SATA cables and added them to the one I found in a drawer and the two that were in the machine, but I got six drives connected. I popped out the optical drive and multi-card reader thing. Even though there is spaces for six drives I don’t have them in place yet… but they are all plugged in and… hanging about. It works.

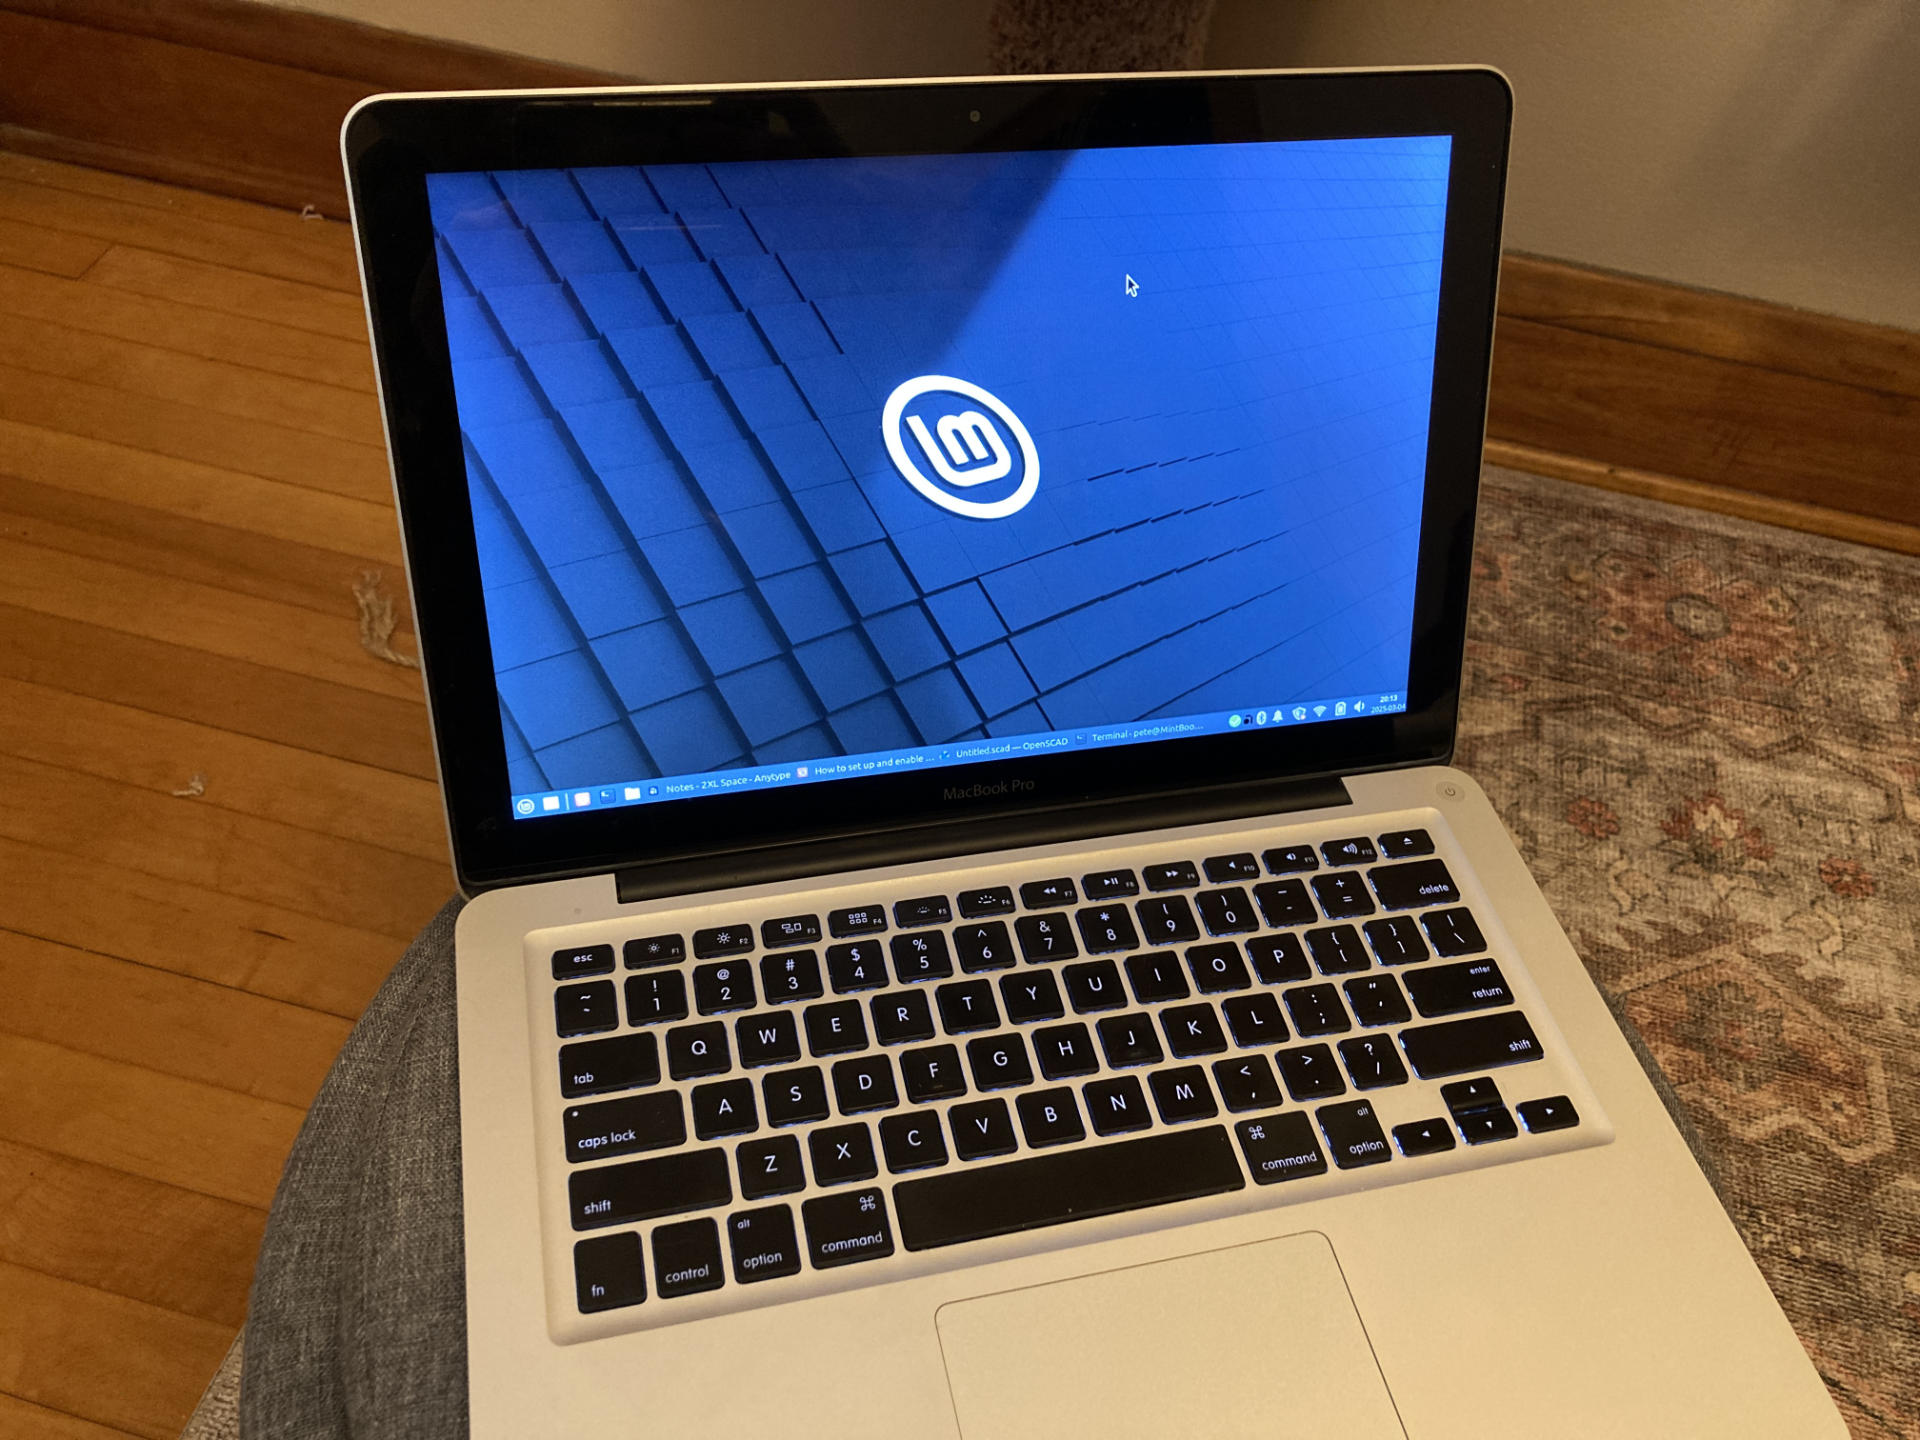
I threw a monitor on for the install but it’s still attached for now as I get things up and running. Like other NAS products you pretty much do everything through a browser so no monitor is expected or needed. (Once your hardware actually works.)

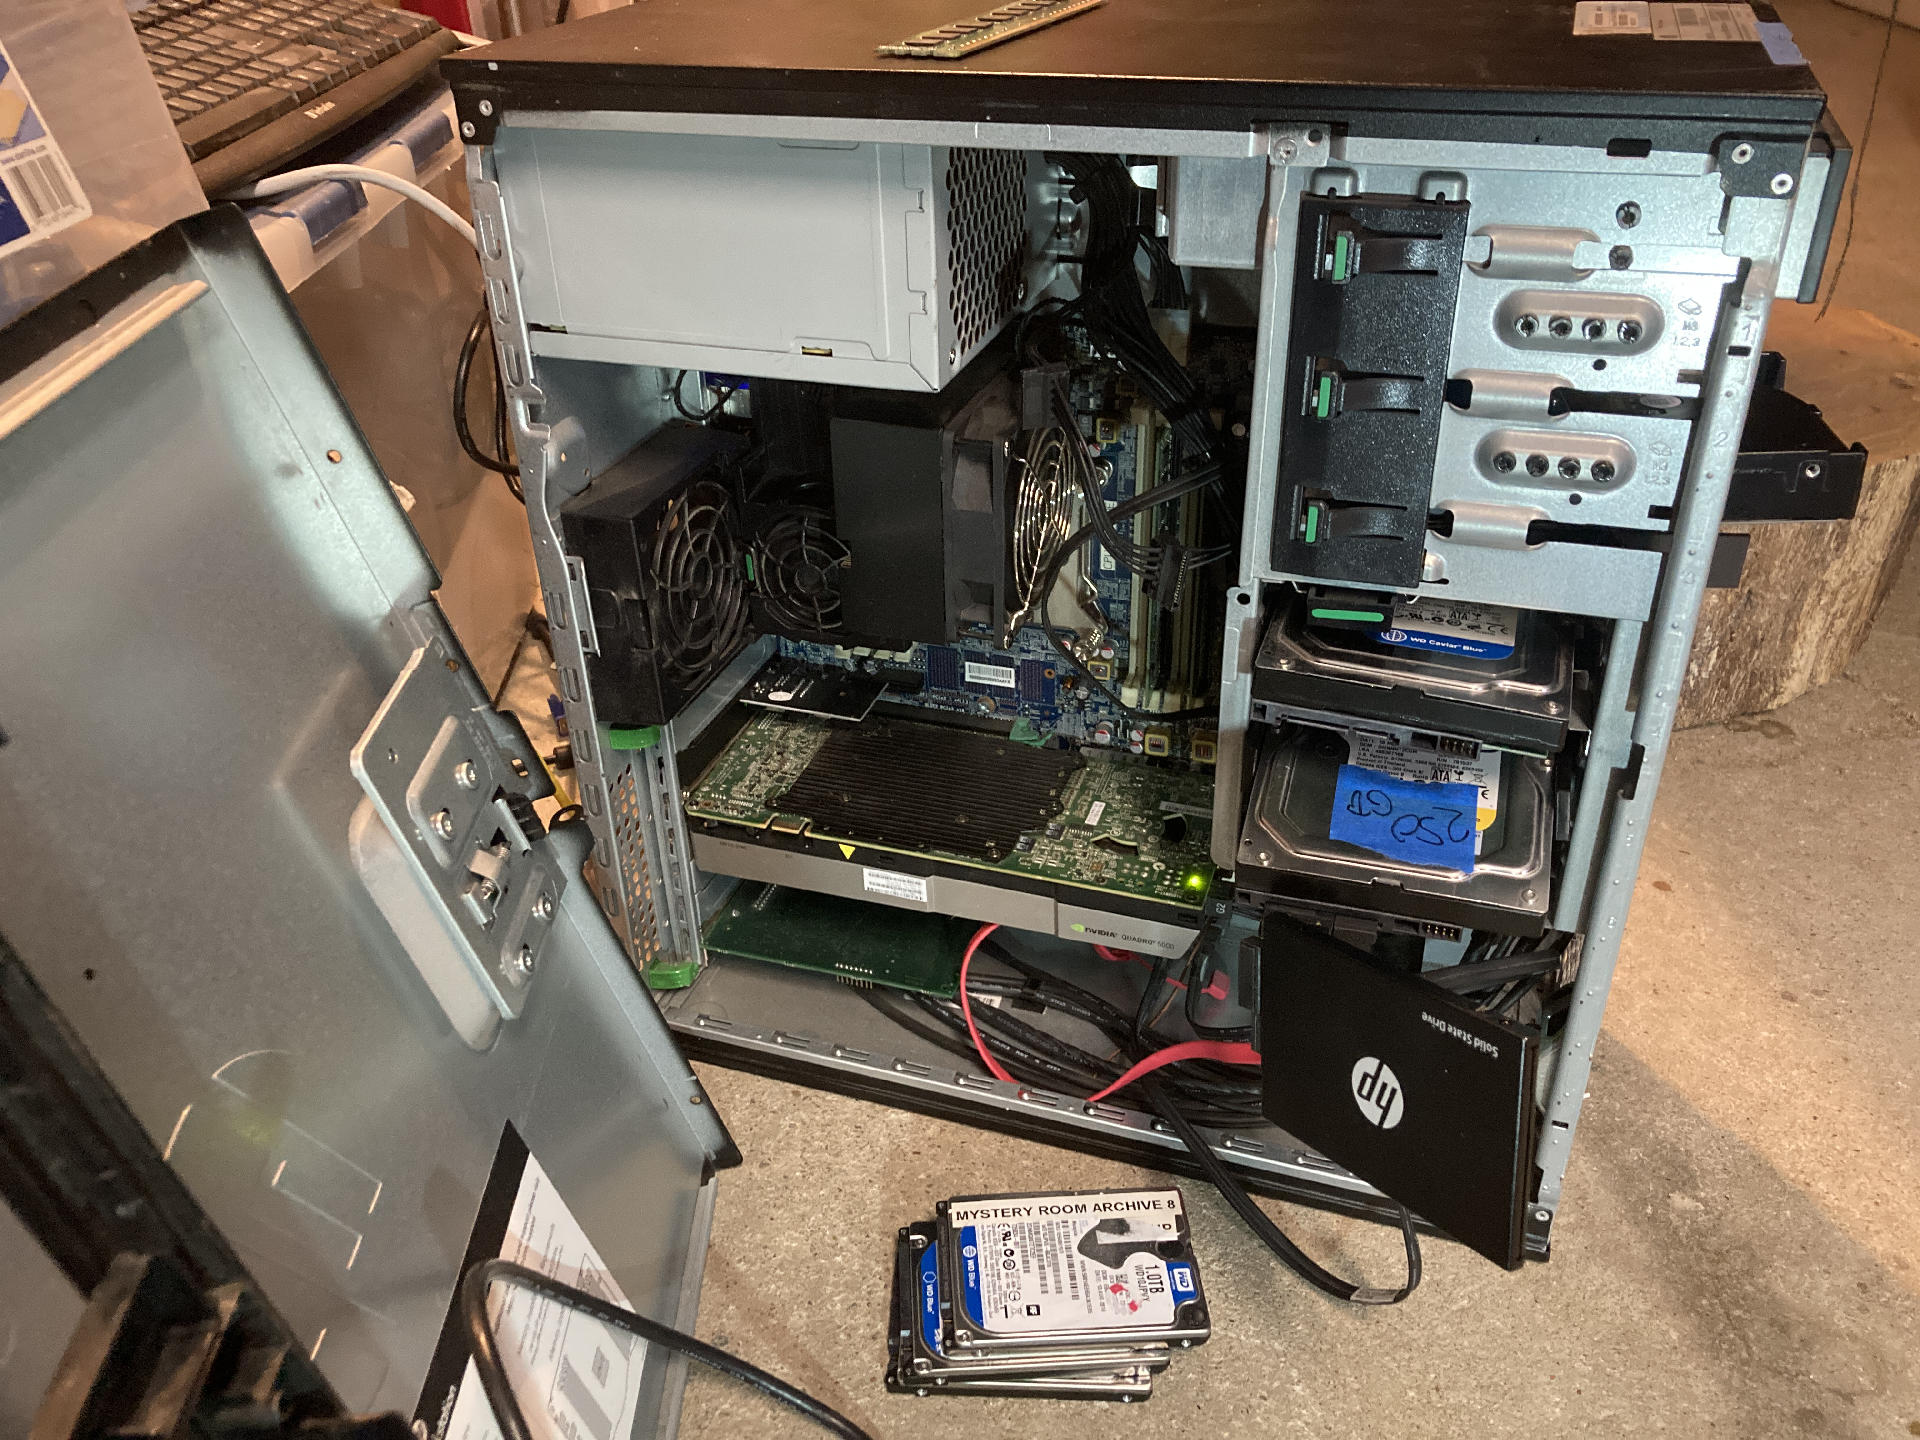
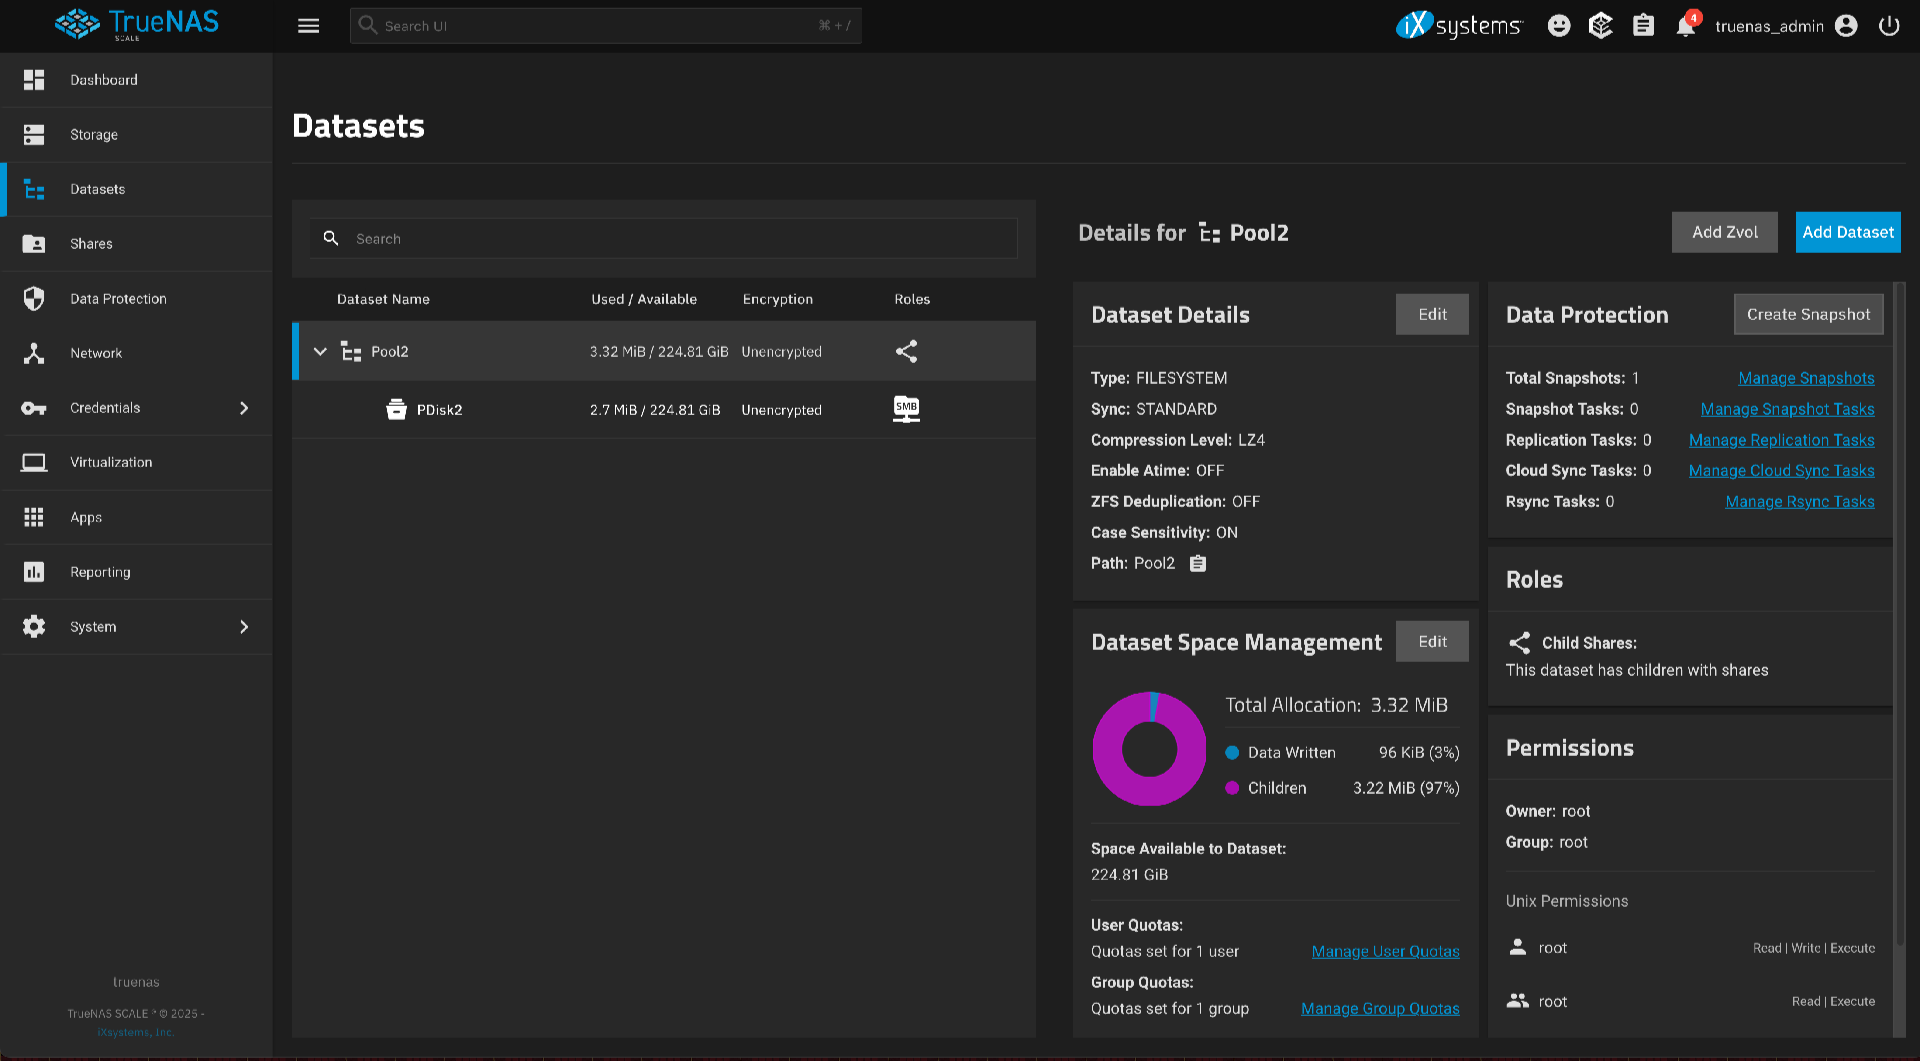
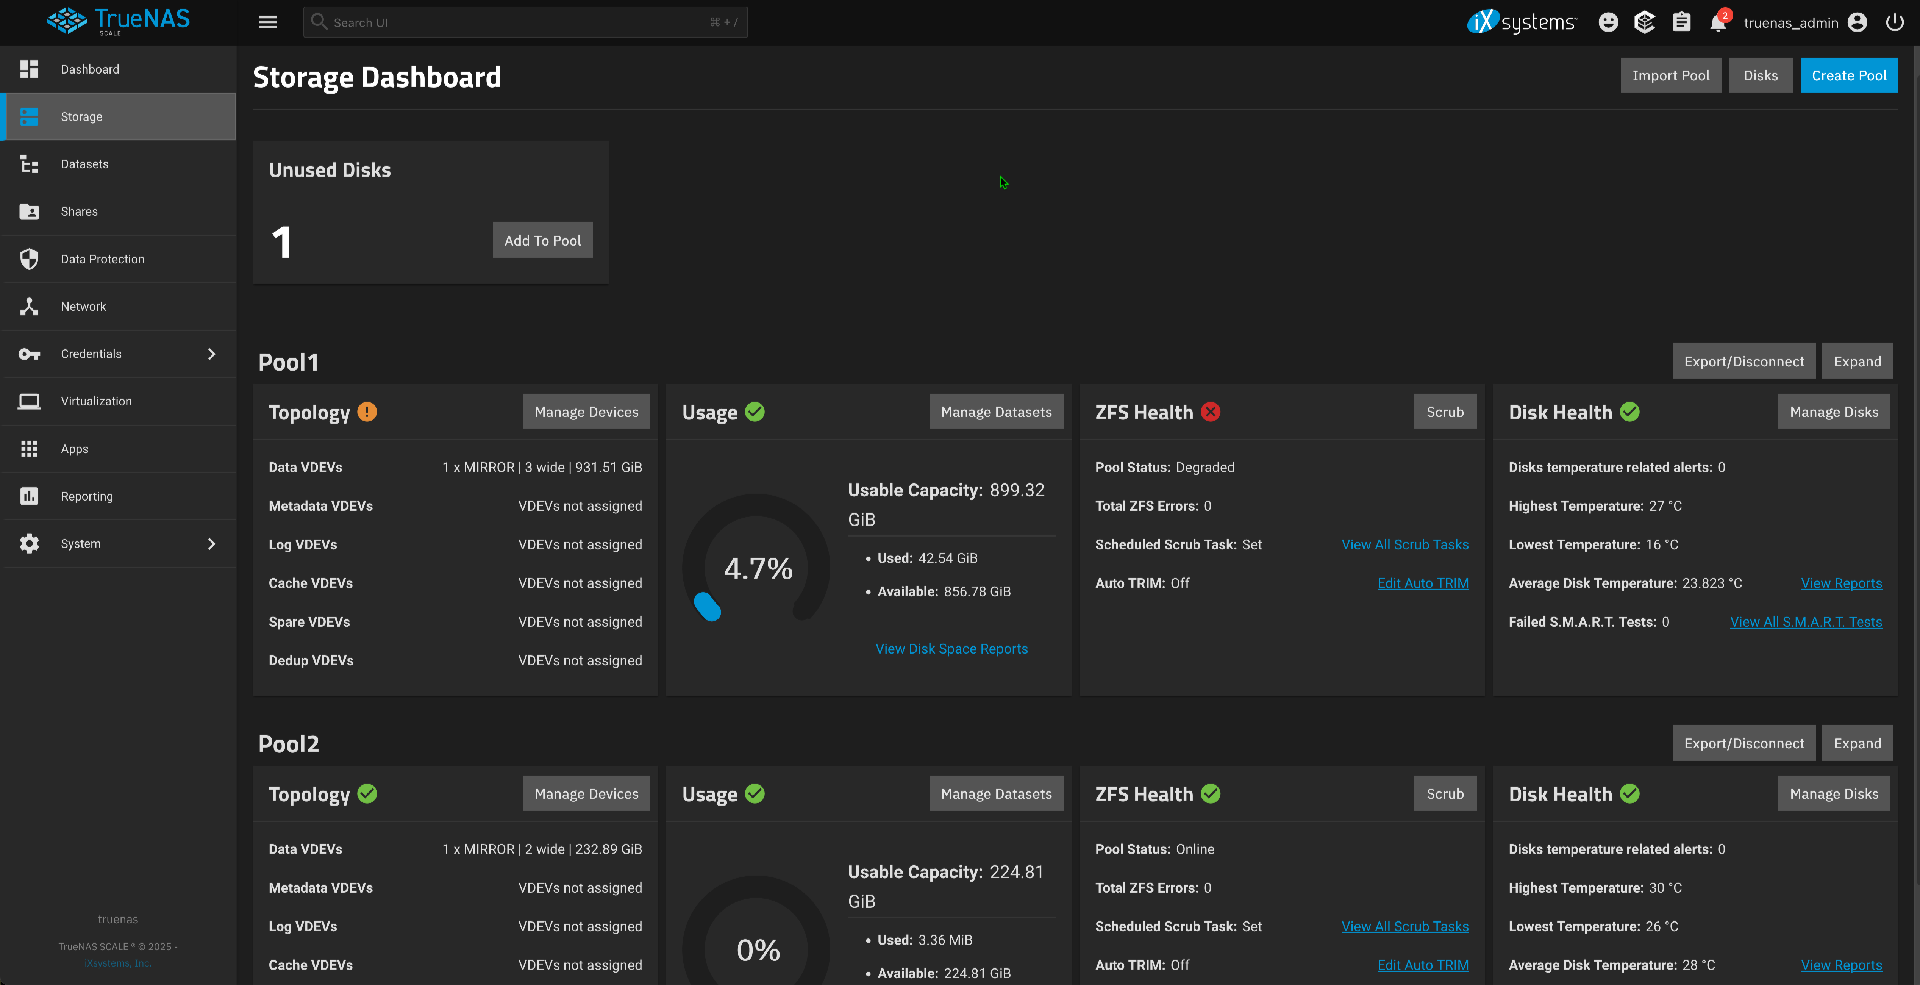
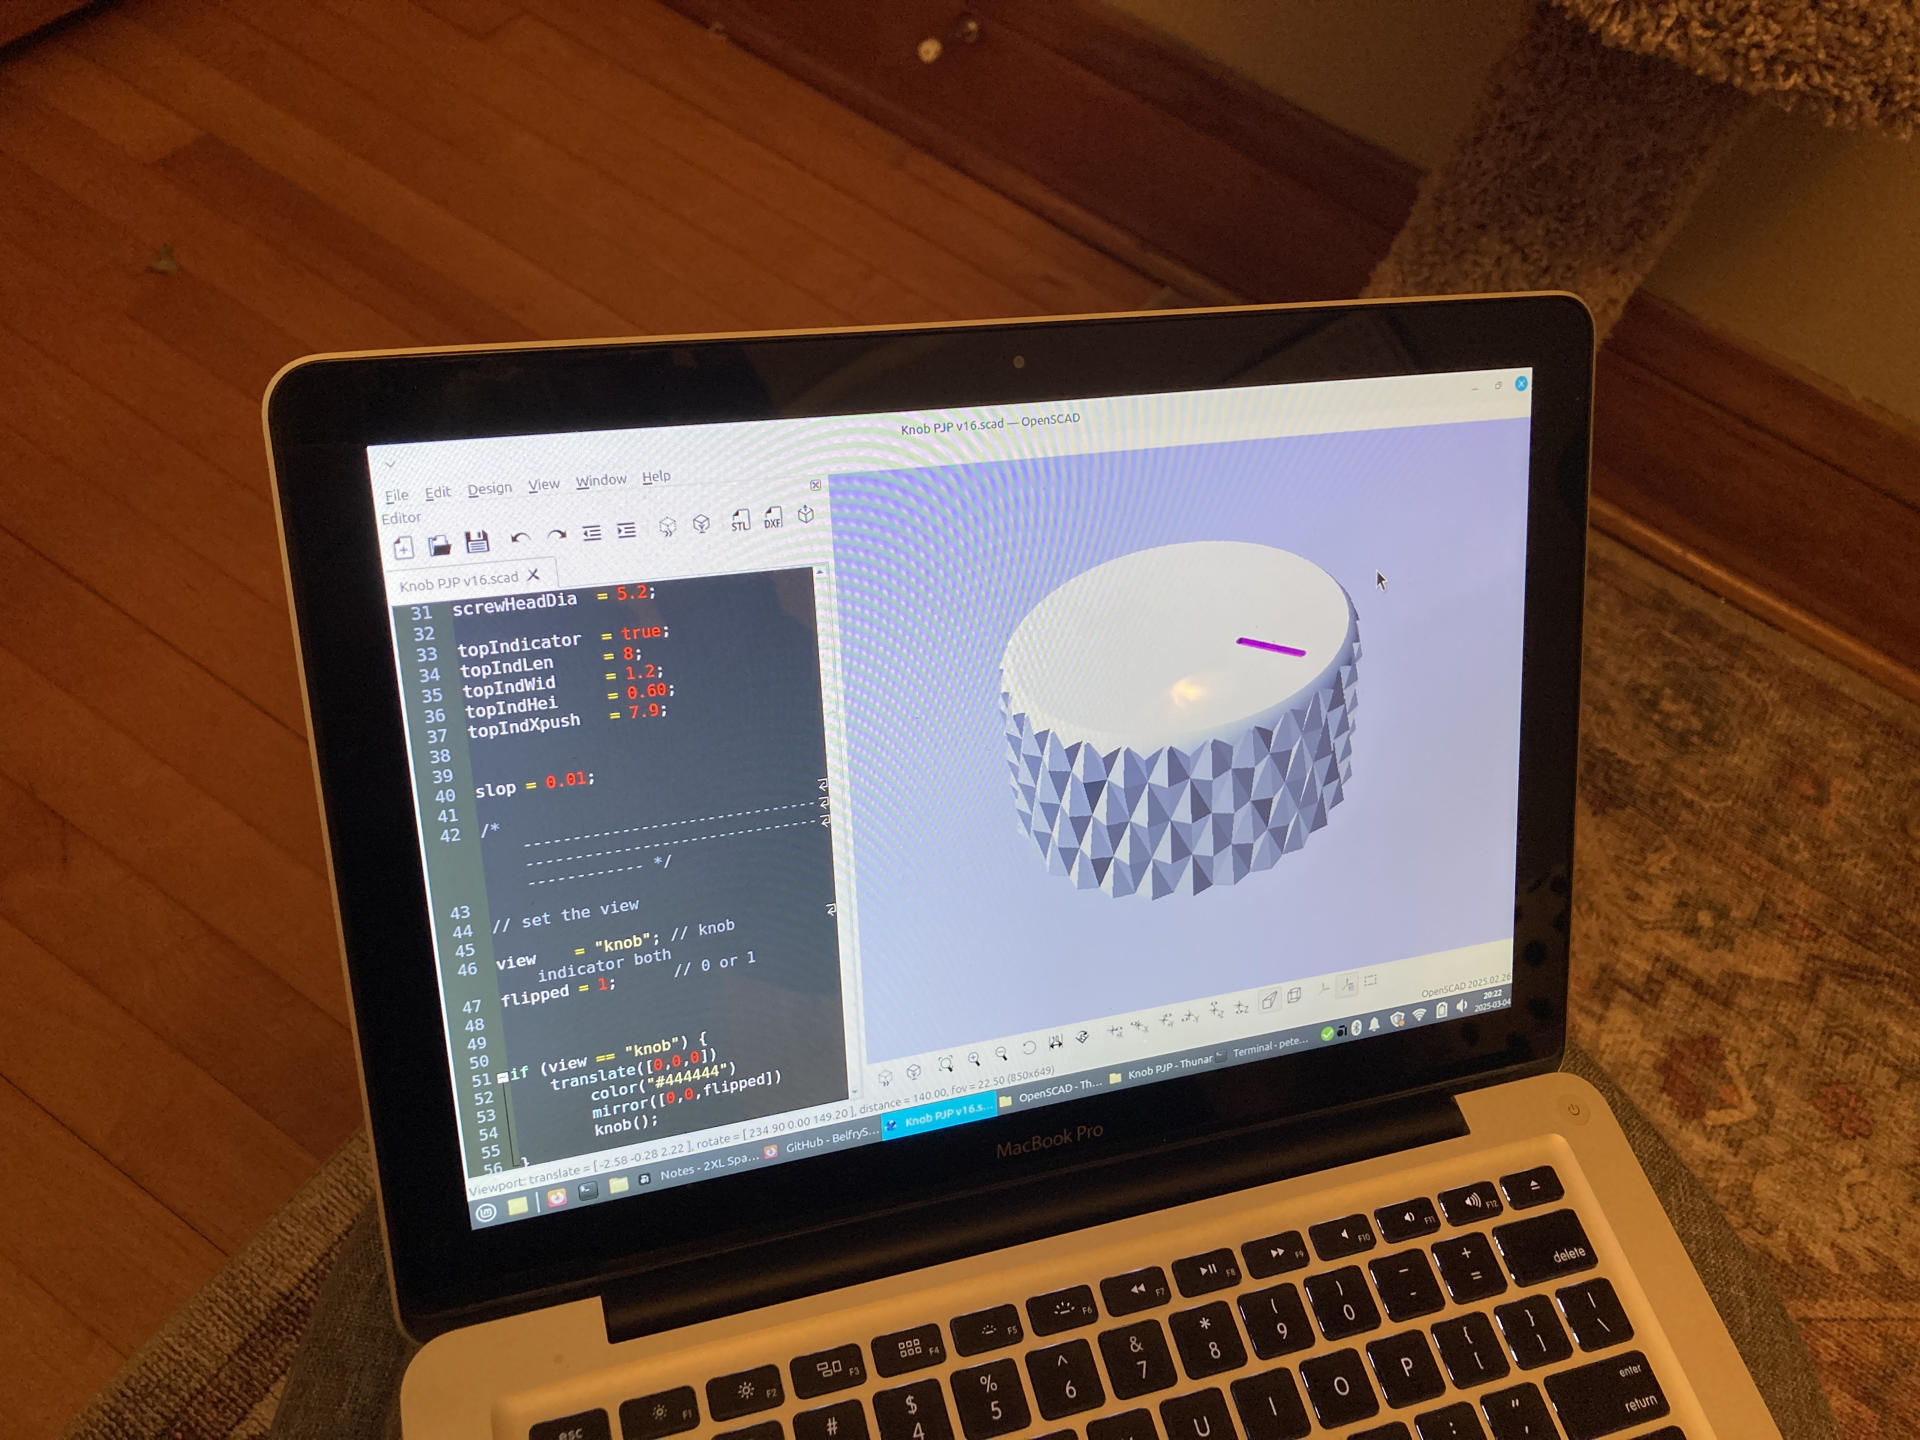
I’ll need to 3D print some hard drive sleds (sled? caddy? whatever) and then get the drives more permanently mounted. These are mostly junk drives, old and smallish… I do have two 4TB drives ready to go and may have a third one soon. You really want a minimum of three drives for ZFS and more than that is even better. Again, I am trying to be economical in this project and not just spend a ton of money. If I wanted to do that I’d just buy a Synology box and call it a day.

Categories
Uncategorized

TrueNAS Testing

TrueNAS Dashboard

After my experiments with OpenMediaVault (and success) I decided to try out TrueNAS Scale. The first thing I noticed about TrueNAS is that it’s legit, and by that I mean it’s described as “Open Enterprise Storage” and on the web site it says “Award-Winning Storage Trusted by Over 60% of the Fortune 500” and lists a bunch of huge corporations. Sounds legit. We’re using the Community Edition which is to say it’s the open source version with no paid support contract or whatever…

Now, besides all of that I just wanted to try it out because I had heard good things, especially about the ZFS file system, which is more advanced than RAID. I had another old Dell Optiplex laying around from a failed client project years ago but it would not boot so I was in no rush with this TrueNAS testing. Then out of nowhere my sister messaged me with a photo of an HP Z420 Workstation and said “How do I get rid of this?” and I said “I’ll take it!” So I did.

The HP Z420 Workstation is a beast of a box with space for six drives so it seemed like a good candidate for TrueNAS… so that’s what I did. (I’ll write up a separate post about the Z420 and just focus on TrueNAS for this post.)

Because I’ve already got a fully functional NAS running this one was for testing, trying, and learning.

It took some clicking around and minimal doc reading to get a pool setup, and eventually an SMB share I could store files on. I also installed some containerized applications. And then I pulled out the three drives and swapped in two other drives and set those up. Then I added back in the original drives but just two instead of three. At this point I wanted to just test things out and see what would happen. I saw warnings about degraded pools and such. Nice to see. I haven’t quite figured out exporting a pool and re-importing again, which is what I think I might need to do someday.

In my mind the nice thing about OpenMediaVault just using an ext4 drive is that if the system dies I can just plug that drive into another computer and access all the data. (It’ll need to be a computer running Linux, but that’s okay.)

For these TrueNAS drives with ZFS it doesn’t seem to be that simple. I know you can run ZFS on Linux and I’ve even found a version for macOS but I think I basically need to learn all about ZFS before I feel confident I can rescue my data if things go wrong.

The obvious solution seems to be running two (or more) TrueNAS servers so one backs up to another, and you’ve got a second one to move drives to in case the first one fails.

I’m sure there are answers to all of this… if you have them, or other suggestions, feel free to share! Otherwise just consider this my notebook where I write things down for future me.

Categories
Uncategorized

OpenMediaVault Update

About a month ago I got OpenMediaVault up and running on a Raspberry Pi. It worked until the disk failed so I ended up redoing it all with a real computer and a better disk. I also added a backup disk and have an rsync job running daily to do a backup.

There’s also a computer off-site that does a daily backup to the NAS via rsync over ssh. Next on the list is to do the same with a web server I’ve got running at a hosting provider.

This post is really just a check-in to say it’s been working really well. I do like OpenMediaVault for a very simple NAS solution…

That said, I’m digging into TrueNAS Scale now and it’s… a lot. Which is fine. It’s been fun comparing the two, and I’ll have a post coming to cover TrueNAS soon.

Oh, and I’m considering building a small simple NAS using OpenMediaVault to go off-site for a bit more redundancy with the backups. Stay Tuned!

Categories
Uncategorized

Nginx Proxy Manager

I recently setup Nginx Proxy Manager and here’s how I did it. Oh, first I’ll explain what it is. A proxy is a person appointed or authorized to act for another…. well, that’s for people, but with computers it’s pretty similar. One computer acts as a go-between for you and the computers/services on your network. Remember when I mentioned Jellyfin? Well to get access to my Jellyfin server running on my home network I poked a hole in my router using “port forwarding” which allowed me to connect to it from anywhere I had an Internet connection.

So if you’re at home and visit whatsmyip.org it will show you the public IP address of the router from whatever company provides your Internet service. (In some cases this address will change, but if you’re luckily it will remain the same. If it changes you’ll need to know about “Dynamic DNS” but I’ll skip that for now.)

Anyway, I was using port forwarding for Jellyfin, but I wanted to add a few more things I could access and rather than faff about with a whole lot of port forwarding I just forwarded one thing (port 80) to Nginx Proxy Manager which runs on a Raspberry Pi at my house. This single little computer routes all the requests you see in the image above.

I used subdomains to determine what goes where, as I have multiple computers on my network, and some run multiple services on different ports. So if your home IP address is 1.2.3.4 and you normally connect to 1.2.3.4:8096 (ip_address:port_number) you can set up the proxy to accept requests from media01.example.com (on port 80, which is the default) to go to the internal computer at 192.168.1.79.8096 (assuming you own example.com, added a subdomain, and pointed it at your home IP address that is!)

I should note that when I did the port forwarding for the computer running Nginx Proxy Manager I got this scary warning about breaking things… and nothing broke.

Why would you want to use a proxy manager instead of just doing port forwarding? Well, besides making things clean (not having to worry about port numbers) you can use Let’s Encrypt with Nginx Proxy Manager and it’s extremely easy to add secure TLS certificates so your traffic is encrypted. Without this anything you log into on your home network is done via plain HTTP which is not encrypted, so it’s like writing your password on a postcard.

I mentioned I am running this on a Raspberry Pi. It’s an older one, a Model 2 or 3 I believe, but honestly its all that is needed. The nice thing about “Home Cloud” stuff is that you probably won’t have a lot of users. For my stuff it’s pretty much just me. Maybe a few family members might access things at some point but I’m not too worried about the Pi not being able to handle it. If the SD card dies and the Pi stops working at some point the worse that will happen is I won’t be able to access things from outside the house until I fix it. So failure isn’t catastrophic. Our (outgoing) home Internet connection will not be affected.

Categories
Uncategorized

MintBook – A Mint Linux MacBook Pro

Last year someone gave me a mint (LOL) condition MacBook Pro. It was a 2010 model just like my old 2012 that I got in 2014 and again in 2019 and used until 2022 when I sold it to someone who needed an older MacBook and I got a 2018 MacBook Pro that I didn’t really like and didn’t use much and then gave to Dana when her employer destroyed all the Macs…

So I’ve been without a “good” laptop for a little under a year. I would borrow my old one that Dana has every now and then but I wanted to stop doing that but also didn’t want to buy a new laptop… So I’ve got this 2010 MacBook Pro, which is a model I used for years and really liked! The issue is that it only runs older versions of macOS. When I was sick for two weeks in December I really wished I had a laptop, so I used it, but I could not installed some of the software I used, or at least not recent versions… like OpenSCAD.

So I said to myself “Self, this is an old laptop that can only run an old version of Mac OS X and old applications… time to install Linux!”

Now, I’ve installed Linux a zillion times, including on a number of old Windows laptops. But this was different. First, it was on hardware that I was used to and I actually really liked! This made a huge difference. I like the keyboard, I like the form factor… I like the hardware.

A MacBook Pro running Mint Linux

Seriously, I can’t believe how much more I like Linux when it is not running on a crappy old Windows laptop someone gave me. I have run Linux on old Mac laptops before, but they were old, old, heavy, clunky, and old. This MacBook (or “MintBook” as I call it) isn’t exactly lightweight or modern, but hey, it works well and I am used to it. That goes a long way.


Oh yeah… Mint Linux!

I started writing a post about Mint Linux so I should probably get on with it…

As someone who has used macOS (or Mac OS X) and before that System 9, 8, 7, 6… I guess I’m a “Mac Guy”, but I’ve also been using Linux (mostly on servers, oh and *BSD before that) but I’ve never been a Windows person. I did get my first Linux laptop (and my first “new” Linux computer) back in 2007.

A MacBook Pro running Mint Linux

So right now this is my primary laptop and I only have laptops running Linux. I’ve been pretty happy with Mint so far and learning all the new stuff in desktop Linux since I last used it on a regular basis. I quickly learned that SNAP is garbage and Flatpack is better.

My biggest complaint so far is the lack of resolution, which is 1280×800. This is terrible. When I ran macOS at least there was QuickRes which made the computer much more usable. Is there something like that for Mint Linux? I would love a bit more screen space!

My other complaint is about the keys and how sometimes you use control, other times it’s option/alt and then sometimes it’s command but control and option/alt are sometimes interchanged and maybe you need to press control-shift-v to paste something!? It’s a little bit madness and my muscles are not used to it yet.

When I first set it up I had to use a USB WiFi dongle to get online but I eventually got the built-in WiFi working just fine. (Whew!)

A MacBook Pro running Mint Linux

I haven’t really been using this laptop every day… It’s been a little busy the last few weeks and most of my work has been at a desktop with multiple monitors running macOS. I do try to use the MintBook when it’s the closest computer to me, so if I’m in the living room or dining room, away from the office, it’s the computer I’ll reach for.

I’m still working towards replicating as much of my normal (macOS) computing experience on the MintBook. That together with a renewed interest in getting away from the Apple ecosystem (and the US Big Tech ecosystem in general) is an experiment I’ll be working on as time allows.

Let me know what you like (or don’t like) about Mint, or what distro you are using nowadays!