Categories
Uncategorized

Laser-Cut Cardboard House

Laser-Cut Cardboard House

I took the family to Discovery World over the weekend and we checked out the Design It! Lab where we built laser-cut cardboard houses. (Well, the kids and I built houses, Dr. Dana made a snowflake ring.)

I was a little disappointed there wasn’t as much “designing” and “making” as I thought there would be. We were handed a piece of laser-cut cardboard (with no instructions) and were tasked with putting it together by folding it along the score lines, and inserting tabs. I was hoping for a bit more… I wanted to use a laser-cutter, or at least see one in operation. It sounded like if you sign up for classes, you get to do a bit more hands-on things like that. Maybe the kids and I are just so used to making things that this seemed fairly simple to us. For first-time makers, maybe this is a good starting point.

On the bright side, I did drop the names of some people I know who work there, and the Design It! Lab guy brought out the Makerbot for me to see. It’s not quite up and running yet, but should be soon.

(If you’re interested, I’ve written up a review of our Discovery World experience over at Yelp.)

Categories
Uncategorized

Milwaukee Makerspace

Milwaukee Makerspace

I stopped by the Milwaukee Makerspace for a few hours last weekend, and I was pretty impressed with the progress they’ve been making.

If you’re not familiar with a Makerspace (also sometimes referred to as a Hackerspace) check out hackerspaces.org where you’ll learn that they are: community-operated physical places, where people can meet and work on their projects.

CNC Mill (In Progress)

At the Milwaukee Makerspace you’ll meet people who know how to build robots, hack Arduinos, weld, cut, drill and use every power tool/hand tool you can imagine. These guys have built electric cars, furniture, camera control systems, and even gained some recognition in the PowerWheel Racing series at the Detroit Maker Faire.

What was going on Saturday? Brant was working on building shelving space for projects, Matt was planning his guitar repair, Ron brought his keychain video camera (and I played with it a bit) and Royce repaired the access control system. There’s still much to do before the open house on April 9th, 2011.

Makerbot

So even though the Makerspace has drills and saws and tools and welders and electronics testing equipment, and they’re building a CNC mill, and repairing a laser cutter… you might wonder why you would really want to be a member… and the reason is: community.

The guys at the Makerspace are passionate about making things, but they want to do it around other people, not in their basement or garage, but in a space where collaboration takes center stage. And these guys are pretty smart, so if you’re trying to do something but don’t know how… chances are there’s a Milwaukee Makerspace member who knows how to do it, and can help you.

"If you can hack it, you can have it"

This might be my favorite photo of the Makerspace, and it’s a great motto: “If you can hack it, you can have it.” :)

Categories
Uncategorized

Now More Than Ever: Make, Do, Create

Nails

In thinking about how I love to make and create things, be it art, music, electronic things, software, blog posts, cookies, photographs, accessories…. I think about why I want to make and create things, and I think it has to do with a few things.

I’m Cheap. I’ll be the first to admit I don’t like spending money. My regular purchases tend to be things like food, gas, and rent. I pay the bills and I while I do pay for the tools I need to do my work (whether that work is “work-work” or “make/create-work”) I really don’t like to frivolously spend money on things, especially if I think I can make it myself. I prefer baking many of the foods that I eat over buying packaged food. I like knowing what’s in my food, and try to avoid certain things, so this helps a lot.

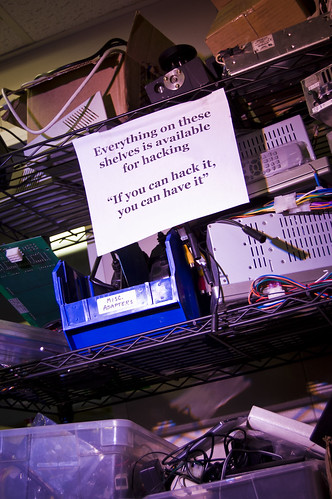
I’m DIY. I’m not sure how much the Do-It-Yourself label has been diluted (or perhaps spread is a better word) in the past 20 years or so, but 20 years ago I was printing my own zines, and stickers, and patches and t-shirts, and starting my own bands, and booking our tours, and booking shows for other bands, and putting out our own music (all of which was much harder to do without the World Wide Web) and for me, it feels good to do things myself. I see so many services online nowadays that provide things I can do myself, so I do them myself. There’s all this talk about outsourcing everything and putting it all in the cloud, but I often like to do it myself and be in control of things a bit more. I fear we’re creating a generation of people who expect “someone else” to do everything for them.

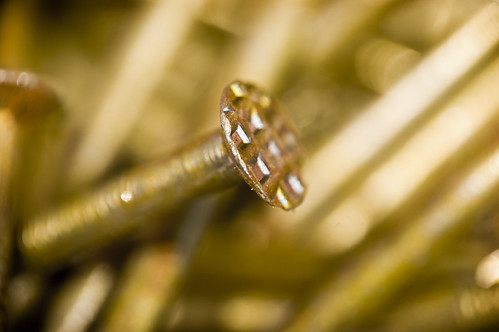
I’m a Legacy. My dad, and his dad, were both what we now call “makers.” They were both experienced woodworkers who build their own furniture, and could repair things, and had great collections of tools and knew how to use them. To this day, when I visit my mom’s house, I love the fact that the end tables were built by my dad. I’m a terrible woodworker in comparison, but I’ve taken to making other things, and when I do make something out of wood, I tend to paint it black to make it look cool, and to cover up my poor craftsmanship. When I make things, I sort of feel this connection to my family, who also made things.

I’m Fun. Who in the hell would ever think a pair of servos and a puppet would get such attention? Much of my making and creating things is done in the name of fun. Getting an idea and being able to execute it, to me, is a formula for a good time. If others enjoy it, it’s that much better… but I’m fine with being selfish and saying that it’s enjoyment in making and creating things that keeps me doing it.

I’m Cool. OK, I’m probably not cool, but what is cool is that it inspires people, like… my kids. (They might be the only people left who think I’m cool.) My daughter made me a cake and I’m still floored by how awesome it was. Knowing that they see me make things, and in turn want to make things, is top notch. I love it… I don’t even care if I’m not cool anymore.

So my plea to you, dear reader, is to Make and Create… Do Something! Don’t just be a passive consumer, buying a pre-packaged life, figure out what it is that you can bring into this world. If you’ve got ideas, take action on them, make them a reality, don’t be afraid of failing because failing is just what you do before you succeed.

Categories
Uncategorized

Time Lapse Bot 3

Time Lapse Bot 3

I built the original “Time Lapse Bot” in September 2009 before BarCampMilwaukee4 happened. I managed to get an old office chair that someone was throwing away and thought I could put it to good use to move around the iMac and camera rig I had attached to it. You can see the original Time Lapse Bot post for more info.

The main issue with the original Time Lapse Bot was that if you unplugged it, you had to boot it up again, set the clock, and then restart the image capture. We thought about a UPS to give it a bit of “unplugged” time, but never added one.

Next up was Time Lapse Bot 2 which used an old clamshell iBook in place of the old iMac. This made everything much lighter but because the battery couldn’t hold a charge we still suffered the inability to unplug it and move it while it was running. (We typically solved this problem with really long extension cords.)

Time Lapse Bot 3

Time Lapse Bot 3 is the next step in Time Lapse Bot technology. We’ve taken an old PowerBook G4 (donated by Matt Gauger) which has a good battery in it, and paired it with a Canon ZR800 MiniDV camera, which also has a good battery. The result is a unit that can run on battery (at least for a few hours) and starts charging the batteries as soon as you plug in the AC power cord.

The entire unit is housed in a custom case which allows for easy transport. By “custom case” we’re referring to the plywood box that I constructed and painted black. That’s what we consider the pinnacle of “custom cases” around here.

The software that runs Time Lapse Bot is EvoCam by Evological. It’s $30 and well worth it. It’s feature packed, and rock solid. If you’re putting together a Mac-based time lapse rig that uses a video camera, or a web cam, or whatever, I highly recommend it.

Here’s a few of the time lapse videos we’ve made with the help of Time Lapse Bot.

We’ve finally reached a point where we are fairly pleased with Time Lapse Bot and it’s performance, so this is obviously not the time to sit still and relax. We’re currently working on a few upgrades to Time Lapse Bot, and hope 2011 brings even more Time Lapse Bot goodness to all the folks who enjoy time lapse videos…

(Thanks for reading this. If you’re reading it on Facebook or Google Reader or somewhere else it got syndicated to, consider visiting the original post, especially if you’d like to leave a comment.)

Categories
Uncategorized

iPad Needs a Stand

iPad Stand

I’ve already told you that the iPad needs a case, but you should know that the iPad could also use a stand. I like the Macally METROLPAD case, but it didn’t have a built-in stand as many cases do, and as I used the iPad more and more, I realized a stand would be useful.

iPad Stand

Rather than buy one, I figured that making one would be a good idea. I took a piece of wood from the scrap pile, and using the jigsaw cut a notch into it. The one on the left is an early prototype I made before I actually got the case. Once I got the case I had to make a new one with a bigger notch. The prototype was also not that great at keeping the iPad standing, so I moved the notch up towards the front. (The one on the left could probably be turned into a toy car if I added some wheels. :)

iPad Stand

Here it is in action. I should probably make a bunch of these and just leave them around various places in the house so I always have one handy.

iPad Stand

Here’s the rear view. One issue with the stand is that it works fine in landscape mode, but not so much in portrait mode. (It works, but it’s sort of “precariously balanced” to say the least.) If I really want to use the stand with portrait mode, I may work on a new one that works a bit better with both orientations.

iPad Stand

If you’ve got some scrap wood and a saw, make a stand, it’s pretty easy. Note that the stand is also backwards compatible with (many) iPods and iPhones.

(Thanks for reading this. If you’re reading it on Facebook or Google Reader or somewhere else it got syndicated to, consider visiting the original post, especially if you’d like to leave a comment.)