
I managed to attend seven Maker Faires in 2019, including Elkhorn Mini Maker Faire, Maker Faire Miami, Maker Faire Kansas City, Maker Faire Detroit, Maker Faire Milwaukee, Madison Mini Maker Faire, and Maker Faire Orlando. For three of those I served as a Producer or Producer in Residence, and for the others I attended as a Maker, either representing Milwaukee Makerspace, Betty Brinn Children’s Museum, or taking part in the Power Racing Series.
Pictured above is a shot of the crew for Maker Faire Orlando. They are an amazing bunch of volunteers who work their butts off to put on an amazing event. I’m proud to have been able to join them the last three years and assist in any way I could. And besides all the local folks who help out we had guest Producers from New York, Pittsburgh, and Milwaukee all helping out, each bringing a unique perspective to the group.
(Note: We’re missing a few valuable crew members in the photo because they were busy with Robot Ruckus, which is an amazing event that happens inside another amazing event. Amazing!)
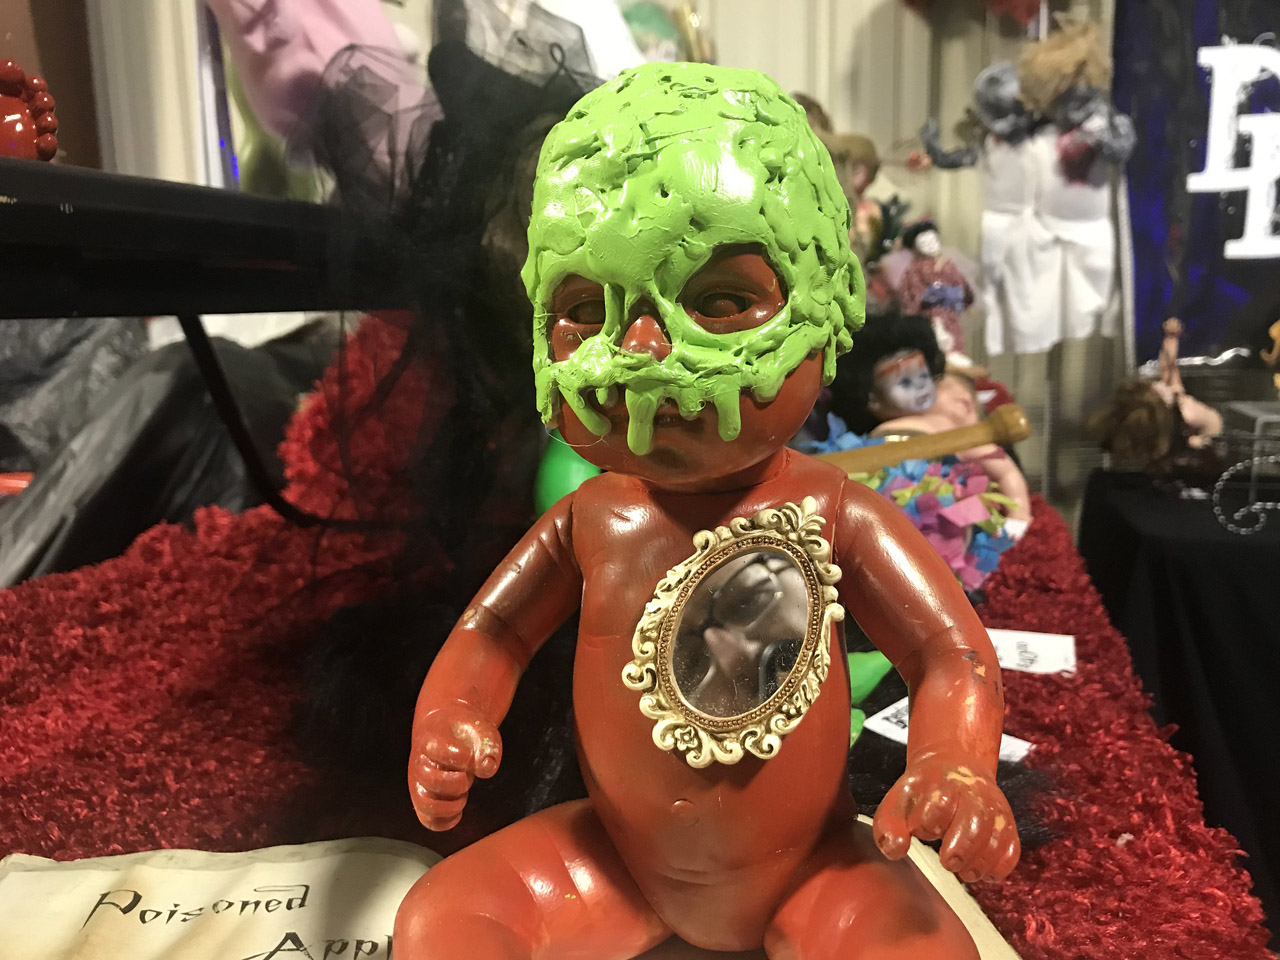
I tried to get a little time to run around with my DSLR and capture some photos, and I’ve got a whole album, but here’s a few worth sharing… Above is a creepy doll, or to be more precise, one of the Deviant Dollz. I don’t know that I’d ever purchase one of these dolls, but I loved seeing them, and if I ever have to shoot a horror film, I know who I’m getting the props from.

Our old pal Matt Stultz was there with Prusa, the company and the man, and people really liked finding out more about what they do. Also, I learned that bringing your Prusa printer to a Maker Faire so Josef can autograph it is a thing people do.

Gary the Snail (along with Aren) made it for the Power Racing Series finale, and took the title! Many PPPRS friends were there as well, including Jim, Patrick, and racers from around the country. We also got to test a new water barrier concept on the track this year, which was fascinating and fun.
![]()
It’s always good to see Jeremy Cook and his latest strandbeest contraptions. If you haven’t met Jeremy yet, check out his videos. He’s one of those makers who seems to keep busy all the time.

Hey, if you’re gonna throw a Maker Faire you should have a DJ because they make sick beats happen, they make people smile, and they make everyone have a good time. At least that’s what the.kd.queen managed to do. She even handed the mic over to some crazy futuristic robot for a while… magical!
Want more? Check out my Maker Faire Orlando 2019 album or browse through photos from Jay De Los Santos, and start making plans to attend Maker Faire Orlando 2020 right now!


