
We’re back once again to talk about my goal of mapping all of my bike rides! This time we’re trying out wanderer (or wanderer.to) not to be confused with wandrer (or wandrer.earth).
We mentioned wandrer.earth back in Part II, in case you forgot. It works with the data from Strava.
wanderer.to is totally different! It’s decentralized and self-hosted which means no corporation is getting your data. It’s open source and privacy first. The copy I have running on my own server has only one account… mine! No one else can login and see my data. If that appeals to you, wanderer might fit the bill.
There are a few servers out there running wanderer and it could be a cool thing for a local community or a group of friends to run. There is a demo server anyone can log into and upload their GPX files to try it out. I did this before installing it via Docker. It also uses federation via ActivityPub so servers (instances) can talk to each other. Since I’ve only got my server I haven’t dug into this yet…

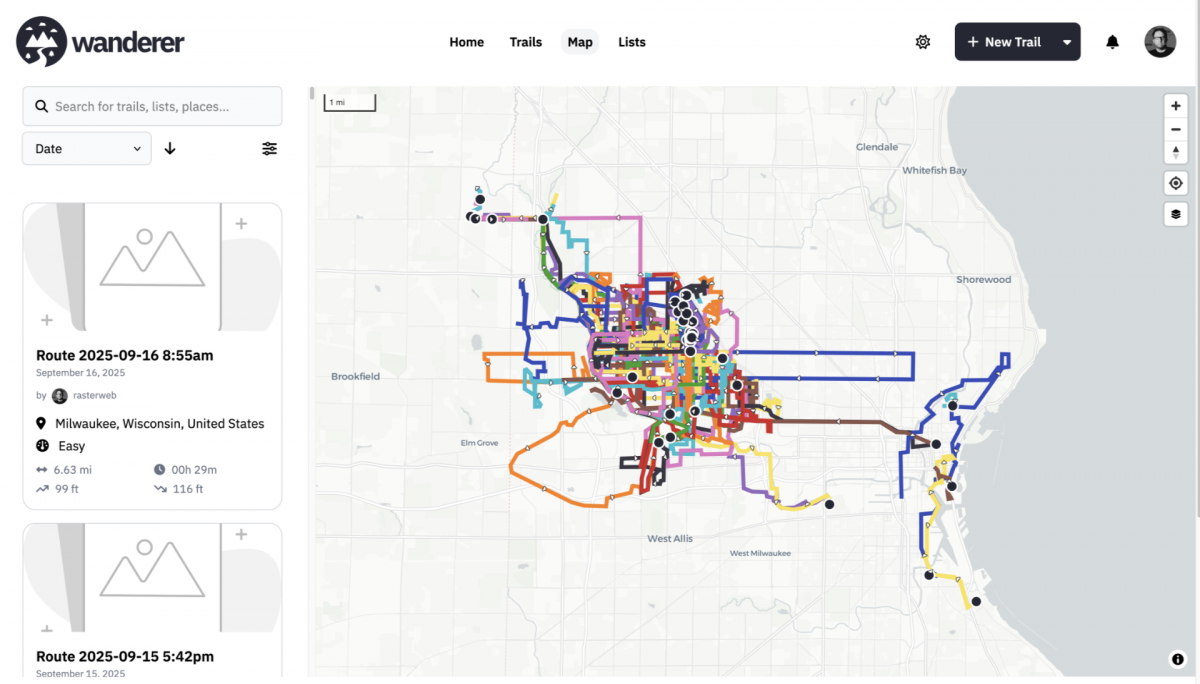
Whew! I should talk about what wanderer does! Just like the others you upload your GPX files and it creates maps using the data. The thing is, wanderer, like many of the other applications that are similar, is more about sharing trails, and recording trails.
(I say “trails” as in routes people share for others to ride. I don’t really do that… I just want to see my own rides. One thing wanderer does is look at your GPX files and try to filter out duplicates. Since I ride the same route to work every day it kept flagging duplicates, but I want those duplicates because they are my rides.)
wanderer is a self-hosted, open source, GPX loading-map making application that shows all of my rides, but it’s also sort of a weird fit for that. I mean, it totally works! And I don’t have to subscribe, or be limited to just the last 50 rides, so it’s a winner in many ways.
So yeah, I guess it’s Mission Accomplished for wanderer! It’s still in development, and I am not using it exactly as it’s meant to be used (which is fine) but this isn’t the end of my quest. It is pretty cool though, and I’m glad I’ve got an install to play with! It even forced me to write some new Python code to further clean up my GPX files.
The idea of wanderer is a good one! And a few people have created their own similar things. Nicolas Hoizey has one, though I cannot read it because it’s in French. (Source code is available!) But wait, there’s more French stuff I can’t read! There is David Larlet’s offering Source code is available!) So yeah, what is with these French people!?
These posts have been fun, but in the next one I’ll start to talk about my solution… yes, I do have one! :)
See Also:
- Mapping Bike Rides (Part I)
- Mapping Bike Rides (Part II)
- Mapping Bike Rides (Part III)
- Mapping Bike Rides (Part IV)