Categories
Uncategorized

macOS Finder and USB Flashing Format (UF2)

Sad Mac

It took me a while to figure this one out. I’m running macOS Sequoia on two different Macs and I would occasionally get Finder lockups. I feel like in with previous versions of macOS I could quit the Finder and restart it in the terminal and things would (mostly) go back to normal. This was not working, and quitting the Finder meant it would never relaunch and I’d be forced to reboot. My Mac Studio at work reboots in under a minute and I can relaunch all my applications fairly easily, but my home (2019) iMac takes a long time to boot back up, so it’s super annoying.

There’s one common thing between these two Macs, and it’s the USB Flashing Format (UF2).

At work I program micro:bit boards. When you plug one into your Mac it shows up in the Finder so you can copy a .UF2 file to it to load new code. At home I program Raspberry Pi Pico boards, which also mount in the Finder on first use, or when holding down the BOOTSEL button when plugging it in.

Matt Godden suggested resetting the Mac’s USB Bus but the solution that seems to be working is to unplug the microcontroller. Yes, unplug it.

It happened again today so I figured I should write this post to remind me, and maybe inform others. Today it happened right as I tried to copy a .UF2 file to a Pico board. I got the “pinwheel of death” so I walked away and when I came back minutes later it was still spinning until I unplugged the board. I am pretty sure I’ve seen it happen with a micro:bit even when I was not trying to copy new code to the board.

So this may happen when copying a file to the board or just even when the board is connected via USB.

So if you are using a Mac to copy a UF2 file to a microcontroller and the Finder locks up try to just unplug the board to see if it fixes is.

Update 2025-05-07

After a few more days of testing I’ve realized that it’s not just an issue with the Finder locking up. There is also an issue with the Finder slowing down. I left a micro:bit plugged in via USB and went about my work and the Finder still worked but suddenly had issues opening folders and displaying files. I took a screenshot and it never showed up on the desktop… until I unplugged the micro:bit! So we’re dealing with an issue that may lock up the Finder but may also slow down the Finder. Sigh…

Update 2025-07-08

To replicate this issue you need to use your Mac. If you just leave a board connected and walk away it seems fine when you return, but the process of actively using your computer, switching applications, creating files, using the Finder, seem to help reveal the slowdown and lockup. I’ll try to get a better sense of things the more it happens.

Update 025-07-30

Still having this issue on macOS 15.4. If I leave a micro:bit connected via USB and try to save files they will not show up in the Finder until the micro:bit is disconnected. This magically fixes things and files suddenly appear. It’s maddening.

Categories
Uncategorized

Scheduling rsync in macOS (with cron)

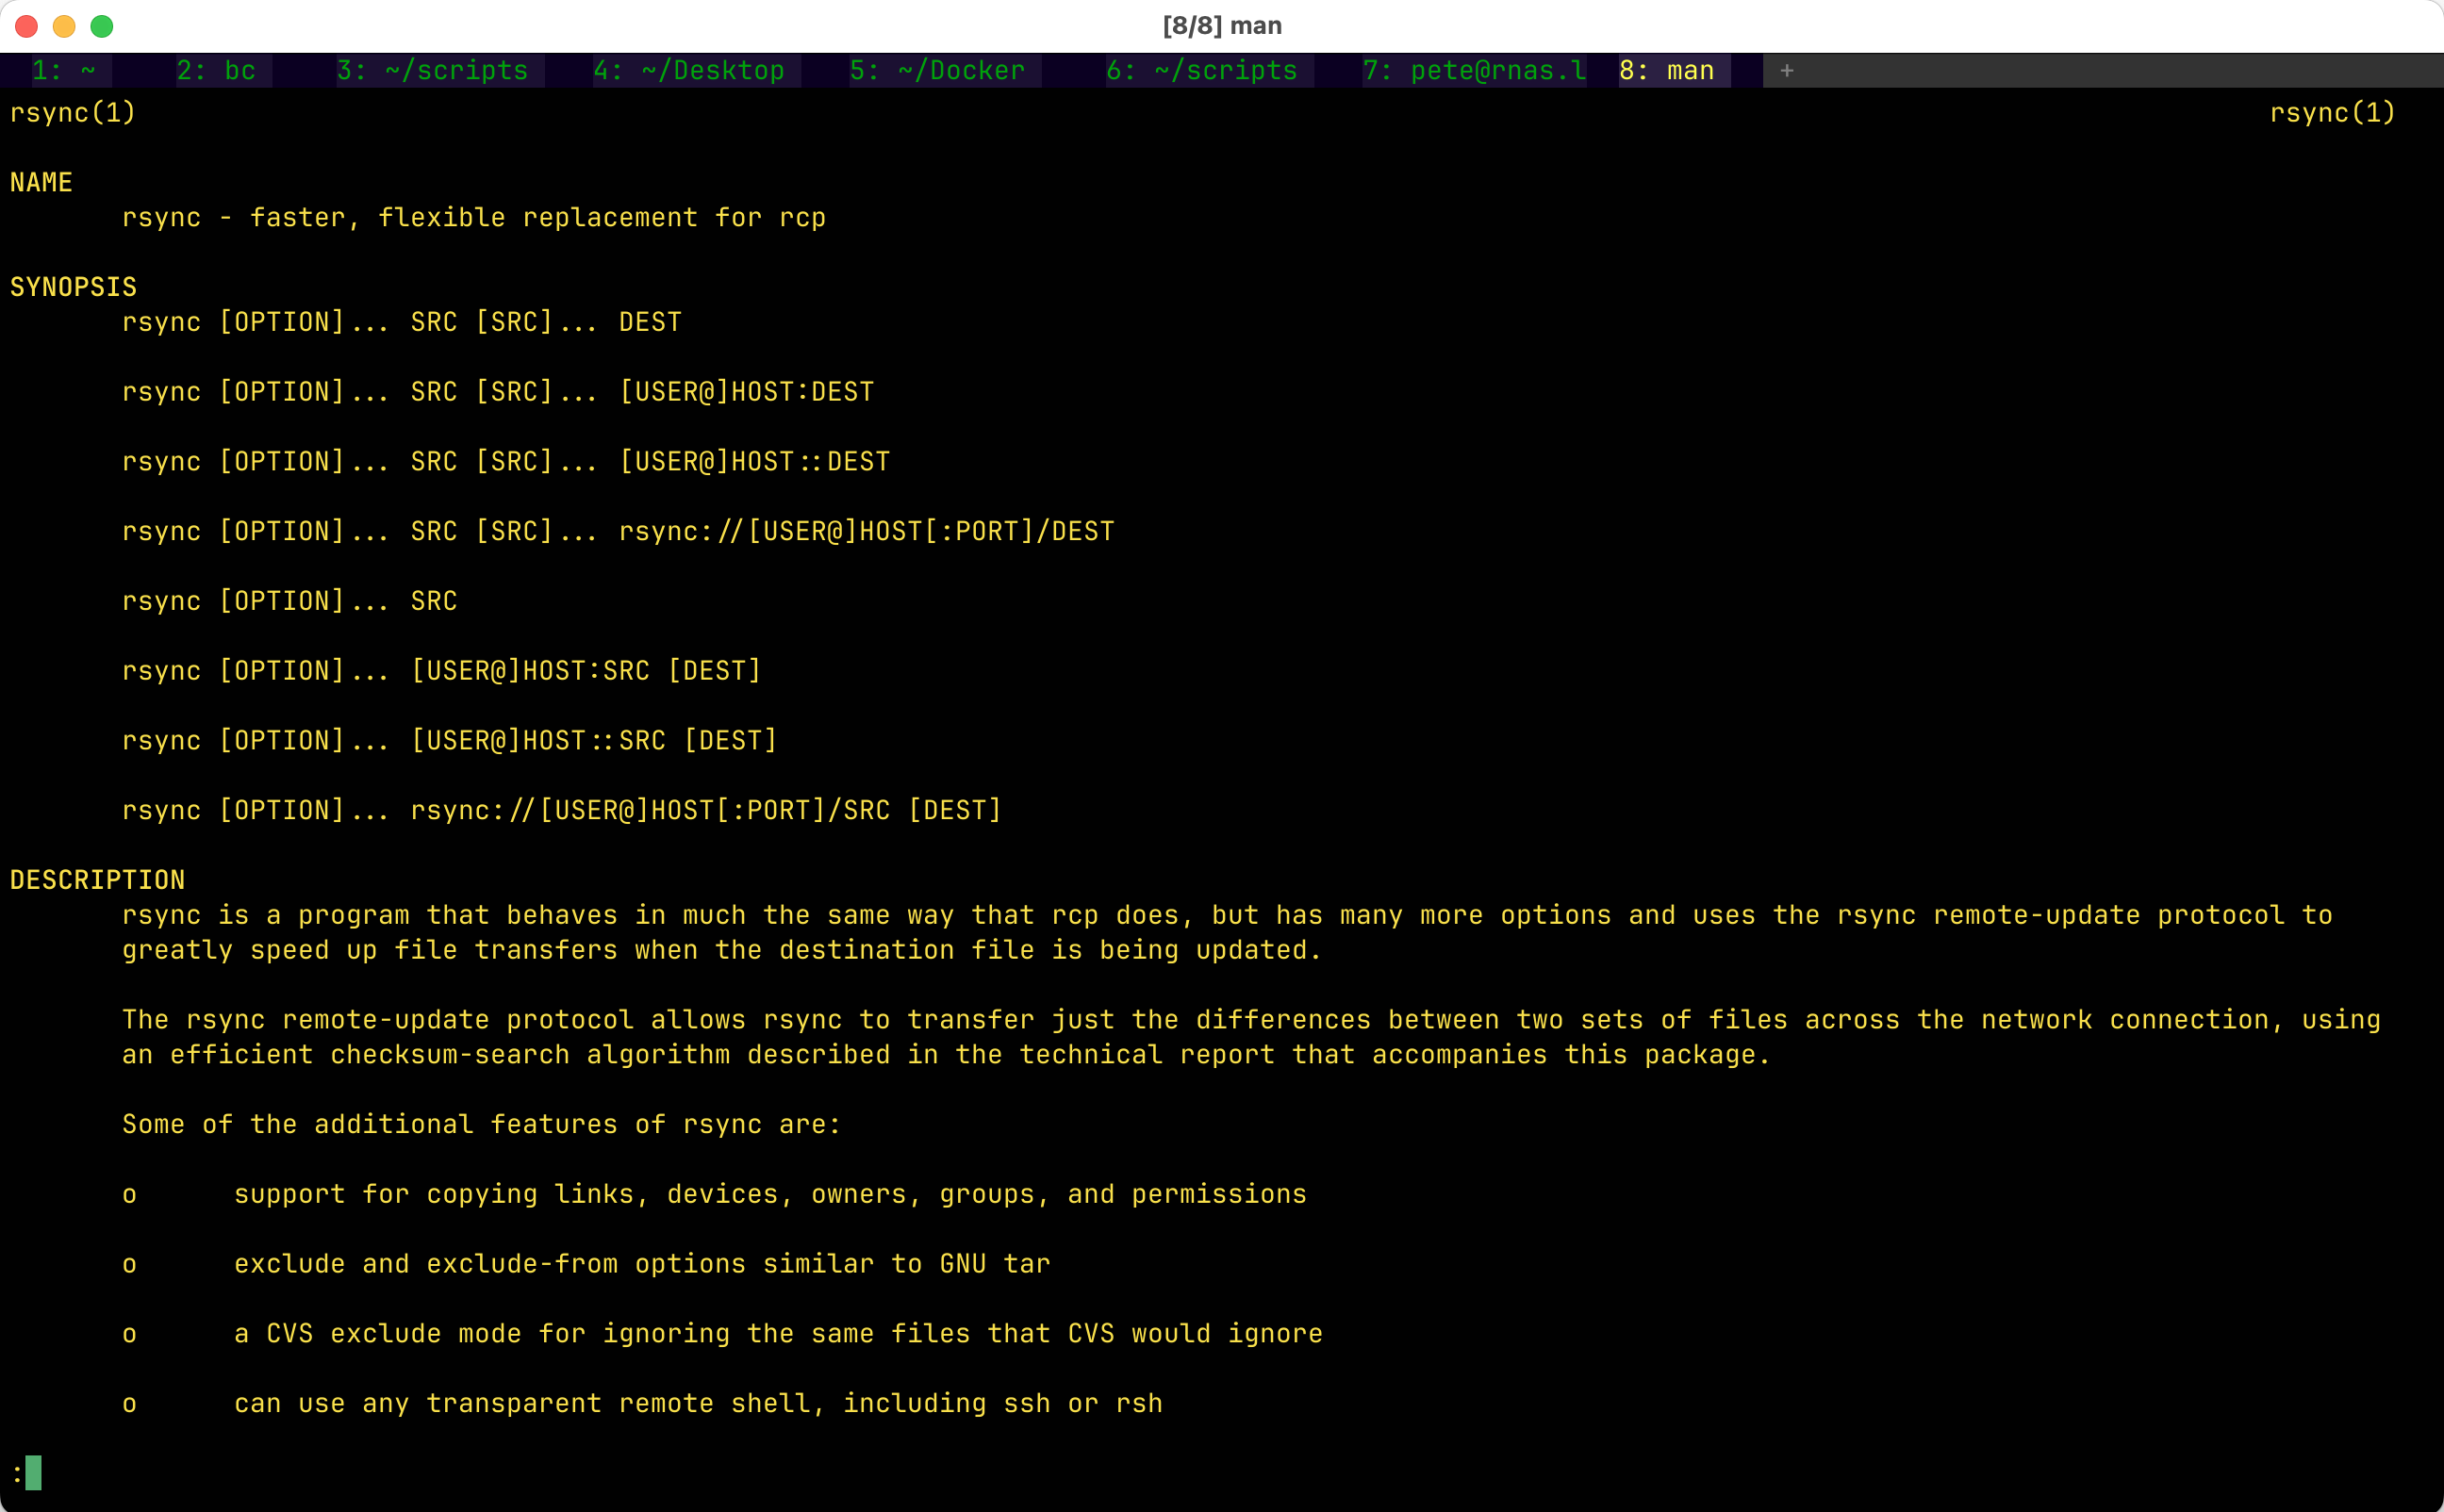
A shell windows with man rsync

There’s an old saying “Linux will give you enough rope to shoot yourself in the foot!” and what that means is you’ve got power but you need to know how to use it. I’ve been using macOS (pka “Mac OS X”) for almost as long as I’ve been using Linux and I use the command line constantly in macOS and try to maintain a consistent experience between macOS and Linux when I can. I also tend to be late to install the most recent version of macOS.

So last year I wanted to set up a cron job to run a shell script to run rsync. On macOS. I tested things, added the cron job and it didn’t seem to work. I debugged, I tested, I searched… It seems macOS could not run an rsync job via cron. I tried to add cron, rsync, zsh, and iTerm, Terminal.app, and WezTerm to the “Full Disk Permissions” thing in the System Preferences. Eventually I gave up.

Well, eventually I created a workaround using Keyboard Maestro which has its own cron, and Platypus which wraps shell scripts in an Application, and that worked, but it’s overly complicated, so I’ll show you the way I do it now.

Automator window showing how to run a shell script

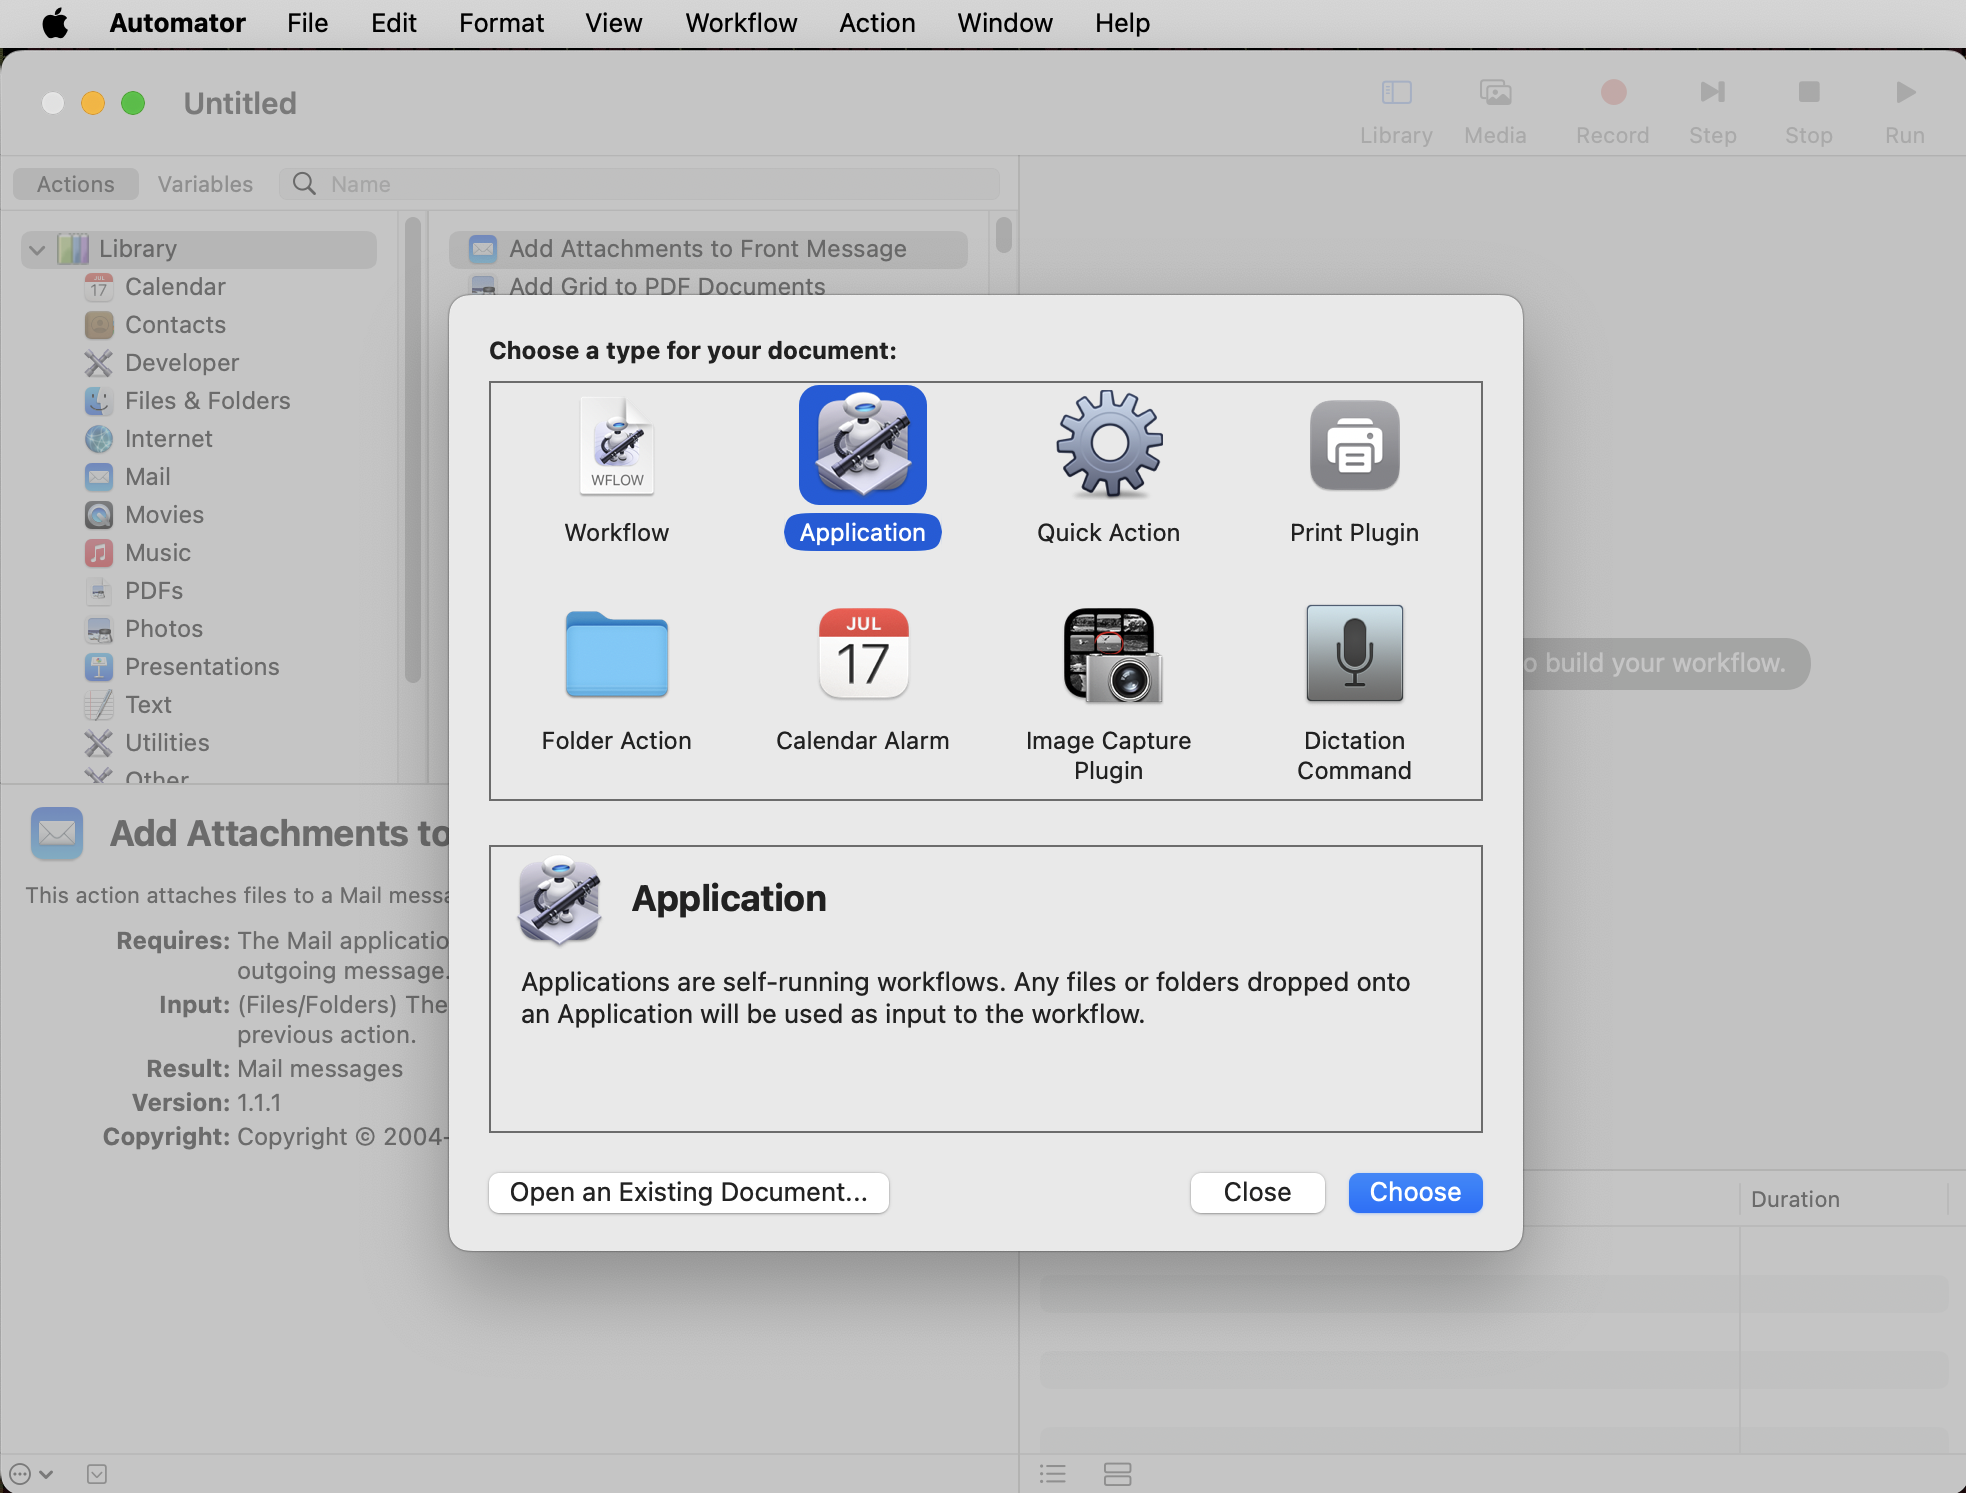
Launch Automator and create an Application…


Automator window showing how to run a shell script

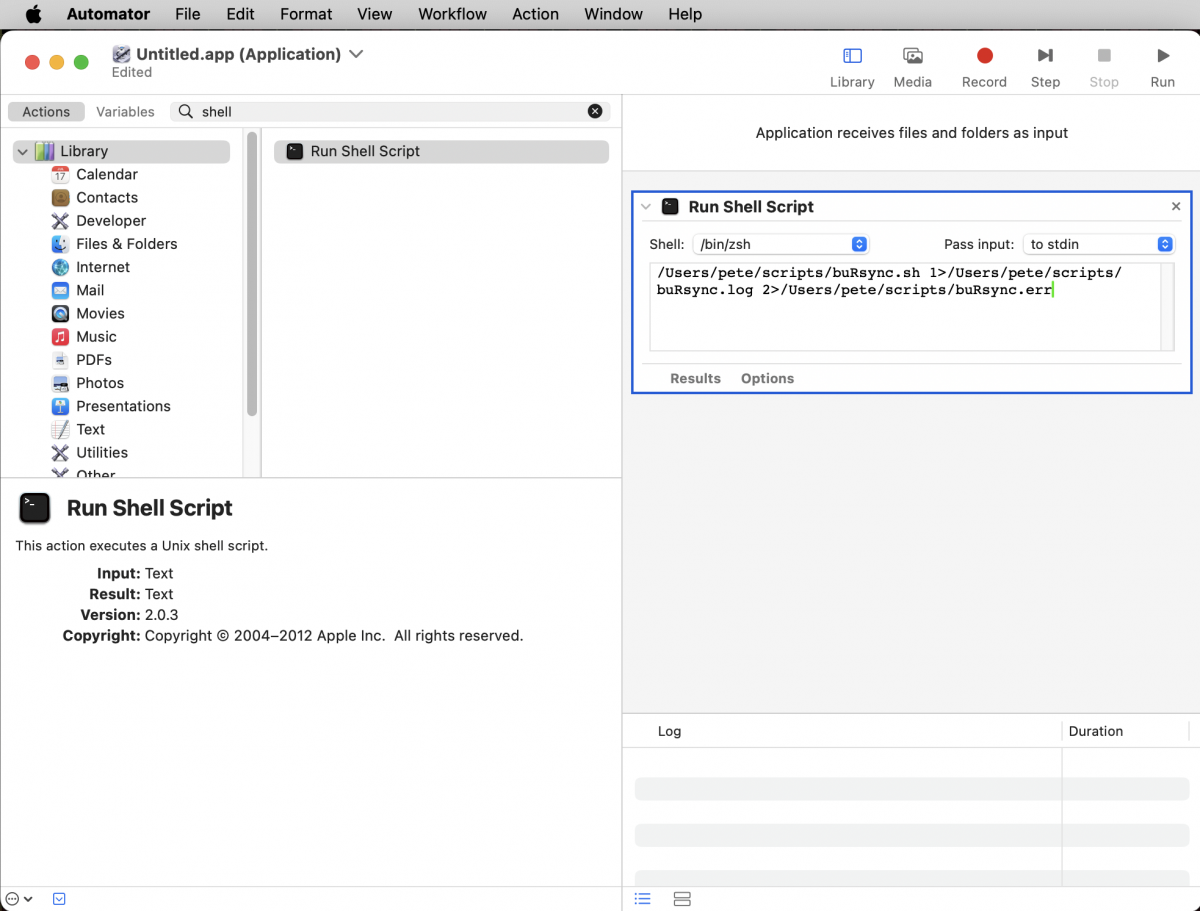
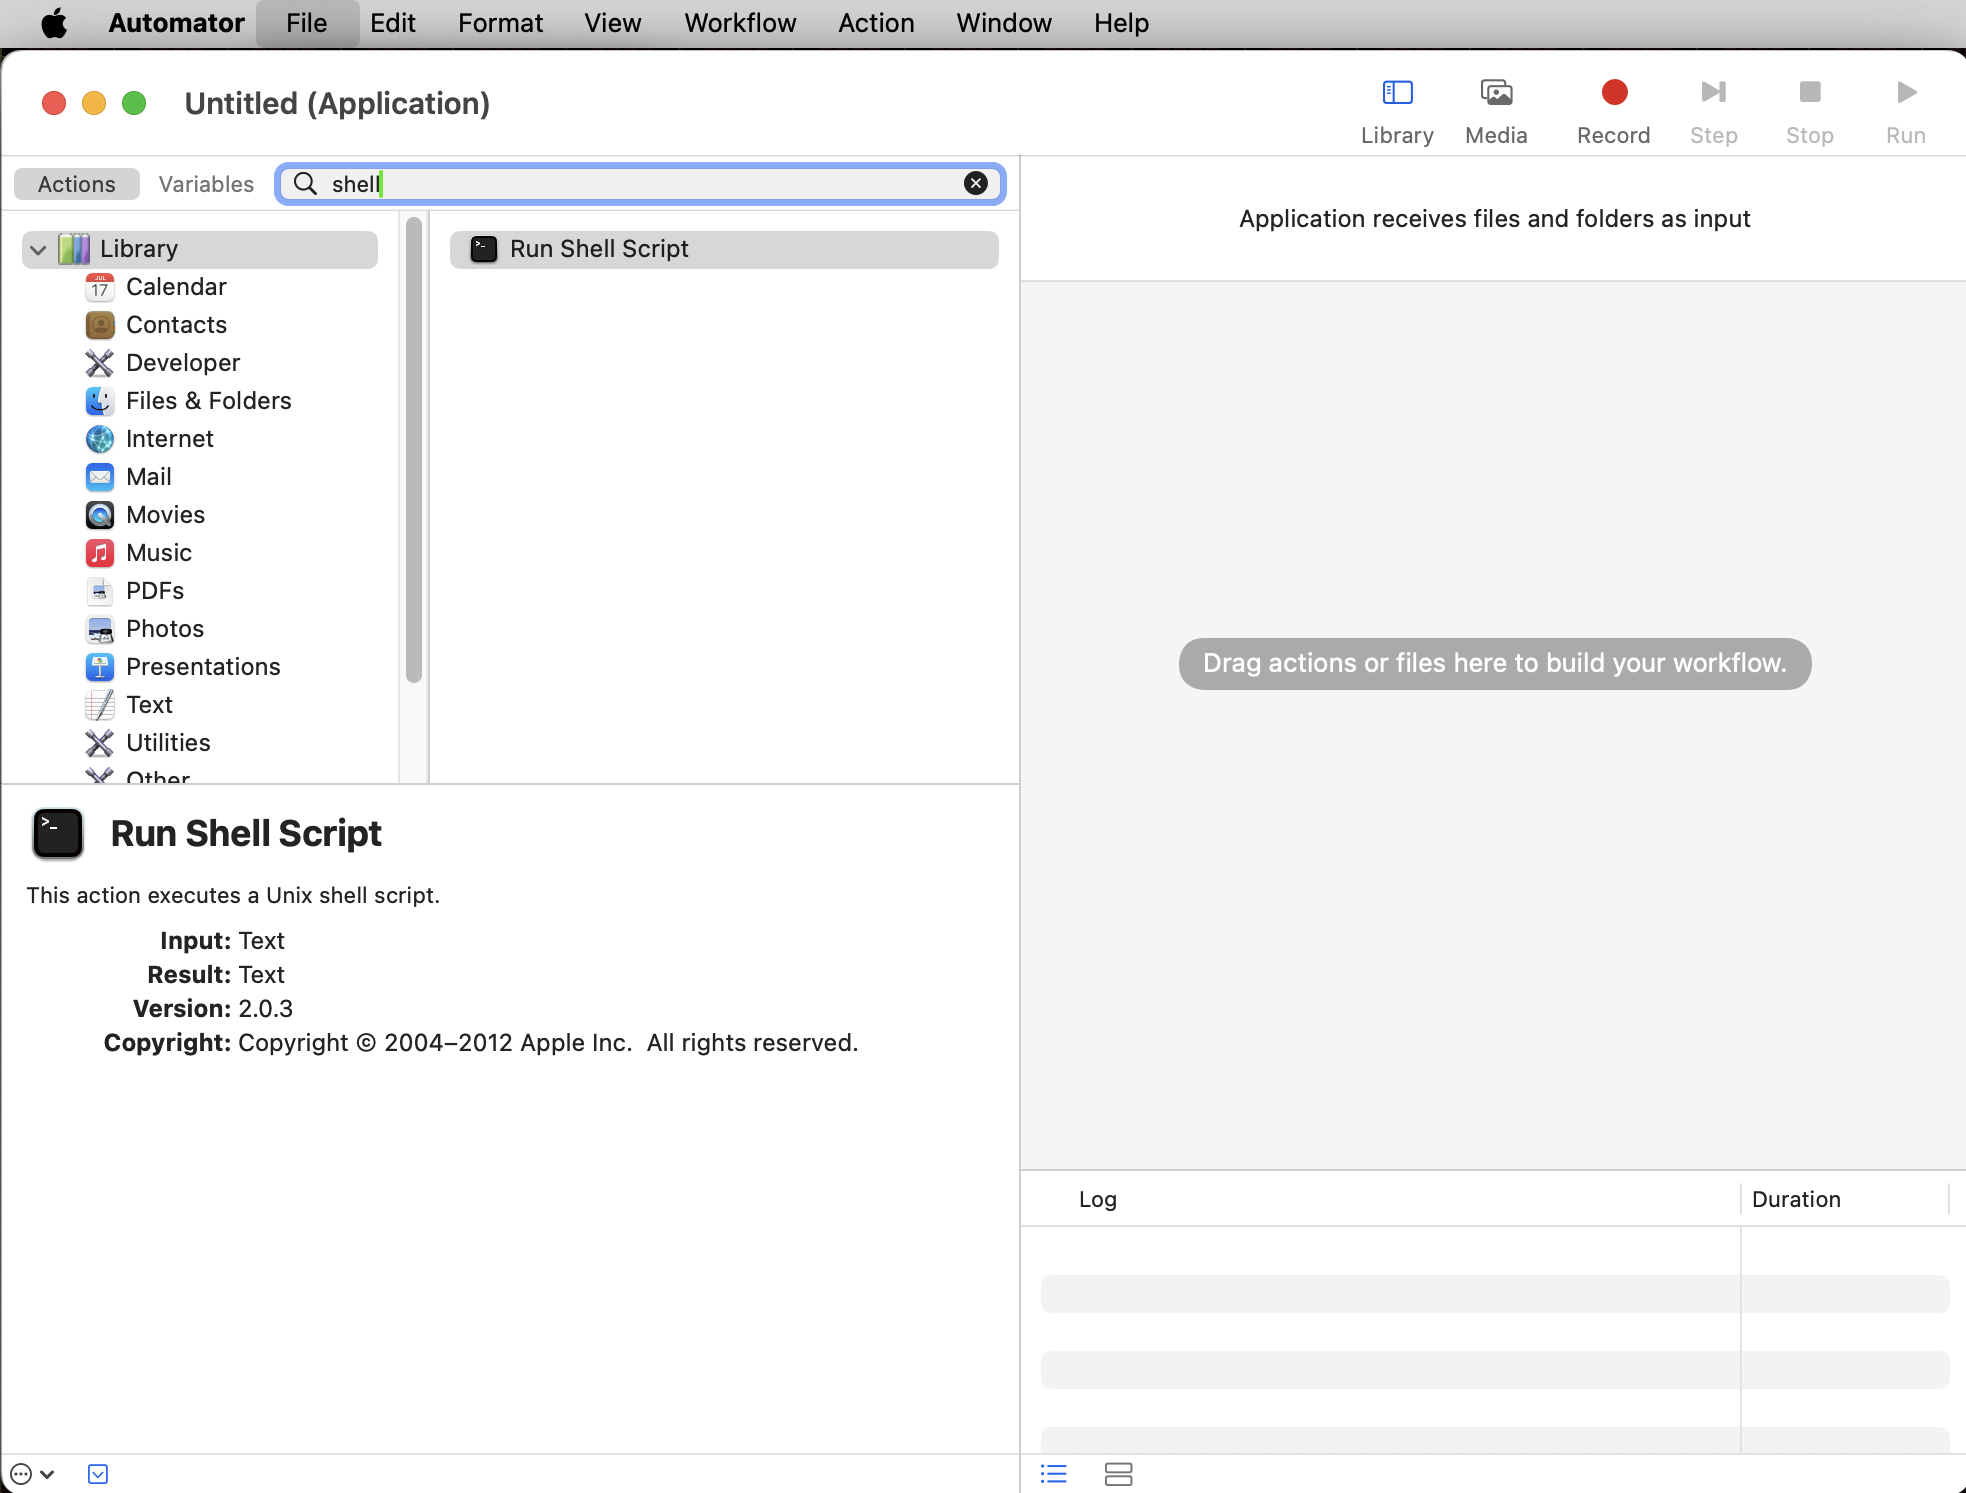
Search for “shell” and you’ll see “Run Shell Script”. Drag it to the right side of the windows…


Automator window showing how to run a shell script

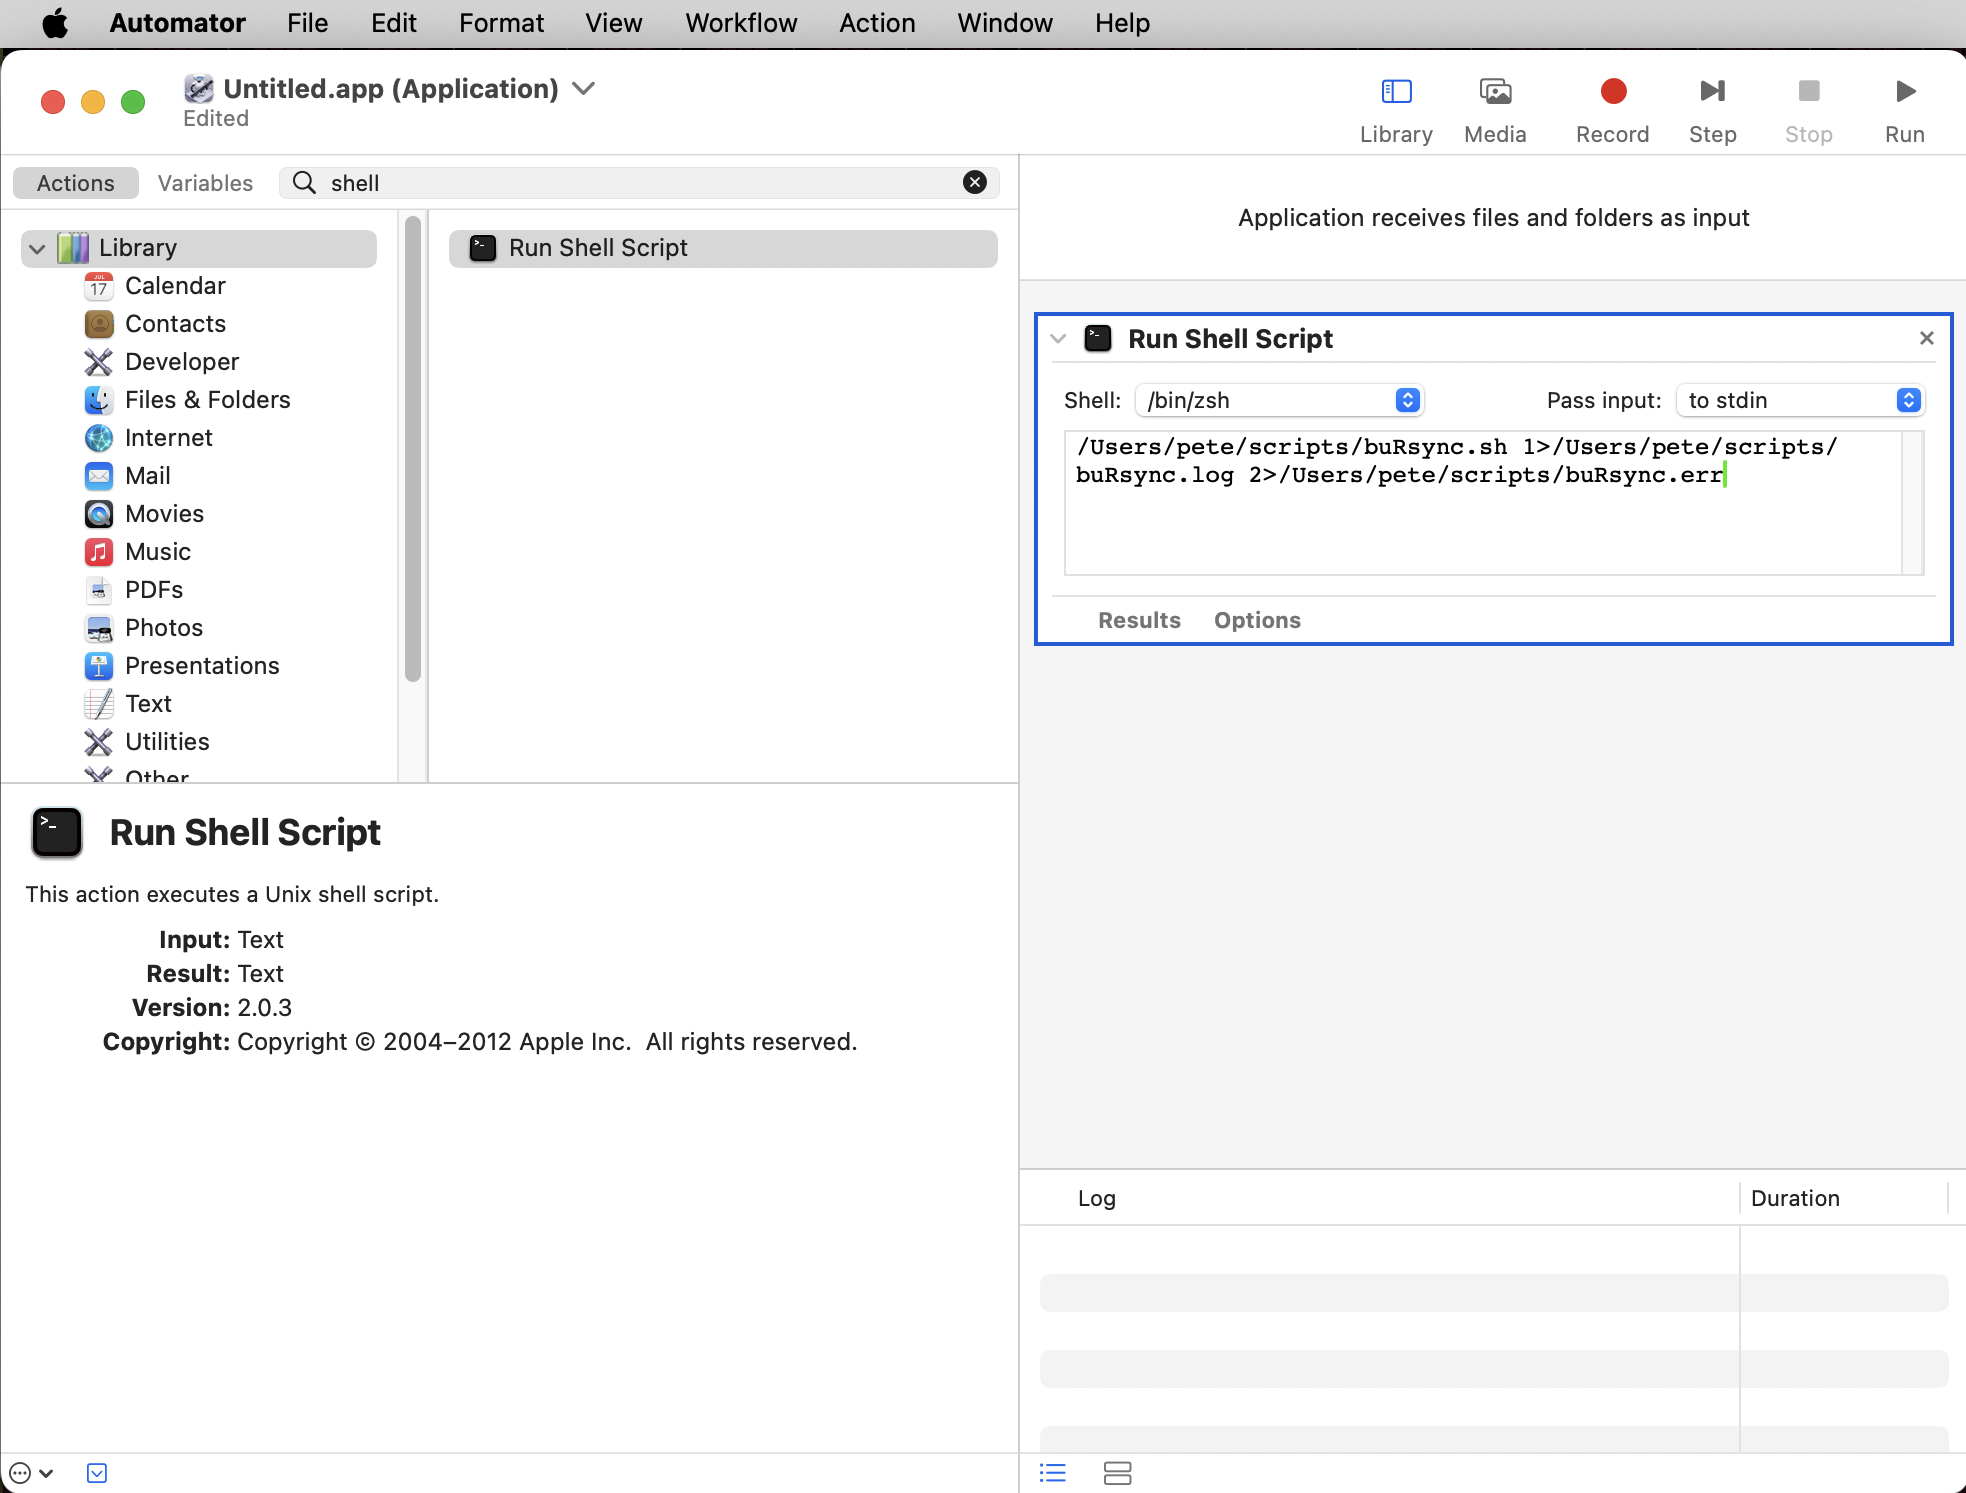
Type the path to your script.

/Users/pete/scripts/buRsync.sh 1>/Users/pete/scripts/buRsync.log 2>/Users/pete/scripts/buRsync.err

I’ve chosen to pipe the output and errors to files but you can skip that if you want. I also chose to use full paths.


Automator window showing how to run a shell script

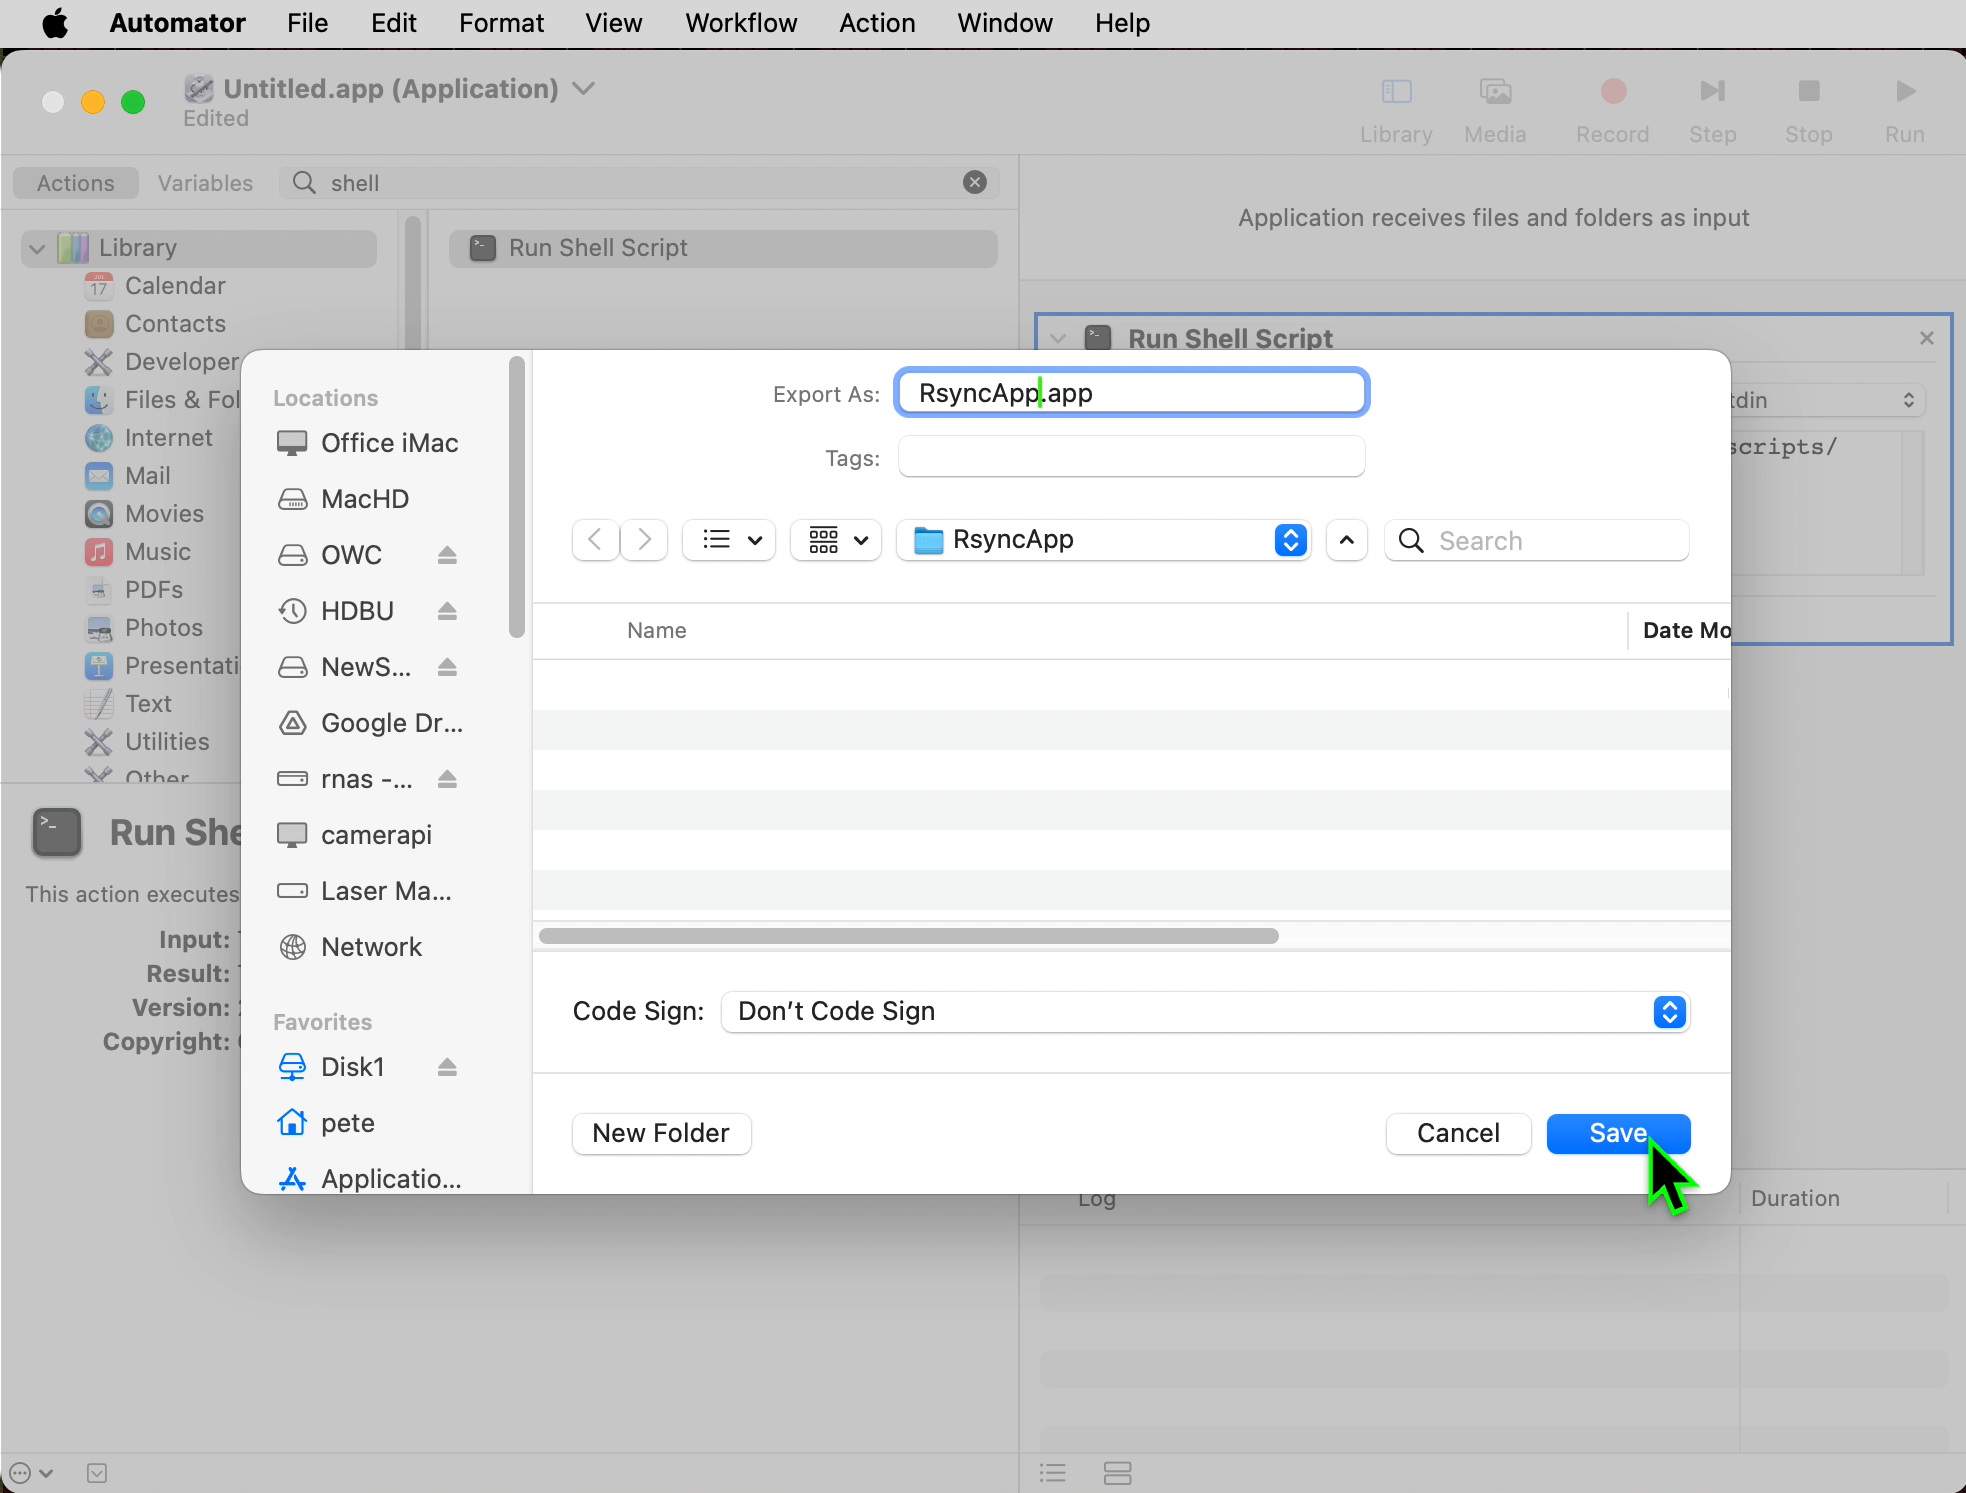
Export the Application…


Automator window showing how to run a shell script

Give it a name and save it. You can put it right in the /Applications folder since it’s an actual macOS application.

Now you can add a cron job and use the macOS open command to open the application instead of trying to run a shell script directly.

0 6,18 * * * /usr/bin/open /Applications/RsyncApp.app

This seems to work fine for me in macOS Sonoma 14.6.1 but if it breaks in the future I’ll update this… if I don’t, just let me know!

Bonus: You can use the macOS Launcher to quickly and easily run shell scripts this way!


Yes, of course there is launchd but I think it’s overkill and a bit complicated for those who already know cron.

Categories
Uncategorized

macOS Web Launcher

Here’s a niche one… If you use the “Launchpad Key” on a keyboard while using macOS you know it’s a handy way to launch an application. I use it constantly. But if you want a similar experience for going to a web site (as in, visiting a web site in your preferred browser) and you don’t have Keyboard Maestro or a Stream Deck, I have another solution that uses Apple’s Automator.

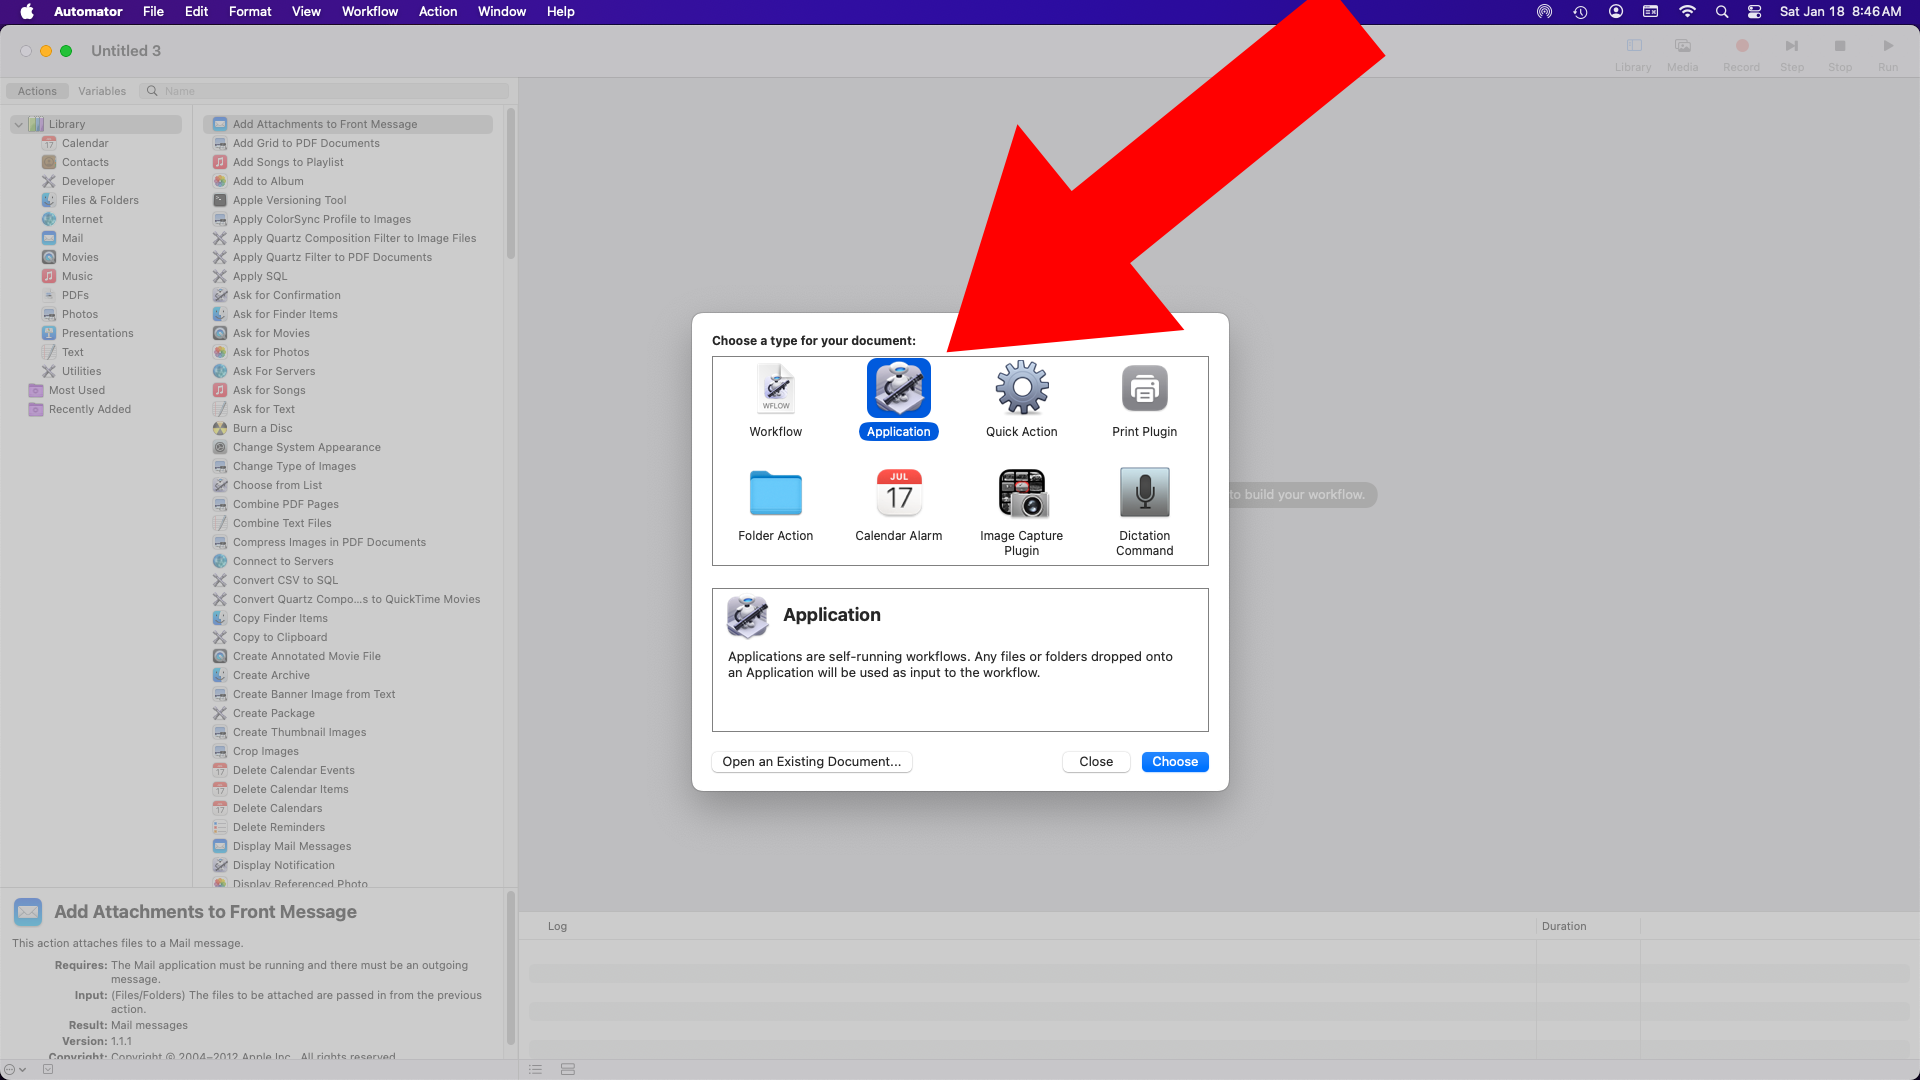
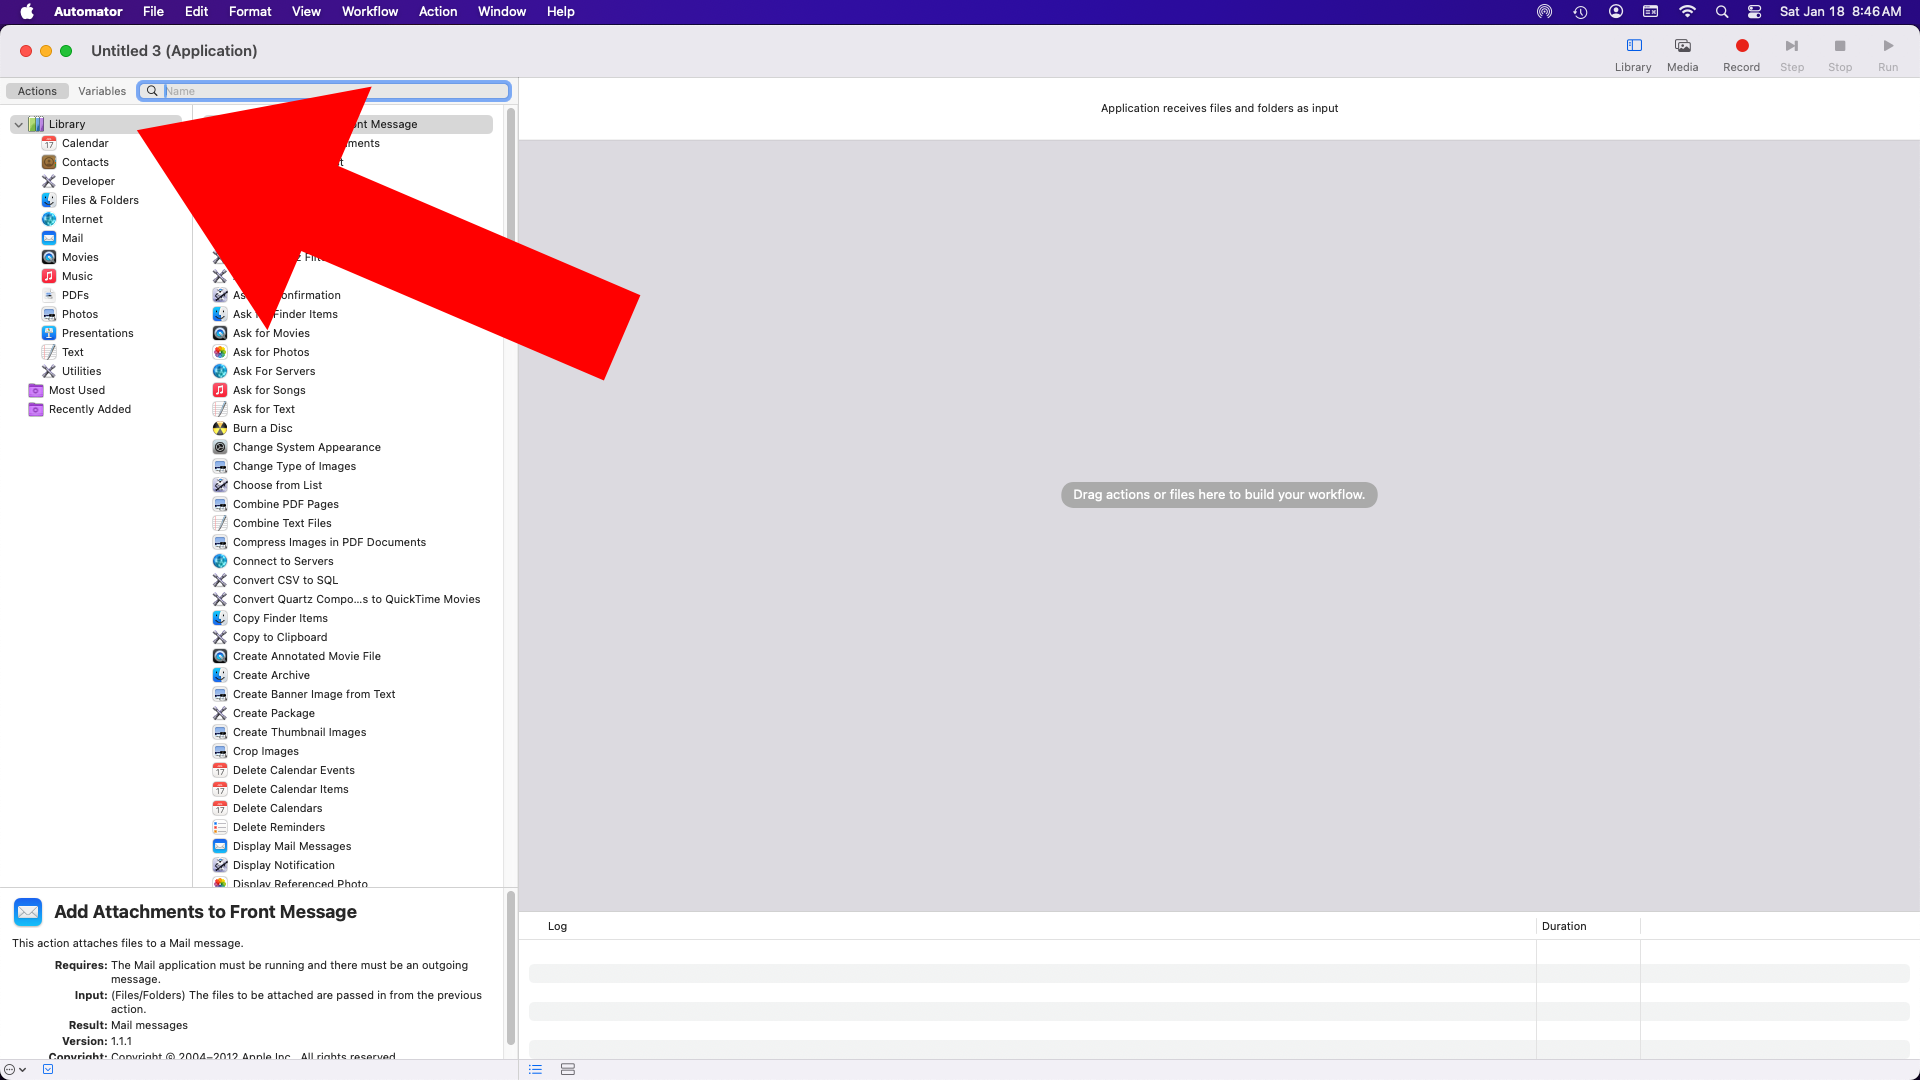
Launch Automator and create a new application…


On the left Library should be selected, if not, select it…


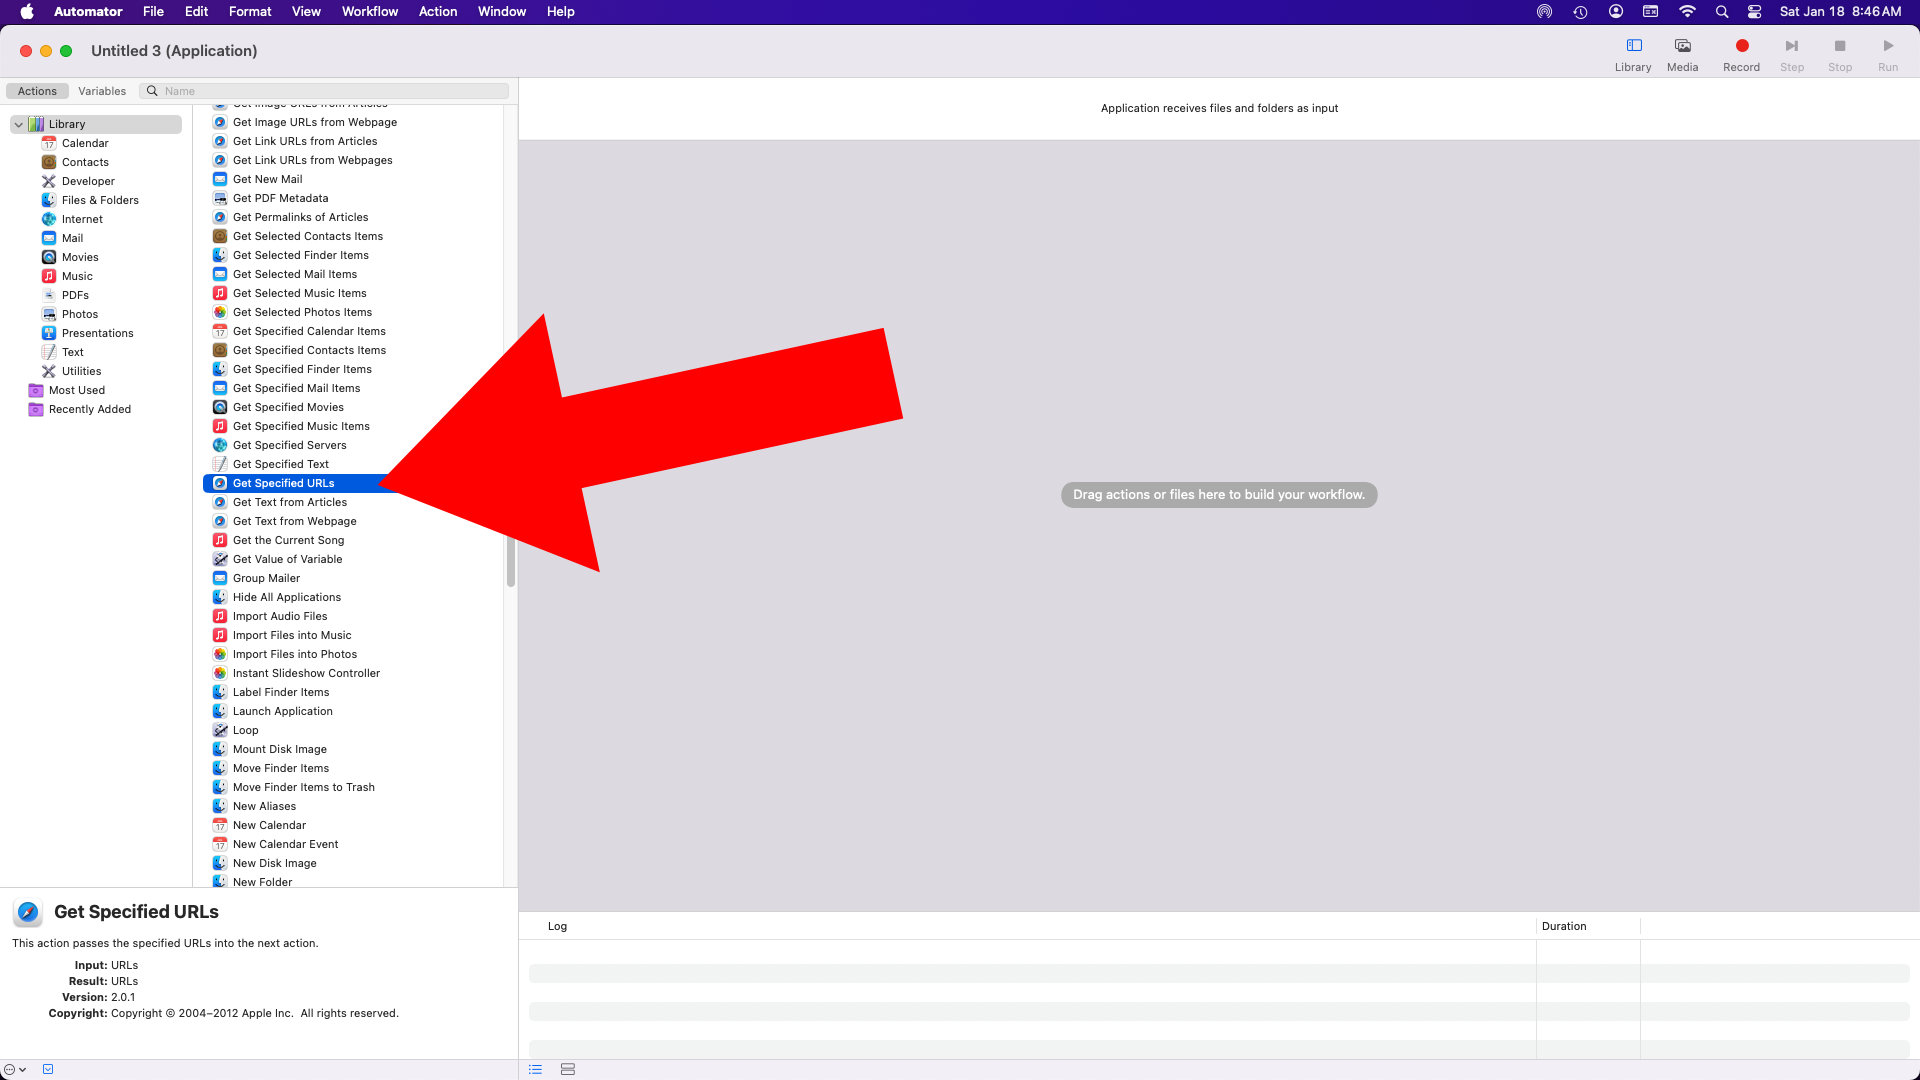
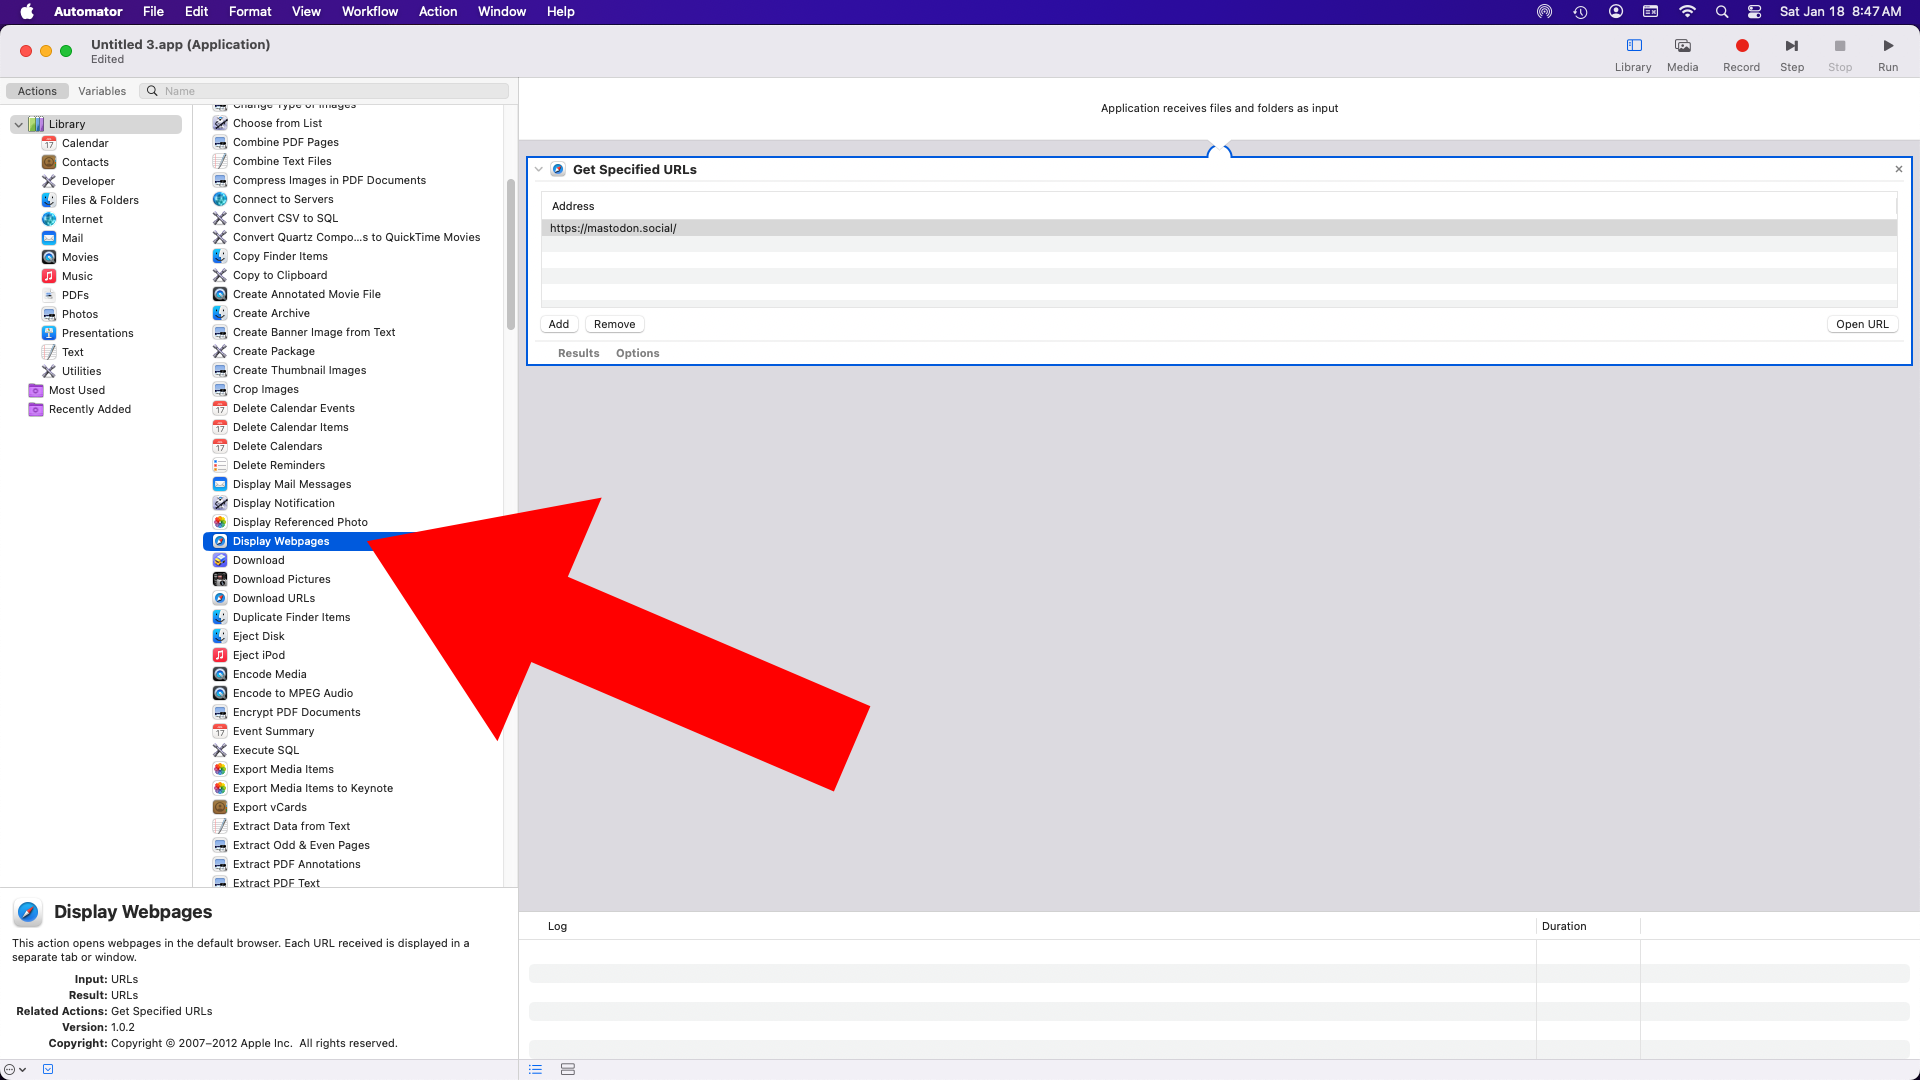
Click on “Get Specified URLs”…


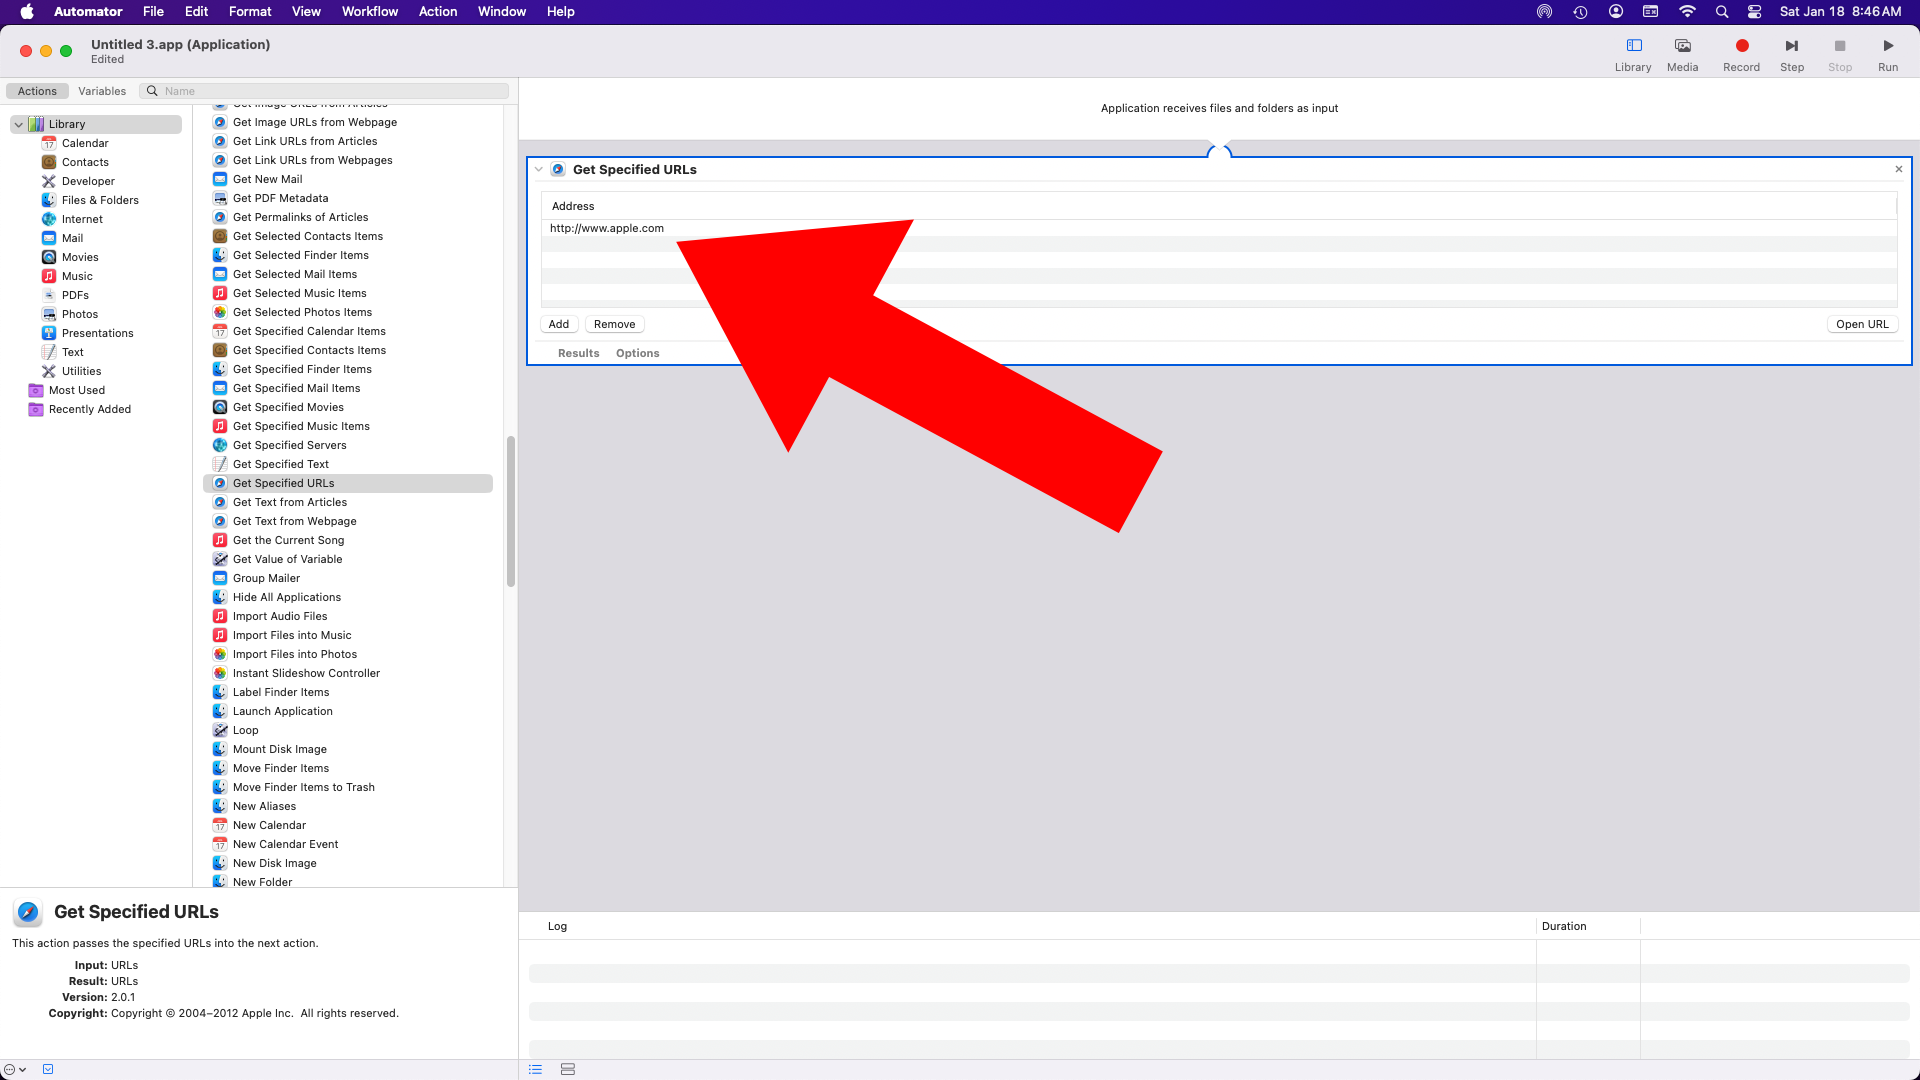
It will load up on the right side with Apple’s web site specified…


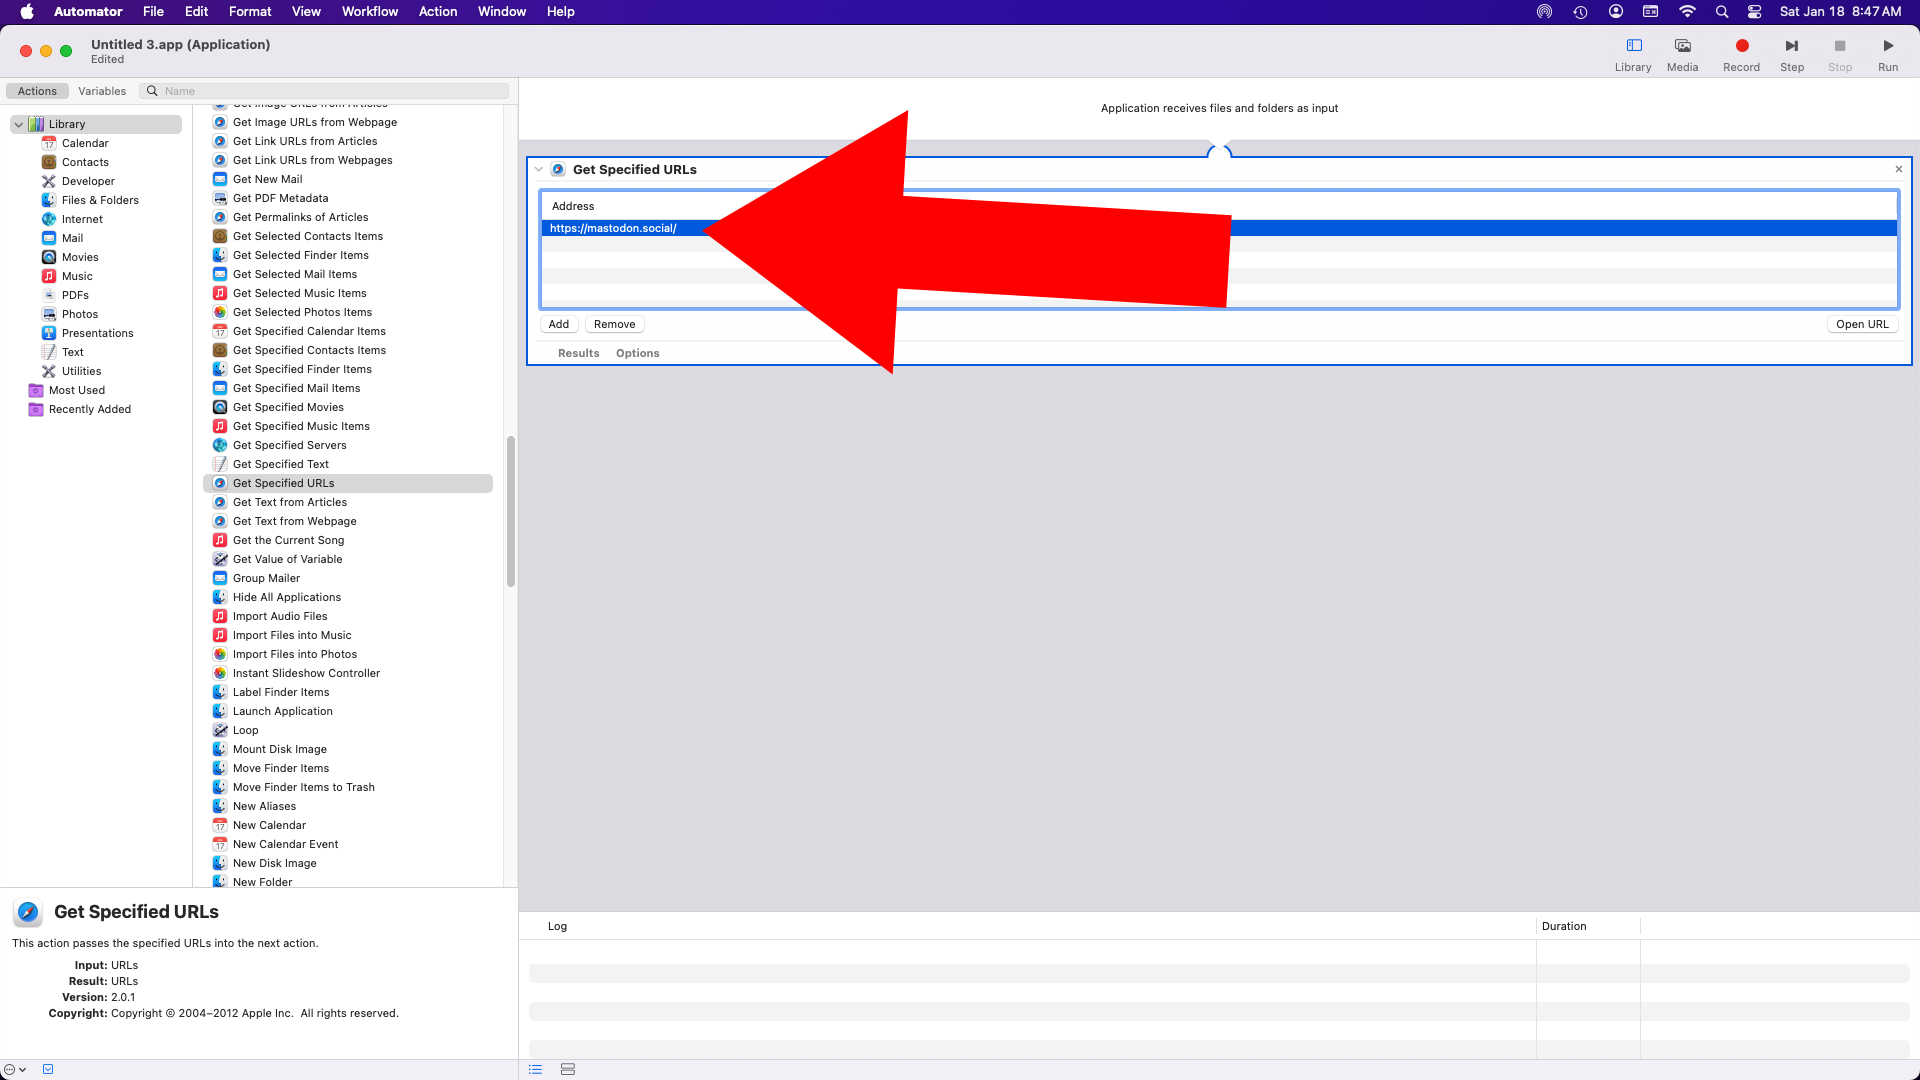
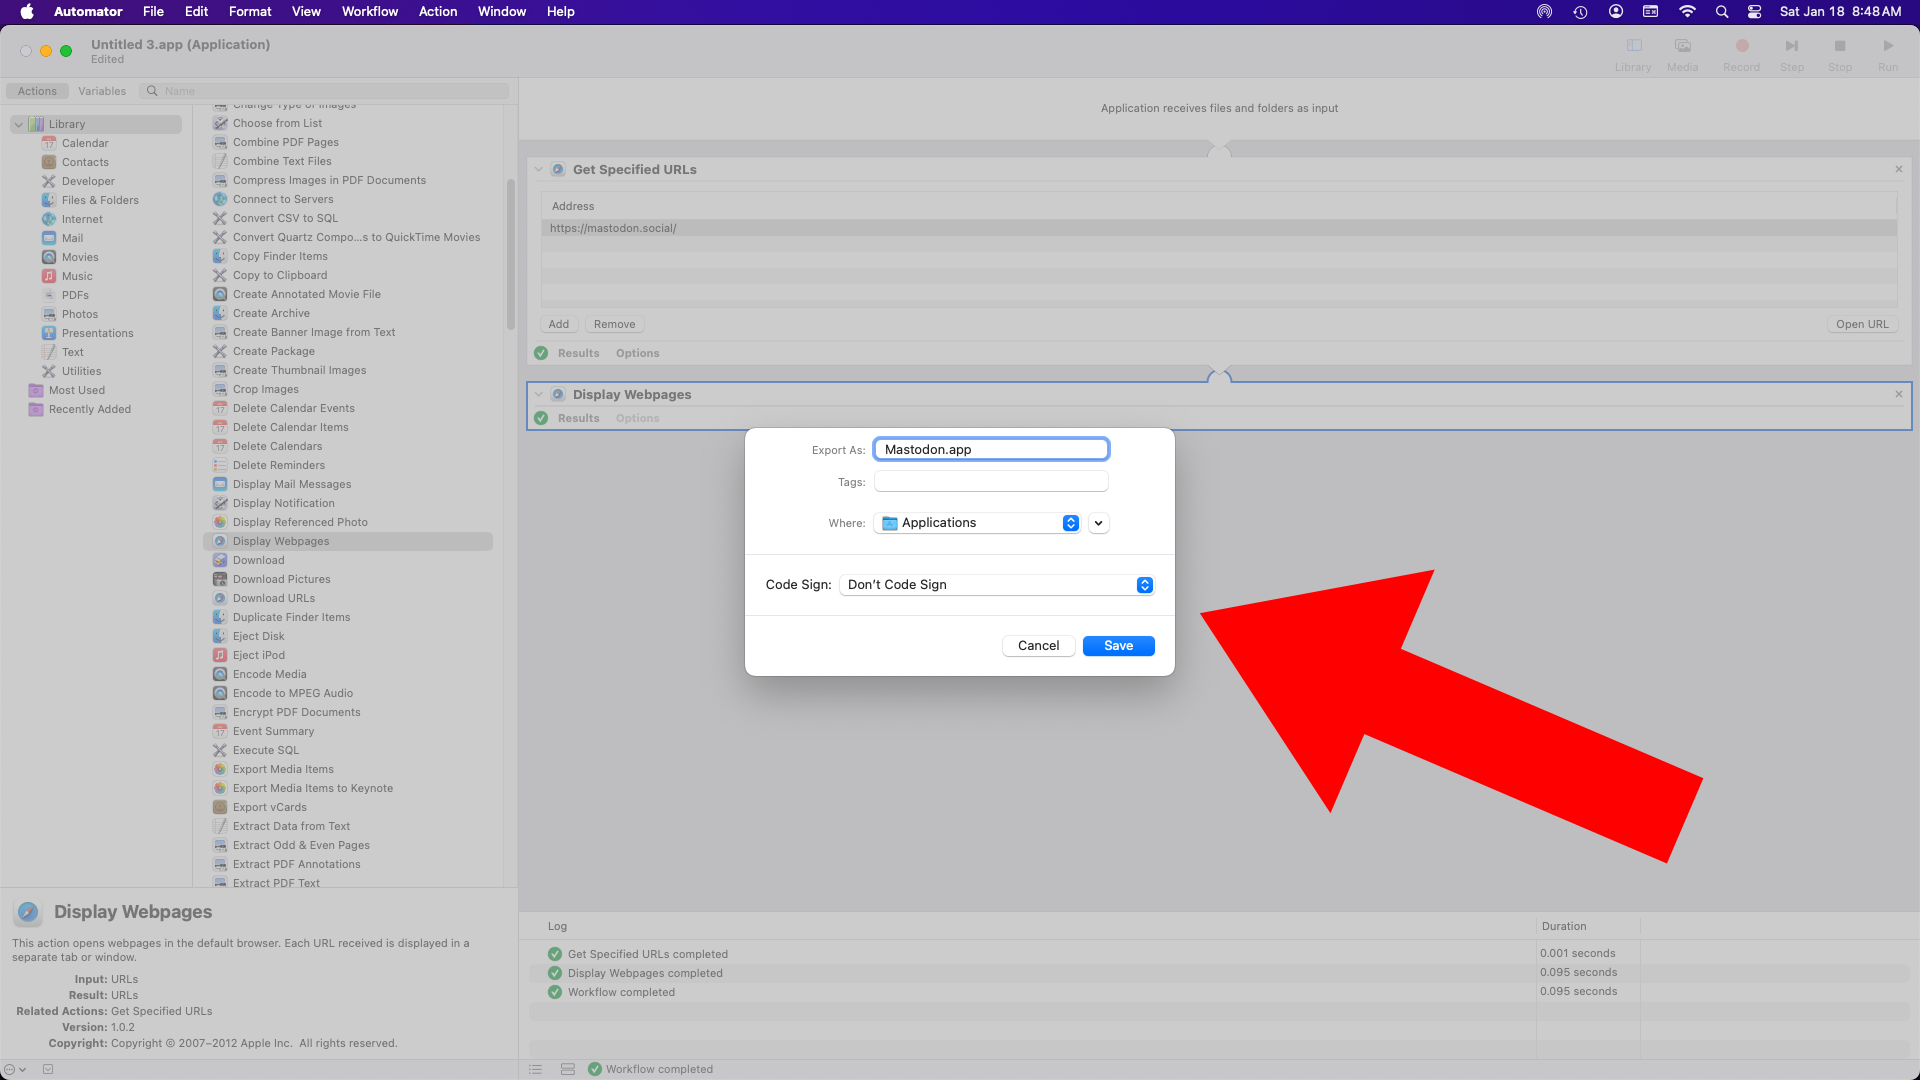
I changed it to mastodon.social in this example…


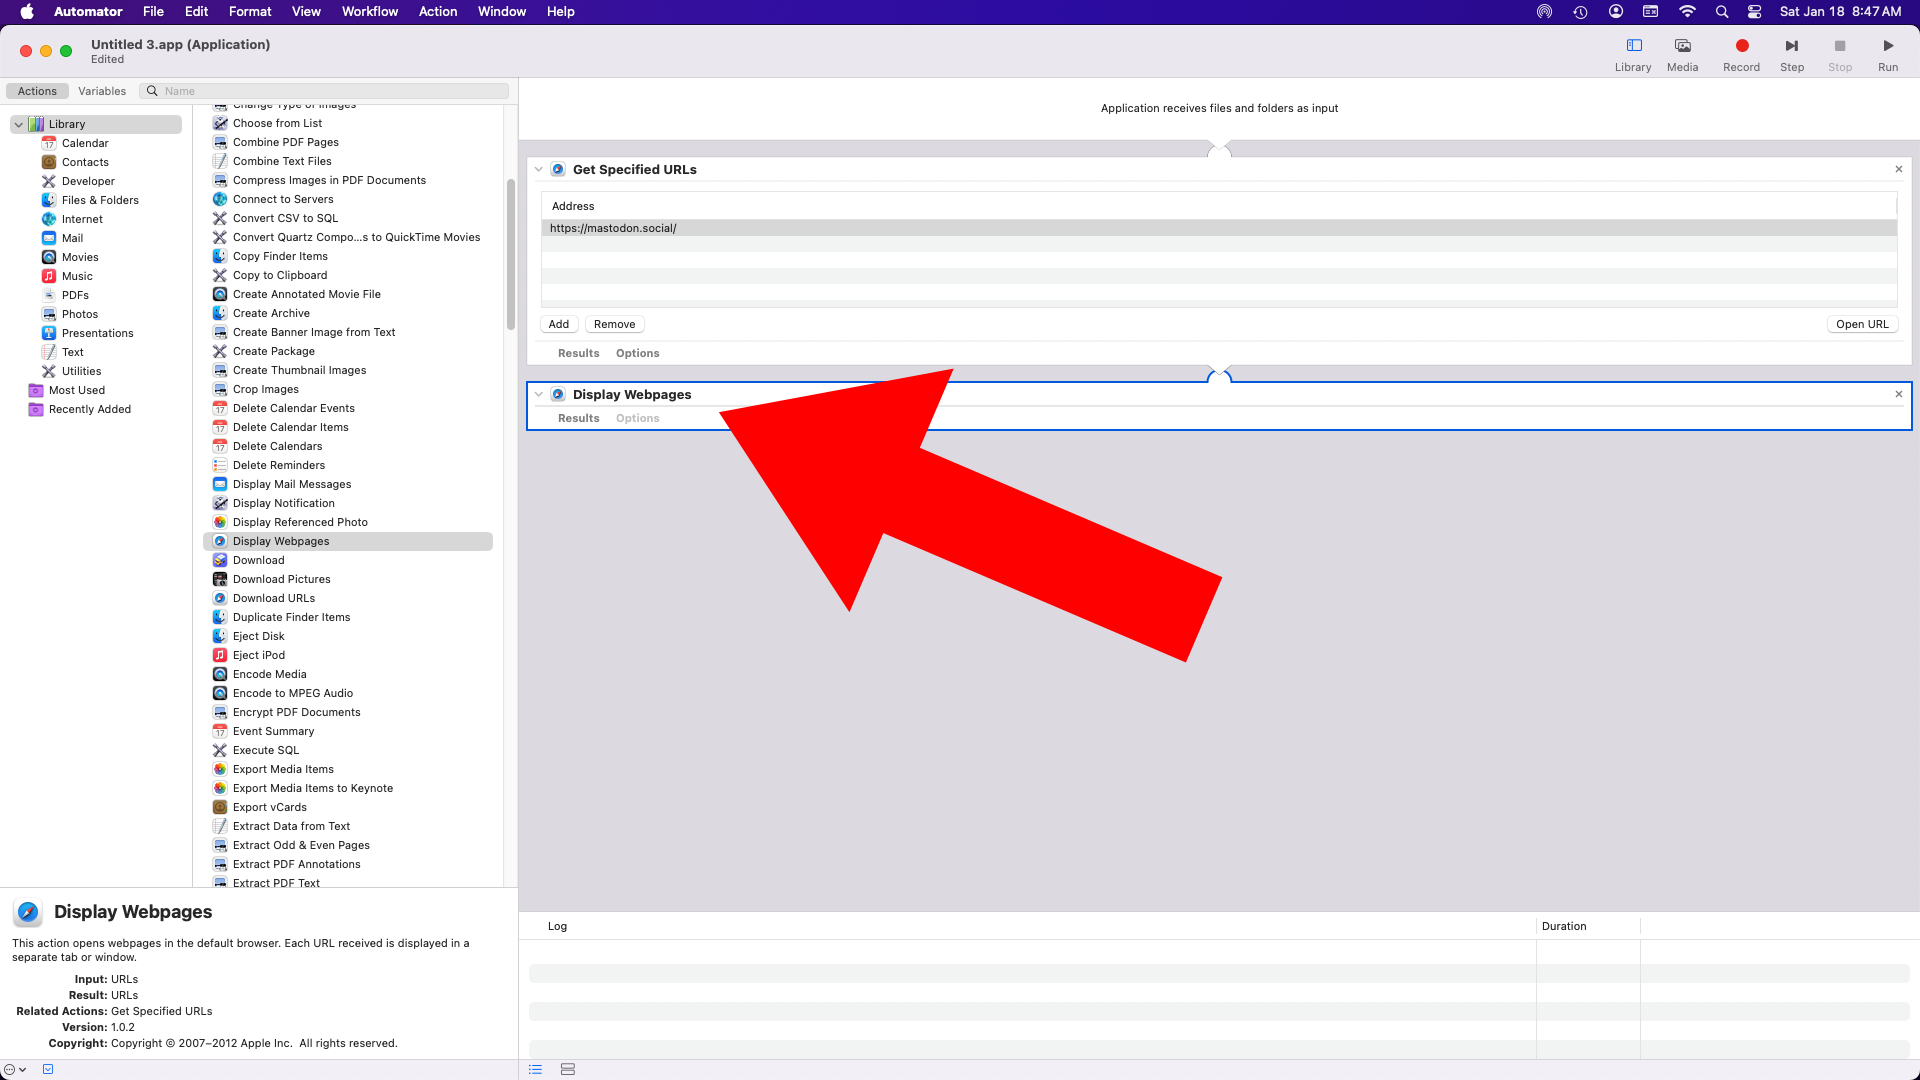
Now select “Display Webpages” from the second column…


It will get added to the right panel…


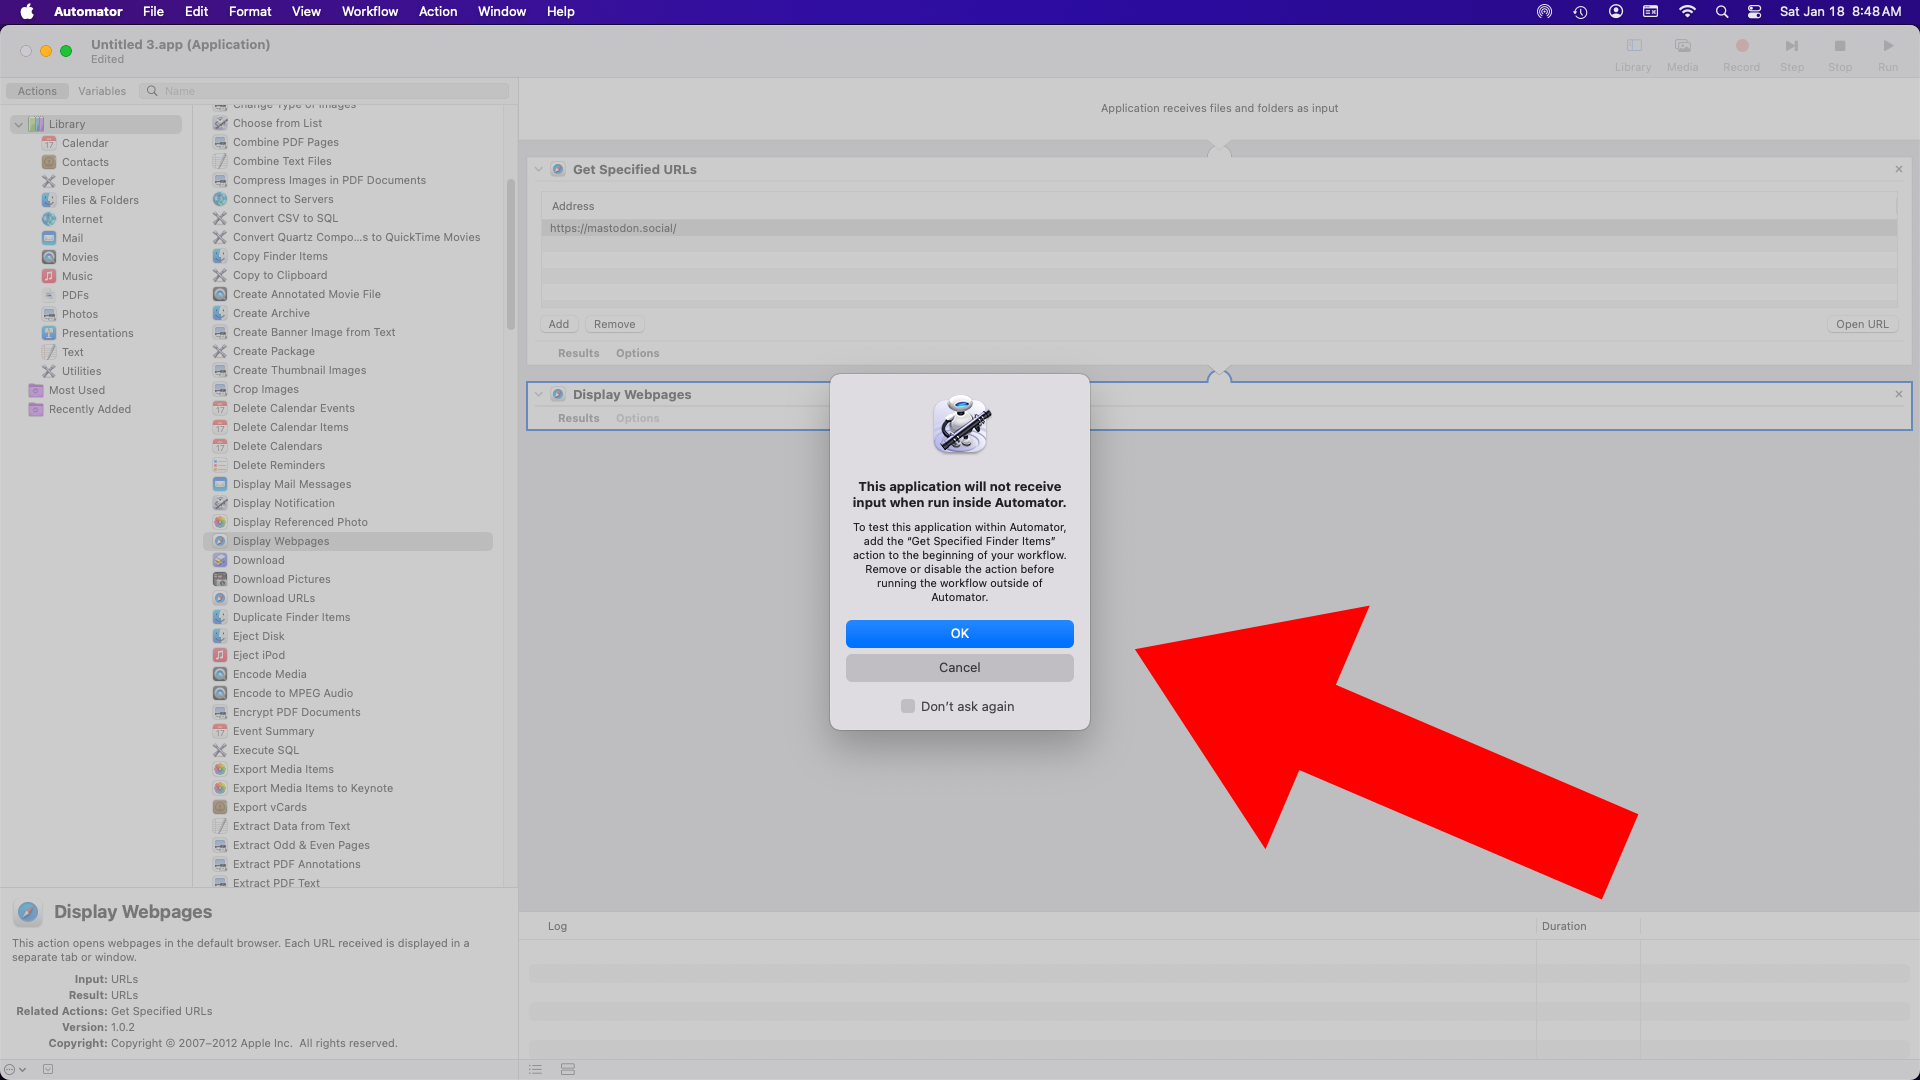
If you click the Run button you might get this warning… it will probably work just fine anyway. Test it out!


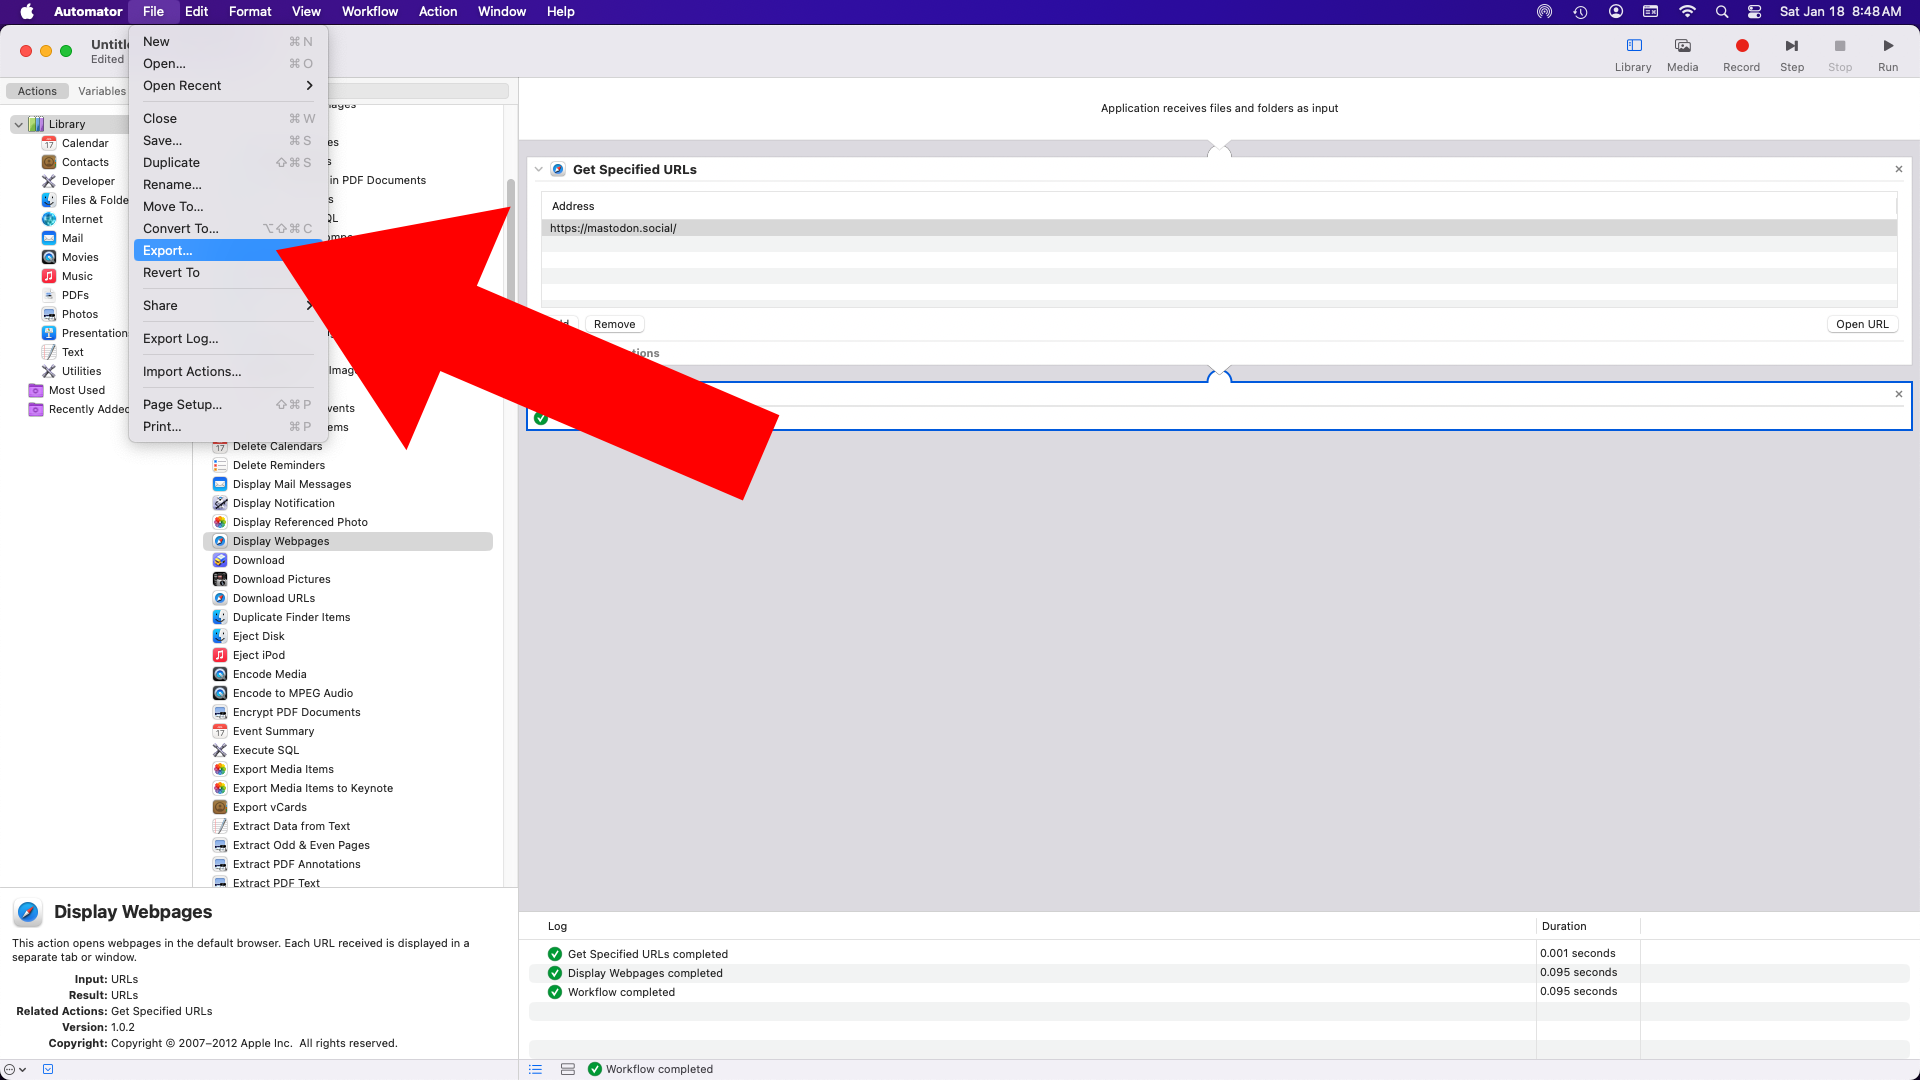
If everything worked you can Export it…


Give it a name (I chose “Mastodon”) and save it as an application in the Applications folder…


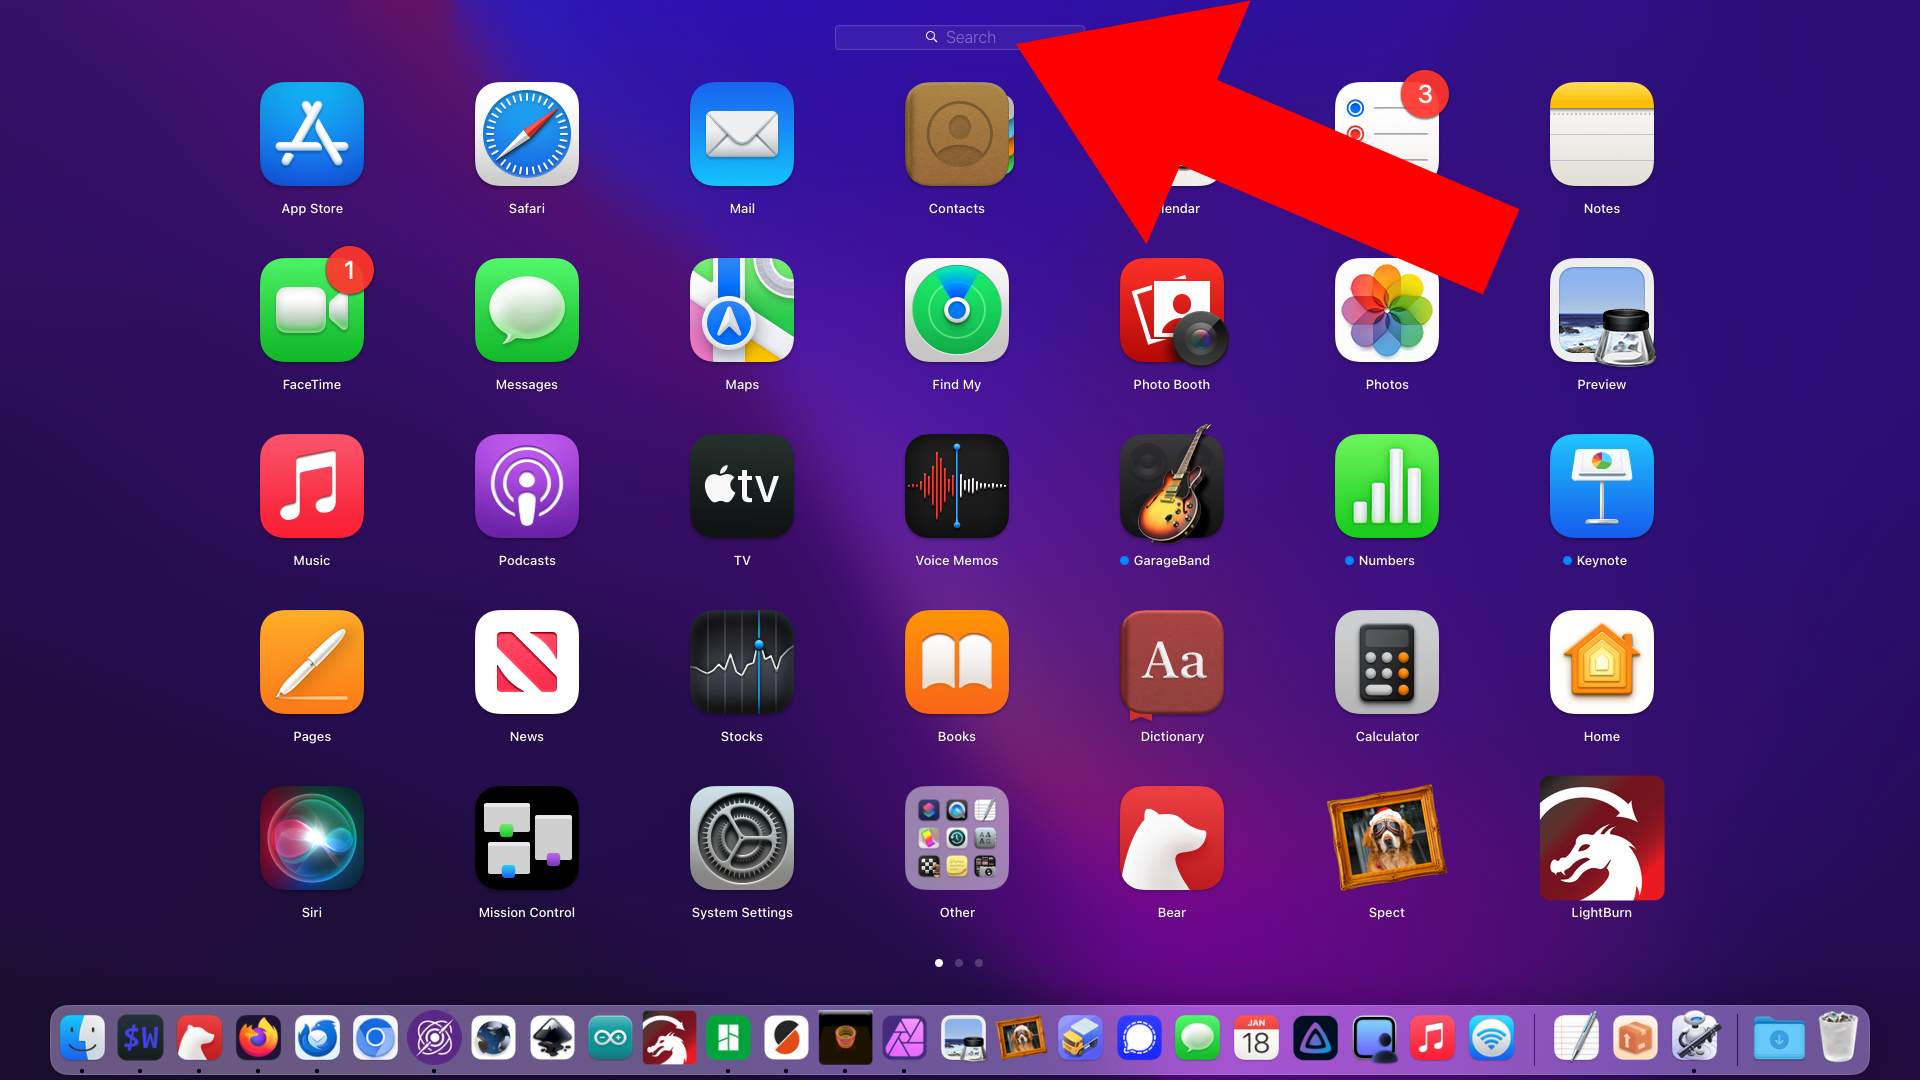
Okay, it should be ready! Hit the Launchpad Key…


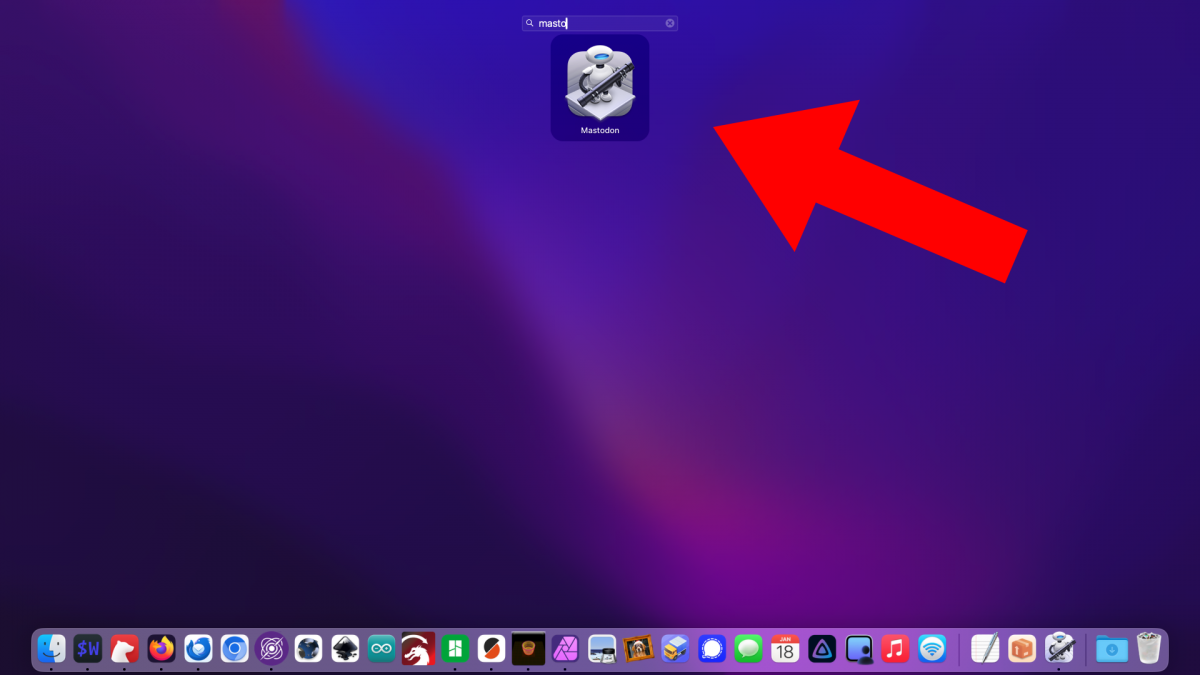
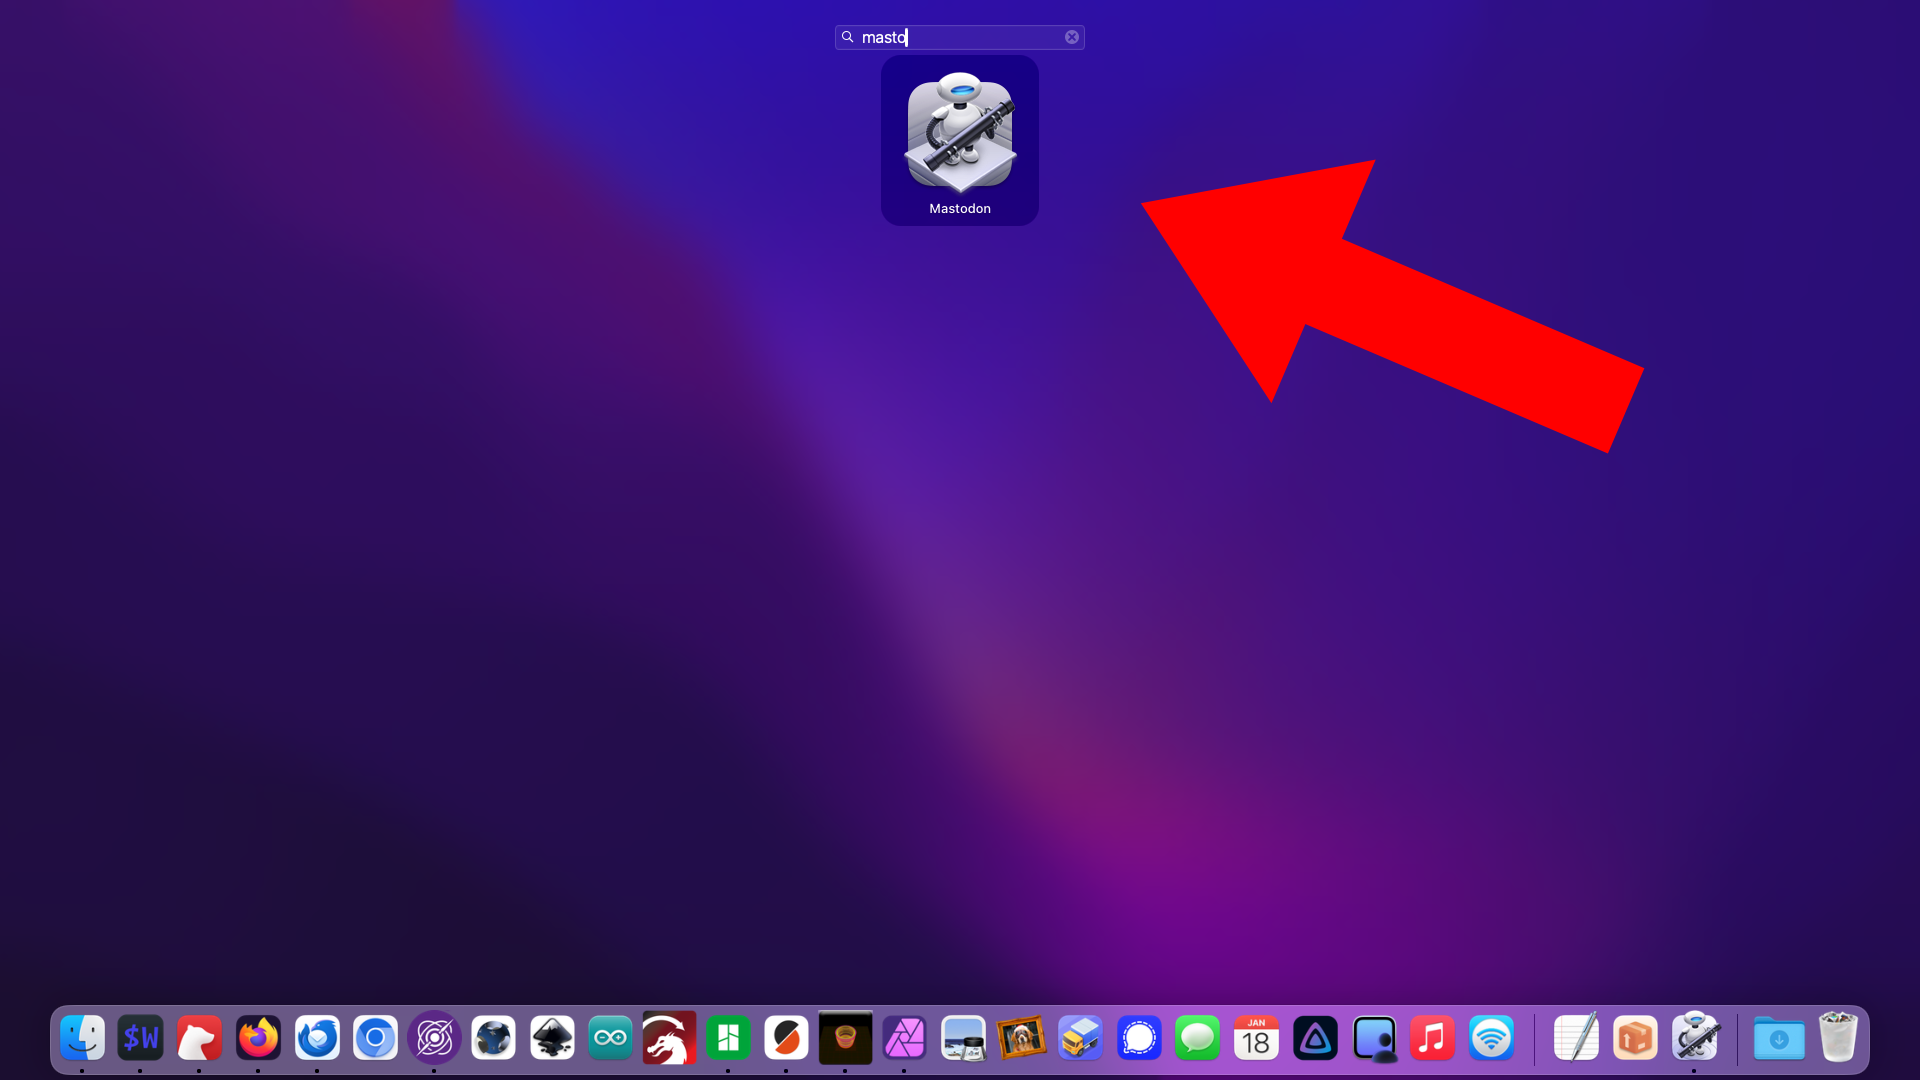
…and start typing the name of the Application/web site and it should pop up… Hit the return key to open it and you should go right to the web site in a new tab in your preferred browser!

I’ve made a few of these for sites I need to visit and it saves me the time of switching to my browser and opening the site in the usual/classic ways. Keyboard Maestro can make this even faster by just using a system wide unique key combo of course.


Note: This post contains an Affiliate Link. Read More.

Categories
Uncategorized

Remap F14 & F15 on macOS

Here’s a fun one. On some Macs the screen brightness keys are actually recognized as the F14 and F15 function keys. Which means when you build your own keyboard with those keys they change the screen brightness. Yuk. I found a post that explained how to change that, which involved going into System Preferences -> Keyboard -> Shortcuts -> Display, except… it’s not there. (See the image above? Not there.)

But wait, it is there after you plug in a device you built that has F14 and F15 keys. (See below.) So once you plug in a device you built that has F14 and F15 keys, the Display option will appear and you can disable the brightness thing by deselecting things. And yes, you can still totally adjust the screen brightness by using the keys on your normal keyboard.

This post is about 95% for future me, and 5% for someone who needs to figure it out and finds this post. You’re Welcome!

Categories
Uncategorized

Spect Image Browser

As I continue to move away from Adobe products (I mentioned Affinity Photo a few months ago) I’ve still been using Adobe Bridge because it’s installed and it works fine, but will break in the future, so… replacement time!

I looked at a few Mac OS X based image browsers and found Spect. There’s a free trial so I gave it a whirl, and then shelled out $4.99 for it. So far I think I’ve got my money’s worth. I like that it can browse a top-level folder and also do a deep scan into sub-folders and show them all in one view.

My only concern is that it may not see updates and may die. There’s a bug where it does not seem to know about Recent Folders, it doesn’t really show any metadata, and the author is probably a little busy with other things.

Still, it works well for now… until I find something better.