Categories
Uncategorized

Dying Plastic

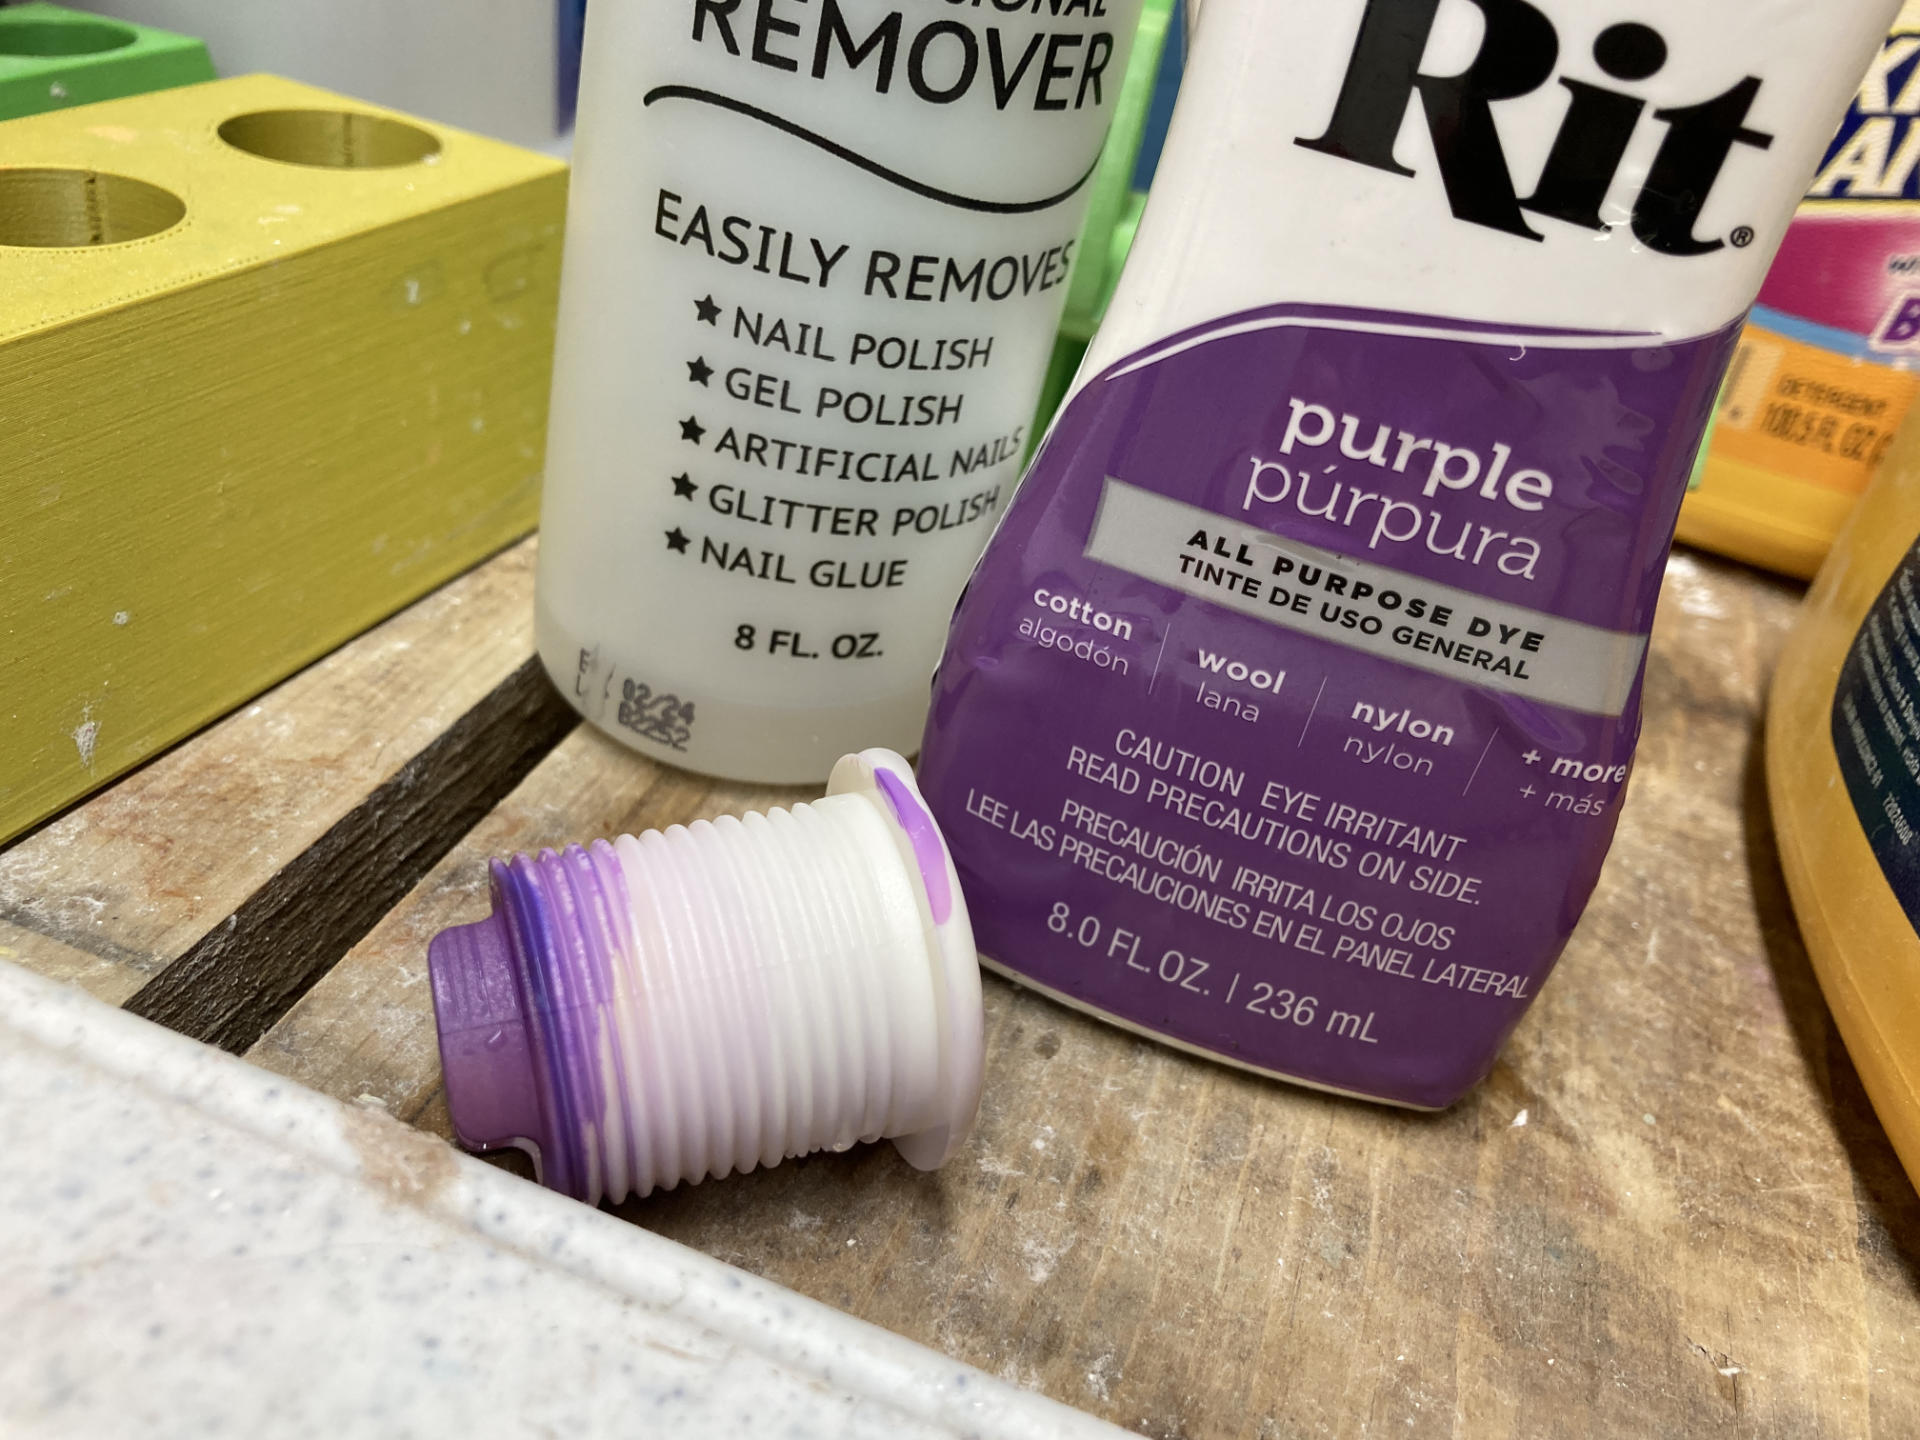
I sometimes need something a certain color, and this time it was a purple button. I could not purchase a purple button, but I could purchase a white button and some purple dye. So the idea is that you can dye plastic like anything else… sort of. It’s complicated.

I got some Rit Dye Liquid after I had ready you could mix it with a bit of acetone and dye plastic with it. Now, there is a Rit product called DyeMore which supposedly will also work, and maybe work better, but the tutorials I found talked about heating up the dye and acetone to a specific temperature, and that seemed like a lot of faff and not something I wanted to do in the kitchen and while I could attempt it in the shop I opted to try the “cold” method first.

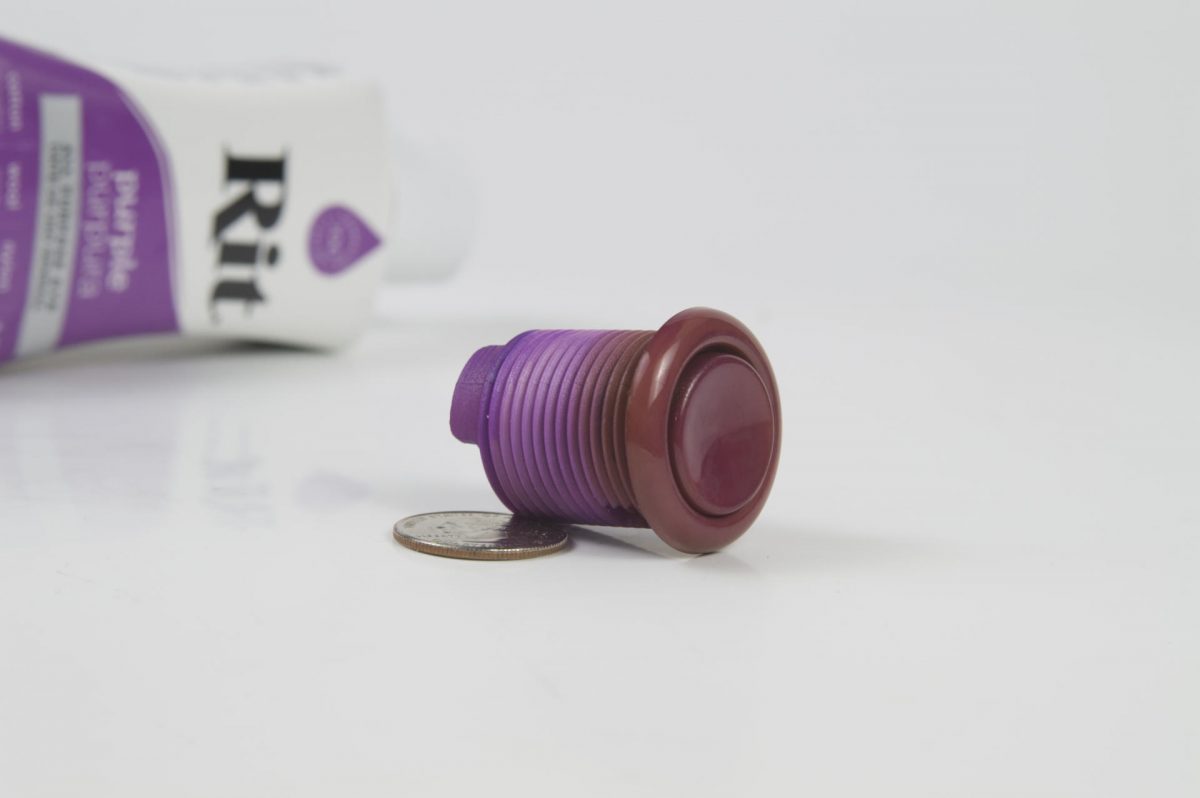
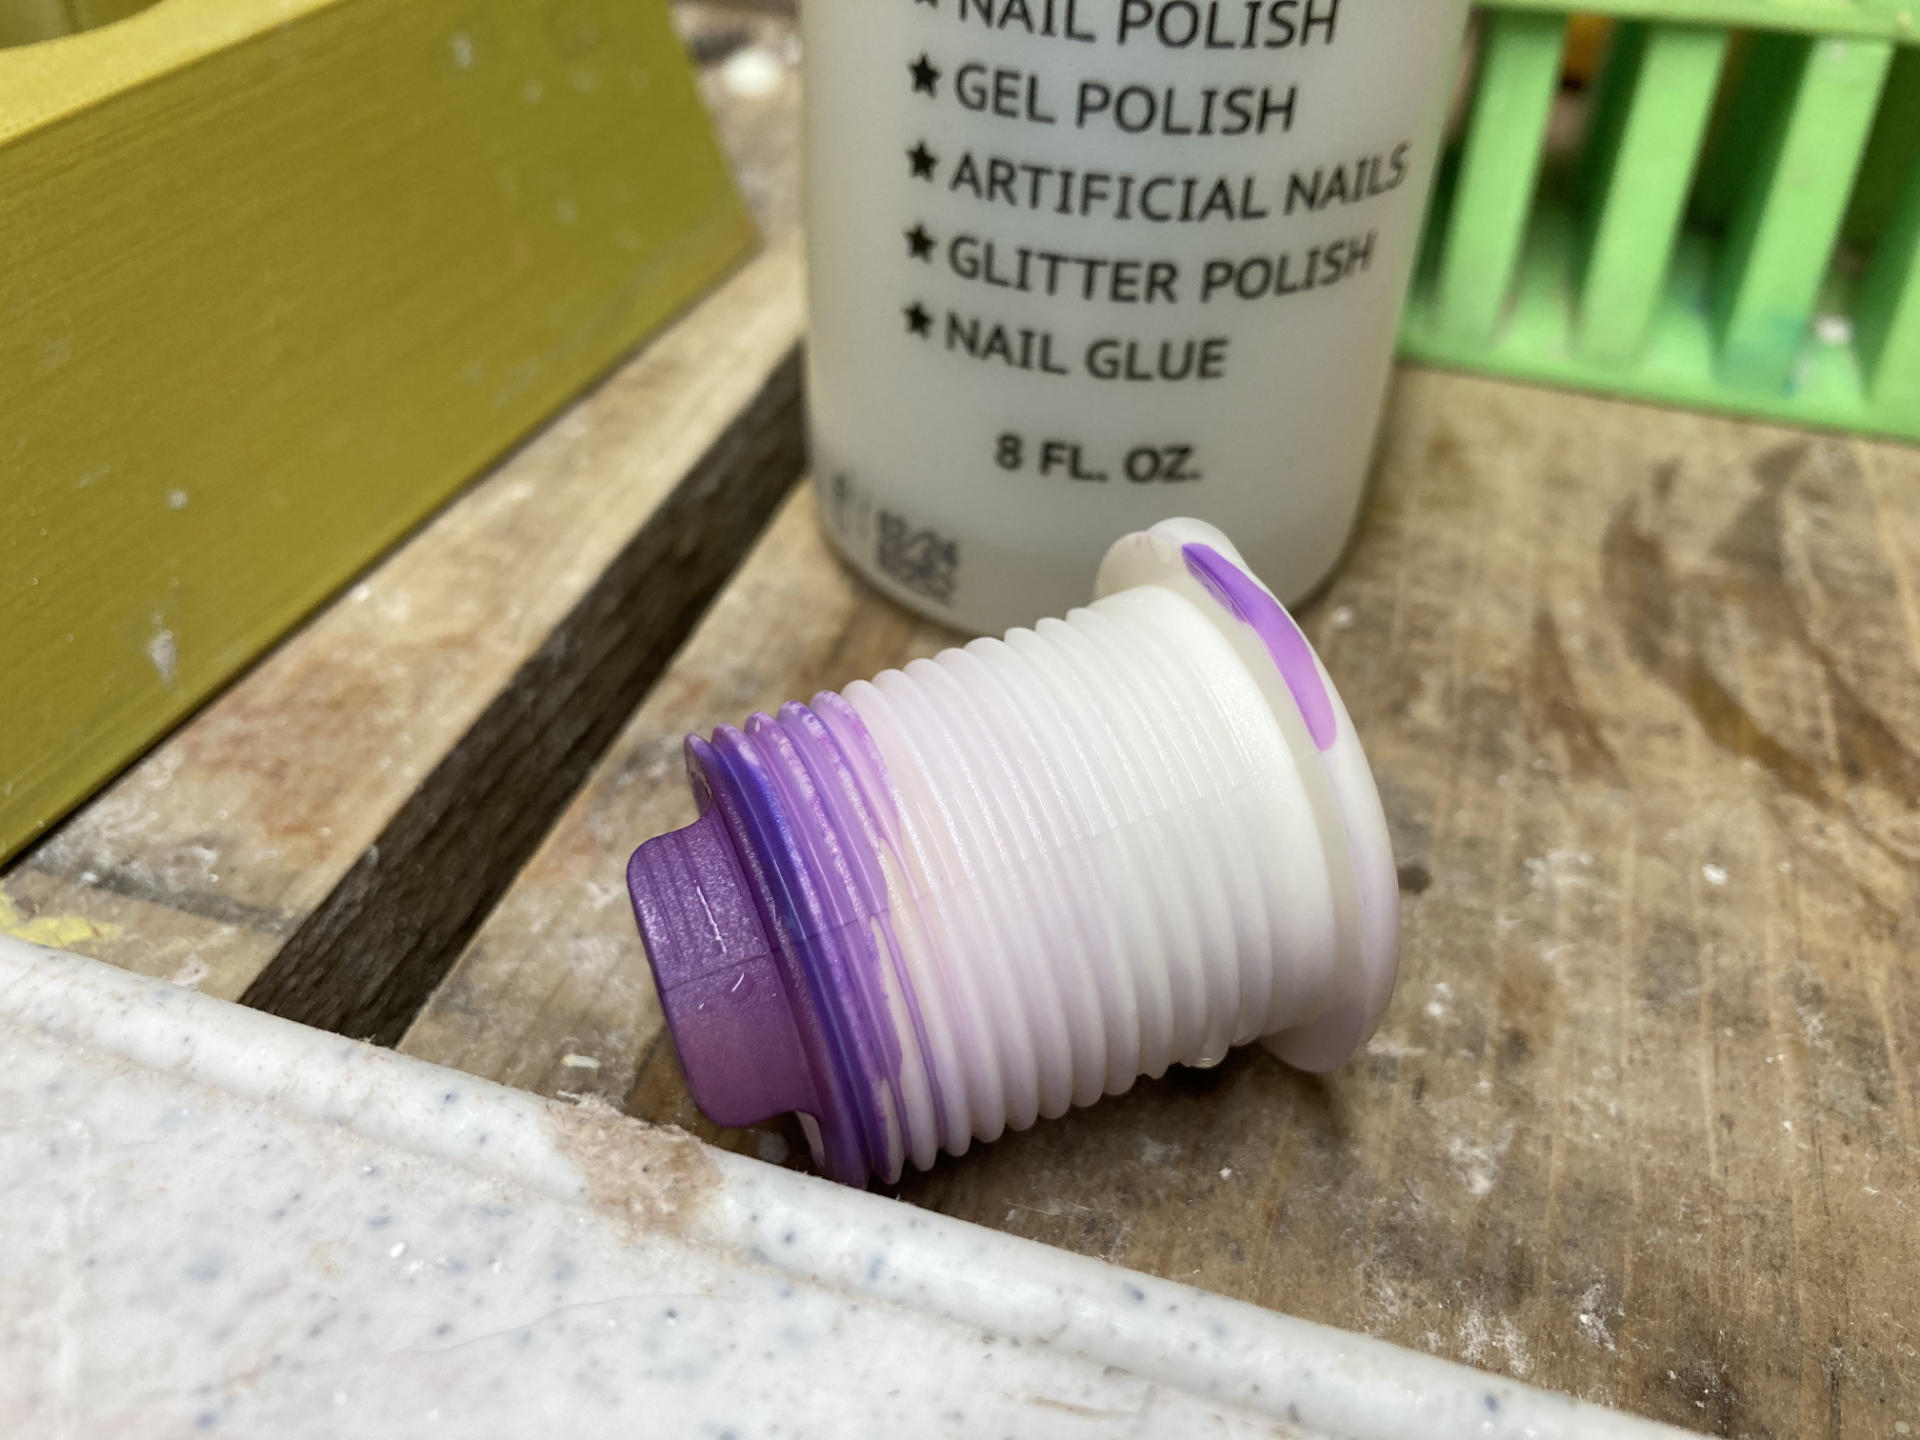
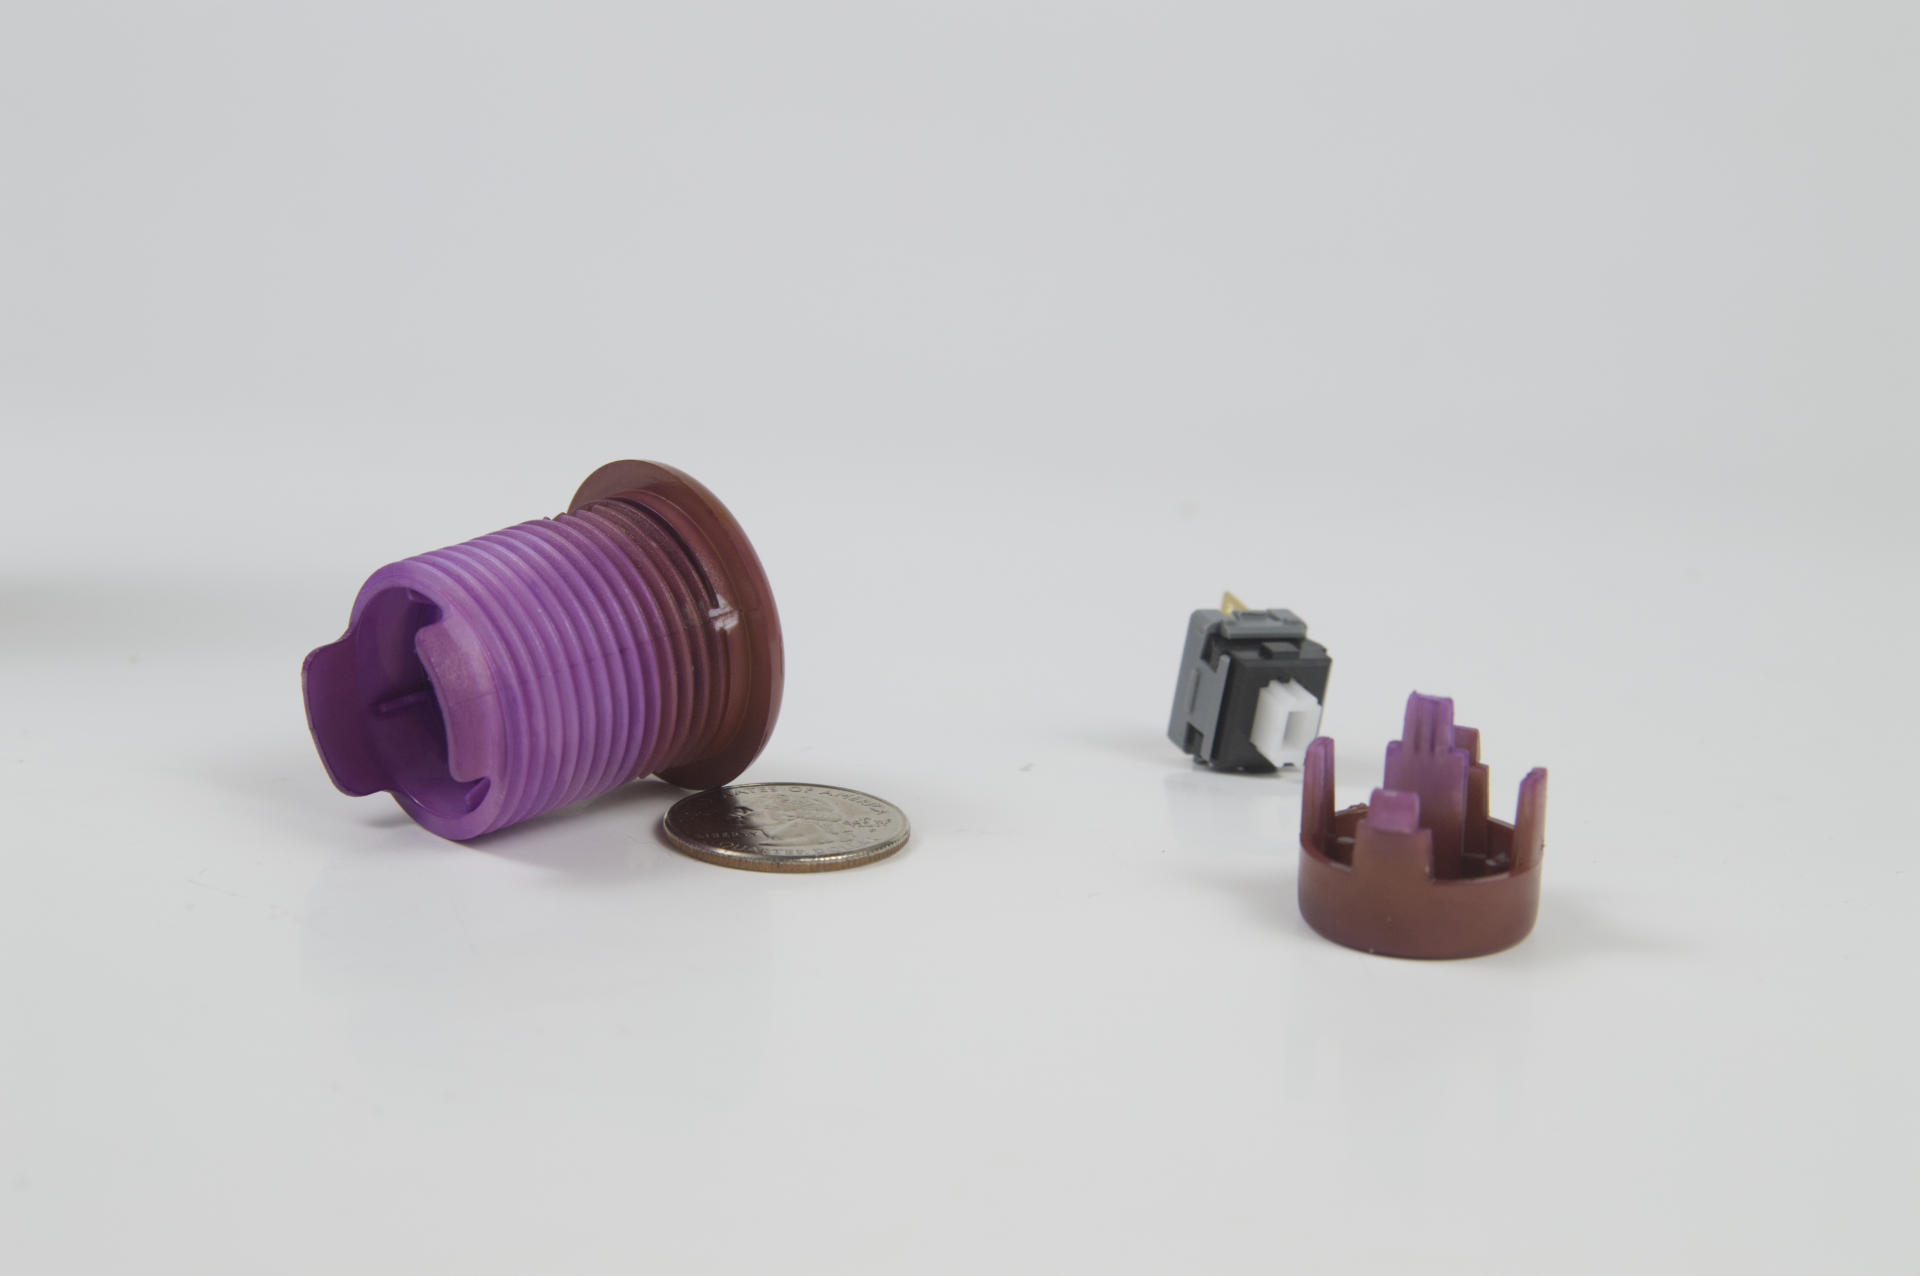
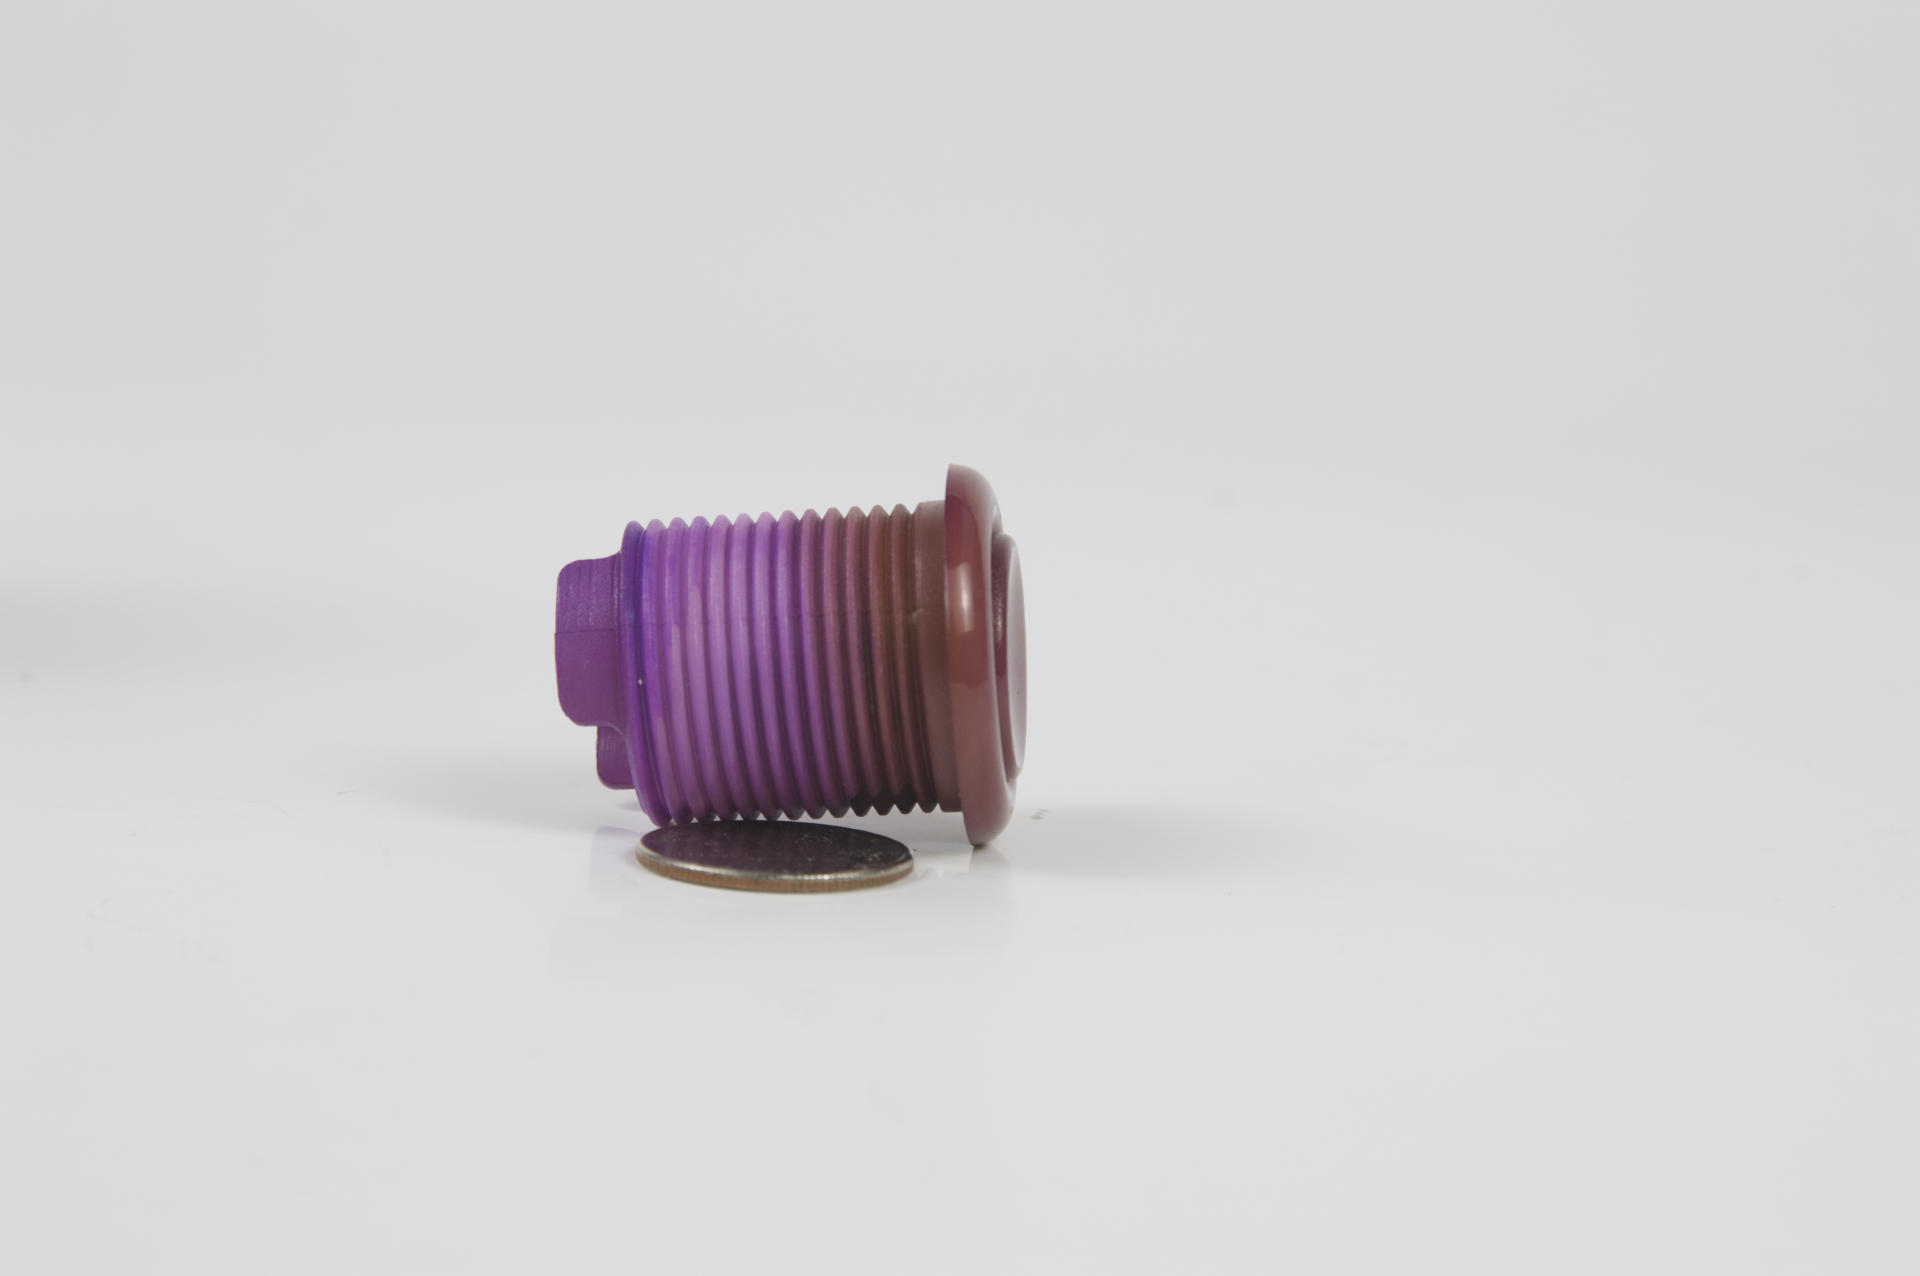
As you can see I was excited that it seemed to work. I tried just the bottom end and it turned purple!

Sadly when I tried to do the important part (the part you actually see when the button is mounted) the color I got was much different. I don’t know what changed. I probably did add more dye and more acetone, so maybe I threw off the ratio or something?

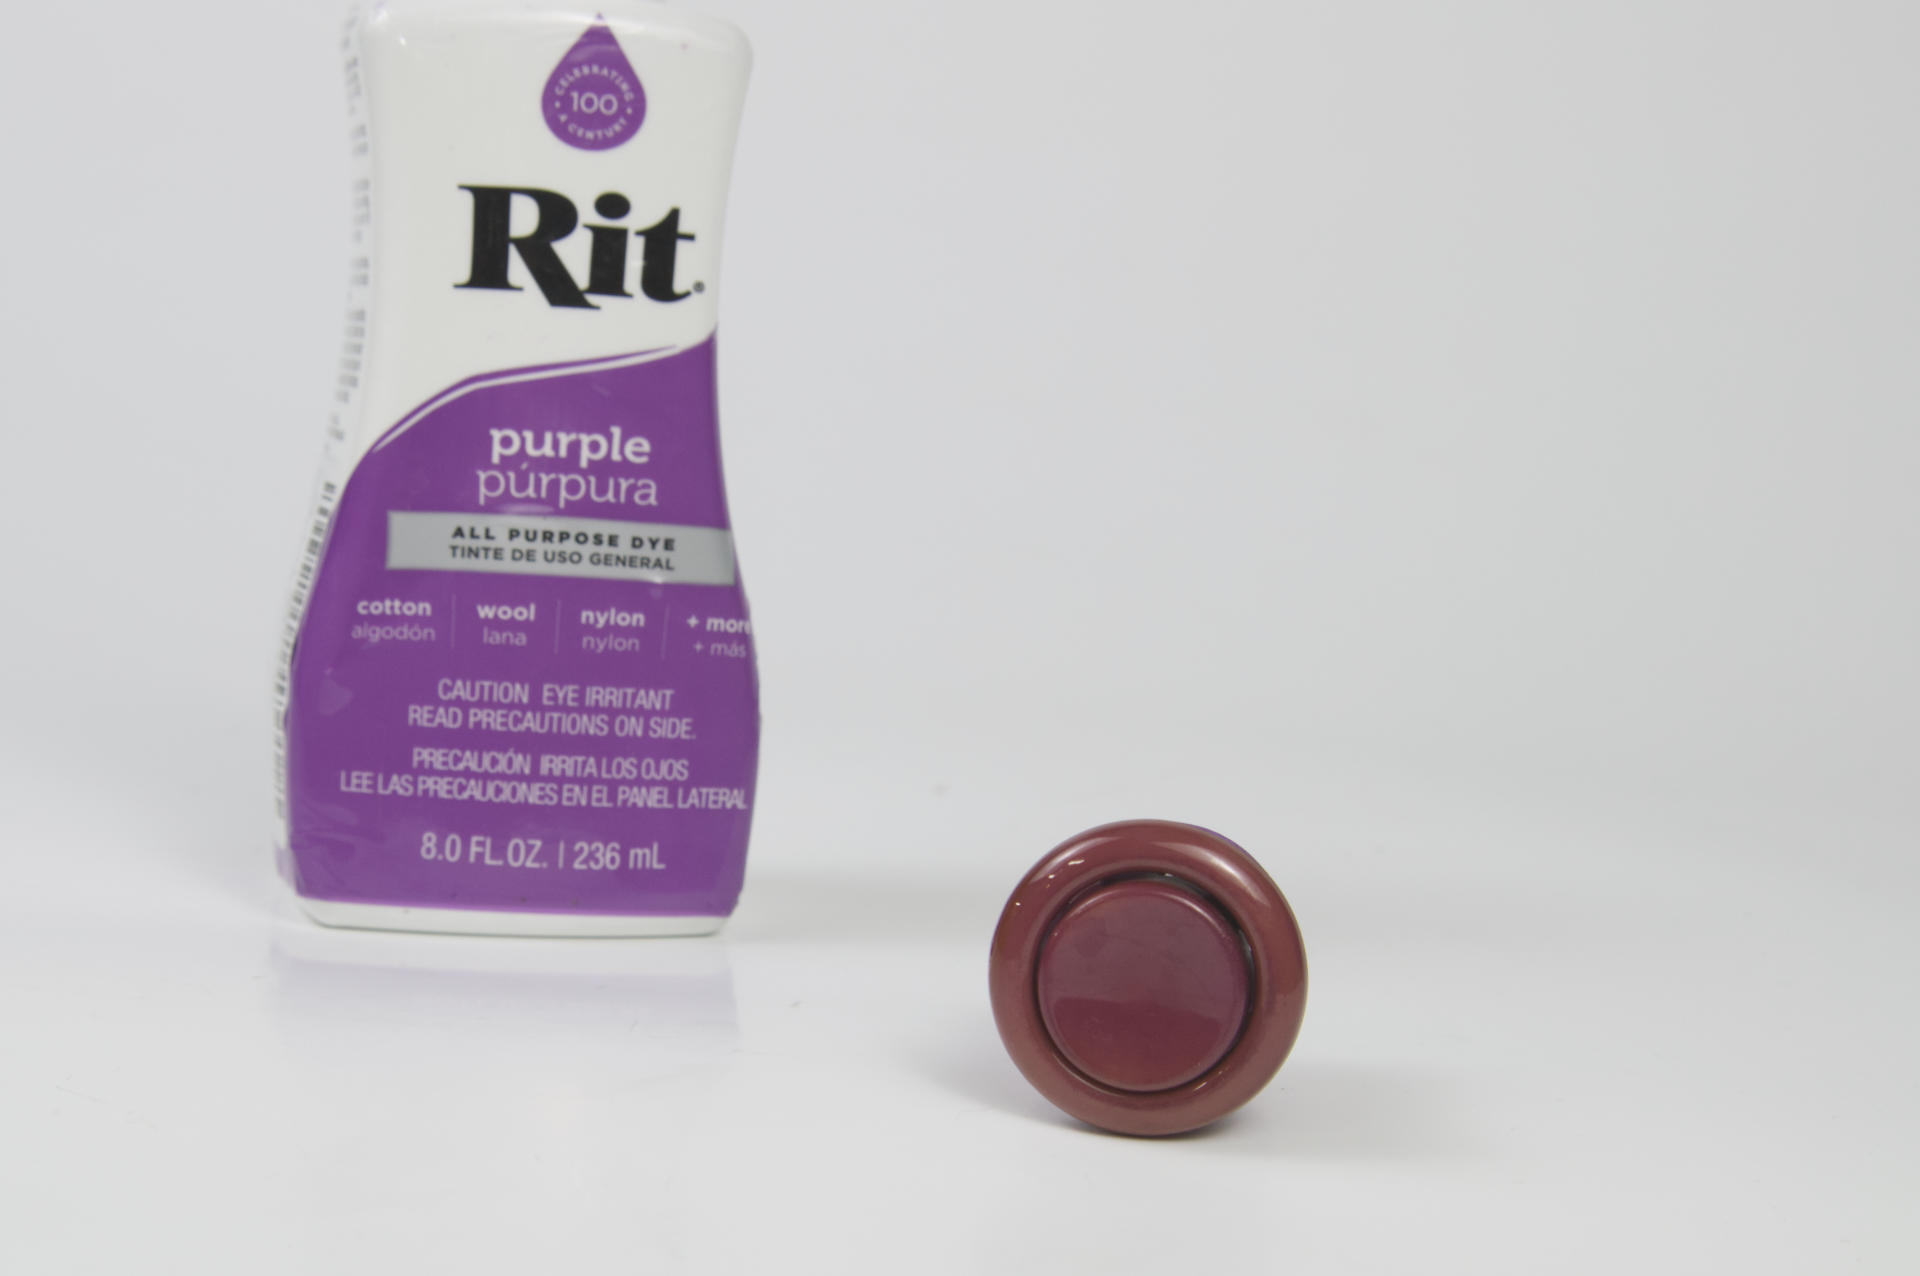
The dye job itself turned out pretty good! It’s just… not the color I wanted. I started to wonder if the plastic is more finished / polished at the top side. It’s possible, but unlikely. This is probably another case of me doing bad science and not properly measuring things and recording things. But to be fair, this was my first attempt.

I don’t know if there will be a second attempt. It would mean using (wasting) more buttons, and I don’t know that I want to color a bunch of buttons without a client paying for it just in the name of science. But it’s good to know it does work if needed. Though getting the correct color may prove a challenge.

I really wish I could have got that nice purple color throughout the whole thing! It could also be timing… Maybe I let it sit in the solution for two long. Again, lack of good data here.

I should note than when I asked for advice a few people said “What kind of plastic is it?” but sadly, I do not know. These are just arcade buttons I buy from a reseller, and they come with no such information. Oh well!


Note: This post may contain Affiliate Links. Read More.

Categories
Uncategorized

Milling (home made) HDPE

mm-helmet-cnc-20

I’m still (slowly) working through using the Little CNC Milling Machine. I (mostly) successfully milled a PCB, but before I did that I managed to grab a piece of HDPE and mill something.

CNC HDPE

I started with a vector file of one of the Milwaukee Makerspace logos, taking just the (“new style”) helmet and I brought that into MakerCAM to create the cutting paths. I created a pocket for the inside part, and used a profile for the cut to remove the part from the material. Since I was just using one bit I exported both jobs into one file so it could run it all at once, since I didn’t need to change tools.

CNC HDPE

I then used GrblController to connect to the machine and send the G-code needed to cut the part. I’m still not convinced everything is working as it should be, because either I keep doing the math wrong (possible) or the machine seems to step down farther than I expect it to. More experimentation is needed.

CNC HDPE

I secure the HDPE piece down to a piece of MDF that is attached to the bed of the machine. The bed is a piece of Aluminum and I’d rather dig into the MDF if I go too deep than carve into the Aluminum. I’m still not totally happy with what I’ve got going on with the bed, but I’ll work on that another time.

CNC HDPE

Let the milling begin! Again, it seems like the machine was going a bit deeper than I estimated. I’ll have to work on getting the speeds & feeds more dialed in, but that’s pretty much a true statement with every CNC machine & material combo, right?

CNC HDPE

Here’s our final piece. I made the pocket deep enough that you can actually see some light coming through. Nice! There’s one little bad spot around the outside cut. I should have added tabs to hold the piece down, since it shifted a little when it was finally cut all the way through and the bit took a bite out of the material.

CNC HDPE

In a way, this is an update to my original HDPE milling experiment, which is fitting, because I used a Shapeoko the first time. Now, when the Shapeoko was first presented on Kickstarter it was presented as a CNC mill that would cost around $300. Well, it ended up casting quite a bit more, but six years later we’ve got the (under) $300 CNC milling machine you can have at home. Yes, the work area is a little small, but we’re going to rectify that in the future.

Categories
Uncategorized

Return of the HDPE

Recycled HDPE Plastic

It’s the return of HDPE! I was recently at IKEA and grabbed a metal baking pan. I gave up on glass after the last episode, and while people suggested Silicone, I never got around to buying a Silicone pan.

Recycled HDPE Plastic

Now, it’s important to remember this is recycled HDPE, and it’s not virgin material. Also, some foreign matter may get mixed in. The HDPE for this batch came from a few sheets I asked John McGeen to plane for me. He swept up the shreds and bagged it and returned it to me to re-melt. (The sweeping from the floor is probably why some foreign matter gets in.)

Recycled HDPE Plastic

The bottom (the part that was touching the metal pan) shows a bit more of a “burny” look to it, being yellow, and such. That may be the difference between glass and metal. I’ll experiment more to find out.

Recycled HDPE Plastic

Like the other pieces I pressed the hot HDPE between some pieces of wood. Removing the plastic from the metal pan was much easier than the glass pan. You could even consider skipping the pressing and just let it cool in the metal pan. It should shrink a little bit and pop right out.

Categories
Uncategorized

HDPE Disaster

HDPE Sheet

My most recent HDPE adventure did not turn out well. While I got a nice sized sheet, I managed to slice my finger open and wasn’t sure why, until I investigated more closely…

HDPE, now with glass!

If you can see those shiny pieces, those are pieces of glass. But since I’m personally cutting up all the HDPE scraps and putting them in the oven, where did this glass come from?

Glass, damaged...

Oh yeah, I put it in the oven in a glass baking pan. The HDPE actually tore some layers from the bottom of the pan when I was removing it! The HDPE doesn’t exactly fall out of the pan, and requires some coaxing to come out. I typically pry it out with a screwdriver, then pull it out. (I wear gloves the entire time, as that stuff is HOT!)

Obviously the glass baking pan isn’t ideal for this. I’ve gone back to using the smaller glass loaf pan. I’m hoping the smaller surface area will help prevent this from happening again.

Baked to Hell!

The glass pan is pretty beat anyway, and with pieces missing from the bottom, I guess I’ll just scrap it. (Unless someone wants to melt it down!)

Categories
Uncategorized

Milling Recycled HDPE

MAKE (in HDPE)

After all of my experiments with recycling various HDPE scraps, I finally got around to milling a piece on the Shapeoko at BAMspace.

Milling on the Shapeoko

The piece I used was close to 0.5″ thick. I added a thin piece of MDF beneath the piece so I wouldn’t chew up our nice looking hold-down surface…

Shapeoko

The milling took quite a while. The first attempt with a different piece did not work out well, partly due to too high of feed rate, and partly due to a piece getting stuck after being cut out. (I can see the appeal of a vacuum table!)

GRBL Controller

We use GRBL Controller on one of my old Linux laptops to control the Shapeoko.

Shapeoko

Did I mention the milling took a long time? It was about 14 passes at 0.04″ per pass to cut through. I used a 1/8″ bit.

MAKE (in HDPE)

The end results were nice. A little rough, but some sanding and a few hits with a blow touch should clean things up just fine.