Categories
Uncategorized

Getting Started with CNC [Book]

Make Getting Started with CNC

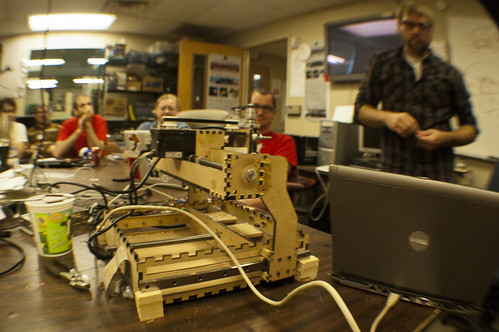
I can’t remember the last time I did a book review… Have I ever done a book review? I should, because on rare occasions I do read books. While stuck on a plane last weekend (as well as a horse farm with no WiFi or cellular service) I read “Getting Started with CNC” by Edward Ford. I met Edward many years ago when he came to Milwaukee Makerspace, and I’ve helped build a few Shapeoko CNC machines over the years. So when I saw his name as the author, I was excited to consume his knowledge of CNC machines.

I should state for the record that I didn’t just see this book and buy it. It was part of a Humble Bundle where you pay some small amount and get a boatload of electronic versions of books. I tend to fill my old iPad with these, and read them when I get the chance. Seriously, if you are a fan of any of the Make Magazine books, sign up at Humble Bundle. You’ll mostly get emails about games (boring!) but once or twice a year you’ll get an email about an amazing book deal. Totally worth it.

Oh yes, on to the review! The book itself is about 160 pages, not too long, but just enough to introduce someone to the world of CNC machines. (We’re talking CNC routers, not mills, or 3D printers, or laser cutters, though some of the concepts apply.)

There’s good information about end mills, and toolpaths, as well as software (commercial and free options) and it even gets into G-code a bit. There are also some CAD exercises you can do even if you don’t have access to a CNC machine. There are a number of good photos and diagrams to explain concepts and machines, and there’s a walk-through of a complete CNC project which involves inside and outside cutting, pocketing, and milling down the surface. It’s written in a very approachable manner.

Now, I’ve done some CNC machining over the years, but I am far from an expert. Still, “Getting Started with CNC” was a worthwhile read, and something I’d recommend to anyone who has any interest in using a CNC router to make things.

Make Getting Started with CNC

I do have a few very small complaints. I found a few typographical errors, as well as some images that appear to have had FPOs put in, and never updated. These are things I think I can mention because I’ve served as a Technical Editor, otherwise I wouldn’t have mentioned them. ;)

Categories
Uncategorized

Milling Recycled HDPE – Workflow

Make

I wanted to document how I did the artwork and toolpaths for the MAKE thing I make on the Shapeoko CNC router at BAMspace recently…

Make

I started with my old MAKE design in Inkscape and set it to the size I wanted. I also placed it on the canvas as if it were on the piece of stock, knowing that the lower left corner would be the home position on the CNC router.

Make

After I saved out my SVG file, I loaded it into MakerCam. Now, you can go to www.makercam.com and use that, or you can load up the SWF, and save it locally to run on your own machine. (Flash is required either way. I guess the source code is also available, but you probably need Adobe’s Flash development tools to do anything with it.)

If you’re using Inkscape, you need to set the prefs to 90ppi instead of 72ppi before you open your SVG file. Oh, make sure you check out the MakerCam tutorial, help, and about pages.

Make

In MakerCam I created two profiles, one to cut the inside pieces, and one to cut the outside of the entire piece.

Make

These setting worked fairly well. I would up the feedrate or the step down on our machine if using 1/2″ HDPE. This job definitely took a while to run…

Make

Once I had the toolpaths all set in MakerCam I exported the G-Code into a single file, and then loaded that file into OpenSCAM to run a simulation. (Looks like OpenSCAM recently rebranded as CAMotics… guess I should grab the latest version!) Running the simulation allows you to see the toolpaths and check how many passes it will take to cut through the material. I guess you could also use math, but sometimes I prefer visualizations…

That’s pretty much my workflow for 2.5D toolpaths; create art in Inkscape, load it into MakerCam and generate G-Code, load G-Code into OpenSCAM (CAMotics) and see how it looks.

Categories
Uncategorized

Milling Recycled HDPE

MAKE (in HDPE)

After all of my experiments with recycling various HDPE scraps, I finally got around to milling a piece on the Shapeoko at BAMspace.

Milling on the Shapeoko

The piece I used was close to 0.5″ thick. I added a thin piece of MDF beneath the piece so I wouldn’t chew up our nice looking hold-down surface…

Shapeoko

The milling took quite a while. The first attempt with a different piece did not work out well, partly due to too high of feed rate, and partly due to a piece getting stuck after being cut out. (I can see the appeal of a vacuum table!)

GRBL Controller

We use GRBL Controller on one of my old Linux laptops to control the Shapeoko.

Shapeoko

Did I mention the milling took a long time? It was about 14 passes at 0.04″ per pass to cut through. I used a 1/8″ bit.

MAKE (in HDPE)

The end results were nice. A little rough, but some sanding and a few hits with a blow touch should clean things up just fine.

Categories
Uncategorized

CAM Workflow

DCRL

A big part of the work I do is the process, and trying to find tools that fit the way I work, and are also available. “Available” may mean open source, or free (as it beer) or multi-platform, or some other criteria I come up with.

In my Digital Craft class we’ve used RhinoCAM to generate the G-code needed to run the 4×8 CNC router in the DCRL. RhinoCAM has a lot of options, as it should for a full-on commercial package. Meanwhile, I’ve been working on a Shapeoko2, which is a small and affordable hobby-level CNC machine. For a machine like this, I’d like to use a workflow that doesn’t require expensive commercial software, because at some point I may not have access to Rhino and I’ll need tools I can afford.

(I should note that I have used CamBam in the past, but being commercial software that is Windows-only doesn’t entice me to want to use it again.)

I’ve played a little bit with Easel from our friends at Inventables, but I’m also not a fan of hosted solutions that can disappear, or start charging for access, etc. At this point I start to sound extremely picky, but really, I’m just looking for tools I can rely on, that are not expensive, and run on the platforms I use. (Easel is actually really nice, and while it’s easy to use, I think that comes at the price of hiding some of the complexity and advanced features I want to learn. Still, if you just want to cut/carve/engrave, check it out.)

I stumbled up MakerCAM, and there’s a bunch more info about it on the Shapeoko wiki. Basically it’s a Flash application (!) that you can use online, or download and run offline, which provides all the basic needs of a CAM application. And it actually works.

Inkscape

I started as I often do, drawing a 2D vector file in Inkscape. (Oh, I should mention there is an extension for Inkscape called Gcodetools, but we’ll skip that for now.) Once I had my Inkscape file I saved it as an SVG, as you normally would with Inkscape.

MakerCAM

I then loaded the SVG into MakerCAM. Note that if you load an SVG from Inkscape you need to set the px/inch to 90 in the preferences. Once in MakerCAM it’s fairly easy to create the toolpaths and generate the G-code. If in doubt, check out the help page and the tutorial page for all the info.

GrblController

After exporting my G-code file I was able to load it into the Grbl Controller and run it on the Shapeoko. Now, Grbl Controller is no Mach3, but it’s also open source, and multi-platform, so there’s that. (Yes, I know the image above does not match the first two images, that’s because I went crazy with the hatch fill from the Egg-Bot extension for Inkscape. Just pretend you know what I’m talking about.)

Oh, if you want to “run” your G-code before you run your G-code to make sure it’s doing what you think it’s doing, check out OpenSCAM, which is a nice little simulator.

(And yes, I know of Chilipeppr for Grbl, but I’ve not dug into it yet.)

Categories
Uncategorized

Shapeoko at Milwaukee Makerspace

Shapeoko at Milwaukee Makerspace

You may have heard me talk about the Shapeoko, a DIY CNC Mill you can (well, should be able to) build for around $300. Edward Ford, the guy behind the project, just wrapped up a Kickstarter campaign to fund the project. And just to be clear, he’s been working on this project for many years, it’s not like he just had an idea a few months back and launched a campaign. (2004 is when he first attempted to build a CNC Mill.)

Edward was kind enough to make the drive up to the Milwaukee Makerspace and talk about Shapeoko with us. It was great to hear about the project, and I think he may have even gotten a few new ideas while he was here. :)

The goal of Shapeoko isn’t to build a business around selling these things, but to create a project that is fully open source, with easy to acquire materials. Typically when you find web sites describing a DIY CNC machine, they involved getting parts from ebay, or from scrap, or other unreliable sources. Edward wants you to be able to get all the parts you need easily, and not have to scrounge around and have a friend who happens to own a mill to make you parts.

Edward’s demo was great, because he wasn’t afraid to talk about all his failures. He admits he’s not an engineer, and he’s learned a lot over the past 7 years about designing and building things. A lot of his description of the project included “So I tried X, and that didn’t really work, then I tried Y…” type things. Experimentation, a bit of guessing, and a lot of testing.

We also learned a bit about running a Kickstarter campaign, and some of the gotchas involved with that. Like refunds, and how you can end up losing money if you issue one, and what happens when there are insufficient funds. Great tips for anyone interested in Kickstarter.

So now that the Kickstarter campaign is done, and instead of the $1,500 he was hoping for, he’s got about 7 times that much, he’s been ordering parts, and is working on a new design, correcting any of the problems that previous designs have had.

For more on the project, check out the web site at shapeoko.com, as well as the blog, Twitter, and the forum.