Categories
Uncategorized

uArm Swift Pro Plotting

urm-swift-pro-00

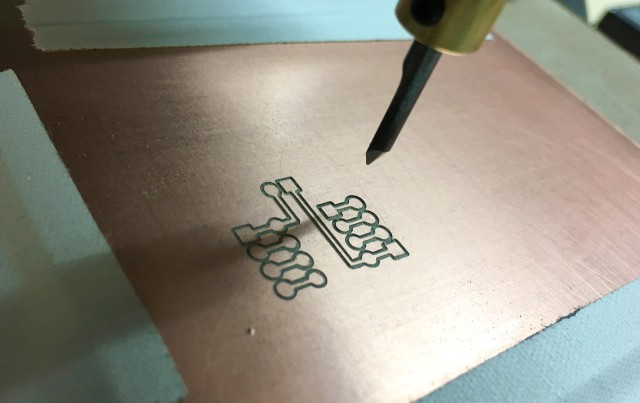
We recently got a uArm Swift Pro robot arm at Brinn Labs and I’ve been putting it through its paces. It comes with software called uArm Studio that lets you do a lot of things, but for this post I’ll focus on drawing (or “plotting”) using a pen.

heart-bw

One of the tools I’ve used in the past with the Egg-Bot was StippleGen2 from our friends at Evil Mad Scientist Laboratories. StippleGen2 is a program written in Processing that takes an image and converts it into a series of lines, or more specifically, a single line, which is suitable for plotting.

Above is the image I started with, an “8-bit heart” as I call it. It’s a simple black and white image of a low-res heart. (Great for Valentine’s Day, right?)

heart-tsp

After running the heart through StippleGen2 and choosing the appropriate complexity of the line drawing I wanted, I saved out the file as an SVG format vector file. Perfect for plotting. (In fact, since it’s a single line, the z axis never has to move up once it starts.)

uarm-studio

I fired up uArm Studio and chose the Draw/Laser feature, and then loaded in the SVG file. I did have to scale it up a bit, as I still don’t have the exact dimensions I should use for artwork in uArm Studio.

Once the file is loaded, you hit start and there’s a step where you set the z axis so it know where the pen hits the paper. At this step, I wish there was a little more control over how the z axis moves. I think the smallest increment is one millimeter, and I think it should be smaller. (Most CNC software has some adjustment to how much you move things, so I can see adding in 0.5mm and perhaps 0.2mm as well.)

urm-swift-pro-01

While the uArm Swift Pro is awesome, I’m still going to be a little critical… One of the issues I’ve come across in the Draw/Laser part of the software is that the speed seems to be hard-coded, with no way to adjust it to go faster (or slower.) As someone who understands G-code and how CNC machines work, I found this a little annoying…

urm-swift-pro-03

So I set about to find a solution. I first posted a message on the forum, but then Chinese New Year hit and it seemed as though it would be two weeks (or more) before I got an answer. I had dug around and found that the G-code created by the Draw/Laser part of the software generates a file and drops it at ~/uarm/Temp/files/gcode/tmp_pen.gcode and I assumed that by editing the feedrate in that file, I could speed things up… I was right!

urm-swift-pro-04

My first attempt was to connect with the arm using Universal Gcode Sender, which in this case was not universal, and failed to properly talk to the arm. I dug around a bit more and found simple_stream.py which is a Python script to stream G-code to a device. Sadly, it was not compatible with Python3, but luckily, I’ve been writing a lot of Python lately, so I fixed it.

After I got it working (that is, after much hacking at the original code) I found that I could easily speed up the drawing to half the time. In this case, 5 minutes with the Python script versus 10 minutes with uArm Studio. For TSP art, great precision tends not to matter too much, and I think I could speed it up even more.

I’ll work on cleaning up my Python code and seeing if I can get it online in case others want to muck around with it.

Update: Code is here: https://github.com/raster/uArm-GCode-Streamer

Categories
Uncategorized

Milling (home made) HDPE

mm-helmet-cnc-20

I’m still (slowly) working through using the Little CNC Milling Machine. I (mostly) successfully milled a PCB, but before I did that I managed to grab a piece of HDPE and mill something.

CNC HDPE

I started with a vector file of one of the Milwaukee Makerspace logos, taking just the (“new style”) helmet and I brought that into MakerCAM to create the cutting paths. I created a pocket for the inside part, and used a profile for the cut to remove the part from the material. Since I was just using one bit I exported both jobs into one file so it could run it all at once, since I didn’t need to change tools.

CNC HDPE

I then used GrblController to connect to the machine and send the G-code needed to cut the part. I’m still not convinced everything is working as it should be, because either I keep doing the math wrong (possible) or the machine seems to step down farther than I expect it to. More experimentation is needed.

CNC HDPE

I secure the HDPE piece down to a piece of MDF that is attached to the bed of the machine. The bed is a piece of Aluminum and I’d rather dig into the MDF if I go too deep than carve into the Aluminum. I’m still not totally happy with what I’ve got going on with the bed, but I’ll work on that another time.

CNC HDPE

Let the milling begin! Again, it seems like the machine was going a bit deeper than I estimated. I’ll have to work on getting the speeds & feeds more dialed in, but that’s pretty much a true statement with every CNC machine & material combo, right?

CNC HDPE

Here’s our final piece. I made the pocket deep enough that you can actually see some light coming through. Nice! There’s one little bad spot around the outside cut. I should have added tabs to hold the piece down, since it shifted a little when it was finally cut all the way through and the bit took a bite out of the material.

CNC HDPE

In a way, this is an update to my original HDPE milling experiment, which is fitting, because I used a Shapeoko the first time. Now, when the Shapeoko was first presented on Kickstarter it was presented as a CNC mill that would cost around $300. Well, it ended up casting quite a bit more, but six years later we’ve got the (under) $300 CNC milling machine you can have at home. Yes, the work area is a little small, but we’re going to rectify that in the future.

Categories
Uncategorized

PCB Milling on the Little CNC

PCB Milling

One of my goals with the Little CNC Milling Machine was to make my own PCBs. I’ve typically made my own printed circuit boards at home by etching them with chemicals, but the mill opens new opportunities to etch and drill the boards, so I gave it a shot.

I knew the basics, but did a a quick search for posts that might explain things a bit more. (I should note I planned to use Fritzing, Inkscape, MakerCam, and GrblController, all free/open source software available on multiple platforms.)

The two useful posts I found were: PCB designing and isolation milling using only free Software and Hello World, How to Mill Printed Circuit Boards (PCB).

OpenSCAM

I wasn’t really planning on documenting this in-depth, but I got a few photos and screenshots, so I’ll share what I can. I had some bits I grabbed from eBay, 0.1mm Carbide PCB Board 60 Degree V-shape Engraving Bits and 0.8mm Carbide PCB Endmill Engraving Bits (a total of 20 bits for under $10) to work with, so that’s what I used. (I may want to try some 45 degree bits and 0.6mm bits next time.)

Milling Traces

Here’s the “isolation milling” I did with the 60 degree engraving bit. Not bad! You can also see a little mark on the copper board where I homed the machine.

Yeah, I did not have double-sided tape, so I just taped the board down to my spoil board. The board wasn’t completely flat, and bowed slightly in the middle. I’ll use double-sided tape next time, which will also help with cutting the final profile of the board.

Set Home

I swapped the bit from engraving to drilling and drilled all the holes. It seemed to work well, so… yeah. (Sorry, no photos of drilling!) I then switched back to the engraving bit to (attempt) to cut out the board…

PCB Milled

It worked, but I miscalculated how deep it would need to cut, and ended up lowering the z home and re-running the job again. I might want to use a different bit next time. When I thought the board was cut out enough I pulled it off the machine.

Light Test

The board held up to the light. Oops! Well, the holes didn’t all work. They were close, but not quite all the way through. I ended up using my Tiny Drill Press to finish the holes, and it didn’t work very well as it was difficult to hit the center. Not great.

I also didn’t cut all the way through with the outside profile. Not a big deal for this board, as it would be easy to cut out on the band saw, but more complex boards may not have this luxury. No matter, the amount of board left was paper thin and it came right out. I’ll definitely use a different bit for the final cut next time.

Final PCB

Here’s the final board. It totally worked, but there’s plenty of room for improvement. This probably won’t be the method I use for all my boards. OSH Park does a great job and prototyping PCBs, and Seeed Studio is great for production runs, but I’ll probably mill any new boards I want to test out before sending out to a fab house. Milling also allows me to have a PCB in an hour or so, versus waiting a few weeks.

Of course I’m (sort of) limited to single sided boards, but most of my PCBs are pretty simple, so I’m not concerned yet. Also, once I master the single sided board, I’ll certainly try a two-sided board, I mean… how hard could it be!?

Categories
Uncategorized

Little CNC Milling Machine (Part II)

CNC Machine

Hopefully you’ve read Little CNC Milling Machine (Part I) in which I completed the mechanical build of a tiny CNC machine. Here’s Part II!

CNC Machine Electronics

The electronics didn’t take much time at all, it was pretty much “plug and play” as far as connecting the three stepper motors and the spindle. No stripping, cutting or crimping wires. The only issue I had was once I tried running it nothing was happening. Turns out the power supply was DOA. I found a 16 volt laptop power supply in my junk bin and tried that, and it still didn’t work (or so I thought.) I ended up cutting the barrel jack off that power supply and putting it on a 24 volt supply I found. It was then I realized that the spindle wasn’t responding because I never set the “spindle speed”. So yeah, steppers worked fine with the 16 volt power supply (but not the original 24 volt supply I got) but the spindle didn’t go, because I’m a fool. All good now! I’ve got functioning 24 volt power supply and a functioning CNC machine.

CNC Machine Electronics

I’ve used Grbl before, usually with an Arduino and a CNC Shield with some steppers. Some of these kits seem to use an Arduino Nano, but this one is its own board with an ATmega328P and a CH340 chip. So yeah, an Arduino with Grbl 0.9 pre-loaded.

There are no endstops, but it looks like there’s room on the board to add them in the future. I can think of a few other improvements as well. I may add an e-stop, or just an “on/off” switch for the power supply. One nice thing about these machines is that if you make a mistake, like jogging the head too far in one direction, you can just cut power to the motors and the software will keep going, assuming the motors are moving, and then once the software is done, you can resupply power and try again.

Oh, you might also notice that next to the spindle connector on the board is a spot to plug in the laser. Yes, there’s also a 500mw laser that can be put in place of the spindle. I’ve not really tried that yet, and have to figure out the software to control it first. (I’ll get into software in a future post.)

CNC Machine Bed

Another area that could use some improvement is the bed. Attaching things with the screws meant to attach things to the Aluminum extrusion is not great. I’ll work on a better clamping system. (Maybe a 3D printed piece, not sure yet.)

You might also notice I left the lead screws hanging in mid-air. I did have a little bit of a binding issue with the x axis, so I just removed both lead screw holders. I think it’ll work fine without them, as the lead screws are not that long.

CNC Machine Collet

The machine came with two tiny collets that allow you to attach bits to the spindle shaft. It also came with super-small set screws. I’m pretty sure I’ll lose the screws, but…

M3 Set Screws

…luckily a few years ago my friends at Evil Mad Scientist Laboratories sent me a lifetime supply of M3 set screws of various sizes. I think I’m good!

CNC Machine Electronics

And yes, I did actually mill something. I’ll cover that in the next post. Overall I have to say I’ve been pleased with this machine (so far, it’s still early, obviously.) It was easy to put together and it works. Once I get things dialed in I’ll look into milling PCBs, and foam, and wax, and chocolate…

Stay Tuned!

Categories
Uncategorized

Little CNC Milling Machine (Part I)

Little CNC Mill

I’ve completed the mechanical build of a small CNC mill/engraver. I’ve seen these on eBay from various sellers (like this, this, this, and this) and I’ve even seen one on Amazon from LinkSprite. I didn’t order from any of those sellers…

Somehow I happened across a blog post at TC Maker about a CNC Building Class at The Hack Factory. While I would have loved to have attended the class, I couldn’t make it, but I got in touch with Alex to ask a few questions, and the next thing you know I’m ordering a kit from him.

Alex said he’ll be doing another class, and hopes to sell these to other people as well. (I guess I’m one of the first customers?) I was attracted to the mill because it’s small (my workshop is cramped already) and it runs Grbl. I’m hoping to mill PCBs with it, and other small things. If I get really ambitious I can extend the machine with some longer lead screws and Aluminum extrusion. But first I have to get it working… I still have the wiring and electronics to deal with.

I’ll go through a bit more about building it in this post, and probably follow up with a few more posts once it’s complete.

Little CNC Mill

First, let’s talk about the instructions. Remember, Alex does an entire class on building this, which I did not attend, but I’ve built a few CNC machines in the past, so I wasn’t too worried. I did get a construction manual, and it was helpful, though in the end it sort of reminded me of building my RepRap. At some point the instructions seem to lose their usefulness and you just have to figure things out. Luckily, there’s the Internet.

The page titled DIY CNC 3 Axis Engraver Machine PCB Milling Wood Carving Router Kit Arduino Grbl is helpful, as is the video LinkSprite DIY CNC 3 Axis Engraver Machine installation tutorial. I should mention that these kits come from different sellers, and they all seem just a slight bit different. Minor things here and there, so again, if you can figure things out on your own, it’s not that bad.

There’s some videos from Jingfeng Liu that might be useful, including LinkSprite CNC Kit base Video 1, How to assemble LinkSprite CNC kit front video 1, and How to assemble LinkSprite CNC kit front video 2. Again, use them as loose guides.

Little CNC Mill

The worst problem I had during the mechanical build was dealing with the rod holders. Now, I’ve used rod holders before to hold smooth rods, and didn’t have issues, but these caused me some heartache. The one on the front right was the first I dealt with. I tried to tighten it up on the rod, and I could not get it tight enough to hold the rod. After I sent an hex key flying across the room, I tried one more time to tighten it up enough by putting a Torx bit in a drill (I know, bad idea.) This just stripped out the screw, and now it’s in there, and not coming out. (Oh, before I over-tightened/stripped it, I tried to put a little tape on the rod. Kapton tape seemed thin enough, but was still too thick.)

Little CNC Mill

I still had three rod holders to deal with, so I took a different approach. I put one in the vise and cranked on it to pre-bend the metal just enough to hold the rod tight, but not too tight. Well, I managed to do that with one of the rod holders. The next one I cranked too much, and then had to pry open a bit with a slotted screwdriver. (You can see in the photo above a little bit of the damage from that. In the end I got them all working good enough, except for the first one, but since the back rod holder is good, I may not have to worry about the front one being tight enough. (It doesn’t wobble, but I was able to rotate the rod when it was just in the front holder.)

CNC Machine

There’s a 3D printed part on the front for the lead screw to set in, with a bearing. I have not mounted this yet, as I’m not sure it’s a good idea. Some builds use this, or a metal plate, and some let the lead screw hang free in the air. (The x axis has a similar holder.) As this is not a super-precise machine, constraining the lead screws might not be the best thing…

Little CNC Mill

The shaft coupling is one rigid piece, which means that if not perfectly aligned, constraining it on the other end could cause binding while trying to turn. I’ve used flexible couplings before and they might be a better option. Again, I’ll probably get the machine up and running first to check the performance before I think about upgrades. (I talked to Alex and he suggested that flex couplings might not work as well as I think they would. I’ll do more research on it.)

Little CNC Mill

The mechanical build took an evening, not a late-night evening, but a full evening. I expect the electrical portion to take maybe a few hours at most, including getting it up and running. Hopefully I’ll find some time this week to get that going, and report back.

See Also: Little CNC Milling Machine (Part II)