
Hey, it’s only been six months since my last post about motor controllers and the Power Racing Series so I guess it’s time for an update! If you missed it, I’m working on a tiny electric vehicle that can serve as a reference for teams of beginners to build their own.

In the last post I talked about a cheap motor controller that required an expensive throttle and alluded to a method of using a cheaper throttle… here is that method.
I started by asking questions on the Power Racing Series Google Group, and people much smarter than myself offered advice, and that’s where I learned about digital potentiometers. I ended up testing my idea with help from this tutorial and eventually got an MCP4131-104E/P-ND digital potentiometer (for less than $1.00) and paired it with an Arduino Nano that was less than $2.50 to create a converter that allows a cheap throttle to be used with a cheap controller.
If at any point you feel like saying “Hey dummy! You should have done it this way!” feel free to leave a comment. Most of my crazy pursuits involve me learning a lot along the way, and this is no exception, so I’ll keep going.

After I had a working prototype on a protoboard I decided to design a PCB because I’ve been working on getting better at PCB design for the last two years now, and it’s sort of fun (and challenging!) This is the most complex board I’ve worked on so far, and of course, mistake were made…
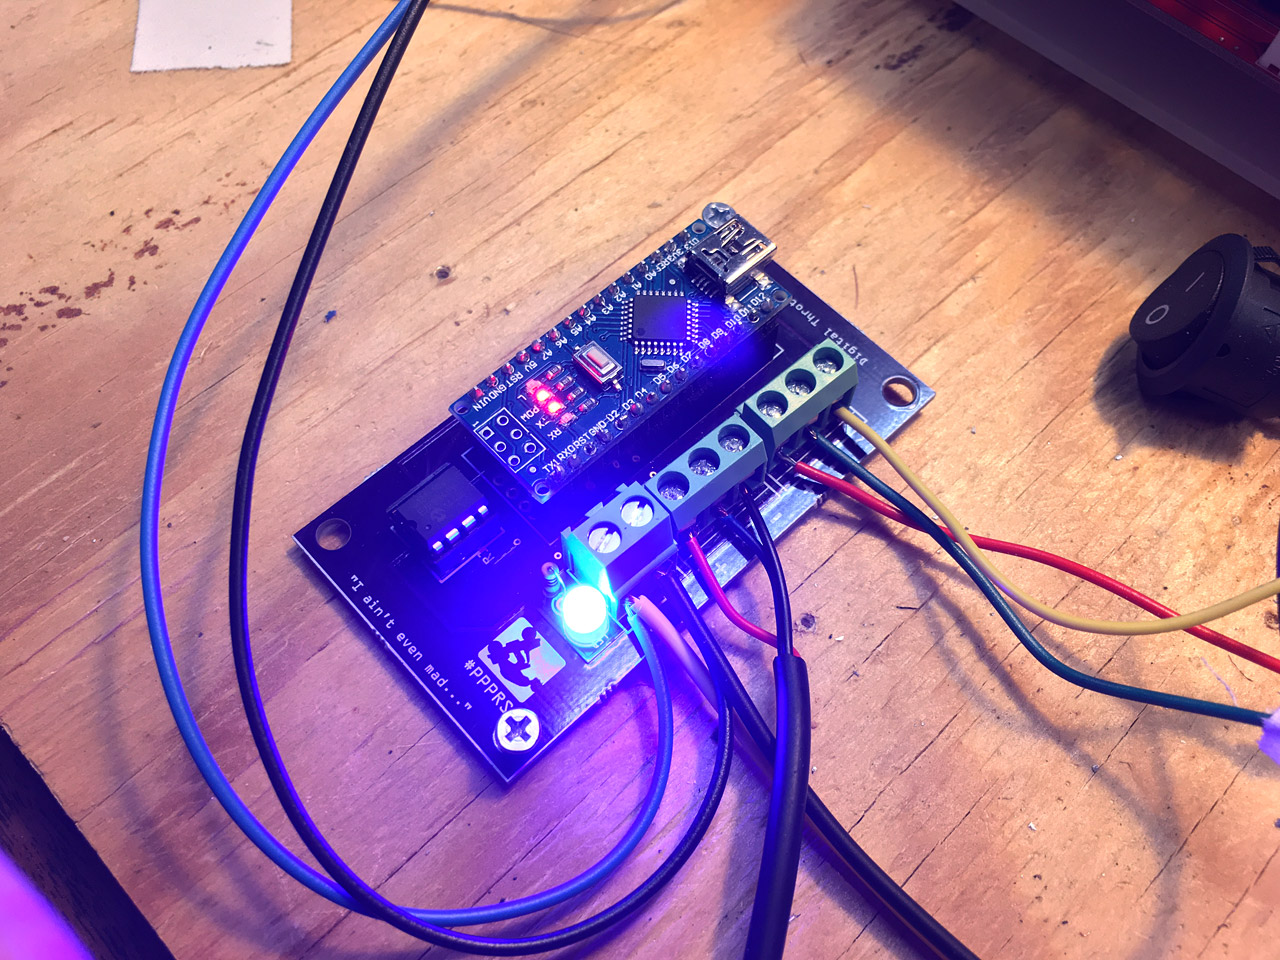
First of all, see those wires coming off the board? There should be screw terminals there, but I was unaware that the holes were the wrong size and the pins of the screw terminals did not fit. Argh… wires will do for now.

Everything wired up and ready to go! Except, it didn’t go… Seems I managed to not quite route everything the right way. Back to the drawing, and tracing all the connections with a meter, and I discovered a connection that shouldn’t be there…

…but that’s what Dremels are for! I was able to cut the trace and get it working. Back to the computer to make a few changes to the PCB. (And yes, I am still using Fritzing. I’ve gotten used to it, and know how it works, so… okay then.)

A few weeks later I got a new version from our friends at OSH Park and this one fixed the issues and worked! I should still get similar screw terminals but hey, it does what it should do, so that’s something.
You might notice some of the analog pins and some ground connections broken out at the front edge of the board. There are for future enhancements. It would be fairly easy to add in “cruise control” (for parades) or a speed limiter, perhaps with a keyed switch, to allow kids to drive the vehicle safely. (Again, people smarter than me.)

Whomp! Here’s my “breadboard” showing everything. Batteries to power the motor, and a buck converter to drop the voltage to 12v for the Arduino and a cooling fan. The throttle connected to the converter and then to the motor controller to control things. We’ve also got a DPDT (double-pole, double-throw) switch in there to allow for forward and reverse to the vehicle, and a kill switch, fuse, and voltage meter. Basically all this will need to be jammed into the vehicle to control it. (Don’t worry, we’ll be using larger batteries, thicker wire, and a larger motor.)

Here’s the controller with a cooling fan mounted to it. I’ll provide files to laser cut or 3D print the mounting pieces, or templates to cut by hand, which is totally doable. (I learned the hard way last year that if not properly cooled the capacitors on these controllers can blow.)

I also added a bright blue LED to the board (you can choose another color) to indicate when it’s receiving power. Another suggestion I got from someone. I’m sure there is still room for improvement (like, you know, diodes) but hey, it works and I look forward to testing it.
Update! Here is some Arduino code.