I’ve decided that I should start doing LinkDump posts. If you are not familiar with link dumps, they are blog posts that link to other things on the web, and usually have little to no commentary. (I really enjoy the dumps that EMSL do.) I plan to use this as a way of sharing links and clearing out my browser tabs. It should help serve as a guide to things I’m looking at or that interest me. I’m hoping both of the people who read this site find it useful!
When I heard WMSE was doing a fundraising event called Art & Music and was looking for artists to contribute, I wanted in. I got in touch with them and got a blank 12″x12″ board. I’ve done some of these art boards before, once for The Eisner American Museum of Advertising & Design and once for a friend of mine. (And while it’s not a board, I also made this NoiseBowl last year.) Besides myself, I also managed to get most of the people I work with at Brinn Labs to make boards, and a few people at Milwaukee Makerspace also made them.
This one is a litte more special to me though… WMSE went on the air in 1981, and while I don’t remember when I actually started listening to it (though I do have my brother to thank) I grew up with WMSE. They played the music I wanted to hear (at least on Wednesday nights when I was in high school.) They introduced me to weird and crazy stuff, and I even got to be a guest on air a few times (and they’ve managed to play a few songs from bands I was in.)
Since I’ve been screwing around with making noise with Arduinos in sculptural form I thought I’d continue that obsession practice once again. I’ve been working on a four step sequencer for work, so that’s what this is…
If it wasn’t for the stain and attention to fit and finish in creating this piece, it might look like some of my work you’d find inside a museum exhibit. We tend to make a lot of devices that produce sound. (We typically don’t go to great lengths to make them “pretty” though, since they always live inside cabinets and are not seen by the public.
Here’s the design for the one cut piece I made. It’s the control panel/user interface, which holds the power switch, potentiometers, and the LEDs. I actually used the CNC router instead of the laser cutter to make it. (Don’t ask why!) It also took some careful drill press operations to get things just right. There was also a lot of sanding involved. (Again, don’t ask.)
There are some 3D printed pieces as well. The standoffs used for the speaker, and to hold the control panel in place. They are similar to ones I’ve used before and before, but of course the beauty of 3D printing is that I can change the design each time to match the speaker and hardware used. (Parametric, FTW!)
Here’s a short video that demonstrates the noise that this thing makes. The first four knobs adjust the pitch for the four steps, with the fifth knob used to adjust tempo, and the top right knob as a volume control. The LEDs light up showing each step of the sequencer.
I also decided when I started to build this that I really wanted one for myself. While I love seeing my artwork go out into the world, sometimes I miss it. Since I was building one, I thought it would be easy to build a second one. Well, it was (fairly) easy, but it was also time consuming. I also had this idea that if anything went wrong, I’d have a backup. Nothing really went wrong, but I did finish the one for WMSE about week before I finished the one for me.
If you’re ever curious about the process I go through when building these sorts of things, you might want to head over to Instagram and follow me there. For instance, I posted a photo there… and another, and another, and a video…
And then I posted more, and then I probably posted even more. So yeah, Instagram tends to be my “in process” photo & video place.
And if you’re not hip to Instagram you might find a photo or two (or three) over on Facebook. Not as much shows up there, but we’re still friends, right?
Enjoy the show!
Note: The piece sold for $510! I’m really pleased I was able to support WMSE with this, and I’m thankful a bunch of people liked it enough to bid on it.
If you’ve ever used a potentiometer you know it can only turn so far. About 270 degrees of rotation is what you get out of most potentiometers, which is plenty. The problem with using potentiometers in museum exhibits is that while adults (typically) know that when the knob stops turning you should stop turning the knob, kids don’t always know this. Kids are notorious for going too far when it comes to physical controls.
So I’ve been working on a way to use potentiometers in an exhibit, but hide them down below in the cabinet, and expose a control knob to the surface that has limited rotation. About 220 degrees of rotation. I could do more, but the idea of using less than 270 is the key. If we don’t get too close to the beginning or end of the rotation limit, we should be able to prevent the potentiometer from being twisted too far and becoming damaged.
I drew up the parts needed to build an encased knob with a hard stop inside. In the final version the knob will be machined from HDPE plastic using a CNC router. I opted to 3D print the pieces for the prototype because it was quick and easy. (“Quick” is relative, of course, but I finished up the drawing and got the model printing at the end of the day, so the printer did the work overnight while I wasn’t there.)
I drew all the pieces in Inkscape and then exported DXF files and brought them into OpenSCAD and extruded them to 1/4″ high. There’s a 1/4″ hole in a few pieces (and a slightly larger hole in the bottom piece) so that a 1/4″ steel shaft can be inserted. The shaft will be connected to the potentiometer. (I made a 3D printed prototype of that too, which you can see here and here.)
Here’s an exploded view of the assembly. Sometimes it’s tricky to design things like this using flat 2D shapes in Inkscape, but I’ve gotten used to it, and I think I’m pretty good at it. I should mention I also printed a paper prototype to help figure things out along the way. (And yes, the original plan was to laser cut the pieces out of foam core which would have made the most sense, but the laser cutter was not available when I did this.) The fact that I created 3D models did allow me to make the nice exploded view very easily.
Here’s a quick assembly using hot glue. Just to test how it worked, as well as get a feel for the size of it. (I’ll have a follow-up post about the layout of the whole panel.)
HDPE can’t really be glued, so we use screws (hidden when possible) to attach layers. We may be able to get away with fewer layers than I used here, because I used 1/4″ layers, but it might make sense to use 1/2″ or 3/4″ layers since we often get HDPE in those thicknesses. And of course we can pocket things out, and not just use a flat stack. (Again, this is a prototype.)
I finally got around to 3D printing on fabric. It worked out okay. I need to experiment a bit more to perfect it, but for a first attempt, it worked out okay.
I used OpenSCAD to design a bump, and then made a field of bumps. (It’s a low-poly half sphere, actually. Really simple to do in OpenSCAD.)
Also really easy to generate a bunch of them in OpenSCAD by using two for loops. I know OpenSCAD isn’t for everyone, but if you think in code, it might work for you.
I used this organza fabric to print onto. It’s a mesh material, so the process of printing on it involves printing a few layers, then pausing the print, moving the print head out of the way, laying down the fabric, securing it to the bed, then continuing the print. The fabric gets embedded within the layers of the print.
My Maker Select Plus did not allow me to pause the print and move the extruder using the on screen controls, so I added some custom gcode to my print. Cura has a post-processing plugin that allows you to inject gcode bits into your script. I had make an edit to get it to work with my printer. And then I actually made my own version so I don’t lost the changes when I upgrade Cura next time.
So what use is this? It allows you to wrap a print around something. It an be used to create fake armor for cosplay, or to wrap anything cylindrical, or add an interesting texture to something. Over at Milwaukee Makerspace we may have something in the works for Maker Faire Milwaukee this year.
I repaired fans, I replaced fans. And then I did it again. Once I got ABS printing up to speed I printed a DiiiCooler, which I finally installed, and still haven’t used (since I’m printing ABS at the moment.) And yeah, I’m waiting for some new extruder fans to arrive after last night’s hurried soldering session to repair another bad fan.
If all of this seems silly, well, in a way it is, and it isn’t. When you buy a thing (be it a 3D printer or a car) you can go cheap knowing that things might break or need upgrades, or you can pay a lot more for quality out of the gate, with the hope that things don’t go wrong or are of a higher quality. I knew that getting the Monoprice Maker Select Plus meant compromising so I could afford a printer (which was replacing my old RepRap Prusa i2 kit from 2011) and I was fine with that. There are many routes you can go with a printer. I’m going the “cheap” route right now, I’ve got friends who work for the “expensive but reliable route” companies, and then there’s the custom build route. They’re all legit choices.
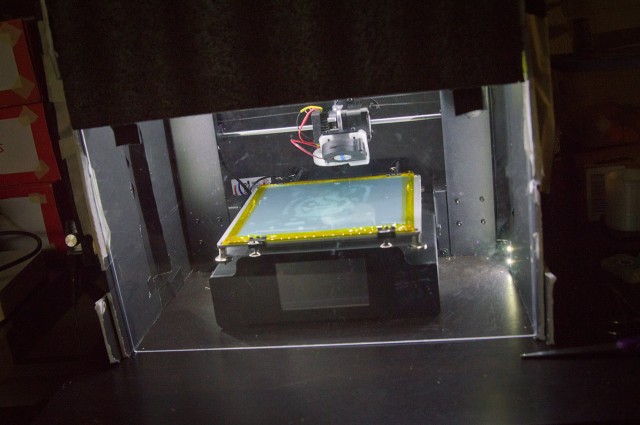
Oh, I don’t think I ever mentioned my enclosure. It’s built from foamcore board and covered with the packing foam that the printer came in. The front window is a piece of Polycarb I got from Amazon. It works. It’s not pretty. That’s okay. Besides keeping the heat in, it keeps the cats out. Also important. I also added a set of 12 volt LED lights with an on/off/dimmer switch.
If I had to build an enclosure again (and I might need to soon) I’d probably go with foamcore again, but take some effort to make it look good this time.
I still feed the filament from a metal rod hanging above my printer in the basement. It works fine. It’s not portable, and that’s probably okay. The drybox I was working on failed, and I haven’t had the energy to revisit that project. That’s okay for now.
Besides all that, I’ve been just printing things. Nothing too exciting, but that may change soon. Happy Extruding!