I’ve completed the mechanical build of a small CNC mill/engraver. I’ve seen these on eBay from various sellers (like this, this, this, and this) and I’ve even seen one on Amazon from LinkSprite. I didn’t order from any of those sellers…
Somehow I happened across a blog post at TC Maker about a CNC Building Class at The Hack Factory. While I would have loved to have attended the class, I couldn’t make it, but I got in touch with Alex to ask a few questions, and the next thing you know I’m ordering a kit from him.
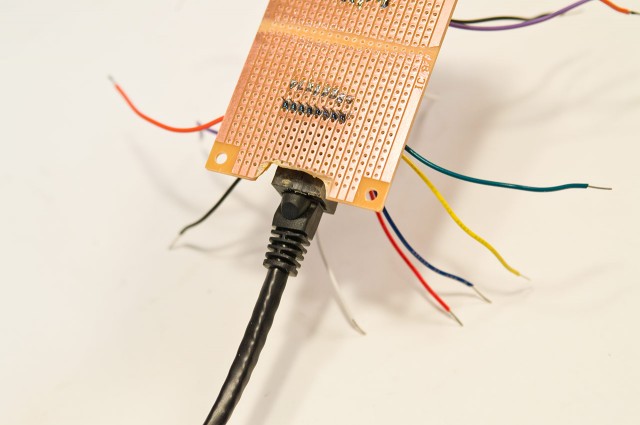
Alex said he’ll be doing another class, and hopes to sell these to other people as well. (I guess I’m one of the first customers?) I was attracted to the mill because it’s small (my workshop is cramped already) and it runs Grbl. I’m hoping to mill PCBs with it, and other small things. If I get really ambitious I can extend the machine with some longer lead screws and Aluminum extrusion. But first I have to get it working… I still have the wiring and electronics to deal with.
I’ll go through a bit more about building it in this post, and probably follow up with a few more posts once it’s complete.

First, let’s talk about the instructions. Remember, Alex does an entire class on building this, which I did not attend, but I’ve built a few CNC machines in the past, so I wasn’t too worried. I did get a construction manual, and it was helpful, though in the end it sort of reminded me of building my RepRap. At some point the instructions seem to lose their usefulness and you just have to figure things out. Luckily, there’s the Internet.
The page titled DIY CNC 3 Axis Engraver Machine PCB Milling Wood Carving Router Kit Arduino Grbl is helpful, as is the video LinkSprite DIY CNC 3 Axis Engraver Machine installation tutorial. I should mention that these kits come from different sellers, and they all seem just a slight bit different. Minor things here and there, so again, if you can figure things out on your own, it’s not that bad.
There’s some videos from Jingfeng Liu that might be useful, including LinkSprite CNC Kit base Video 1, How to assemble LinkSprite CNC kit front video 1, and How to assemble LinkSprite CNC kit front video 2. Again, use them as loose guides.

The worst problem I had during the mechanical build was dealing with the rod holders. Now, I’ve used rod holders before to hold smooth rods, and didn’t have issues, but these caused me some heartache. The one on the front right was the first I dealt with. I tried to tighten it up on the rod, and I could not get it tight enough to hold the rod. After I sent an hex key flying across the room, I tried one more time to tighten it up enough by putting a Torx bit in a drill (I know, bad idea.) This just stripped out the screw, and now it’s in there, and not coming out. (Oh, before I over-tightened/stripped it, I tried to put a little tape on the rod. Kapton tape seemed thin enough, but was still too thick.)

I still had three rod holders to deal with, so I took a different approach. I put one in the vise and cranked on it to pre-bend the metal just enough to hold the rod tight, but not too tight. Well, I managed to do that with one of the rod holders. The next one I cranked too much, and then had to pry open a bit with a slotted screwdriver. (You can see in the photo above a little bit of the damage from that. In the end I got them all working good enough, except for the first one, but since the back rod holder is good, I may not have to worry about the front one being tight enough. (It doesn’t wobble, but I was able to rotate the rod when it was just in the front holder.)

There’s a 3D printed part on the front for the lead screw to set in, with a bearing. I have not mounted this yet, as I’m not sure it’s a good idea. Some builds use this, or a metal plate, and some let the lead screw hang free in the air. (The x axis has a similar holder.) As this is not a super-precise machine, constraining the lead screws might not be the best thing…

The shaft coupling is one rigid piece, which means that if not perfectly aligned, constraining it on the other end could cause binding while trying to turn. I’ve used flexible couplings before and they might be a better option. Again, I’ll probably get the machine up and running first to check the performance before I think about upgrades. (I talked to Alex and he suggested that flex couplings might not work as well as I think they would. I’ll do more research on it.)

The mechanical build took an evening, not a late-night evening, but a full evening. I expect the electrical portion to take maybe a few hours at most, including getting it up and running. Hopefully I’ll find some time this week to get that going, and report back.
See Also: Little CNC Milling Machine (Part II)