The thing about how the government works, and how the system works, is that it’s often much easier to complain about it then it is to actually try to do anything about it and make things happen. I’m guilty of this, just like others are, but I learned something from my Pothole Journey, and what I learned is, it’s better to try than to give up and do nothing.
Since I started to Bike to Work I noticed that the worst part was crossing Mayfair Road on the Menomonee River Parkway. There’s no traffic light and there are not flashing lights for a pedestrian crossing. Cars are easily doing 50mph and expecting drivers to stop for pedestrians is insane.
Crossing in the morning isn’t as bad as crossing after 5pm. It’s like Fury Road out there! One day when I had to drive home on Mayfair I saw a cyclist stuck in the middle (like I’ve been) and other zip across (on bike or on foot) and it just looks super-dangerous. So I decided to do something.
I tracked down the City of Wauwatosa’s Service Request page and submitted a “Street Light Issue” and I had to choose an address which was incorrect, and choose from a menu that didn’t have the choice I needed, but I basically asked if there could be a be a Rectangular Rapid Flashing Beacons (RRFB) added. Granted, those don’t always work, but it seemed like the simplest request, and you gotta start somewhere. (An RRFB is probably the wrong solution and I almost got hit using one just last month, but…)
To my surprise, I got a reply the next day!
“The Wisconsin Department of Transportation is planning to raise the Mayfair Road bridge over Menomonee River in the Year 2026. The project will include a bicycle/pedestrian underpass as well as improved lines of sight for the Mayfair & Menomonee River Parkway intersection.”
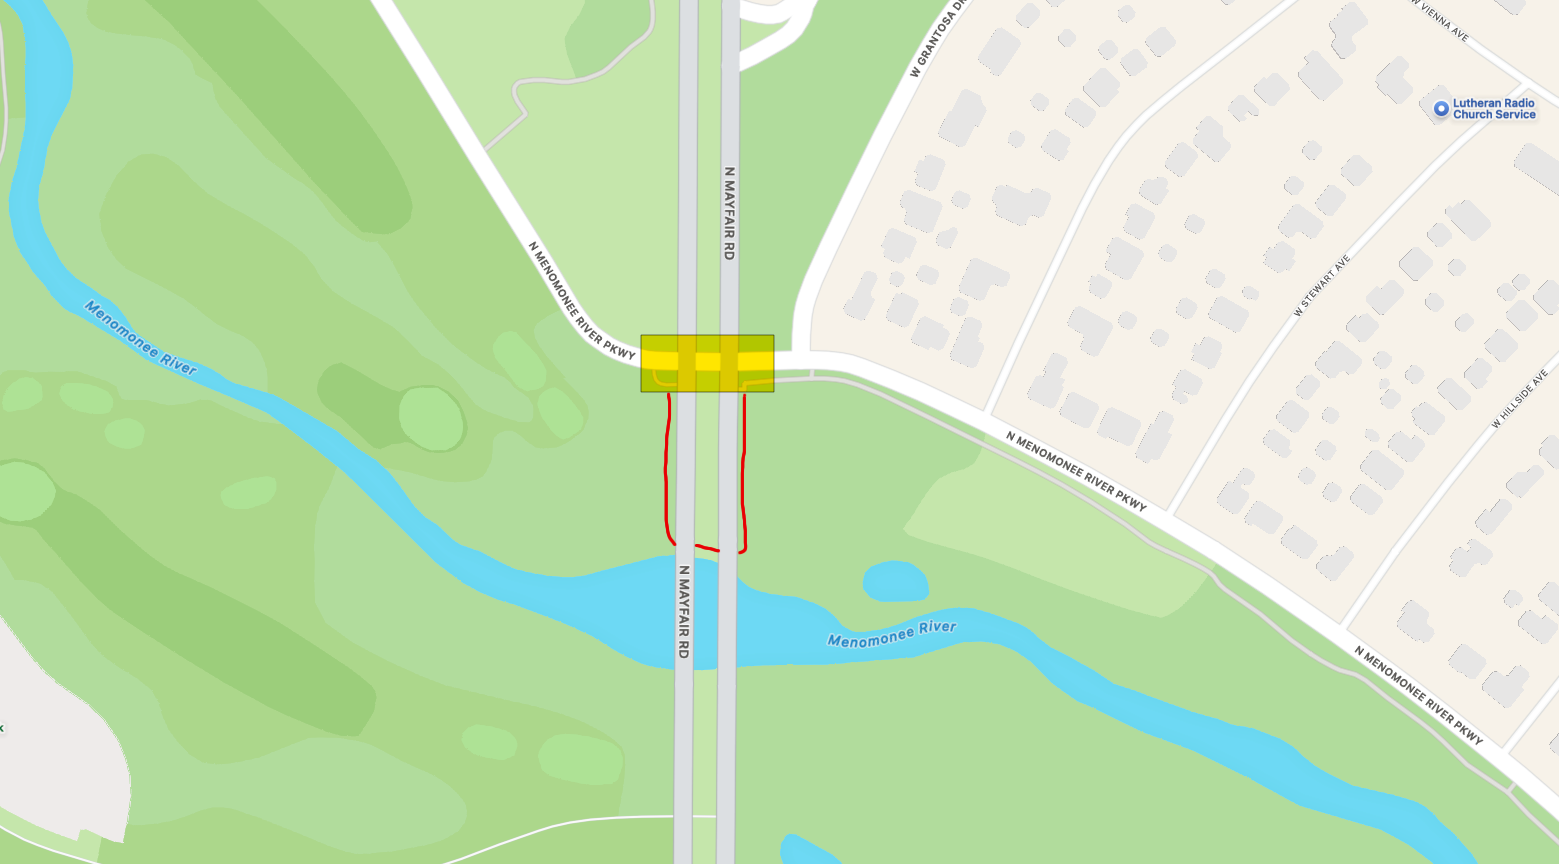
Wow! This was even better than I had hoped for! I’m excited to see this is planned for the future. The map above shows what I think they are suggesting. (The yellow box is the intersection and the red lines would be the pedestrian/cycling path.) I’m not sure if I got it right, but I guess we’ll find out.
I assume it might be like over on Hampton where the Oak Leaf Trail goes under Hampton, but there are paths leading up to the road on both sides. (See image below for reference.)
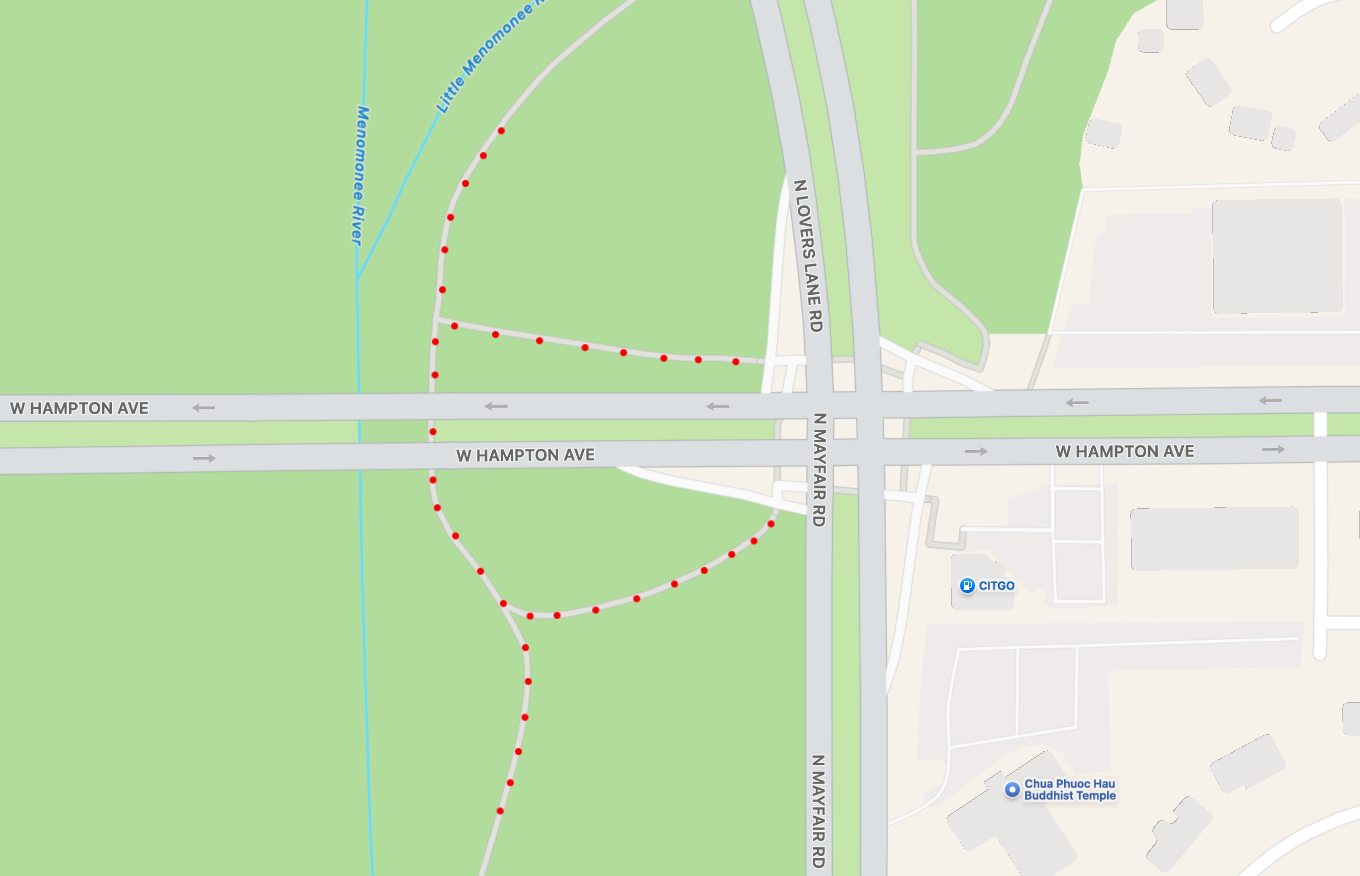
This would (will be?) a great addition to the Oak Leaf Trail as it allows for getting past Mayfair Road, probably the worst crossing in Wauwatosa. Anyway, fingers crossed it actually happens!
Note: Follow the links on the WIS 100 (Mayfair Rd./Lovers Lane Rd.) Rehabilitations – Milwaukee County page under “Public Involvement”.