Our old (dumb) pal Pizza Bagel Bot didn’t spring from the oven fully baked… far from it! Why, I’ll have you know I spent nearly an hour carefully crafting a block of wood and a delicious meal into a whirling cheesy disaster!

I started with a nice block of wood and drilled a few holes to mount the motors. The motors are these Pololu 120:1 Mini Plastic Gearmotors. These were the only “high-tech” thing I used. Just under $12 for two motors.

There were zip ties involved. And hot glue was added later. Of course. Oh, I did solder some wires onto the motor terminals. I was worried that might also be “high-tech” but whatever. I wired them up so that it would just go in circles instead of forwards (or backwards) because going out of bounds means you lose the match. (Note: The zip ties are from Harbor Freight. There should be bonus points for that.)

Now, for the wheels… I actually designed laser-cut wheels that fit nicely on these motor shafts, but… high-tech! Instead I dug through the basement workshop until I found these old control knobs from Radio Shack. They have a little set screw, and I figured I could screw them tight to the D-shaft. Perfect! Almost!

The outer rim part was too big, and they did not fit. A little time on the grinder took care of that… I consider the grinder decidedly low-tech. (At some point I considered just putting a wheel on the grinder and using that as my robot… maybe next time!)

Boom! 5 minutes later, the smell of melty plastic, and I had two “wheels” which would be all wobbly because they didn’t center correctly on the D-shaft. No matter.

Wheels are on, and the wires are twisted together, but not soldered, in case I want to reverse the wiring or something. It’s starting to look good. If you squint real hard you might mistake this for an actual not-dumb robot!
I seem to be missing some photos, but at some point I decided the square shape was no good, so I used a coping saw (hand-powered!) to cut the corners. (Literally!) I then needed something to hold the pizza bagel in place…

Nails are good for holding things in place. They also split wood. I split the wood. No matter, because… hot glue.

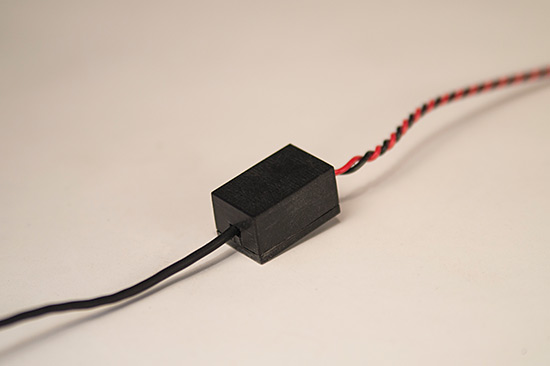
I also added this “high-tech” battery holder, which was a whopping 79 cents… Oh, the alligator clips were taken from some jumper wires I melted at some point. It’s not the volts, it’s the amps, kids! The batteries are AA and I’ve had them for years.

Oh yeah, the screws! Typically a robot will have a caster wheel or two, but at $1.99 each, and needing two of them… over-budget! (I could have 3D printed one but… high-tech!) The screws are not drilled into the wood the same amount because, me. This helps it wobble more unevenly. On purpose. Obviously.
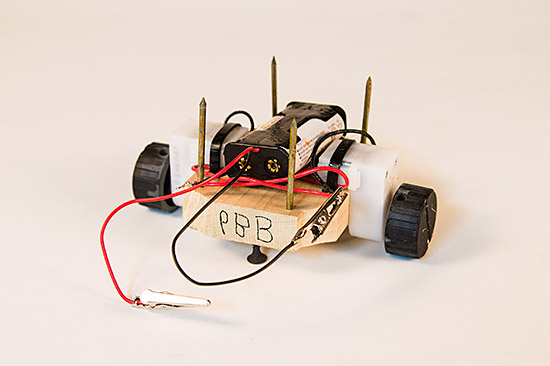
Wow, look at that beautiful robotic platform. In about an hour. And I probably got distracted for part of that hour. The only thing missing is a delicious pizza bagel.

Mission Accomplished!
Don’t forget to check out the video, which at least one critic described as “mesmerizing”. Also, if you’ve got any good pizza bagel recipes, post them in the comments!