Categories
Uncategorized

Hangers

Back in 2018 while at Brinn Labs I was tasked with doing a mobile activity (the kind of mobiles you hang, not the kind that are British cell phones) and I came up with an idea based on the work of Man Ray, specifically his Obstruction sculpture.

man-ray-obstruction-instructions

hanger-svg

I designed a hanger that could be fabricated at a small size (approximately 5″ x 1.5″) and could hang more hangers from the ends. Man Ray’s version used full size hangers that had wire hooks and holes on each end of the wooden part which made it easy to link them all together. Mine was a bit different with a simpler one-piece design. I assume the hangers Man Ray used could swivel completely around, which is an added bonus my version would not have. (But there’s always more than one way to do it.)

Here’s a hanger laser cut from 3mm Baltic Birch plywood. The nice thing about 3mm Baltic Birch plywood is that it’s easy (for me) to find scrap that is around 1.5″ tall and use it for this, which meant I had no real material cost as I could essentially create these from scrap.

I should note that I originally tried using corrugated cardboard, which is even more abundant than 3mm Baltic Birch plywood. While it sort of worked, it depended a lot on exactly where the corrugation was after cutting. I abandoned the cardboard version after a few tests. (If I had made larger hangers I think the cardboard version could have worked fine.)

Because the hanger was a simple 2.5D object I also created a 3D printed version of the hanger… like many of the things I create I tend to come up with ways others could make them depending on the equipment they have available. If you don’t have a laser cutter but do have a 3D printer you can still easily create a bunch of these.

In the photo above you see four versions. Version 1 is the plain Baltic Birch version; Version 2 is a sanded and stained Baltic Birch version; Version 3 is a 3D printed version using grey PLA plastic; and Version 4 is laser cut from clear 3mm Acrylic. Again, multiple methods and materials to choose from.

Since I was working towards making a lot of hangers for an event I just cut them all quickly on the laser cutter and didn’t pay much attention to quality, so the backs of the wood hangers got a bit charred from the honeycomb bed. This is the part where it shouldn’t matter, but sometimes things bug you… so later I ended up designing a small jig to hold the hangers so I could sand them and make them look nice. I don’t know why I torture myself… I hate sanding.

Designing the jig involved creating a slightly larger version of the hanger and then differencing it from a small rectangular shape, then 3D printing it. It worked well to hold the hangers in place while sanding them, but in the end staining them a darker color was much easier. (Again, I really hate sanding.)

When I made the hangers I sort of envisioned it as a game where one or more people would try to build the hanging structure without it falling. Sort of a reverse Jenga perhaps, or maybe more like Barrel of Monkeys though I’ll admit I was completely wrong about how you play Barrel of Monkeys, and this video shows the correct way.

Overall I’m fairly pleased with how this projected turned out. Oh, I should note that the hexagonal tops on the hangers were mean to mimic the hexagonal logo of Brinn Labs. they could certainly have been more rounded or another sort of shape. Who knows? I may redesign these hangers in the future after a bit more prototyping. As I mentioned, this was a quick project and once I got a working hanger I just kicked out a bunch.

hanger-square8877

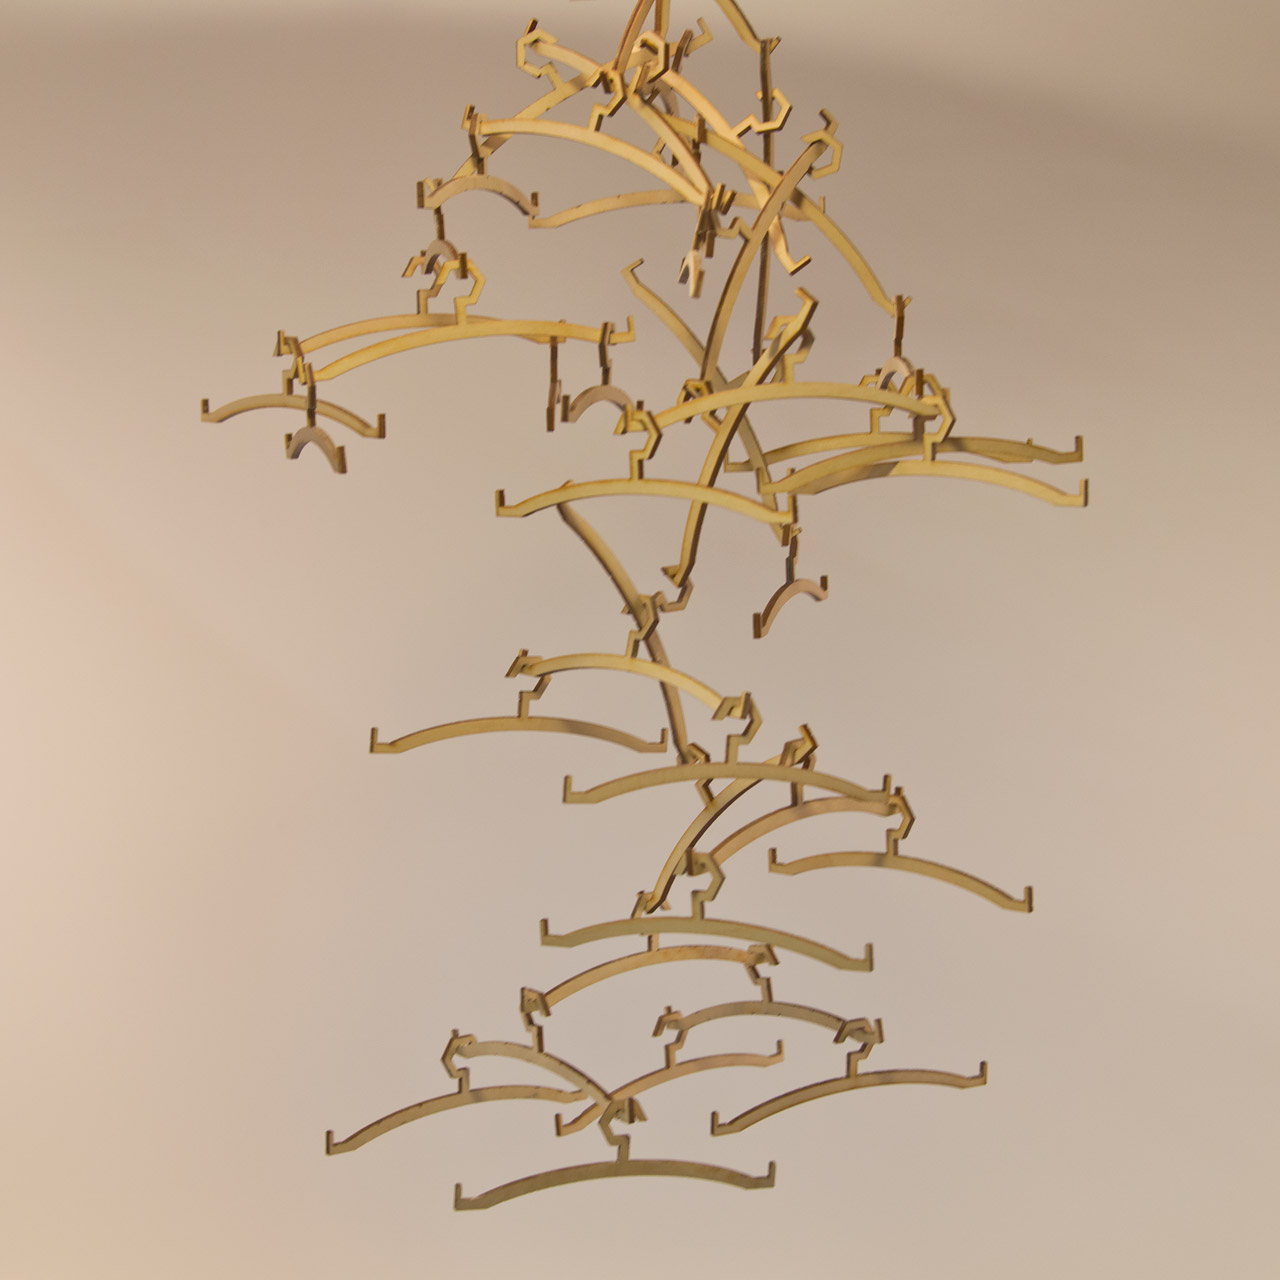
I hope I was able to create the “increasing confusion” that May Ray talked about in the instructions for Obstruction. It’s certainly a bit confusing when you are creating the structure, and at times I wished I had a helper to attach two hangers while I was attaching two hangers.

I’ll probably get around to releasing the files for this in case anyone else wants to do something with it.

Categories
Uncategorized

A Tiny Little Stocking for a Spider

stocking-6186

A few weeks ago Dana posted something on Facebook about this rather large spider that had taken up residence in our doorway. I did my best to avoid using that door ever again but while decorating for the holidays she said she wanted to do something for the spider’s little corner of the house, so I offered to make a tiny stocking for the spider. (I may not like spiders, but I like making things.)

stocking-01

I started by looking at some photos of stockings online, then did a quick trace of one in Inkscape. I figured it would have three parts, the red stocking, the white upper part, and a dark colored letter “S” for “Spider”.

stocking-02

Once I had the design I broke it out into the three parts. The little hanging tab on the upper left part of the red piece took a little work. For the first one I made it was way too small, and also lacked a hole for the pushpin to go into.

One thing that’s hard to notice here is that the white part is a bit larger than the red part it will get attached to. This was done using the Dynamic Offset feature in Inkscape which will scale up or down an object proportionally.

stocking-03b

I brought the pieces into LightBurn for laser cutting, and set each of the three pieces to their own color to cut individually with different color felt, and made the little slot for the hanging tab another color as that would cut first before the rest of the red piece would cut.

stocking-05

The green outline in the image above is the tab for the pushpin. It’s tiny. Really tiny. You can also see how I increased the size of the tab here. Fun fact, I originally made this at half this size (the final version is than 30mm tall) but that was ridiculously small!

stocking-04

LightBurn also has a kerf offset setting which I used for the tiny little pushpin hole because it allowed me to cheat and make the shape just a little larger than it really was. When you cut this tiny it helps to account for the kerf.

stocking-6187

Here’s what I made. You can see the tiny little slot for the pushpin in at least two of them. Sadly the white part on the top of the stocking isn’t exactly white as I had no white felt so it’s sort of bluish-white, but it’ll do.

stocking-6188

Here are some spares on the bulletin board with gigantic pushpins holding them in place. They are just assembled using some spray glue. I thought about sewing them but I’m not that insane.

So yes, this is probably the most ridiculous and tiny holiday decorations I’ve made this year…

Categories
Uncategorized

Wavosaur for Mac

loopwav

I’ve been playing with SamplerBox on a Raspberry Pi lately, and one of the things I need are WAV files with loop markers, and I’ve not been able to find free/open source software for Mac OS X that allows you to set loop markers. One suggestion was Wavosaur, which does loop markers, but is a Windows application.

I’m familiar with WINE which I thought was just for Linux but also works on BSD and Mac operating systems. In fact, this blog post titled Wavosaur for Mac ! with Wineskin was just what I needed. It uses Wineskin which is an open source utility to covert Windows applications to Mac OS X applications, and yeah, it uses WINE to do that.

It seems like most people who want to run Windows software on other platforms are interested in games, but I’m just looking for ways to not have to use Windows any more than I need to, and if I can get some niche utility to run on my main computer(s), I’m all for it. Of course right now only 32bit Windows applications will work, but hopefully 64bit will be in the future.

Categories
Uncategorized

A 1982 Joystick

byte-shop-joystick

Back in the 1980s my brother bought an Apple ][+ from a local computer store called the Byte Shop in Greenfield, Wisconsin. (And yes, there were other stores that used the same name.) I was lucky enough to be able to use the Apple ][+, and learn about computers and programming, and it was the start of my journey of understanding and using technology that has been part of my life for the past 40 years.

My brother recently gave me the receipt for the joystick I purchased in 1982. Yes, this is what 12 year old Petey was saving his money for, an analog joystick made by TG Products from Richardson, Texas. (And you knew it was from there because it was printed right on the top of the enclosure.)

The included “documentation” mentioned a method of removing the springs inside that centered the joystick when released, and I used the “hack” to utilize the joystick as a drawing device (which was quite difficult with the springs in place, and still difficult with the springs removed.)

I remember a lot about this joystick and using it with the Apple ][+ at the time. Computers were so scarce back then, and I don’t think anyone else I knew at school had one at home. I did my best to treat the computer with care, and even to this day, I’m sometimes shocked at the way people treat their technology, as if it’s disposable… but maybe that’s just how it is today, with computing devices being so ubiquitous and easily replaceable.

TG Products Joystick

Above is a great photo of the joystick that I borrowed from the Computer History Museum’s web site. Those buttons are still available, and I’m pretty sure I’ve used them for projects. (I may have even bought some from Radio Shack back in the day.) Also, check out that awesome ribbon cable! (Hey, it was an analog device.)

I did a bit of searching for this old joystick and came across a few links. Here one from a Vintage Apple site. It’s a bit weird because it’s extra long… what’s up with that? Well, see this tweet for some interesting info on that.

I found a few other TG Products online as well. There’s also a TG joystick at The Strong (which I wish I had known when I was there two years ago.)

And this one is a little weird… It’s a Super Game Stick for Apple II I found on Amazon which is obviously a clone.

The other strange thing for me is that back in 1982 I bought a computer controller (a joystick) and in 2019 I now occasionally build computer controllers, sometimes for work, sometimes for fun, and sometimes it’s a joystick.

Well, you know what they say… you can’t ESC your past.

Categories
Uncategorized

Dodecahedrons

dodecahedron-connectors

I honestly can’t remember where I got the idea to make a bunch of dodecahedrons for Maker Faire Milwaukee came from, but I do remember looking at Thingiverse for some connectors I could use with 1/4″ dowel rods. I know I tried Trammell Hudson’s design, since I always admire his work, but I was not using pencils, so it didn’t work. I did attempt to alter his file, but ultimately ended up designing my own file, which worked well enough that I wanted to share it. (Check out Dodecahedron Connector on PrusaPrinters.)

dodecahedrons-colors-01

So I made nine dodecahedrons that could hang from the ceiling in the Dark Room. And since they’d be in the Dark Room I figured I should use fluorescent filament to create the connectors, and fluorescent paint to paint the wooden dowel rods, and with help from Kathy H. at Milwaukee Makerspace, we got everything painted. Sadly, we did not get the blacklights set up in the Dark Room due to budget constraints, and there was too much light where they were placed, and we had to bundle them all together, and… well, anyway, they turned out great, despite a few issues with presentation.

dodecahedrons-small-01

I’ve also made a smaller (hand-held) model for home. It’s small enough to fit on a 13″ MacBook Pro, though I might hang this one from the ceiling as well. Or maybe make it into a lampshade. I don’t know yet.

dodecahedrons-mms-01

This is the original version, which uses 12″ long, 1/4″ diameter wooden dowel rods. A pack of 100 dowel rods is under $15, and a roll of fluorescent filament is about $22. Since you need 30 dowel rods and 20 connectors per dodecahedron you can easily build three large ones (or a lot of small ones) for under $40 USD as long as you’ve got access to a 3D printer.

Did I mention I really like dodecahedrons?