Categories
Uncategorized

HP Z420 Setbacks…

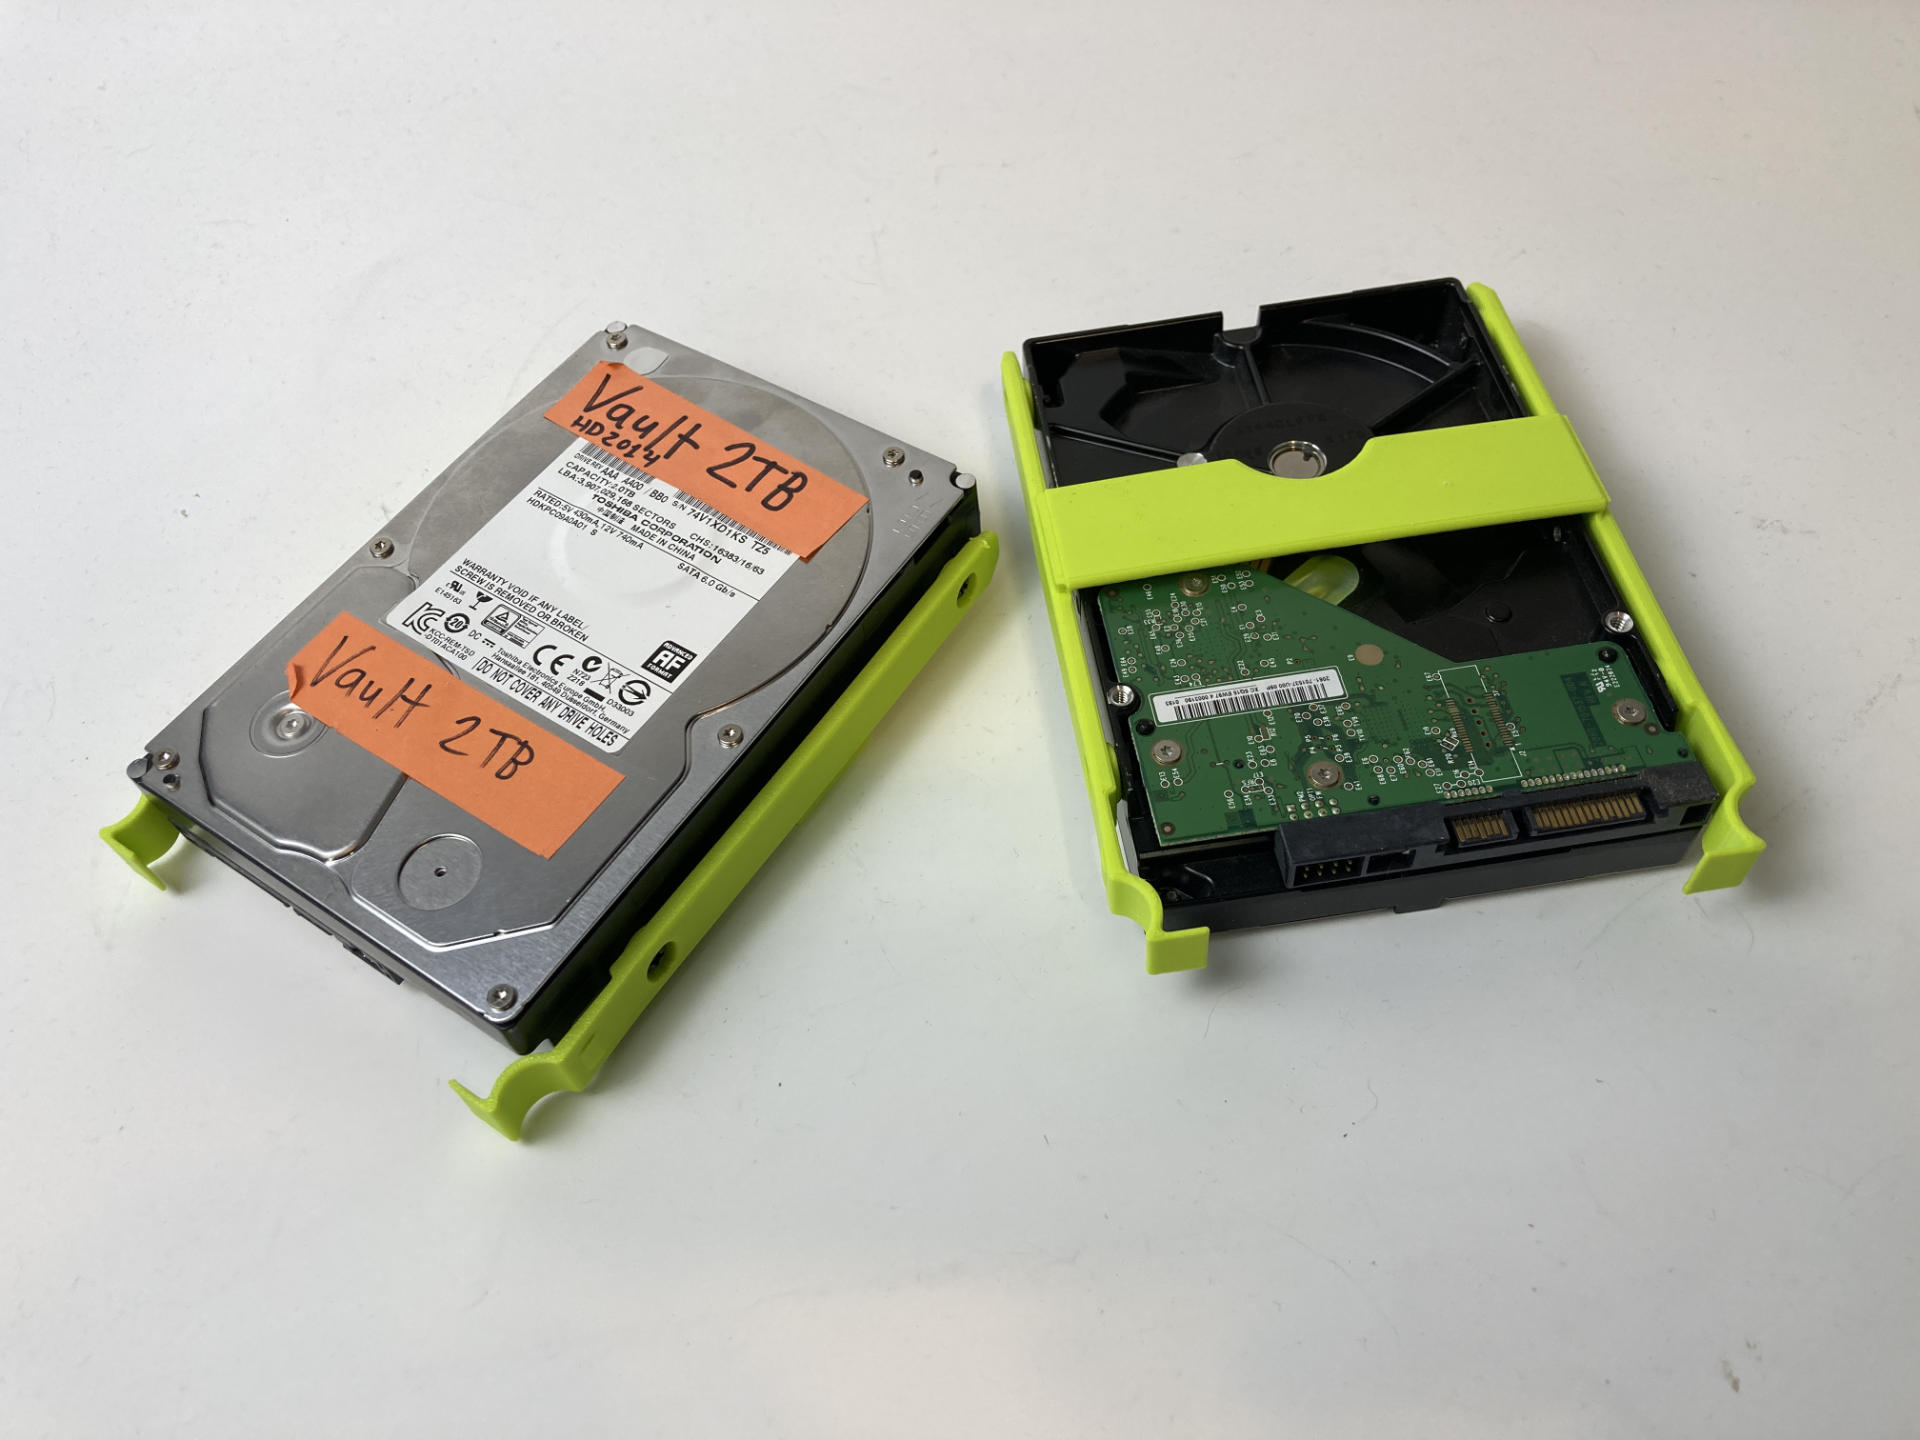
I found some 3D models for hard drive caddies and one was not great and the second was not great but okay so I tweaked it a bit. Still not perfect, but good enough for now.

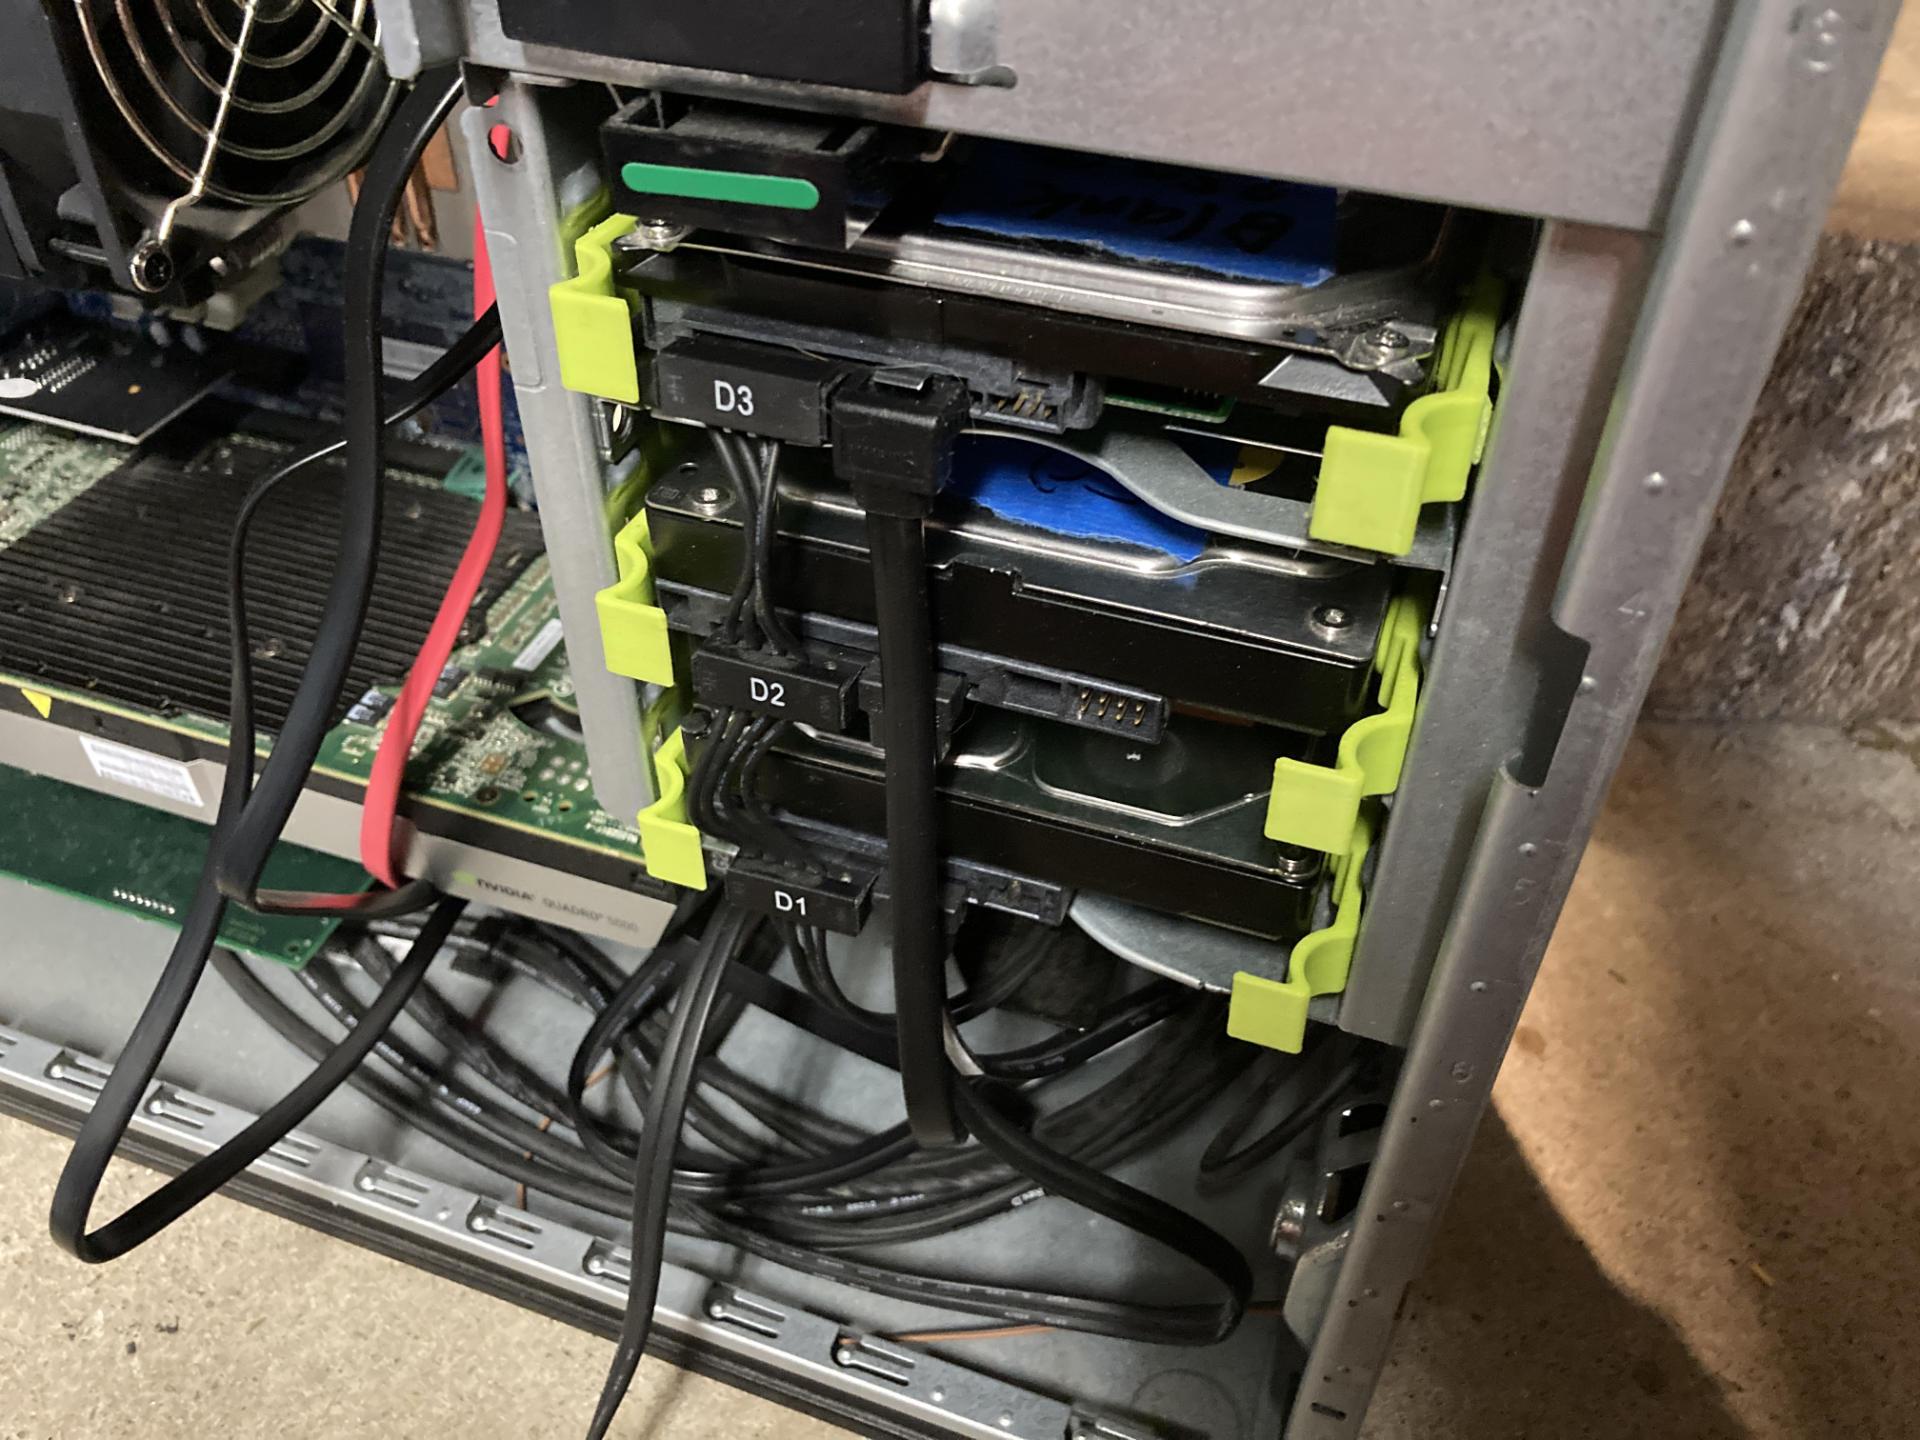
I was able to get the three large hard drives in place and connected. Not bad.

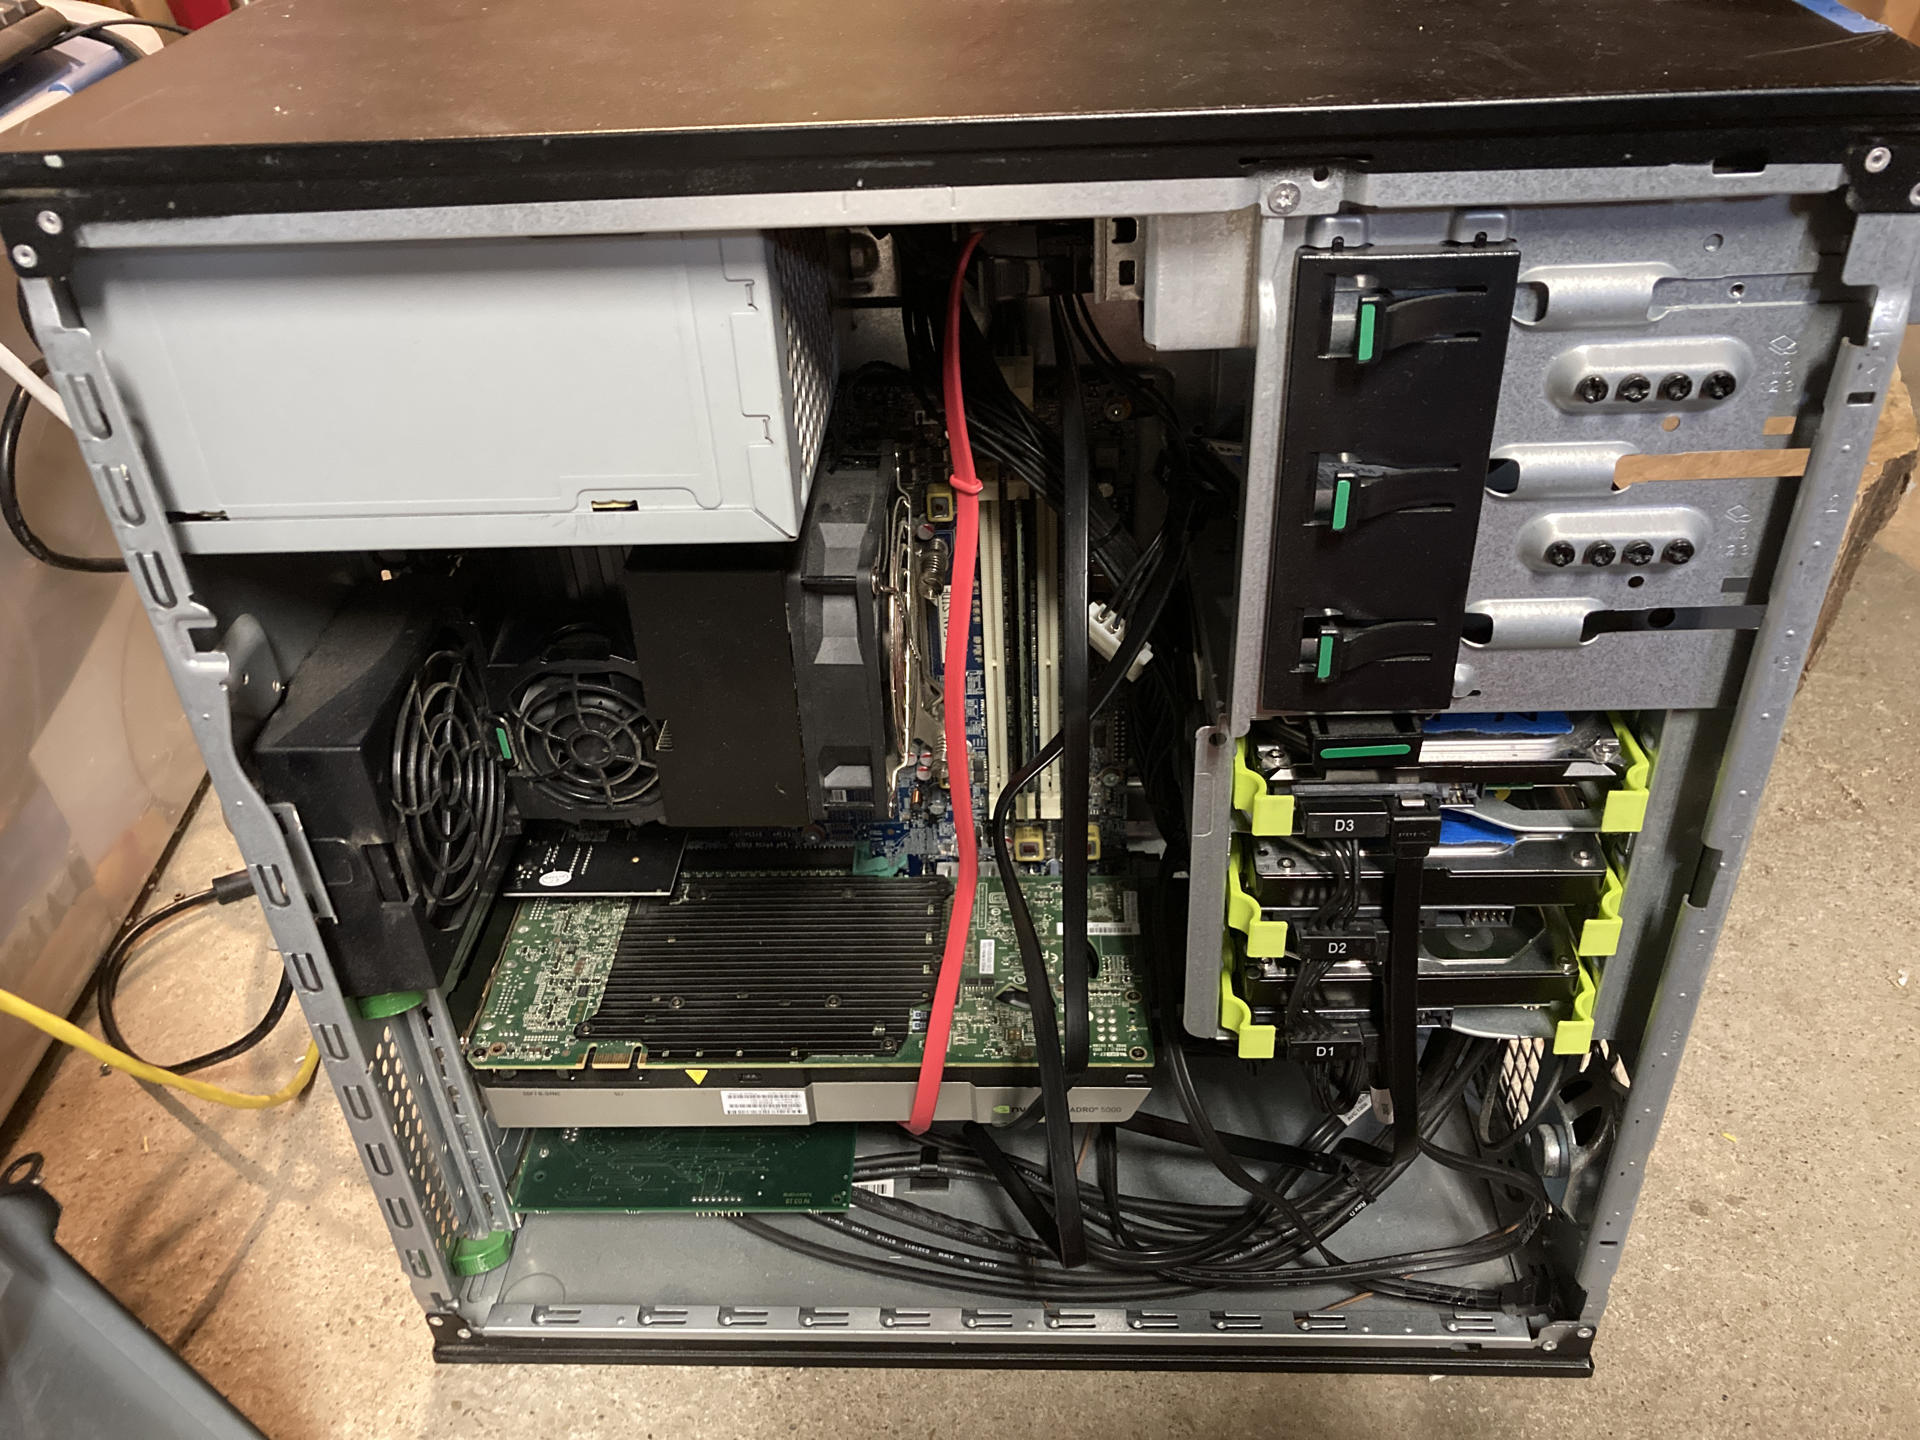
I put the smaller drives into the large front-accessible bay and things looked pretty good…

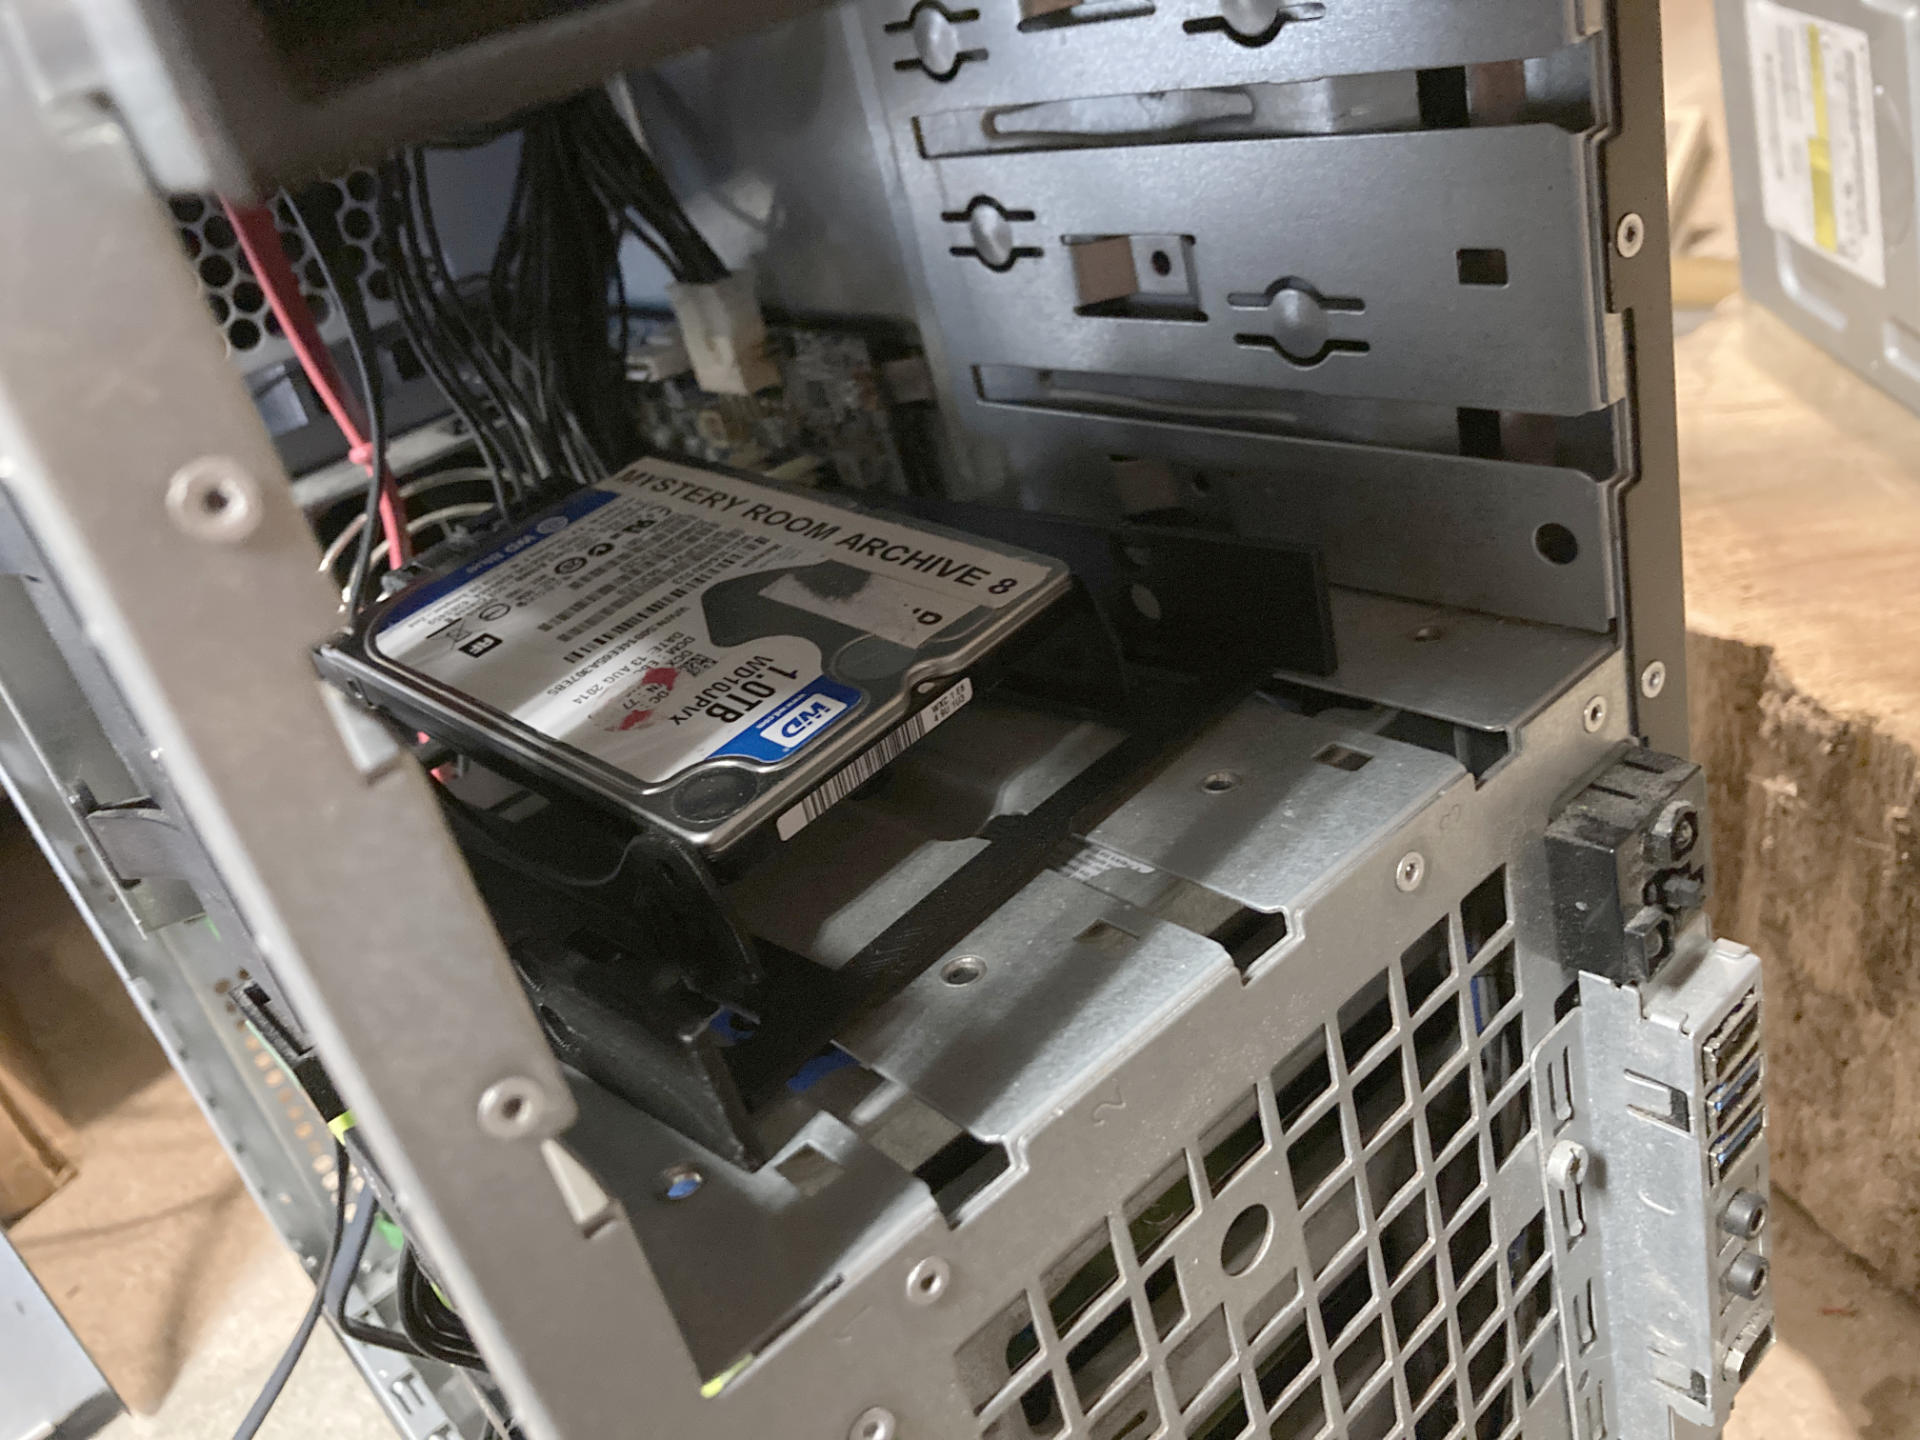
I figured I would deal with the large front-accessible bay next, eventually building something to properly hold the drives…

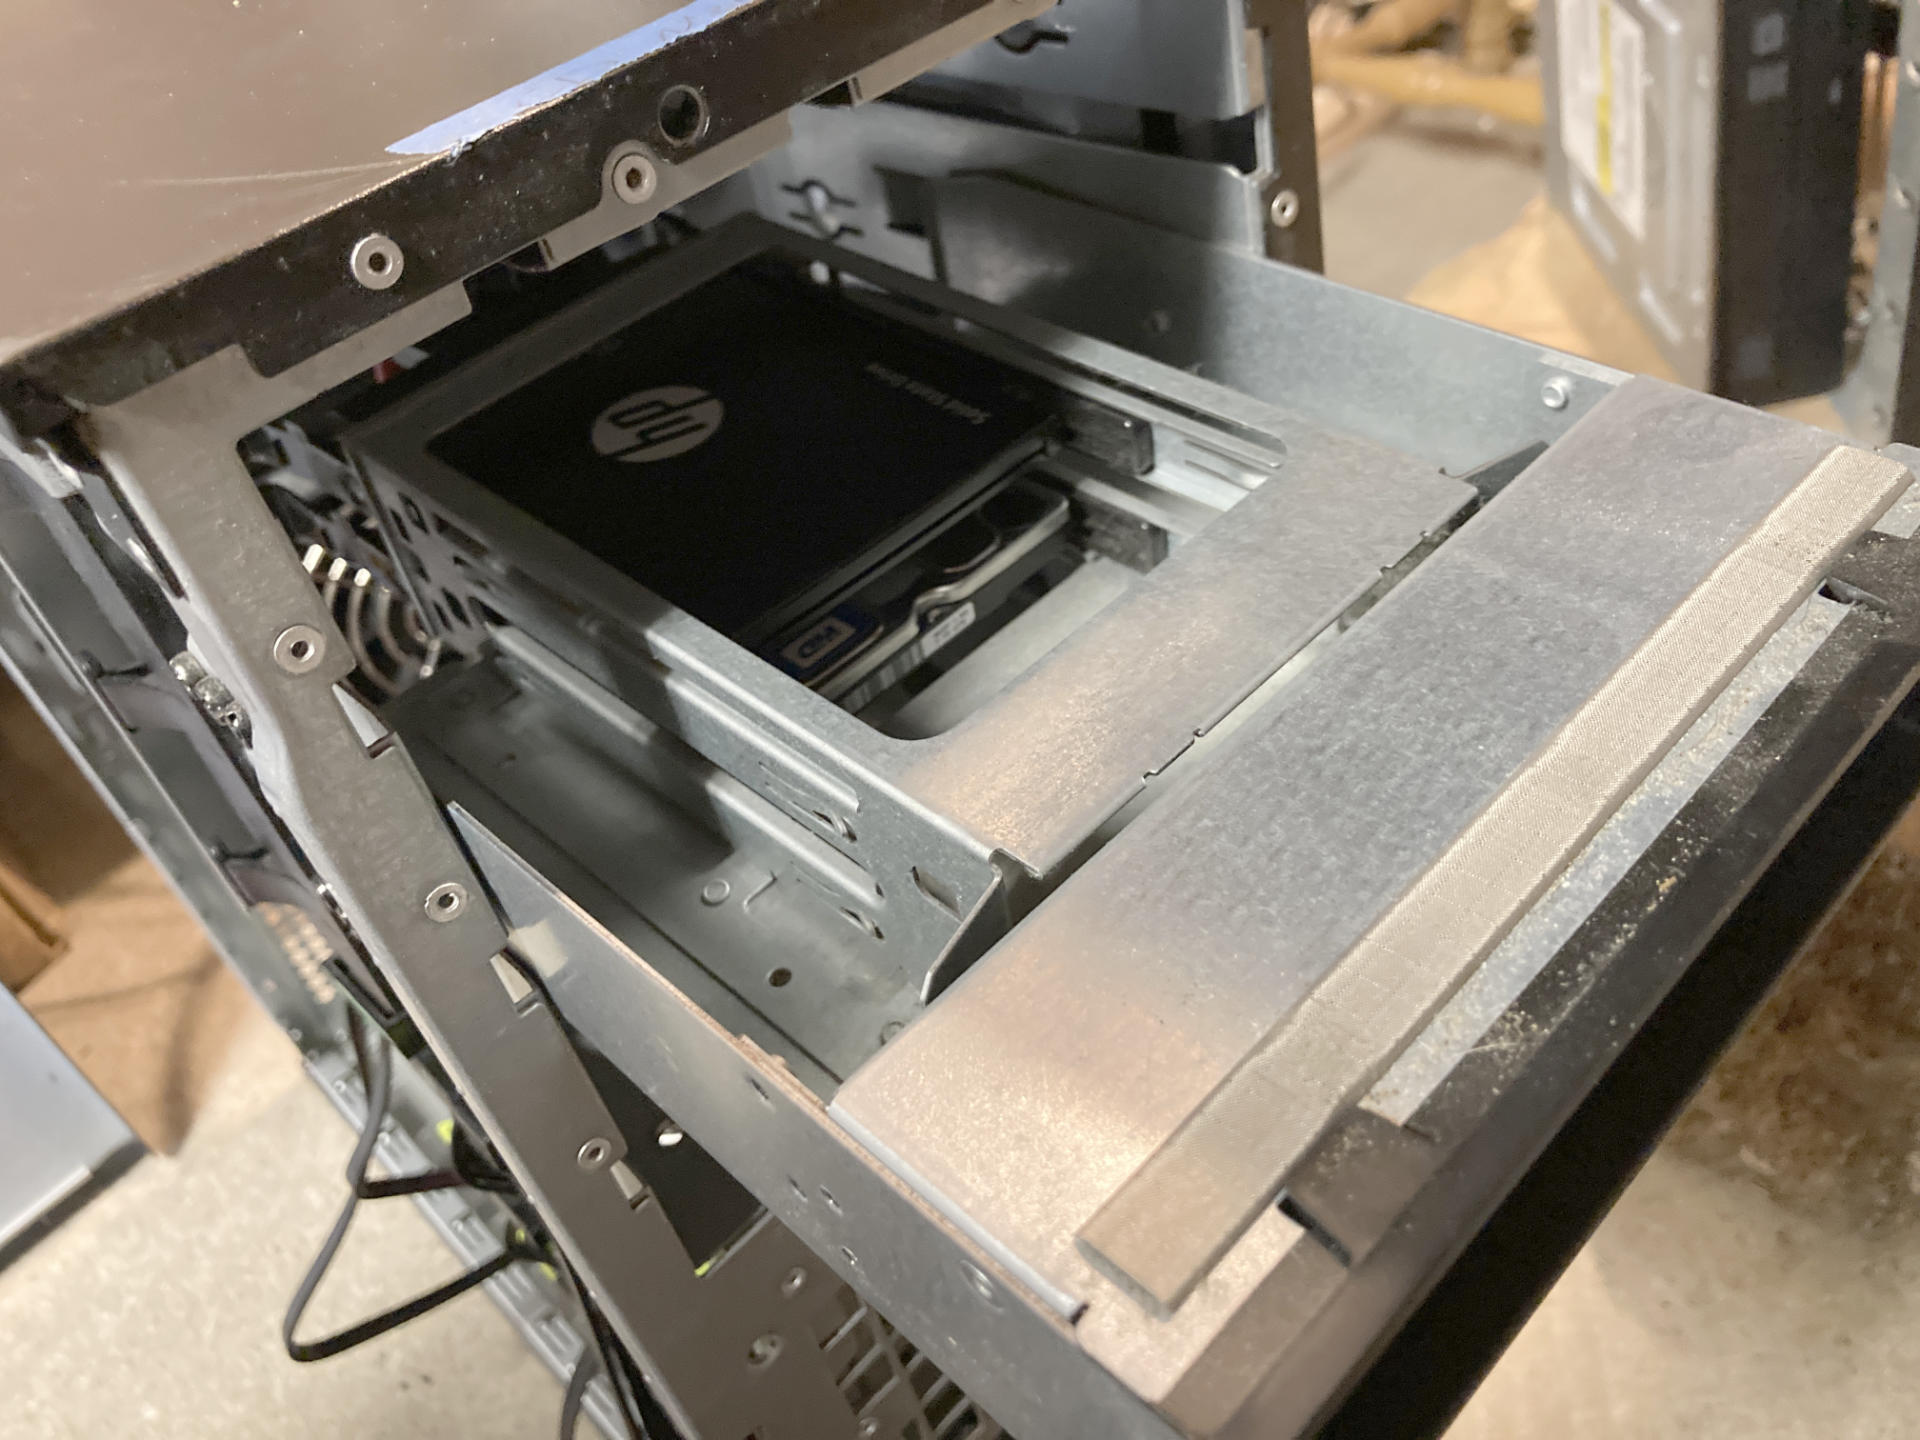
And then I noticed the top piece had two little caddies for small drives so I put the boot SSD in there along with another drive.

That’s when the bad happened.

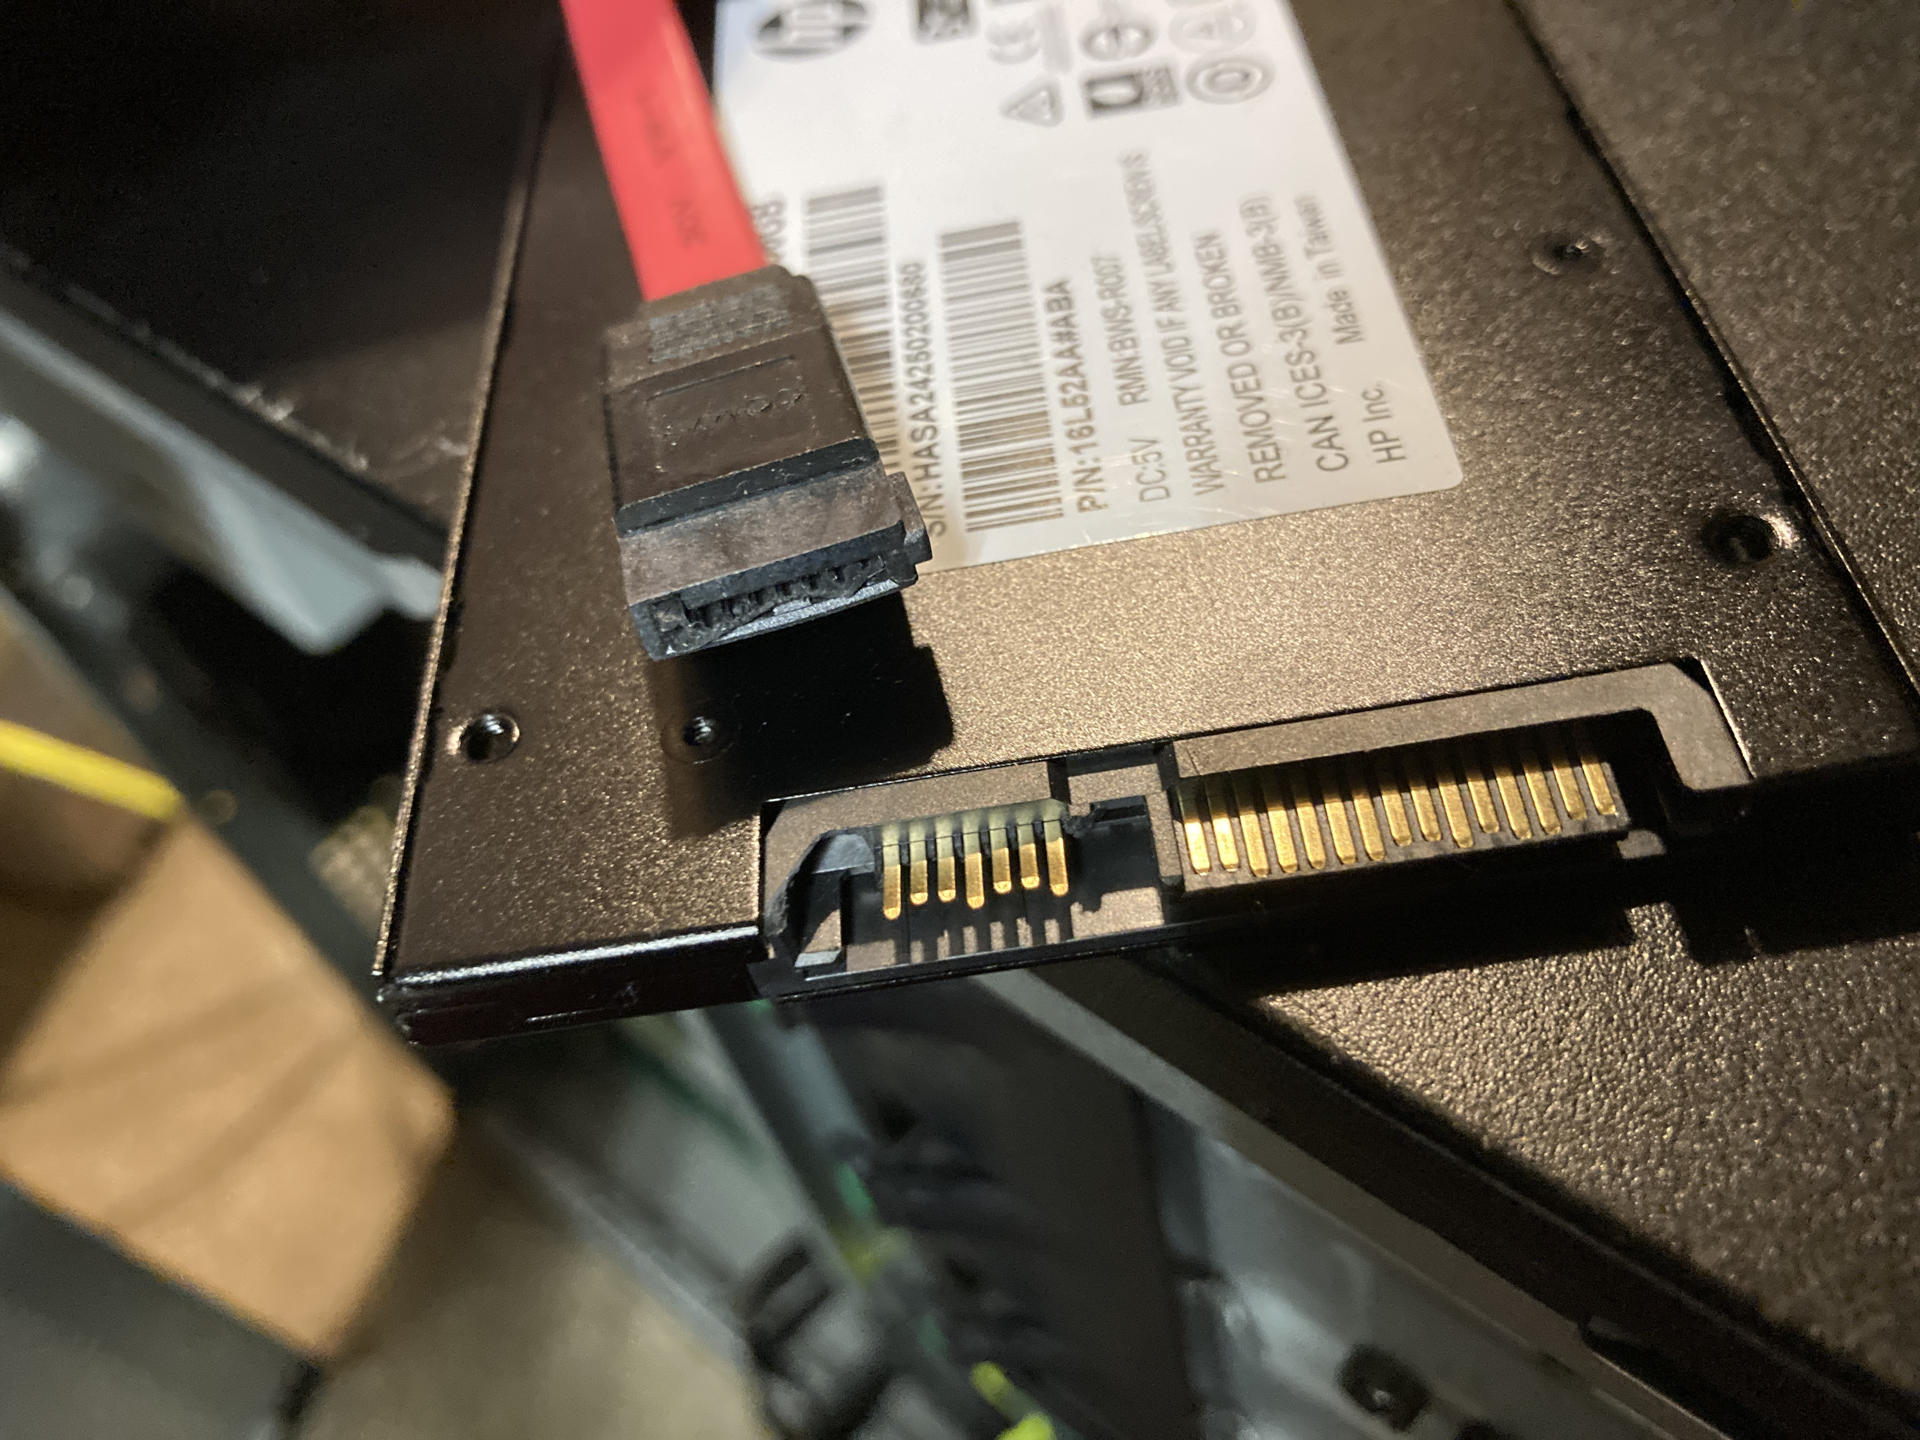
I had this straight (not right angle) SATA cable in my cable bin and maybe it was too stiff, or maybe I pulled to hard on something, but whatever, the SSD I got less than two months ago had the plastic connector housing torn off, and stuck inside the cable end.

I tried to reinsert things and reconnect, but after a half dozen attempts it was pretty clear it wasn’t going to boot.

I’m a bit bummed about the destruction of a brand new SSD. (It was only $20 but hey, $20 is $20.) I have a super-cheap SSD I pulled from the dead OptiPlex that I’ll use for a replacement until I get a new one. (I looked up the brand for the super-cheap SSD and all I could find was comments saying it’s garbage hardware to avoid.)

Anyway, this is just a minor setback, and a small increase in the price of this build. I think we’ll still be pretty close to my original estimate for three 4TB drives in this TrueNAS box for under $180 USD.

Categories
Uncategorized

Warning AT&T U-verse TV Stop Working

A screen from an AT&T Router that says Warning: The change you are attempting to make may cause AT&T U-verse to stop working properly.

NOTE! Make sure you read the Update! at the bottom of this post.


This blog post exists for one reason, to let you know that I clicked “Confirm” to this warning screen and everything was totally fine.

Warning: The change you are attempting to make may cause AT&T U-verse to stop working properly.

It’s 2025 and I have an AT&T router with a fiber connection with the DirecTV package. I do not have AT&T U-verse, though I did about a decade ago in 2014. I don’t even know if they still offer U-verse, but when I searched online to see if it was okay to click Confirm and it would not break my Internet connection all I could find was people asking the question on various forums with no clear answers given. So I’m here to tell you that for me it worked fine.

You can stop reading if you’ve learned all you need to know!

A screen from an AT&T Router

Still here? Okay, so I was using the NAT feature of the router to do some port forwarding but I then wanted to install Nginx Proxy Manager to make things easier… Once installed Nginx Proxy Manager wants to be set to port 80, which causes the router to show you that warning. That’s when I did some searches and found no good answer.

I decided to be the person who tried it out, and… it worked for me. I did not see any disruption in my Internet connection, my TVs are all fine, and my non-existent U-verse service did not get interrupted because it does not exist.

A screen showing the Nginx Proxy Manager Setup

So yeah, Uverse, U-verse, ATT, AT&T, Router, Internet, Warning, did not Stop Working, and all was well and just fine in the end. (Yes, that contains some of the potential search terms people might use.)

I should do wrote another post that covers the Nginx Proxy Manager.

Update!

About four weeks after doing this the router lost power one day and when it came back online it lost many of the settings… The WiFi newtwork name and settings I’ve had set for 6+ months was gone along with any port forwarding information. I don’t know if the actions I took were at all related, but it may be worth mentioning. It may be a good idea to reboot and see if your settings stick. (I guess I should schedule a reboot and test as well…)

Categories
Uncategorized

CPAP 2024

Back in 2011 I did a sleep study and then got a CPAP in December 2011. It broke around 2018 or so and I got a loaner for a week or two while it was repaired. (The hinge on the lid had broken so it did not stay closed properly.) Just to be clear, my CPAP from 2011 was repaired around 2018, not replaced…

Jump to March 2023 where the machine started showing an error message “Motor life exceeded, please contact service provider” so I got in touch with my doctor, who told me to get in touch with the department that handles CPAP machines, and they told me a replacement could take months and months, and even a loaner could take quite a while, but they said it should keep running for a while… hopefully.

After a month I got a phone call and they said our insurance company was not going to replace it. I explained again what was going on, they confirmed everything, and tried again. Eventually I got a letter from our insurance company saying “Claim Denied” or whatever. They let me appeal, where I explained that for 6 months it was displaying an error message and I was concerned it would fail at any moment. They asked if it was working properly and I said “I do not know. I am not an engineer versed in CPAP machines. I have no idea if it is working properly. It does turn on, air comes out of it, but I do not know if it is working properly or to capacity.” They sent me a letter saying “No” they would not replace it. Sigh…

My appointment with my sleep doctor rolled around (September) and I brought it along to show him it was knackered. He told me that if our insurance company would not replace it I could try CPAP.com for a discounted machine. I looked and discounted was still $500 or so for the machine and other equipment, so I put it on hold.

A month later I got a call from ResMed about supplies for the machine and I asked when they are typically replaced. The told me that typically insurance companies provide a replacement after 5 years. They said some will do 3 years, some as long as 7. If you’re keeping track mine was 12 years old at this point. WTF…

December rolls around and my employer tells me that we’ll have a Heath Reimbursement Agreement starting in 2024. I’m on my wife’s insurance so I didn’t know what that even meant for me. well, what it meant was I could use funds from my employer to replace my knackered CPAP machine!

So yeah, I got a new CPAP machine, but not after going back and forth with my doctor, CPAP.com and myself in the middle There were some weird issues with my prescription, but we got it all sorted. I had to do the settings myself using the hidden menu option on the machine (by holding down the dial and the Home button until the service menu appears!) And there are a lot of improvements on this model compared to the one I’ve had for 12 years so that’s cool.

Okay, so the short version is, my CPAP was 12 years old, my insurance company would not replace it, I managed to get my own. Yay.

Maybe I’ll return to posting my Sleep Reports soon.

Categories
Uncategorized

Vivitar Foot Repair

Vivitar

So I got this Vivitar 285 flash last year, and it’s been working great, except for one thing… the little plastic foot is no match for the weight of this thing. Eventually, it broke. Argh… To be expected though.

I found a replacement metal foot on ebay for $6.99, and I watched some YouTube video that explained replacing it. Here’s the thing though… after I watched a damn advertisement, and then a 9 minute video showing how to do the replacement, I decided that I’d help people of the future by presenting the same info in a good old no-nonsense way, with words and pictures!

Broken Foot

So here is our broken foot. Thin, old, cheap plastic. No good! Grab a tiny screwdriver and remove the foot. Don’t lose the screws, they are tiny! (Also, you will need them later!)

Remove Foot

Here is the broken one still attached, next to the new one. On the original unit, there are 4 wires. Two of them (white and green) go to the test button. You don’t need these! You just need the black and red wires. The button on the new one will work just fine with only the black and red attached.

New Foot

The black and red wires are short, so don’t cut them, you need to desolder them. If you don’t have a good soldering iron, and some soldering wick and a solder sucker, find someone who does. (Maybe your local hackerspace?) I did cut the white and green ones, and put a tiny amount of tape over the ends, just to be totally safe.

Soldered

Solder the black and red wires in place securely. It appears I put the black on in the center. I’m not sure that it matters, but YMMV and I make no guarantees. (See where I put the screws? Right where they belong, because they are so damn small I was afraid of losing them!) Also, don’t put the foot on backwards, as that would be stupid. (Disclaimer: I’m not even sure you can put it on backwards. I just like disclaimers.)

New Foot

With the soldering done, put the foot in place, put the screws in, and put the batteries back in (you did take them out before you started, right!?) and test it!

OK, there’s your short guide to replacing the hotshoe foot for a Vivitar 285 camera flash. Hopefully you read this in less time than it took me to watch that 9 minute long YouTube video.

(And yeah, the fact that this is a post about photography that has terrible photos is not lost on me. Apologies…)

Categories
Uncategorized

Is Matt’s Phone Broken?

NO

Keep checking back for updates!