Last year I was invited to a co-worker’s wedding. And, since so many weddings nowadays involve being creative on a budget, they had a photo booth there that they set up themselves using Sparkbooth, a great little Adobe AIR-based application. A few weeks later we were having our annual work party, and I was tasked with making a photo booth a reality. Since then I’ve been working on building a better photo booth experience.
NOTE: Need a button? Now you can buy one! Visit our store or Etsy.
For the first one I set up, I used my MacBook Pro. We connected a Sony PD-150 video camera via FireWire and selected it in Sparkbooth rather than using the built-in iSight camera. (The iSight is a small camera, with a tiny lens, so the video camera ended up providing a better image.) We also put a little sticker on the space bar that said “PRESS HERE TO TAKE PHOTOS” and hoped for the best. It worked, but there were just too many moving parts to deal with, like the camera on a tripod behind the MacBook, and a light clamped onto the tripod. It wasn’t elegant.
The Sparkbooth software is great and provides a ton of features, including the ability to upload photos to Flickr, Facebook, Tumblr, Posterous, or a dozen other sites. There are some optional features that would require a keyboard—if you prompt people to enter their name, email, a comment, or choose if they want the image uploaded or not—but the main interaction is through pressing the space bar to start the picture-taking process.
If you need a space bar, you may need a keyboard… unless you build something that can emulate a space bar. When I saw The AWESOME Button on Make, I knew what I had to do. I had to build a button.

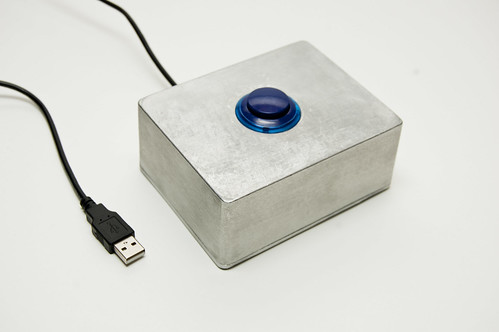
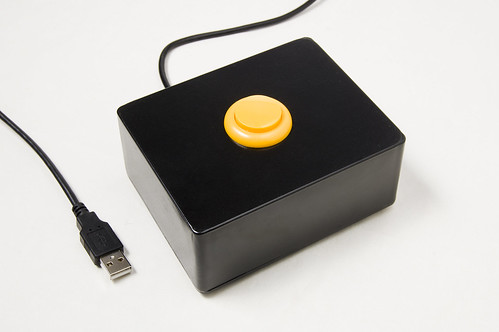
The Button
The button is simple, and built into a metal case. It should stand up to abuse that a normal keyboard might not, and it’s pretty simple. You can’t really press the wrong button, there’s only one.
Once I had the button, I set about getting my old iMac set up as the photo booth machine. Not being happy with the built-in iSight (the iMac is about 4 years old, and it’s definitely not as good as the latest round of iSight cameras), I ended up taking the Canon ZR800 from Time Lapse Bot and using that. It worked OK but wasn’t ideal. I didn’t want to have to deal with a tripod and more cables, etc. (I even ended up testing a floor-mount camera holder I built which took pictures of shoes for a specific event—don’t ask!)
Ultimately I settled on using a Logitech HD Pro USB Webcam C910. Its image quality is much better than the iSight, and there’s just one cable to plug in. Just one problem… while it worked fine with my MacBook, no matter what I tried, I could not select it in Sparkbooth on the iMac. I tried everything, including different versions of Adobe AIR, different versions of Mac OS X, reformatting the drive, a clean install… nothing would work. I ended up disconnecting the built-in iSight thanks to some help from iFixIt.

The Completed Photo Booth
So I now had the button and the camera. I then needed something to hold it all together. I wanted a stand to put the iMac on that was about the right height for a “typical human being,” and by that I mean: about my height. (You can also easily adjust the camera by just tilting the iMac a bit.) I ended up building a simple pedestal out of plywood and painting it white. I used thin plywood to save on weight since it needs to be somewhat portable. You can’t see it in the photo but the back has been left open, and there’s an internal shelf for the keyboard and mouse. I keep those handy in case of trouble, or if I need to change any settings in the software. The shelf actually helps structurally as well.
For the light, I used a small IKEA clamp light (you’d be amazed how hard it is to find a small, good-looking clamp light.) There’s an L-shaped piece of plywood behind the iMac that’s held onto the stand with a c-clamp. It works for now. I may upgrade the light in the future.

Photos from the Booth
Here’s a selection of photos from the first official use of the Photo Booth. (Yes, there are two Munchkins on the back wall—it was a “Wizard of Oz” themed party.) I’m asking for a bit of forgiveness in calling this a “Photo Booth” at this point because, while it does take photos, there isn’t an actual booth yet… I need to save something for Phase II of this project…
Stay Tuned!
NOTE: Need a button? Now you can buy one! Visit our store or Etsy.