Categories
Uncategorized

Acrylic Bender

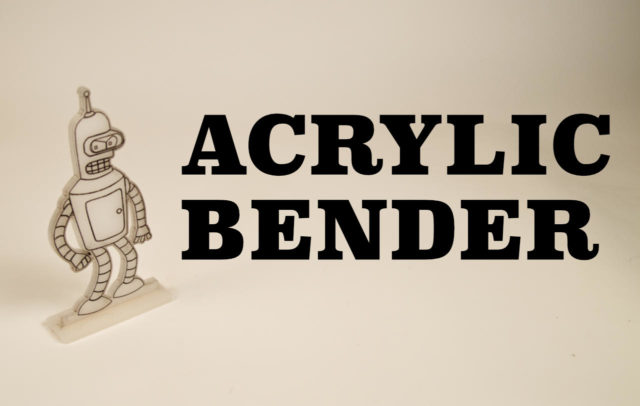
I made an Acrylic Bender. If you are one of the people who appreciates that joke, I appreciate you. I mean, it’s an Acrylic Bender, not an Acrylic Bender, an Acrylic bender, or even an acrylic Bender

Sheesh! Look at that face… it’s a face only a mother could love. Seriously folks, this “Acrylic Bender” joke is like six years in the making. I really hope you appreciate it.

I etched the acrylic as I usually do, with LightBurn and the RasterLaser upgraded with a Cohesion3D board…

After etching I applied some black Speedball block printing ink and spread it over the surface, pushing it into the etched areas. I then wiped it off the top surface with toilet paper… Just kidding! I used paper towel. (That joked will not age well.)

Thank you for reading this post, meatbag… also, bite my shiny, metal plastic ass!

Categories
Uncategorized

Multicolored Laser Etching

If you want a true to life banana you can’t just laser etch something, you need to go that extra kilometer to make it multicolor. (Of course real bananas need not apply.)

I didn’t go large this time, I went small… How small? Here’s a quarter for scale. Oddly enough, I did not find a banana in the house to use for scale, as they’ve all bean eaten, or frozen, so a quarter will have to do.

I etched some dayglow green acrylic using LightBurn and the RasterLaser upgraded with a Cohesion3D board…

Here’s a plain old green banana that has been laser etched. Look how lifeless and colorless it appears! It’s almost downright unappealing. I dare say we should consider slipping some color into place. It’s probably what Warhol would do.

I took some good old Speedball block printing ink and with my finger (inside a nitrile glove) rubbed ink across the surface. I then took some paper towel and wiped it off. It stayed in the etched part pretty good. Good enough for this first test anyway…

Here’s our multicolored banana with some edge lighting. I should try proper acrylic edge-lighting to see what the results are…

Here’s a view of the edge without extra lighting. This is 3mm acrylic. I’m thinking next time I’ll try additional coats of ink with time in between to dry.

Here’s another photo of the banana with a quarter, but the quarter is out of focus and in the foreground because it feels forelorn because it knows it is not a banana and will never be a banana, and for that, it mourns silently.

Enjoy your banana!

Categories
Uncategorized

Ball Feeder Mechanism

Here’s this week’s progress on the wax ball feeder mechanism. These are actually 2D files that were laser cut, but I sort of like the look of making them 2.5D so you can see the dimensionality.

Oh, to make the 3D render I exported a DXF file from Inkscape, load it into OpenSCAD and then use the linear_extrude function.

And yeah, these files are already outdated as there was one mistake (which I fixed with the bandsaw) and I’ve assembled it and found room for improvement.

You can see some earlier iterations here, here, here, here, here, here, and here. Which is to say, if you want to see minor updates with very little context, follow @raster on The Instagram.

You’ll notice an issue with the balls getting stuck in the chute, so there’s a bit of work to do there. I’ve got a few ideas, just need time to test them.

And don’t worry, at some point this might all make sense, once you see the rest of the thing. Or maybe it won’t… who knows!?

Categories
Uncategorized

Sensor Boxes and Controller Box

Here’s a few photos of a project I recently worked on for Stamm Media and No Small Magic. These are sensor boxes that were used for a tradeshow. I don’t know how much I can say about the tech inside them, but this is what they look like.

I designed, laser cut, and assembled all the boxes. They are partially glued together but the back covers are held on with screws so as to be accessible for adjustment purposes.

This is the final product from last month’s blog post Enclosure Prototyping. Since I finished this piece first I actually added a bit of shellac to it, which makes it just a bit nicer than raw wood. (I ended up making two of these.)

The sensor boxes connect to the control box using Cat5 cable and the RJ45 Adapter Boards I developed last year. This allows for the sensors to be easily placed quite a distance from the control box by just using an existing Cat5 cable instead of needing a custom cable/connector.

Categories
Uncategorized

Enclosure Prototyping

I’ve made a lot of laser cut enclosures over the years. I typically make them out of 3mm or 6mm Baltic Birch plywood, and sometimes I even mix the two sizes, which is fun because you need to remember which tabs need 3mm and which need 6mm.

As much as I’ve made a lot of enclosures, I still occasionally screw up, or get things not quite right the first time. Typically I design the entire enclosure in software and then cut things out. If I’m smart I’ll first cut it using cardboard to prototype how it all goes together. Cardboard isn’t always the correct thickness, but it can often get you close enough and reveal flaws in your design that you can correct before you start cutting wood.

One of my recent discoveries is that if your cardboard is too thick you can squish it in the hydraulic press and it’ll stay pretty squished. There’s a little bounce back, but it’ll be thinner than it was originally.