Categories
Uncategorized

Turntable Supports

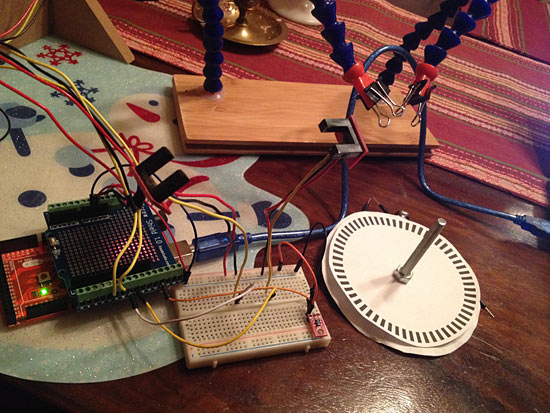
One of the pieces I needed for my turntable drawing machine was something to hold a bearing in place underneath the platter to support it and let it spin easily. If you’ve ever taken the plate out of your microwave oven to clean it you may have seen a “Microwave Roller Wheel / Turntable Support” thing. (Really, that’s what it’s called. Check Amazon.)

Spinners

I decided to use 608 bearings, mainly because I had a lot of them on hand, but they’re also really easy to get for a low price. (I think I got 30 608ZZ bearings for under $20 from Amazon.)

Bearing Mount

I designed these two arms that would fit into slots cut into the base of the machine, below the platter. Each piece would be locked into place with a 3mm bolt, so there’s holes and t-slots for those. The extra piece you see on the bottom (with the 4 slots and 2 holes) is the mating piece. This was designed based on the arm pieces fitting into it, and I would only need to cut one (hopefully) to test the fit.

The arms are slightly different. The one on the right has a hole large enough for the 8mm bolt to fit through, while the one on the left has a slightly smaller hole. The plan was to tap the smaller hole so the bolt could screw right into it without needing a nut. Do a search for metric tap drill size and you’ll see that a 6.8mm hole is needed to tap it for an 8mm bolt. (Sometimes you can just look on the tap and it’ll tell you what size to make the hole.)

As a bonus, when I share the files for this you can decide which pieces suit you better, depending on the availability of an 8mm tap in your workshop. No tap? Just use the larger hole version and a nut instead.

Bearing and Bolt

When you’ve got a laser cutter and lots of scrap acrylic, it makes a lot of sense to make your own washers and spacers and standoffs. (Assuming acrylic is up to the task of what you’re designing.) The spacers were sized to match the inside part of the bearings allowing the outer part of the bearing to spin freely.

I originally was going to make acrylic nuts as well, but decided on tapping the holes with threads. I still wanted the “hex nut” part of the design, as it’s used to hold the platter in place. So that, in conjunction with the tapped parts, prompted me to make the hex shape at the top of the arms. (It’s the details, right?)

Bearing Holder

The one thing that making and using acrylic nuts would have allowed would have been adjusting the height of the bearing. I could have created a slot for raising or lowering the bolt and bearing combo, so with this design featuring the tapped holes, there was no room for adjustment. Luckily I got it right by the second (or third) attempt.

Arm Spacing

Here’s a shot of the spacing of the bearing holders below the platter. It worked out well and I got the math (mostly) right. I may end up making a new bottom in the future to account for other faulty measurements this time around, but I’ve already adjusted for them and things work well enough.

(For other posts about this turntable, check the posts tagged with dcrlmtm.)

Categories
Uncategorized

Turntable Arm

Arm

You can’t have a turntable without an arm! Well, I guess you could, but where would you put the pen? Here’s some of the design files for the arm. The hole pattern on the larger part was made to match a servo hub from SparkFun, which is also from ServoCity, which provided a STEP file. (Ignore the heart-shaped thing for now. It’s experimental!)

Servo Hub Rhino

Luckily I was able to open the STEP file in both Rhino and in FreeCAD! It’s like I won the CAD file lottery or something. But seriously, if there’s ever a competition to convert from one format to another and then another and another… I think I can win.

Servo Hub FreeCAD

I was able to get what I needed to get the hole spacing right, which is all I really needed this time. The holes are tapped for 6-32 screws. Once again I’m mixing Imperial and Metric. Sigh… Mission (somewhat) accomplished, I guess.

Arms

The arm consists of three layers of laser-cut pieces stacked up, and screws to hold them together. I played around with materials a little bit, trying wood in the center, but finally choosing the red acrylic. I thought about clear, but there is at least one other red element right now, and possibly more to come, so I chose the black and red combo. Always a good choice!

Arm Hinge

There’s also a hinge I cut from a 1mm thick plastic I got from the Midland scrapyard. (Windell from EMSL thinks it might be polypropylene.) The laser cut it fine once I figured out the proper settings… and covered it with masking tape on both sides.

Pen Mount

And yes, I did borrow a few ideas from the Egg-Bot design. Sharpies, FTW! Pen holder designers unite, and all that. There’s a 8-32 square nut in there, really snug. I do not have a nice thumbscrew like EMSL uses… yet!

Categories
Uncategorized

It’s a QWERTY Keyboard

QWERTY Keyboard Rendering

I’ve always been fascinated by typewriters. I find them to be curious machines, and their history is no less interesting. (Go on, take a look!) Of course I’m also fascinated by digital technology, and how it empowers people to creating things. Above is a rendering of a QWERTY keyboard, and below is an actual QWERTY keyboard I created using digital fabrication and a tiny computer called a microcontroller functioning as the “brain”.

QWERTY Keyboard

The keyboard is fully-functional. Plug it into the USB port of your laptop or desktop computer and you can start typing. Of course you can only type the letters Q, W, E, R, T and Y… but it does work. Like all of the things we use, it has limitations. Like all of our technology, it doesn’t do quite all of what we’d like it to do.

QWERTY Keyboard

The QWERTY Keyboard is made from wood. (Just like the early prototype of the Sholes, Glidden & Soule typewriter seen below.) My father was good at working with wood, and his father before him was probably even better at it. I am not that good at working with wood, but I am good at creating things digitally. There is perhaps an inverse skill scale at work here. Are we losing the ability to craft real-world objects in exchange for creating digital objects? Maybe digital fabrication is the answer, bridging the gap between the two.

Sholes, Glidden & Soule typewriter

The Sholes, Glidden & Soule typewriter is a weird looking device, as is my QWERTY keyboard. I think there’s a place in the world for both of them, and perhaps a place where the two can meet.

QWERTY Keyboard

For more information on this piece, visit the QWERTY Keyboard project page. There are more thoughts and more photos, and as always, I welcome your comments.

Categories
Uncategorized

More Rotary Encoding

When last we discussed rotary encoding, it was all experimental. Since the project (which will eventually be revealed) is complete, I figured I should share a bit more about the exploration and final solution.

Encoding Disk

I moved from printed paper disks to laser-cut disks. I cut some 3mm Baltic Birch plywood at Milwaukee Makerspace. They worked well, but since I was hoping to get more steps/resolution I continued with the paper prototypes as well.

Encoding Disk

The one in the photo above was a bit too fine… too many steps. The more steps the more precise the alignment has to be, and the more chance of errors.

Gap

We had some concerns about a disk spinning between a U-shaped sensor with just a few millimeters on each side, so rather than just go with the GP1A57HRJ00F Photo Interrupter, I started experimenting with the QRD1114 Optical Detector / Phototransistor as an alternative.

Sensors

The idea would be to use a wider disk and instead of it spinning between two pieces, it would have the encoding stripe on the edge, and the sensors would be on the outside of the disk. Back to the breadboard! The QRD1114s require a pair of resistors to work properly, so I wired it up and did a few tests and things seemed to work.

Encoding Strips

My first tests just involved sliding a piece of striped paper across the sensors, but I needed a real disk. I used the laser cutter at Brown Dog Gadgets to cut some disks from 1″ pink foam, and also from 1/4″ foamcore board. The pink foam actually ended up with concave sides due to the melting power of the laser, so I used the foamcore board pieces stacked up.

Stripes

Math time! How long of a strip do we need to wrap around the disk? Well, you can determine the circumference of a circle if you know the radius or diameter. Hooray for math! Above is a letter size file that I could print on a laser printer to produce the stripes I needed. The thin line on the right side was used for alignment since I had to use multiple stripes to wrap around the disk.

Encoder

Here’s a sneak peek of what the final disk looks like. There’s a few more steps before we got this far though, so I’ll continue the story next time.

Categories
Uncategorized

Infrared Proximity Sensor (Mount)

GP2Y0A41SK0F

The Sharp GP2Y0A41SK0F is an infrared proximity sensor. You can grab them from SparkFun, Pololu, or many other vendors. (There’s a bunch of different models, but I’m using the GP2Y0A21YK right now. The GP2Y0A21YK appears to be roughly the same physical size.)

If you’re using it with an Arduino, Jeroen Doggen has a nice library called Arduino-distance-sensor-library (which should be easily extendable). It’s just a few lines of code to read distance in Centimeters, so it can be used for robotics or physical computing projects quite easily.

Distance Sensor Mount

Since I’m using this sensor, I needed a way to mount it. As usual, I look around for a datasheet. Datasheets will often contain the technical drawings of a part. If you’re lucky, they’ll be vector based (Hello, Inventables!) but if not, you can still use them to determine the dimensions of things, or where mounting holes need to go.

Sharp GP2Y0A41SK0F Analog IR Distance Sensor

Often I’ll pull a datasheet into Inkscape, put it on the bottom layer, lower its transparency, and draw on top of it. Sometimes that works, and sometimes you just need to pull out the calipers and take a few measurements. In an ideal world, all vendors would release technical drawings of their products in vector formats. (Well, at least in my ideal world.)

Distance Sensor Mount

You may notice that some of these parts look familiar. Indeed, I grabbed part of the motor mounts from my FND upgrade.

Distance Sensor Mount

Oh, I should note than I want this sensor mounted on the inside of things. If you want it mounted on the outside, you really just need two holes for the mounts, and maybe one for the wires.

Distance Sensor Mount

If you were wondering about that part with the notch, that’s to make the sensor level while mounting it inside, and the notch is for the wire connector.

One more note on the mounting holes. They are 3.2mm in diameter, which means using a 3mm screw would make sense, but I only had Imperial hardware handy. I also only had 6-32, which is 3.5052mm in diameter, and no 5-40 which is 3.175mm in diameter. No worries, since the sensor is plastic, a quick shave with an X-ACTO knife on the inside of the holes made them fit quite easily.

At some point I’ll need to test how multiple sensors react to each other in the same physical space… That should be interesting!

Note: You can find it on Thingiverse and YouMagine.