Categories
Uncategorized

RepRap Z Motor Mounts

bracket

As the RepRap build continues, I designed some motor mounts that will work with the 40mm extrusion I’m using. The Nema 17 stepper motors I’m using are about 43mm wide, so they hang just outside the extrusion if centered, so I’ve designed the mount to be slightly off-center so the motor do not hang outside the frame.

mount-rails

I’ve incorporated the model into the overall render of the printer. I don’t have the hole yet for the smooth rod to fit into the mount. I’m looking at models like this one to base my work on.

reprap-6000

I’ve also worked on the full model a bit, and made it slightly larger for reasons I’ll get into in a future post. I’m currently thinking of a few ways to make this machine a bit more flexible in its capabilities, and a larger frame made sense for that. (And it means I can waste less extrusion when I cut it down to size.)

motor

Things look wonky in this photo because that’s actually a piece of 38mm (?) extrusion I had handy, since all the 40mm is at Milwaukee Makerspace right now. I’ve got a few projects to wrap up before we cut down and mill the extrusion, so I’ll probably keep working on the printed parts for a bit.

Categories
Uncategorized

RepRap Frame and Rods

40x40-extrusion

I managed to get the 40mm extrusion I need for the RepRap frame at Milwaukee Makerspace. Mark is our 3D Printing Area Champion and he’s managed to collect a bunch of pieces from a scrap dealer, pretty much at scrap prices!

reprap-v12

I tweaked my render a bit expanding the frame slightly, and adding in the rods and rod supports. Speaking of the rod supports…

sk12-render

I could not find an acceptable file for the SK12 rod supports. I found one on GrabCAD (which I’ve never used before) but even there I found the file formats very disappointing. I managed to convert something to an STL and I didn’t like it so I used it get dimensions and then remodeled it.

Yes, I could just buy some SK12 rod supports (eBay has some for cheap) but the last time I used cheap rod supports they were not great, so I figured I’d print them for now, and I can always replace them later. (And yes, the nice thing about having access to a good/working printer when you are building a printer is that you can print the parts you need.)

sk12

I printed one on the Prusa i3 at work with low infill to test the fit, and it was perfect on the second attempt. (My 3mm screw and nut hole were just a bit off on the first try.) Oh, the mounting holes are sized for 5/16″ carriage bolts, which fit right into the slot of the 40mm extrusion. That’s another trick I picked up from Mark. (5/16″ is just about 8mm as well.)

sk12-rods

After the second test I was satisfied, and printed the rest on my Monoprice Maker Select Plus at home. It’s also nice to have a variety of 3mm hardware I can use this time around. The first RepRap I built was a kit and came with everything I needed. (Well, in theory.) This time I’m figuring out a lot as I go, but I already have a lot of the things I need.

These linear rods are 12mm diameter and plenty long, so they’ll need to be cut down a bit. I pulled them from a large laminator I pulled apart a few years ago. As I’ve previously mentioned, I’m going to be using lots of parts I’ve been collecting over the years, so hopefully I can keep new purchases to a minimum, at least to get up and running with this printer.

(Note: SK12 Rod Support is available on YouMagine and Thingiverse.)

Categories
Uncategorized

RepRap 6000

reprap-prusa-i2

I built my first RepRap back in 2012, and it worked for a few years, and things broke, and I usually fixed them, but when I got my Maker Select Plus I sort of pushed the old RepRap off into a corner. I eventually loaned it to someone at Milwaukee Makerspace, who promptly broke it, and then I repaired it (again) and got it working, a bit…

To be honest, the machine is quite a mess, but I’ve decided to stop being sentimental about it. It’s existed for a while now as a “This is how we used to build printers!” example, but I decided that the time has come to take drastic measures, and it’s all coming apart.

Over the years I’ve managed to scrounge up some nice components for a new build. Some 450mm lead screws from an unnamed medical facility, some 12mm x 720mm smooth rods from an old laminator, etc. Couple that with the donor parts from the old RepRap and I’ve got most of what I need to build a new machine.

RepRap v07

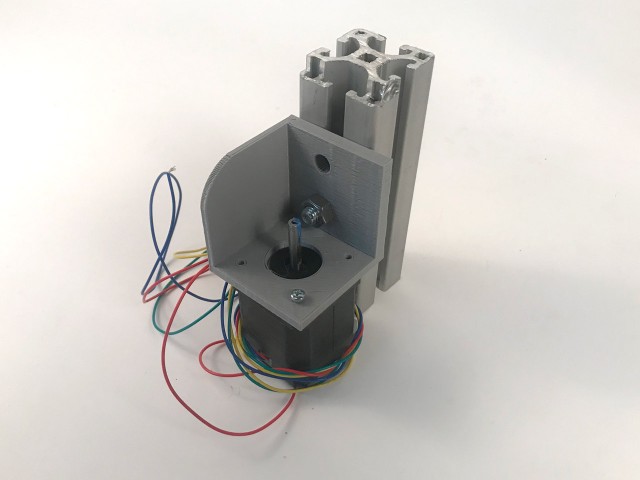
The one thing I don’t have is extrusion for the frame, but Mark (of SoM and UMMD fame) does. He’s got a pile of 40mm Aluminum extrusion which I might acquire to start on this new RepRap journey. (If I do not acquire it, I may end up going with 20mm extrusion. Not ideal, but possibly more affordable.)

I won’t go to the lengths that Mark has in building his heavy-duty industrial-style printers, but I’m headed in that direction just a bit. I’ve looked at the Wilson TS, other T-slot designs, and any other printer using Aluminum extrusion, and I’ve got a rough design figured out. I may try to use machined parts rather than printed parts where I can (meaning where it’s practical and affordable.)

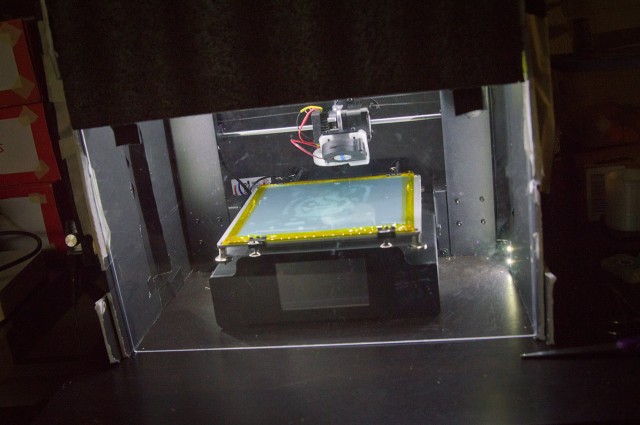
I’ll probably stick with a 200mm x 200mm heated bed for now (since I’ve got two of them) but since I have the long lead screws already, I’ll be shooting for a 200mm x 200mm x 400mm build volume. Quite a bit more Z than the 180mm of my Maker Select Plus.

While I want this to be an economical build, mostly by using components I already have, I’m not trying to build a super-cheap 3D printer. I considered buying a second printer, but the pile of parts and a mostly functional donor machine convinced me to go the route of designing and building my own. Plus, this means I’ll have a printer to experiment on while still having another that actually works! (In theory, anyway.)

Categories
Uncategorized

RepRap Report #6

diii-cooler-0906

It’s been a while so it’s time for another RepRap Report! So what’s changed since last time? So much… I’ll try to hit it all.

I got rid of the BuildTak and moved to a PEI Sheet. I upgraded to the Micro Swiss All Metal Hotend which made printing ABS reliable once again.

I repaired fans, I replaced fans. And then I did it again. Once I got ABS printing up to speed I printed a DiiiCooler, which I finally installed, and still haven’t used (since I’m printing ABS at the moment.) And yeah, I’m waiting for some new extruder fans to arrive after last night’s hurried soldering session to repair another bad fan.

printer-enclosure-0904

If all of this seems silly, well, in a way it is, and it isn’t. When you buy a thing (be it a 3D printer or a car) you can go cheap knowing that things might break or need upgrades, or you can pay a lot more for quality out of the gate, with the hope that things don’t go wrong or are of a higher quality. I knew that getting the Monoprice Maker Select Plus meant compromising so I could afford a printer (which was replacing my old RepRap Prusa i2 kit from 2011) and I was fine with that. There are many routes you can go with a printer. I’m going the “cheap” route right now, I’ve got friends who work for the “expensive but reliable route” companies, and then there’s the custom build route. They’re all legit choices.

enclosure-lights-0905

Oh, I don’t think I ever mentioned my enclosure. It’s built from foamcore board and covered with the packing foam that the printer came in. The front window is a piece of Polycarb I got from Amazon. It works. It’s not pretty. That’s okay. Besides keeping the heat in, it keeps the cats out. Also important. I also added a set of 12 volt LED lights with an on/off/dimmer switch.

led-dimmer-0913

If I had to build an enclosure again (and I might need to soon) I’d probably go with foamcore again, but take some effort to make it look good this time.

filament-rod-0916

I still feed the filament from a metal rod hanging above my printer in the basement. It works fine. It’s not portable, and that’s probably okay. The drybox I was working on failed, and I haven’t had the energy to revisit that project. That’s okay for now.

Besides all that, I’ve been just printing things. Nothing too exciting, but that may change soon. Happy Extruding!

Categories
Uncategorized

RepRap Report #5

reprap-3dprinter

This time in the RepRap Report we’re going to talk about the functional 3D printer, and not the old RepRap Prusa which I don’t know the status of since someone else has it right now…

I upgraded to a CNC Machined Lever and Extruder Plate back in June after having some issues printing ABS. I also replaced the 2m PTFE tube inside the hot-end, and now (thanks to eBay) have enough to last for years.) Other things I’ve done is add a PEI print surface attached to a piece of glass, and I had to replace a fan I broke while trying to attach it while it was spinning (which is a bad idea.)

Besides all that, it’s just been cranking out prints of various types for work, fun, and whatever else I create. Nine months into it, I’m still pretty happy with the Maker Select Plus for basic 3D printing using PLA.