Bleargh!!! Sorry, had to get that out…
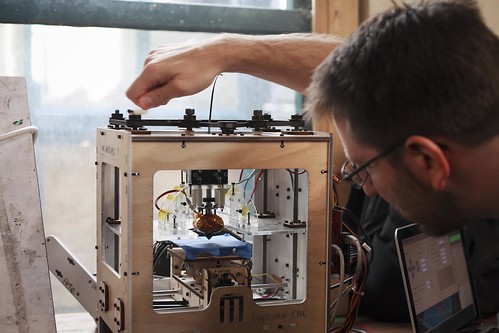
I seemed to be able to do nothing right last night at Milwaukee Makerspace. I joked that the only thing I was able to make was a mess. Besides hot-gluing my own thumb (though not my ass) and having many MakerBot failures, I was able to print two things, though even those two didn’t turn out that great. I’m getting a bit frustrated with the MakerBot Cupcake, and the mysteries of Skeinforge aren’t helping.
I’m waiting for MakerGear to ship my RepRap Prusa Mendel, which of course will require assembly, and configuration, and ten other weird things, but hopefully at the end I’ll have better prints than the Cupcake. Don’t get me wrong, the Cupcake is fun, but it’s also frustrating.
So I printed the 70mm lens gear, even though I really need one that’s about 85mm, just because I’ll be using a follow focus next week, and I want to see if this works. The gear teeth look good, even if the print itself did not turn out great.

I also tried this bottle opener, and again, while it is OK, it’s definitely not great. It looks pretty sloppy. The weird bits in the centr are the Milwaukee Makerspace logo, which was way too small to even attempt to print. It also filled in some of the hole areas a bit, which I had to remove the plastic from. That may be due to me editing the STL in Sketchup and creating a new STL with my own edits. I don’t know…
I think I need to take a break from printing things for a bit, and work on some other things. Printing takes a long time, and if it’s the only thing I do at the space, I feel like I’m neglecting other projects. (I did work on my Nutellastruder a bit, of course that led to the hot-gluing of my thumb!)

Oh, we did play around with KinectToStl a bit. Again, the results were not super-impressive, but it was fun to experiment with it. I didn’t bother to read the instructions, so there may be some good times on making it work better, but that will be something to try another day.
Update: The bottle opener broke while trying to open a bottle. #fail


 >
>