Categories
Uncategorized

Teensy vs. Atmega32u4 Breakout Board+


Photos from Adafruit Industries.

I remember seeing the Teensy when I was digging into Arduino stuff last year, and it looked interesting, mainly due to it being small and cheap. (I like cheap!) But since I’m a lot more interested in what the Arduino has to offer, I didn’t look into the Teensy very much.

The Teensy is interesting though because out of the box it functions as a USB HID device, which means it can very easily emulate a keyboard or mouse. (See this Awesome Button post for a neat example.)

If you didn’t know, I’m a big fan of Adafruit Industries, not just for their amazing customer service and great products, but for their support of the open source movement, especially the work they’ve done with open source hardware. Adafruit actually sells the Teensy, but they also came out with a product called the “Atmega32u4 Breakout Board+” (terrible name, eh?) which is like a Teensy, but not like a Teensy.

Here’s where it gets weird… or interesting… or both…

By all respects, the Teensy is pretty cool, as I said, it’s small, and cheap, and can emulate a USB HID, and if your project needs that, it’s a good fit. See the Teensy page for more info.

Now, the “Atmega32u4 Breakout Board+” (terrible name) by Adafruit is similar but different. You can check out the Atmega32u4 Breakout Board+ page for more info.

Ultimately, I think I’d prefer to use the Atmega32u4 Breakout Board+ from Adafruit, and for a good explanation, see this Adafruit blog post about the Teensy, and for extra credit, see A Brief Essay About the Benefits of Open-Source Hardware.

It’s a shame the Teensy is not open source hardware, as I’d prefer to support vendors of open source hardware.

So I’ve got a project planned, and it will use a Teensy. So why not use a Atmega32u4 Breakout Board+? The first reason is, I don’t think I’m ready for it. In reading through the Atmega32u4 Breakout Board+ docs and digging through the forums a bit, it looks like Atmega32u4 Breakout Board+ development is not exactly easy for a beginner. I’d like to get into it at some point, but right now, the Teensy seems like an easier path to completing my project, and maybe once it’s done I can look into working with the Atmega32u4 Breakout Board+.

I know this may seem like a small thing, but I’d really like to support open source hardware when I can, the same way I try to support open source software when I can. It’s always a struggle.

Categories
Uncategorized

Egg-Bot for Newbies

Egg-Bot for Newbies

Hello folks! So you came here to hear about the Egg-Bot! Well step right up and buy my new book “Egg-Bot for Newbies!”

But seriously folks…

As we all know, an expert is just someone who knows more about a subject than you do… so with that said, if you know less than I do about the Egg-Bot, consider me your expert.

At the Milwaukee Makerspace Grand Opening plenty of people had questions about the Egg-Bot, and I did my best to answer them. Here’s a quick rundown of some of the things I said, as well as what I’ve learned in the past few weeks.

It’s a kit.
Don’t expect to pull Egg-Bot out of a box and plug it in, you have to build it first. It’s all just assembly, no soldering, but you will need some tools and the ability to follow directions and not lose very small parts. Set aside a few hours. I set aside 3 but was done and plotting eggs in less than 2, and I was even drinking while I assembled it, but I’m an expert.

You’ll need Inkscape.
The open source vector art application Inkscape is used to send the artwork to the Egg-Bot. You’ll need to install it, as well as the Egg-Bot extension, and I’d recommend the Hershey Text extension. And Mac users will need X11. If any of those things confused you, you’ve got a little research ahead of you. If all you plan to do is print other people’s Egg-Bot specific designs, it will be a little bit easier. If you plan on making your own designs, or making existing designs work with the Egg-Bot, you’ve got some work to do. (If you are already an expert at Inkscape, well, then you’re lucky.)

Get ready to tweak.
Tinkerers tinker. Tweakers tweak. !? What I mean is, you’re going to have to mess with things. Little things. Egg-Bot is not just “set up and go” ready Freddy. You need to find the center of things, and the height of things, and what numbers equal what settings. And not just for the hardware, but for the software as well. If you have a problem figuring out how the DVR works to record “Glee” you might be in trouble…

But hey, don’t let me scare you… I’m not trying to. In fact, the Egg-Bot kit is not rocket science (that’s the Rocket-Bot kit) but it does require a bit of work. If doing some work before you have some fun doesn’t interest you, well, I can’t help you.

There is a mailing list, and a wiki, and the folks at Evil Mad Science are awesome and helpful. So there’s that.

And one more thing… I may not be an expert, but I’m willing to share what I know, so for the locals (meaning, near Milwaukee, Wisconsin) I joked about an “Egg-Bot User Group” when I met the other guy in town who has one, but since a few people thought that was a good idea, maybe we should arrange some demo or meeting or something? If you’re interested, get in touch with me, or leave a comment.

(And yes, I tried very hard to avoid using the “Eggspert” joke. You’re welcome.)

Categories
Uncategorized

Milwaukee Makerspace Grand Opening Recap

Grand Opening
Photo by Michael Diedrick

The Milwaukee Makerspace Grand Opening & Mini Maker Fair was held on Saturday, April 9th, 2011 and wow, what an event it was! The photo above should give you a little indication of the crowd. It was “several hundred people” from the estimates I heard…

I’m mainly going to talk about my own experience, since I really didn’t get to experience much of the event, which is sad, and weird, but also cool.

Pete and Sam
Photo by Michael Diedrick

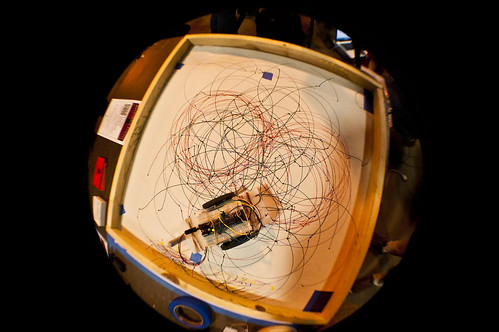
So, I got there around 10am and Matt was heard to say “Hey look, Pete brought BarCamp!” due to the amount of stuff I tend to bring with me, including projects to show, camera equipment, tripods, audio equipment, projector, tables, Time Lapse Bot, and other things. I got set up at a table and put out my projects. As usual, I was way too ambitious, and actually pulled back and didn’t show everything. This was a good decision, as there was just too much going on. The two projects that got the most interest were the Egg-Bot and the Friday Night Drawbot.

Egg-Bot
Photo by Brant

The Egg-Bot is just, well, it’s just cool. I had to explain a number of times that I did not “invent” it, but I built it from a kit. I gave a brief explanation of it (including open source software/hardware, Inkscape, etc.) to a lot of people. One kid was interested in it, and I told him how much the kit cost, and then he complained it was too much. I then described the parts used to construct it, and as soon as I said “laser cut” he was like “oh, yeah, laser cut, OK!” and then he was sold, and thought it was something he should have. (I did point out that it was all open source and he was welcome to get all the parts and assemble his own.)

Eggs
Photo by Brant

I ended up printing about 50 eggs throughout the day, pretty much non-stop. I ended up doing someone’s name on an egg, and then printing one with the word “VEGAN” on it, and then at some point a mom asked if I could print a monkey. A monkey!? Well, off to OpenClipArt.org to find a monkey. And a candy cane. And a rose. And a cat. And the Rebel Alliance logo… I somehow ended up being a one-off egg printing factory! (But it was a lot of fun, and I learned a lot more about Inkscape.)

We gave away a lot of eggs, and I (mostly) remembered to tell people they were raw eggs, and advised the kids not to squeeze them, put them in their pockets, or drop the on the car ride home. One very young girl suggested I should have got up earlier that day (maybe 4am) so I could have boiled them all. As my excuse, I told people it would be easier to preserve them by blowing out the insides since they were raw. One woman gave us a dollar for an egg. (We added it to the Makerspace Donation bucket.)

Drawbot Action

And what would the day have been without some Drawbot action!?

I don’t know, but I do know I’m lucky Sam showed up and took on a lot of the Drawbot maintenance. He also ended up exploring Drawbot in ways I haven’t yet, using the Ultra Fine Point Sharpies, and the results were pretty darn good. I’ll try to scan some of the drawing this week. I’ve also got some reprogramming of Drawbot I want to do soon.

Oh, and I ended up telling a lot of people about the Arduino, and how the Drawbot worked, and explained that it was pretty darn easy to build, and if they came down to the Makerspace on a Thursday night, someone could probably help them get started with Arduino hacking.

Now, as for the rest of the event… I missed most of it! I was at my table for nearly 8 hours straight, with just a few quick bathroom breaks here and there while Sam watched the table. I think I need a “Back in 10 minutes!” sign or something. But really, it was a blast talking to so many people and answering questions… but it was also exhausting. I didn’t feel comfortable enough to just leave the table unattended for any large amount of time, so I’m not sure what the solution is… except to have someone else work the table along with me.

I have almost no photos to share from the event, and no video (except for the stuff Time Lapse Bot shot) so head over to the Flickr pool to see some more photos.

Oh, and word from the makers is that they all loved it, it was a great/successful event, and they can’t wait to do it again. Well, they can wait about a year maybe. :)

Categories
Uncategorized

Thingiverse

Thingiverse

Update for 2022: Use Printables.com instead. — Pete

OK, so you’ve got your 3D printer, or your laser cutter, or your CNC machine (or even your Egg-Bot) up and running… but you need some files to feed these things… where do you go? Thingiverse… that’s where.

I’ve finally got around to putting some of my Egg-Bot SVG files up there. I’ve currently got the Jolly Roger and the Milwaukee Makerspace logo (stippled edition.)

You can check on the newest things being added (or follow @thingiverse on Twitter) and you can find awesome things, like this quickmount plate which matches the one we have at work! Or perhaps you need a hinge, or a coathook, or a whistle.

You can also keep an eye on the blog or the featured things, but really, the most important thing to do is to share, share, share…

Categories
Uncategorized

Protect and Soft Serve

Protect and Soft Serve

Clip art fans… Have you ever used openclipart.org?

The artwork there falls under the CC0 Public Domain Dedication license (big thanks to the artists who submit their work!)

Hey, you could even find a policeman and a soft serve cone and do something interesting with it.