

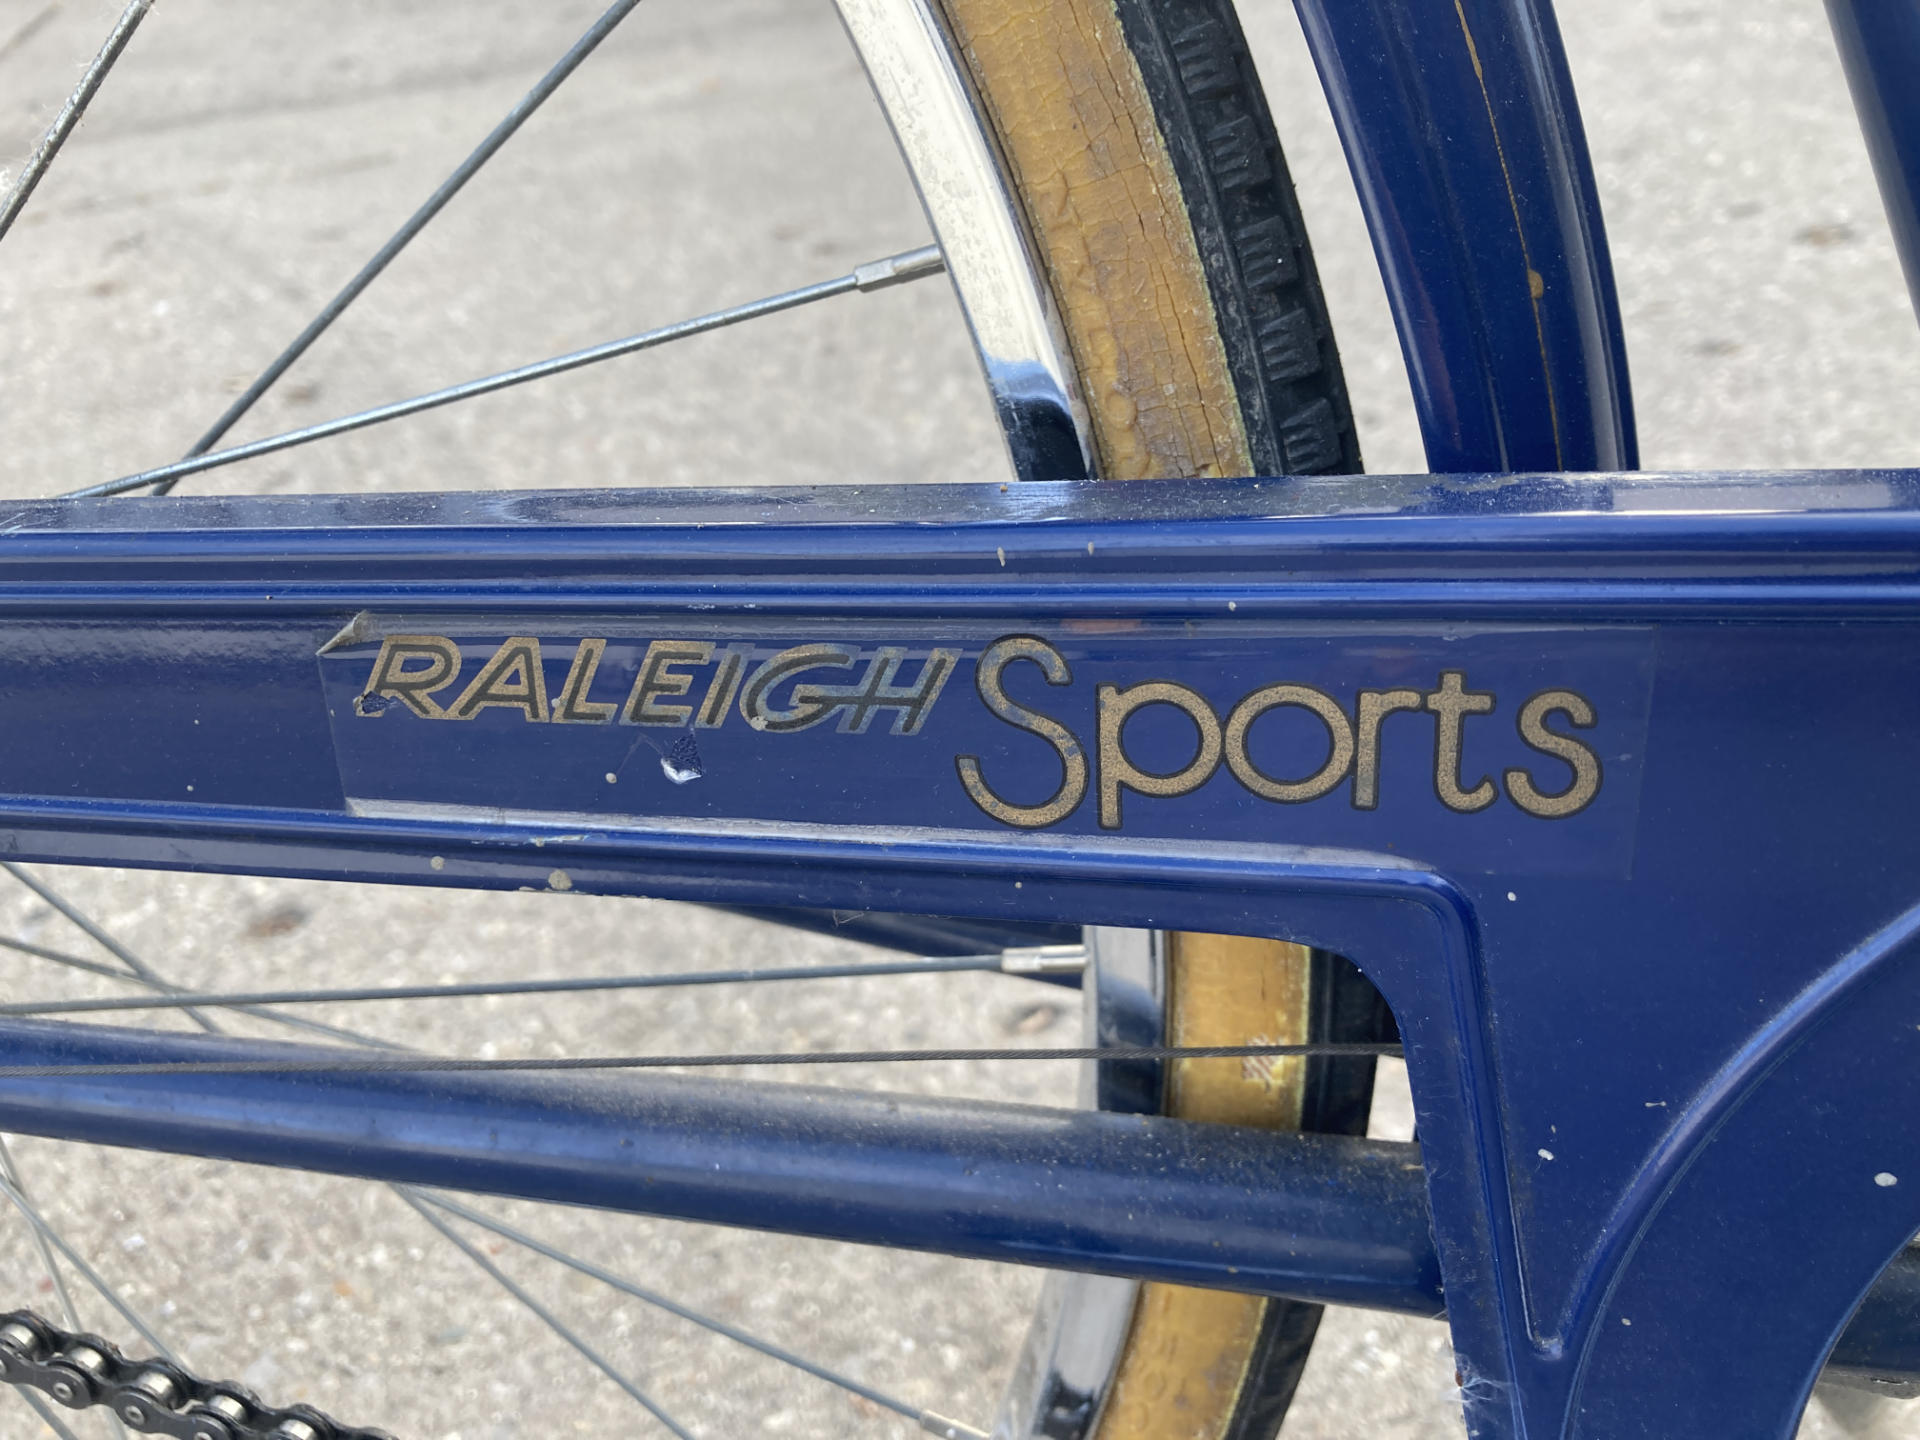
I’ll just admit it, this post is mostly to share photos of an old bike. This is a 1970’s Raleigh 3-speed bicycle. I don’t know the exact year. I rode it today for three miles and I nearly kept my normal pace.

The shifting isn’t perfect but the brakes are good. It feels pretty solid. It’s not as smooth as my Trek 7200 Hybrid but it’s 50 years old and has skinnier tires and no suspension. I just rode around the neighborhood for around 16 minutes. Also, it was 25 degrees F when I was out.
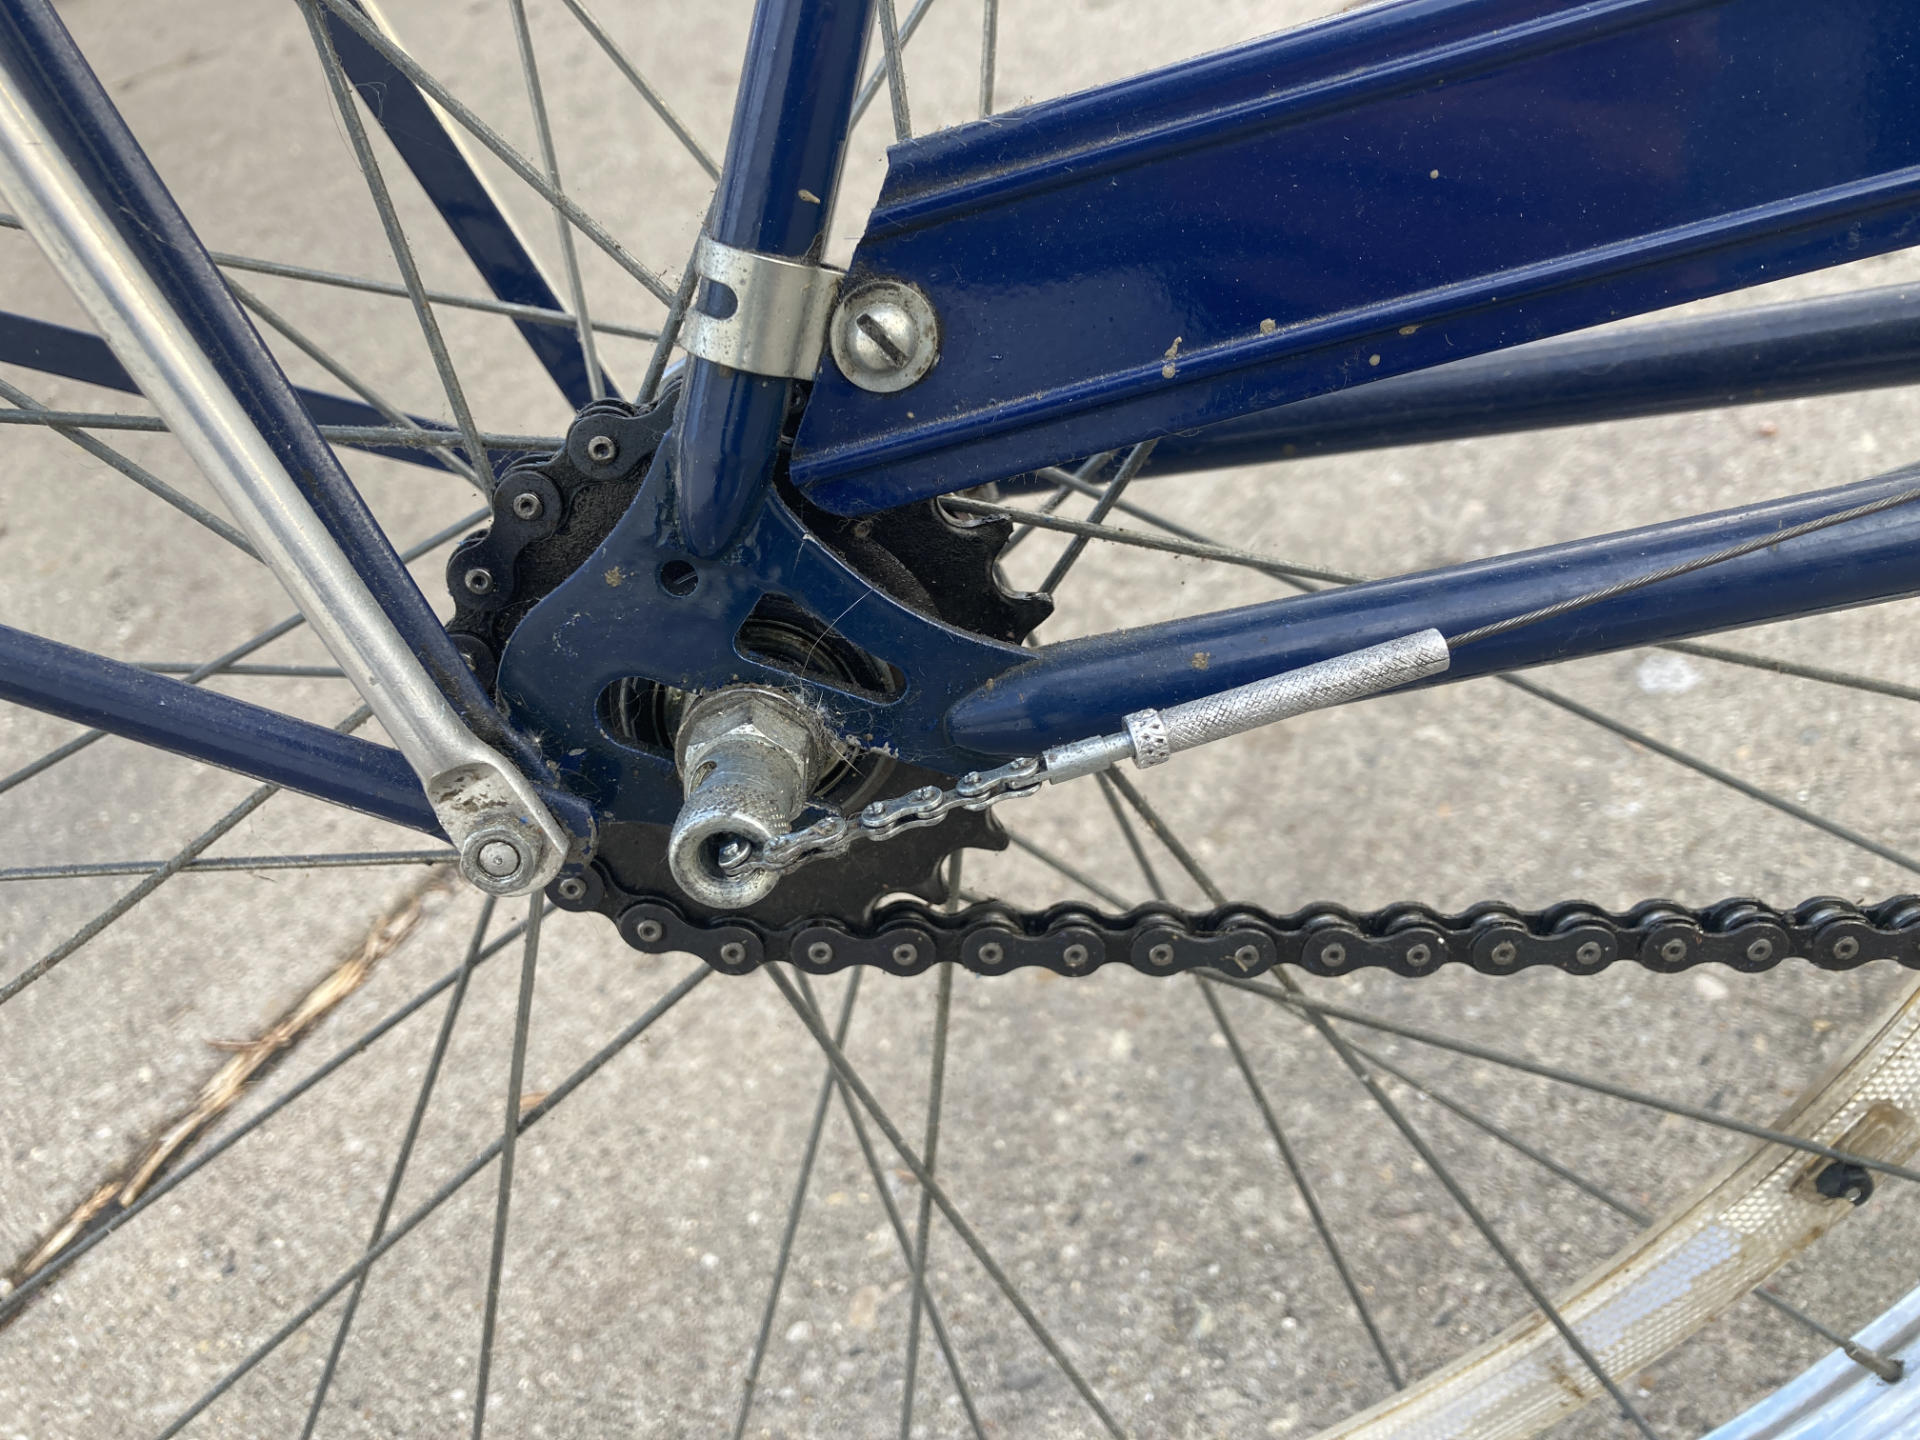
It’s got a three-speed internal hub shifting thing. I tend to ride in low gears a lot, and even in first gear the one hill I went up was a little difficult. (My wonky knee didn’t help.) Still, for tooling around on a fun ride, this thing is just fine.
There are no lights, the reflector is angled all weird, no phone holder, no 3D printed mount for a Meshtastic radio, no top bar bag… just a bike.
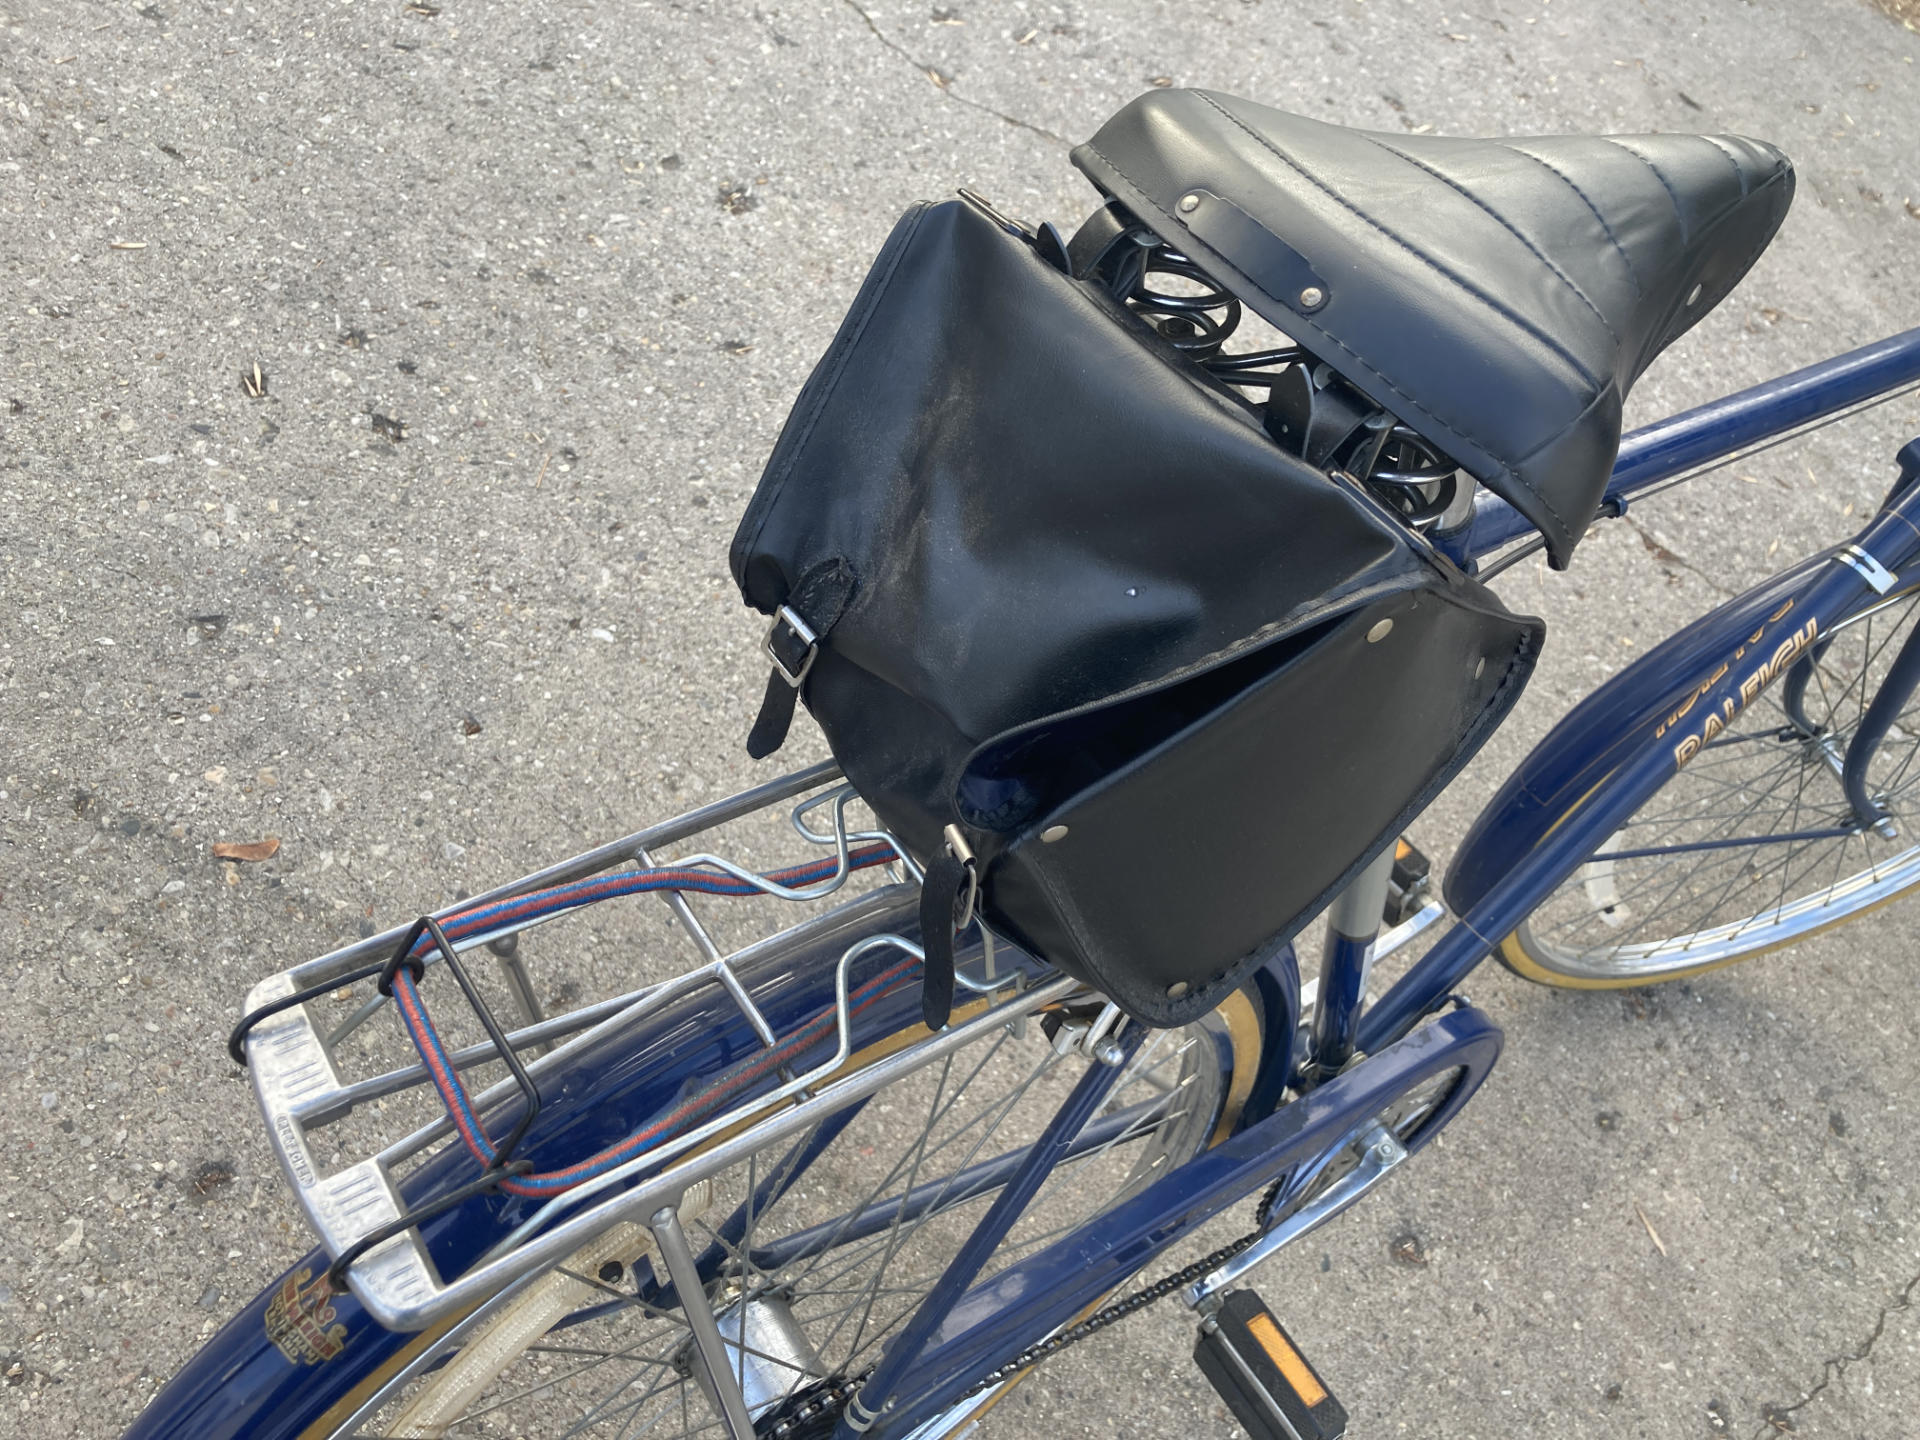
There is a bag (appears to be “fake” leather) and a bike rack on the back. The bag is probably also original, and the rack is probably also from the 1970s.
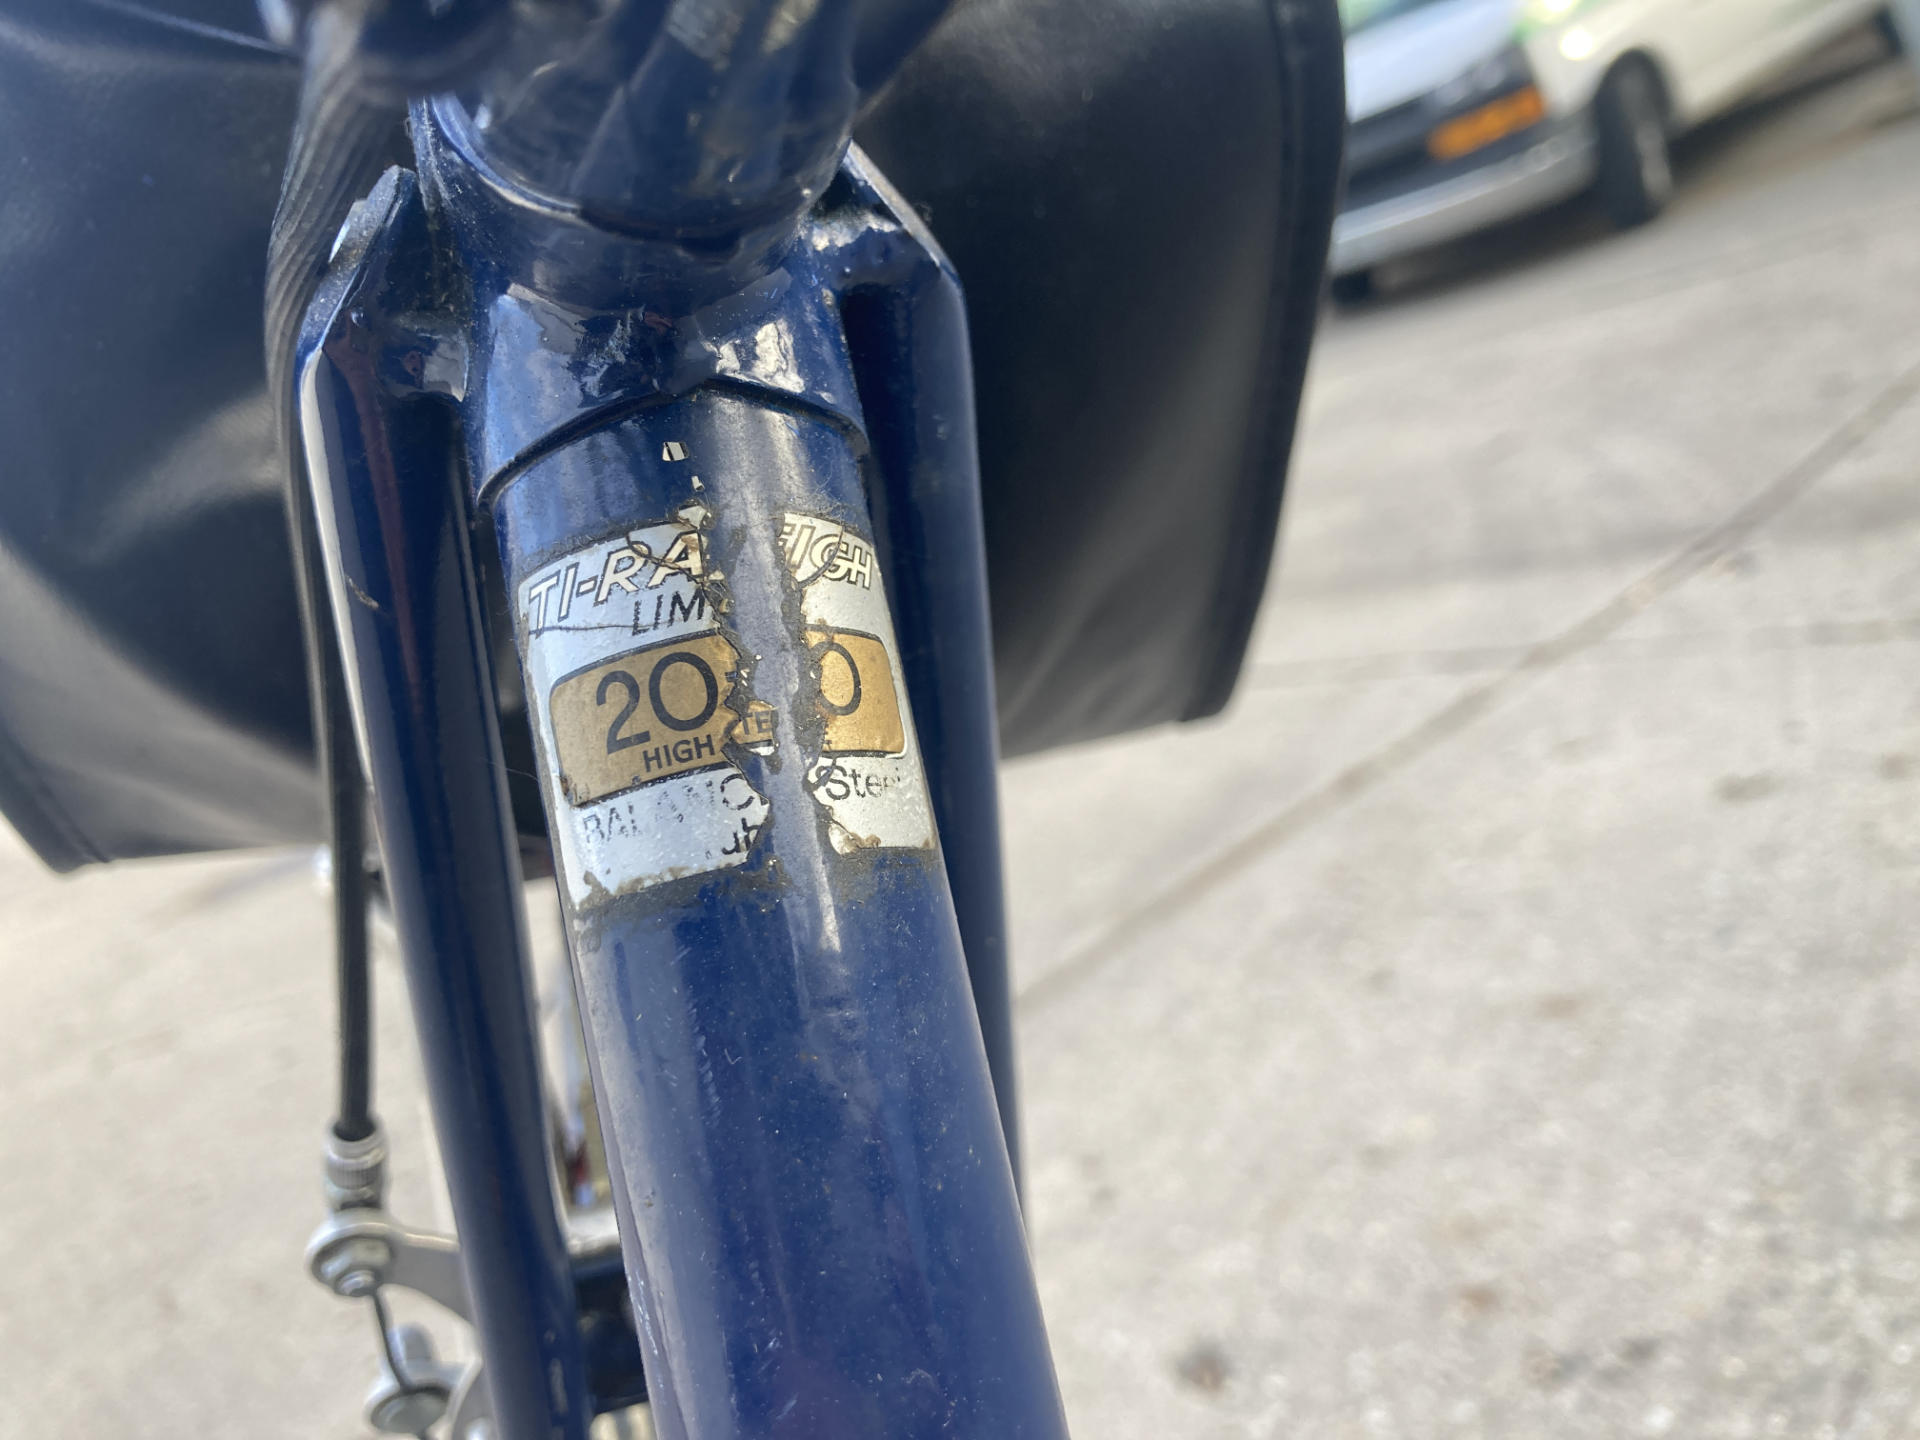
The sticker with info is all scratched up… I tried to identify it when I got it but gave up after some searching. (Feel free to keep looking and let me know!)
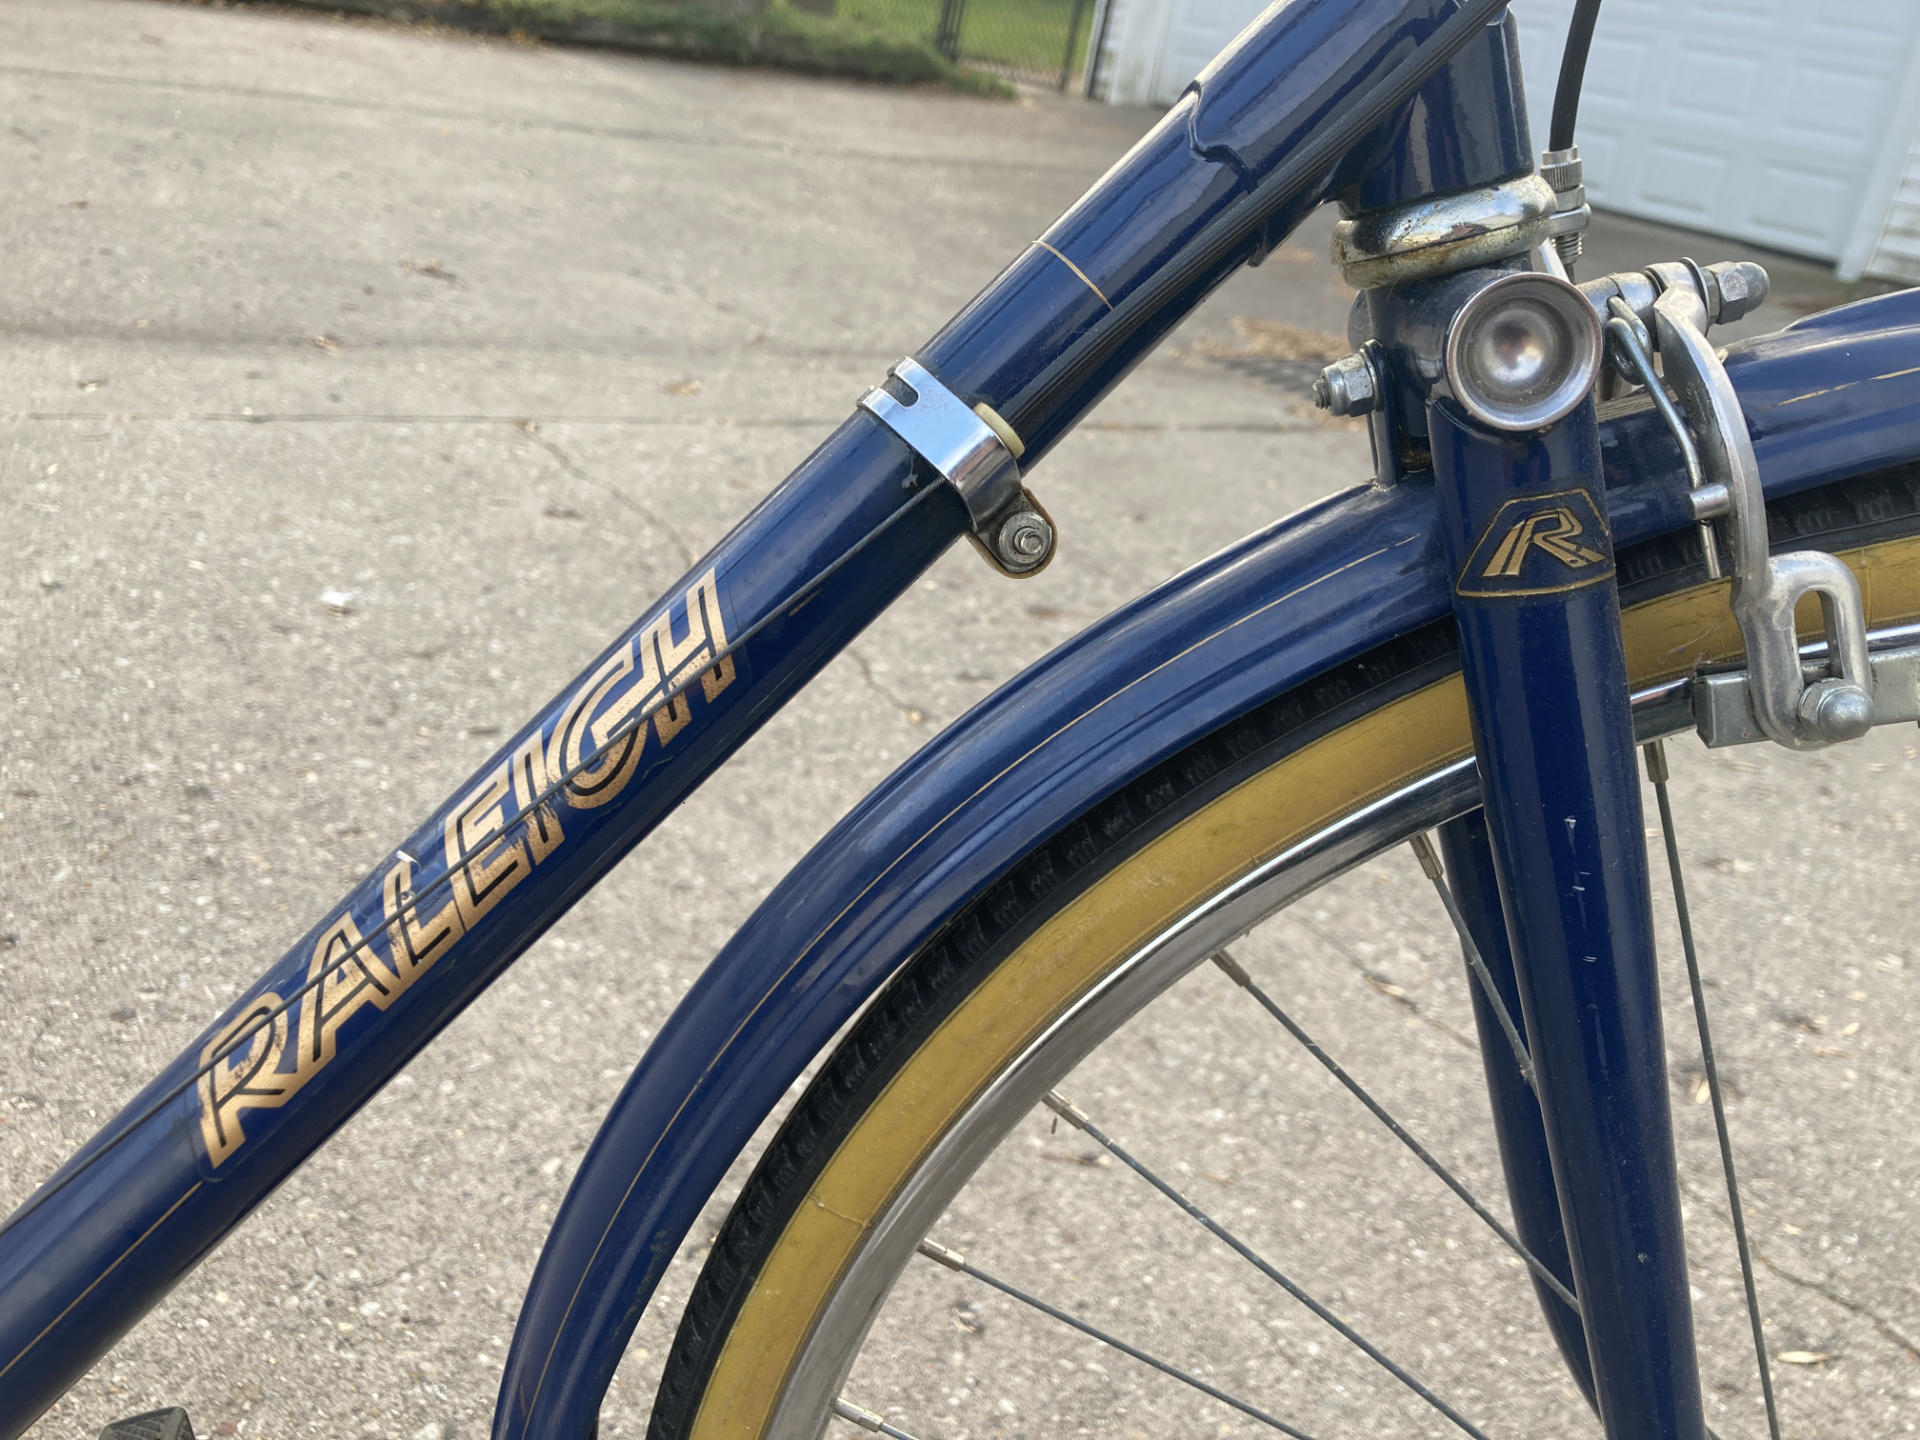
Yeah, you know its got fenders! I’d say this bike was well maintained but it may also be that it was just not ridden in the past 20, 30, 40(??) years. I don’t know. I’ll ask around. It was in my mom’s garage so it probably belonged to a family member.
Update: It did not belong to a family member. Years ago my brother helped my mom clear out the garage of someone who passed away and they got the bike at this time.
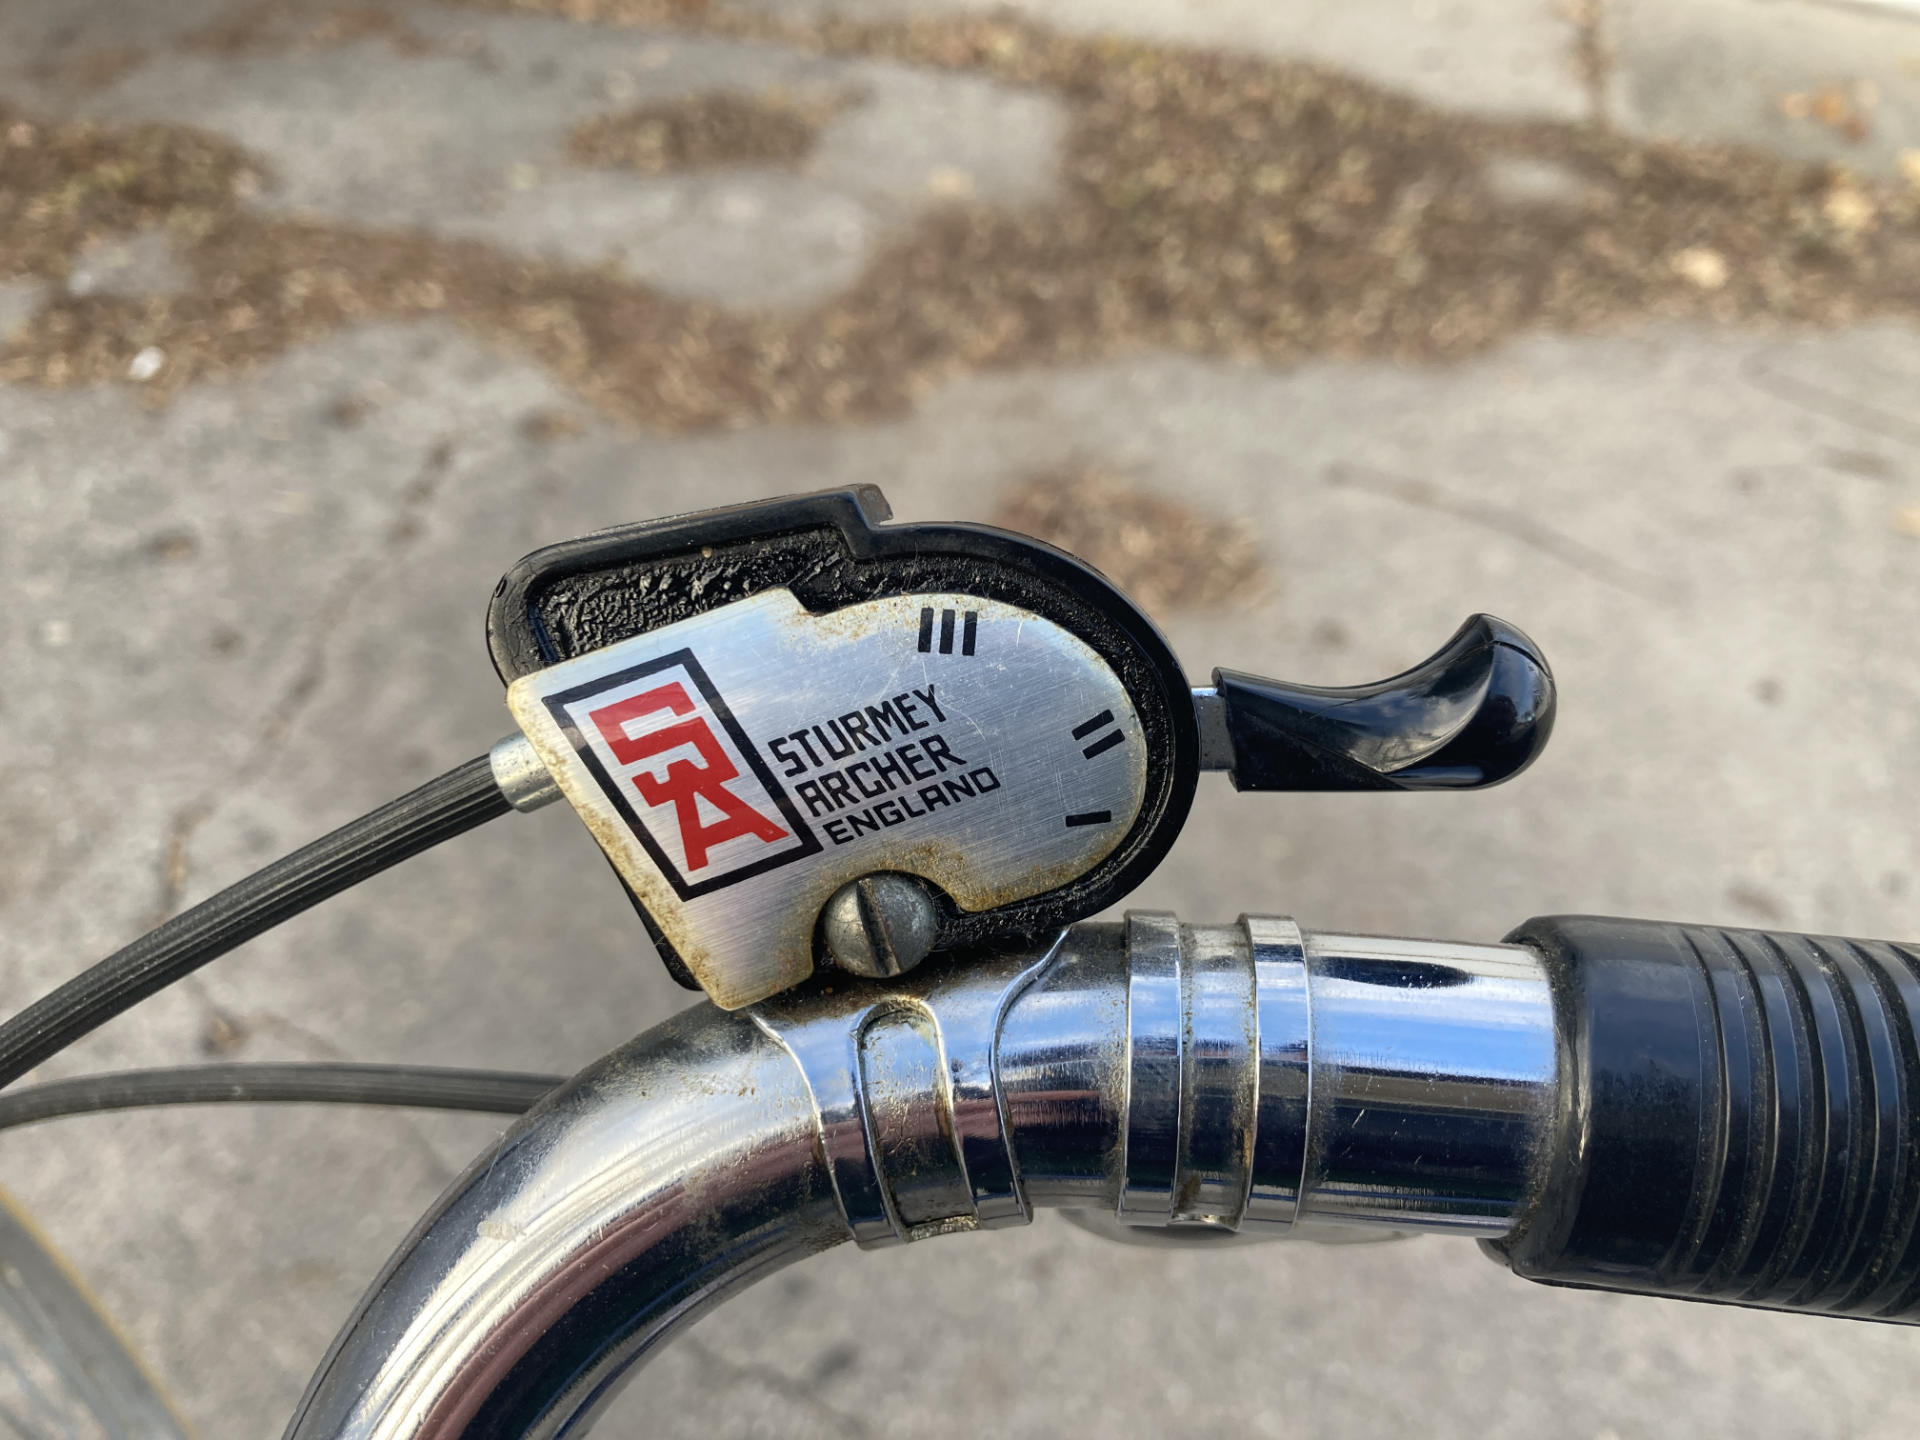
The shifter works… mostly. It didn’t always shift smoothly and sometimes I was not sure what gear I was in.
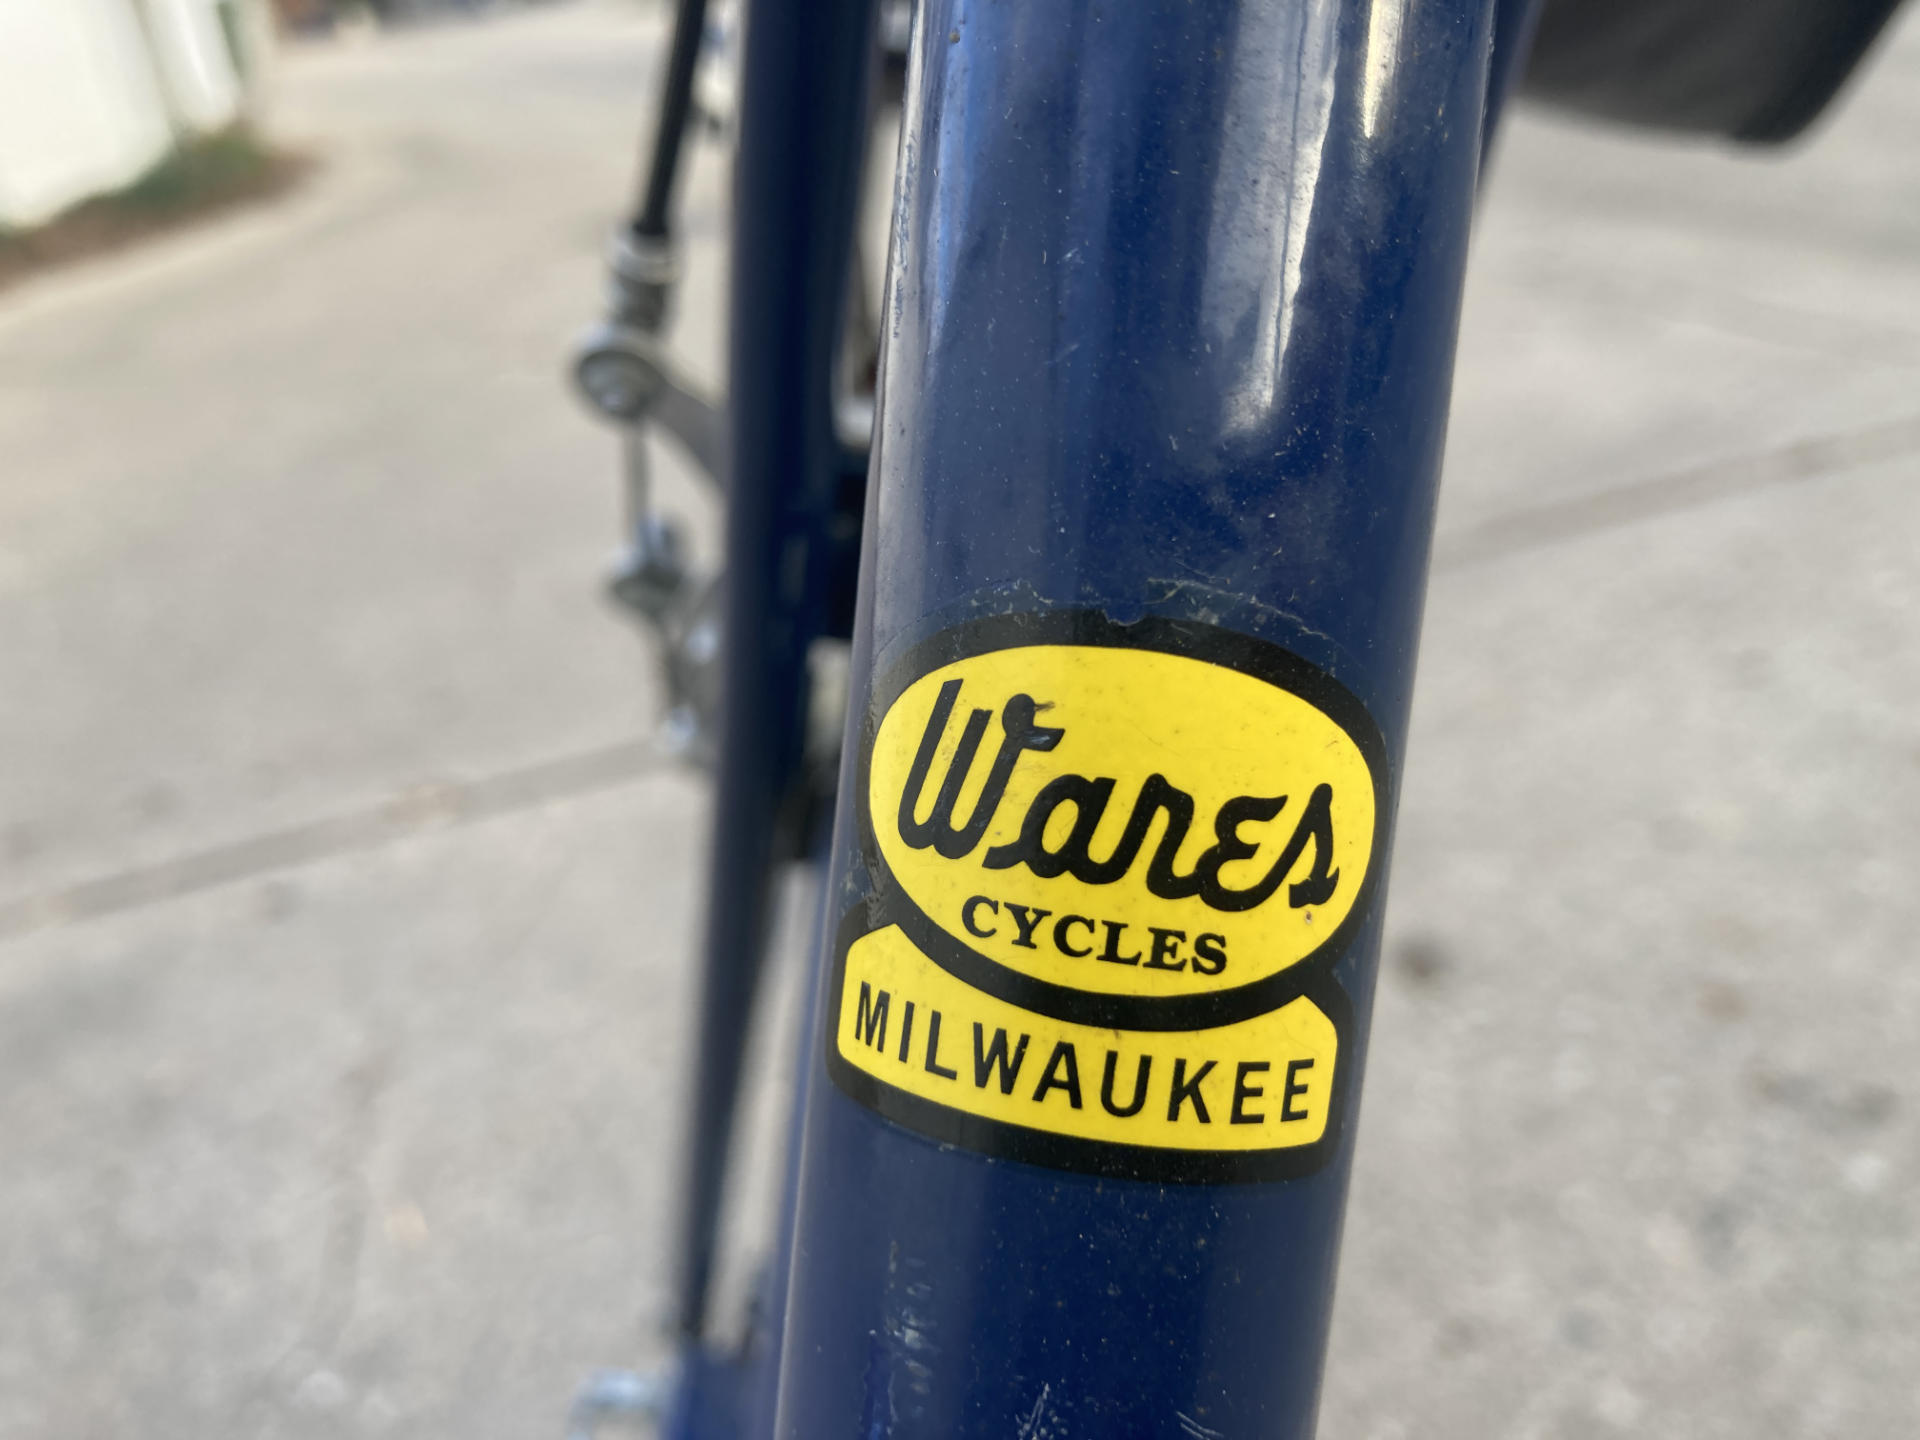
It looks like Wares is gone now… Support your LBS!
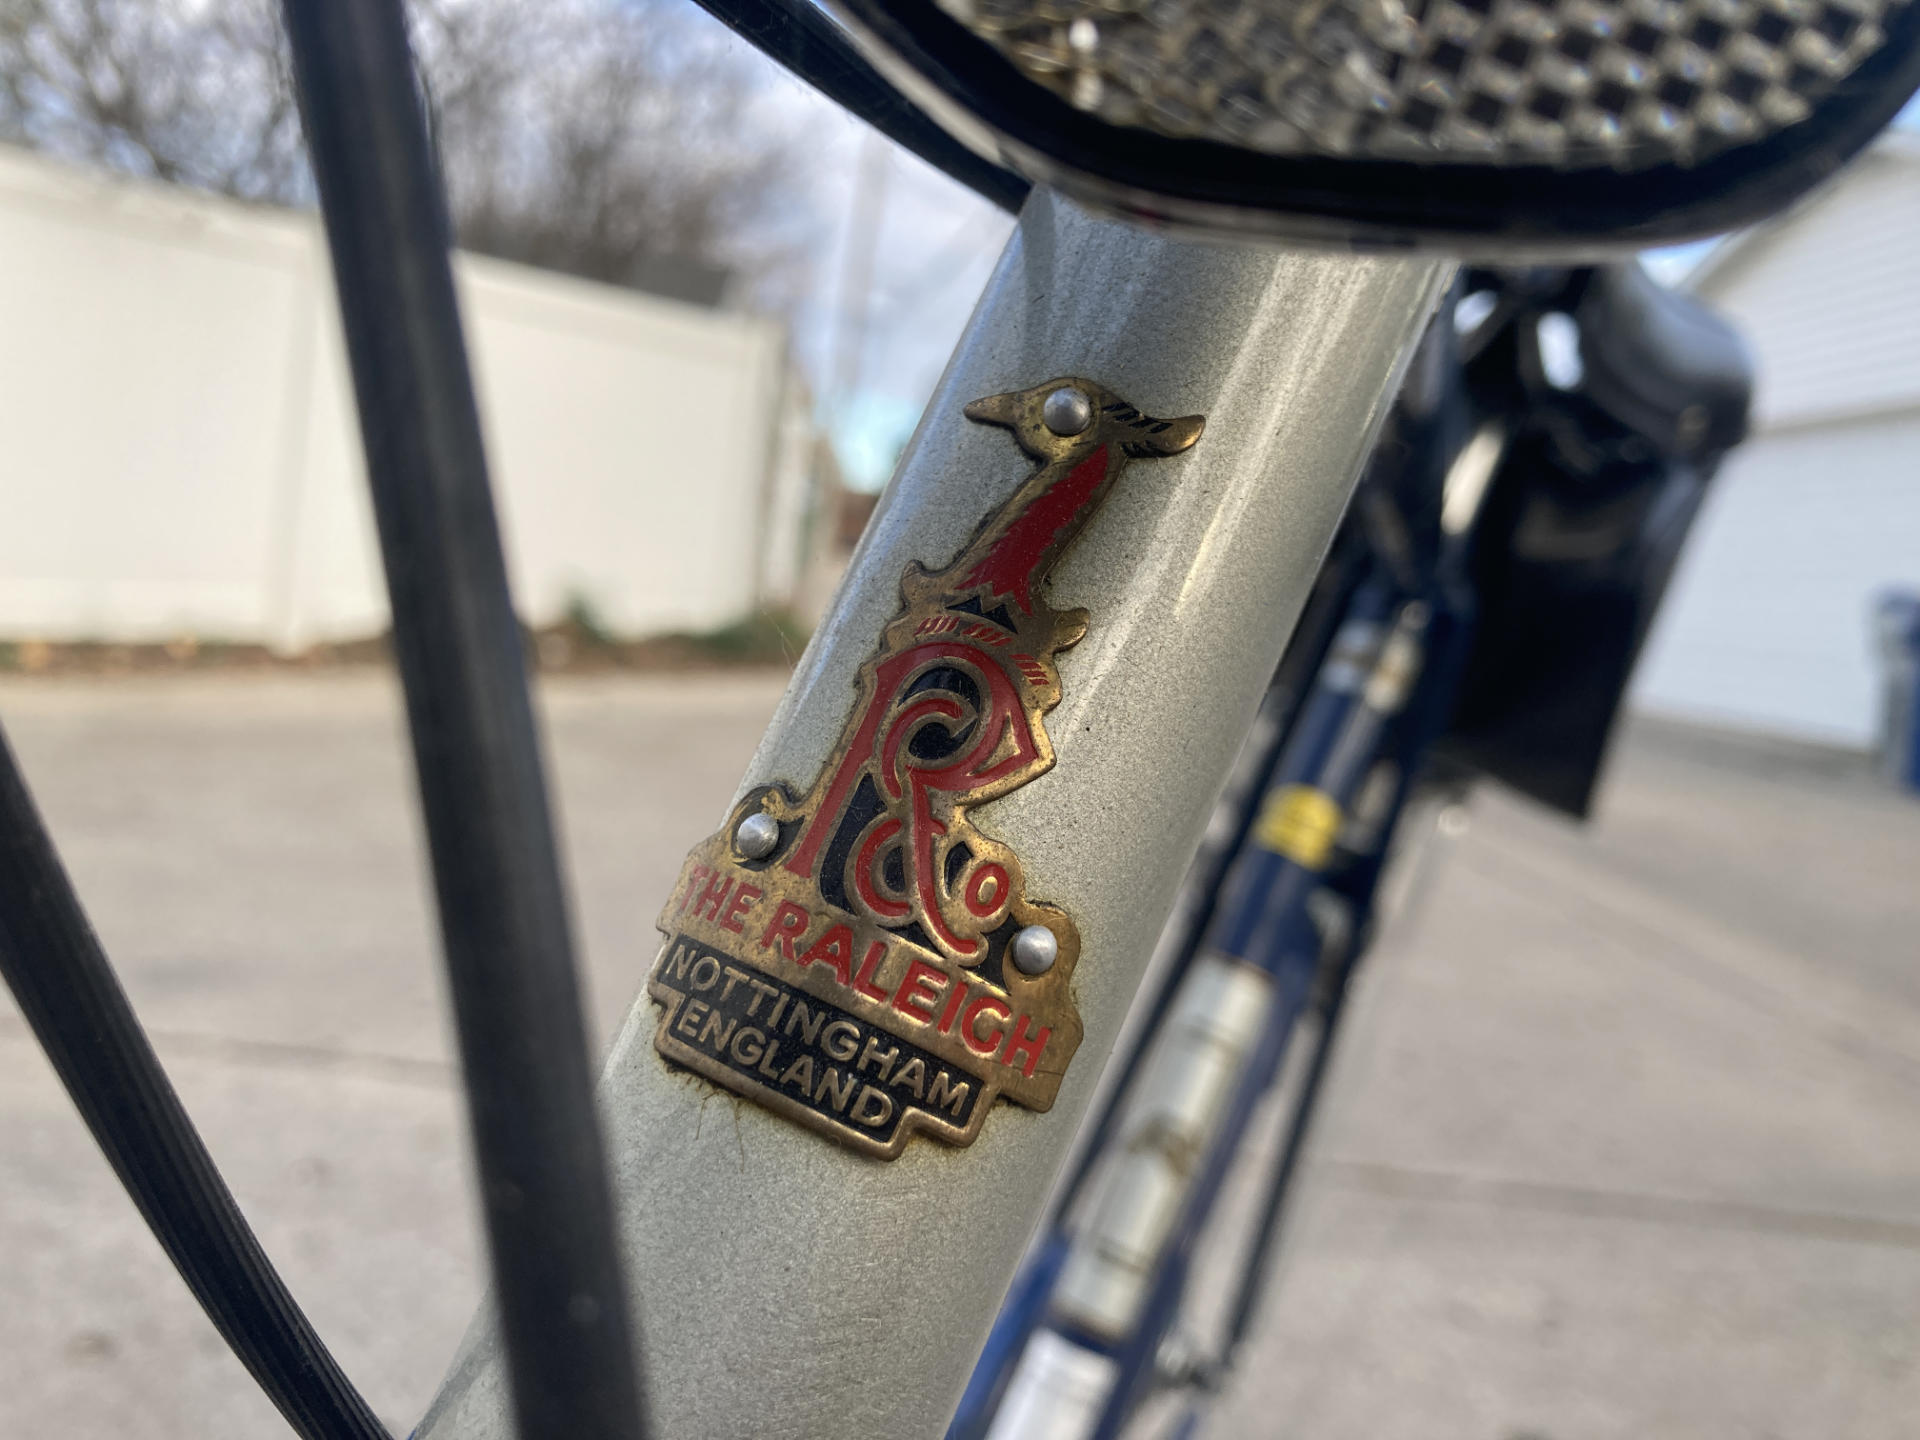
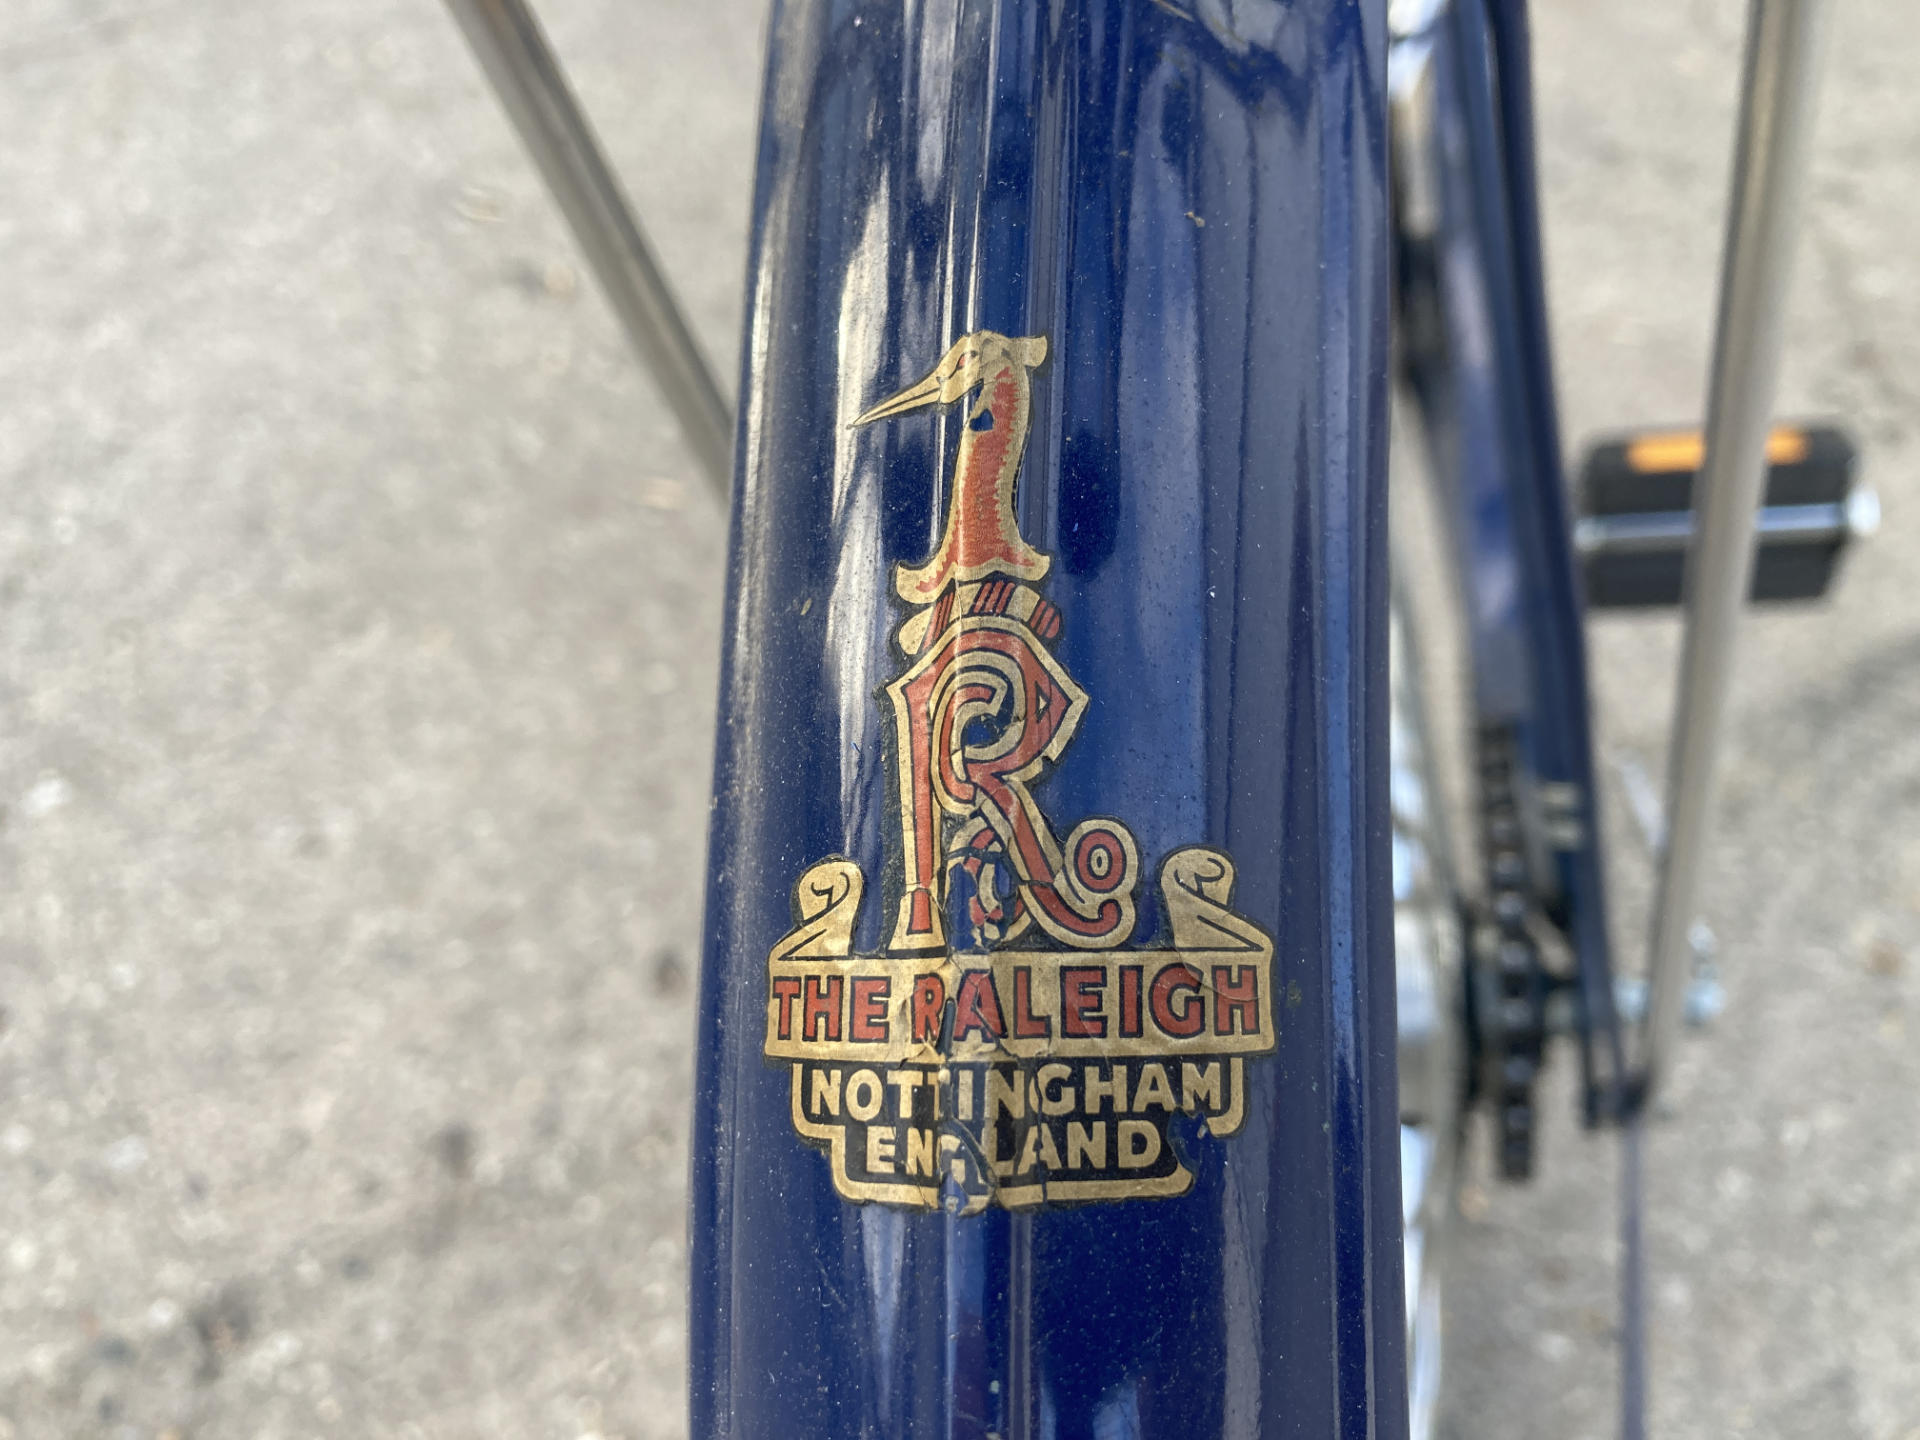
The Raleigh is from England. Yes, I have a British bike! You should hear its accent. (LOL)
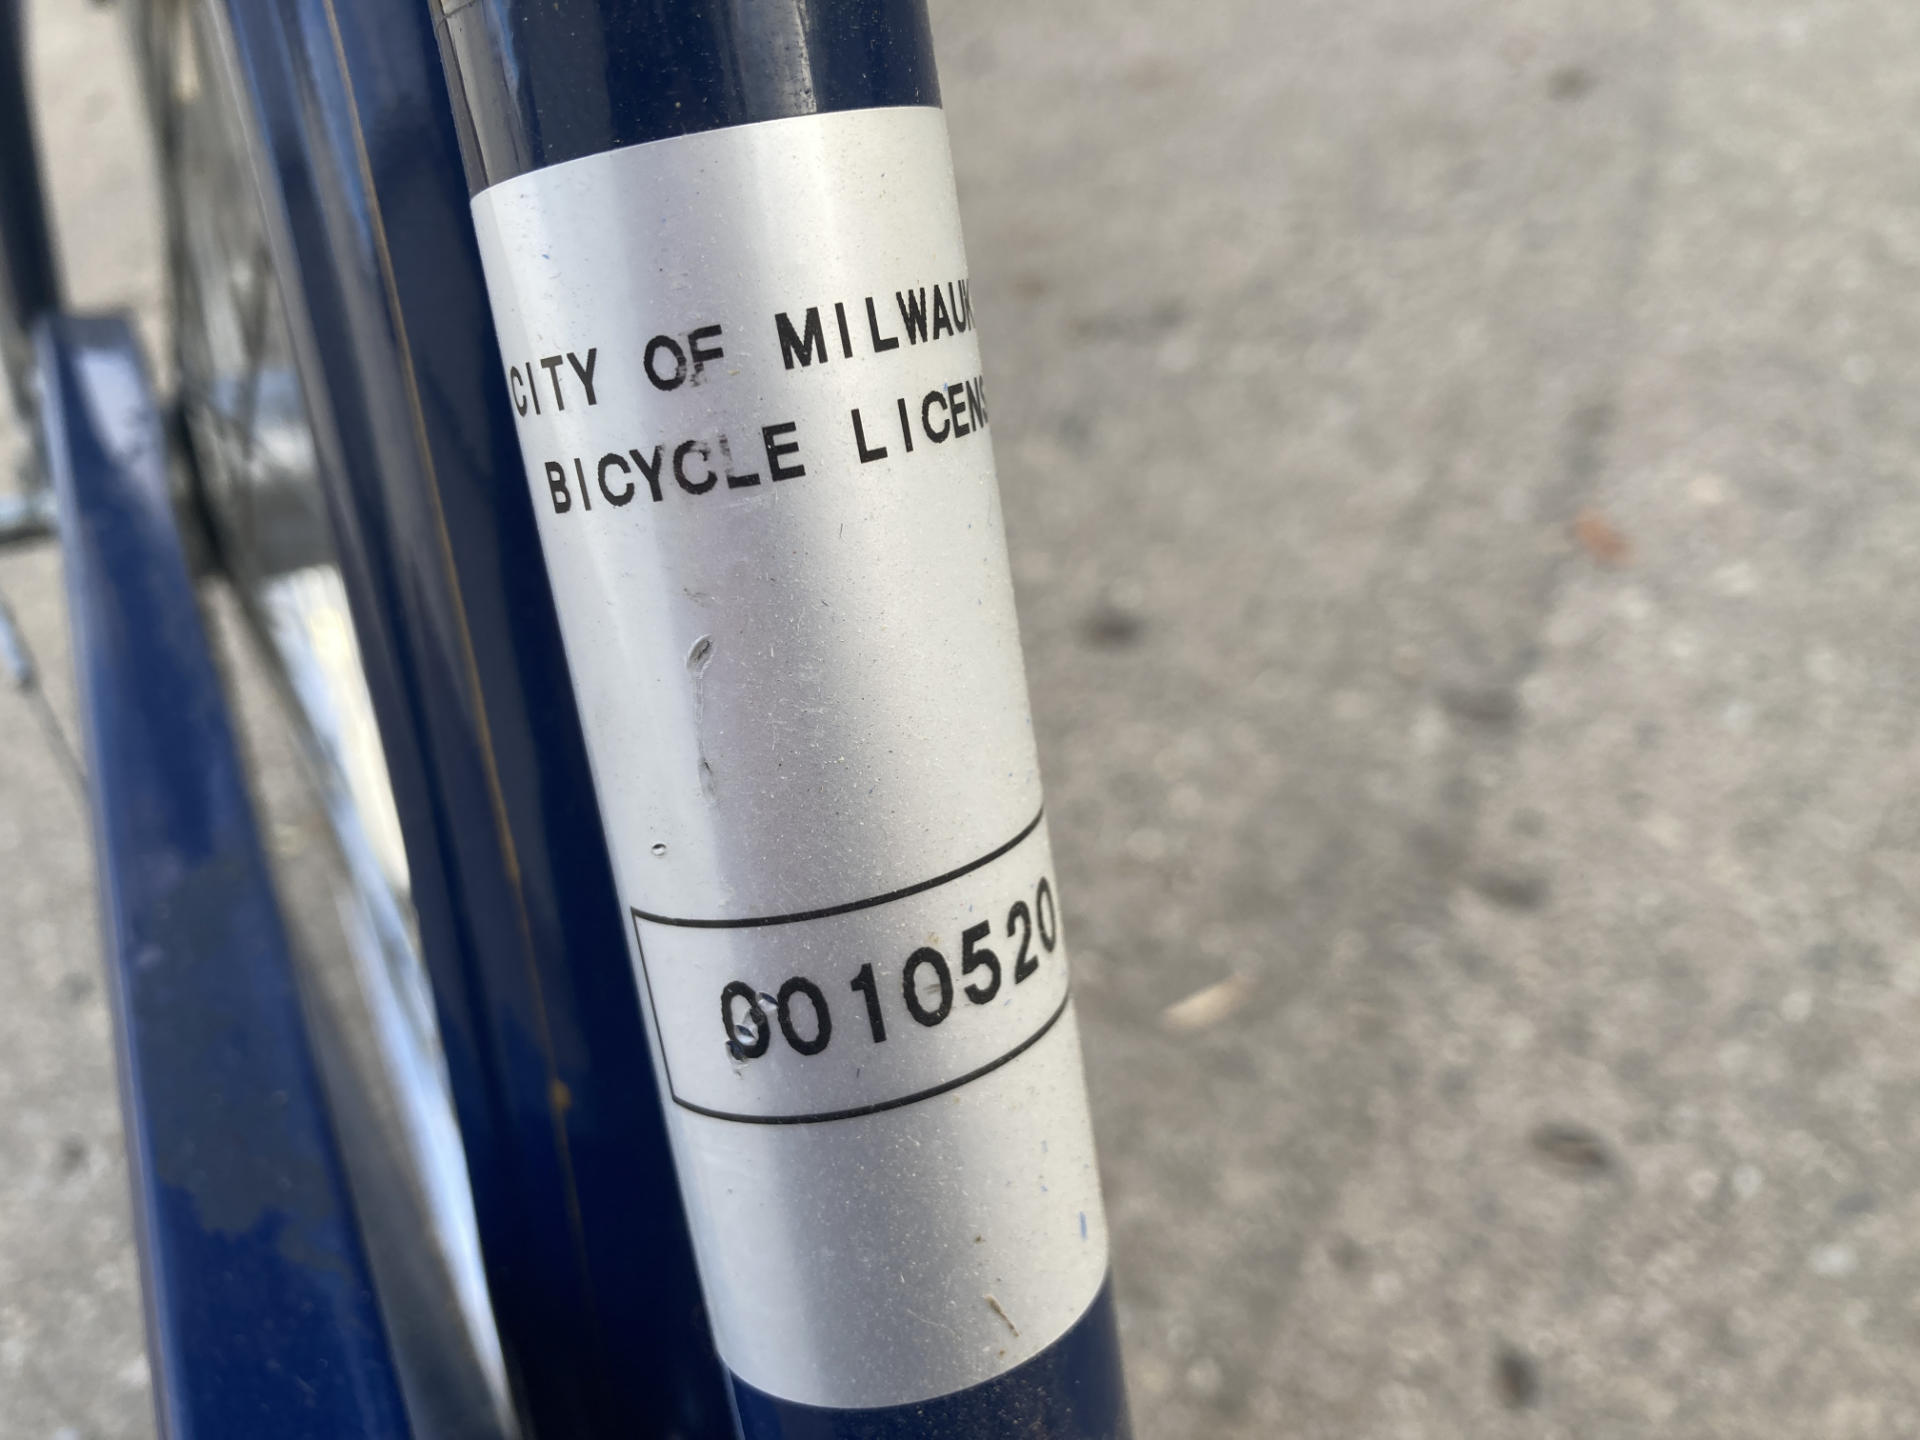
Oh crap! I better renew the bike license… Actually, I should list this on Bike Index and you should list all your bikes on Bike Index!
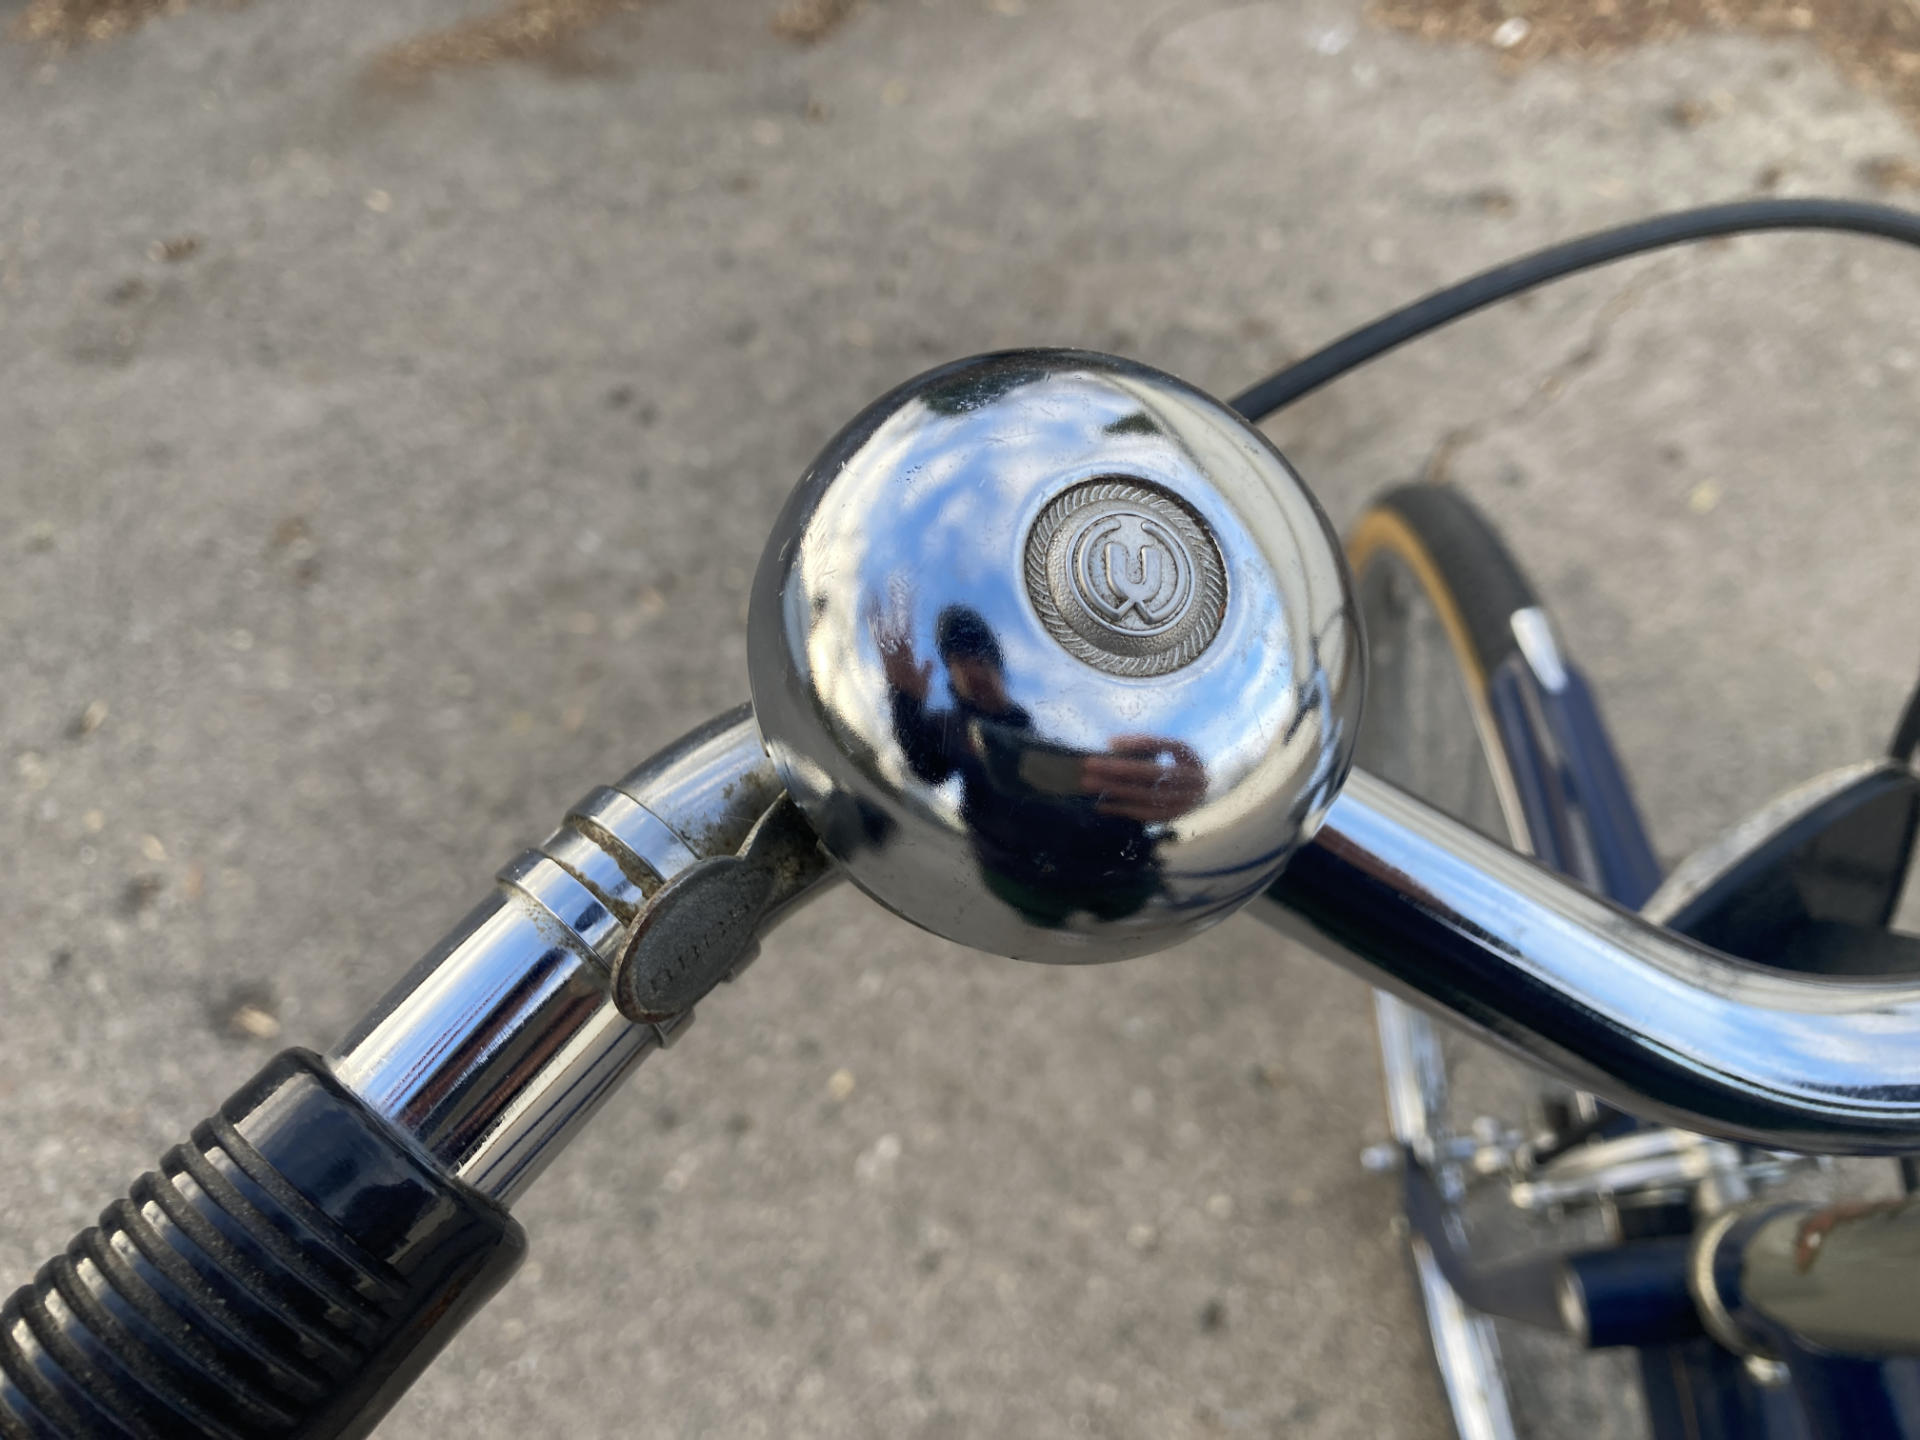
I am probably the first person in 50 years to take a self portrait (aka “selfie”) using the bell on this bike. I am both proud and ashamed at the same time.
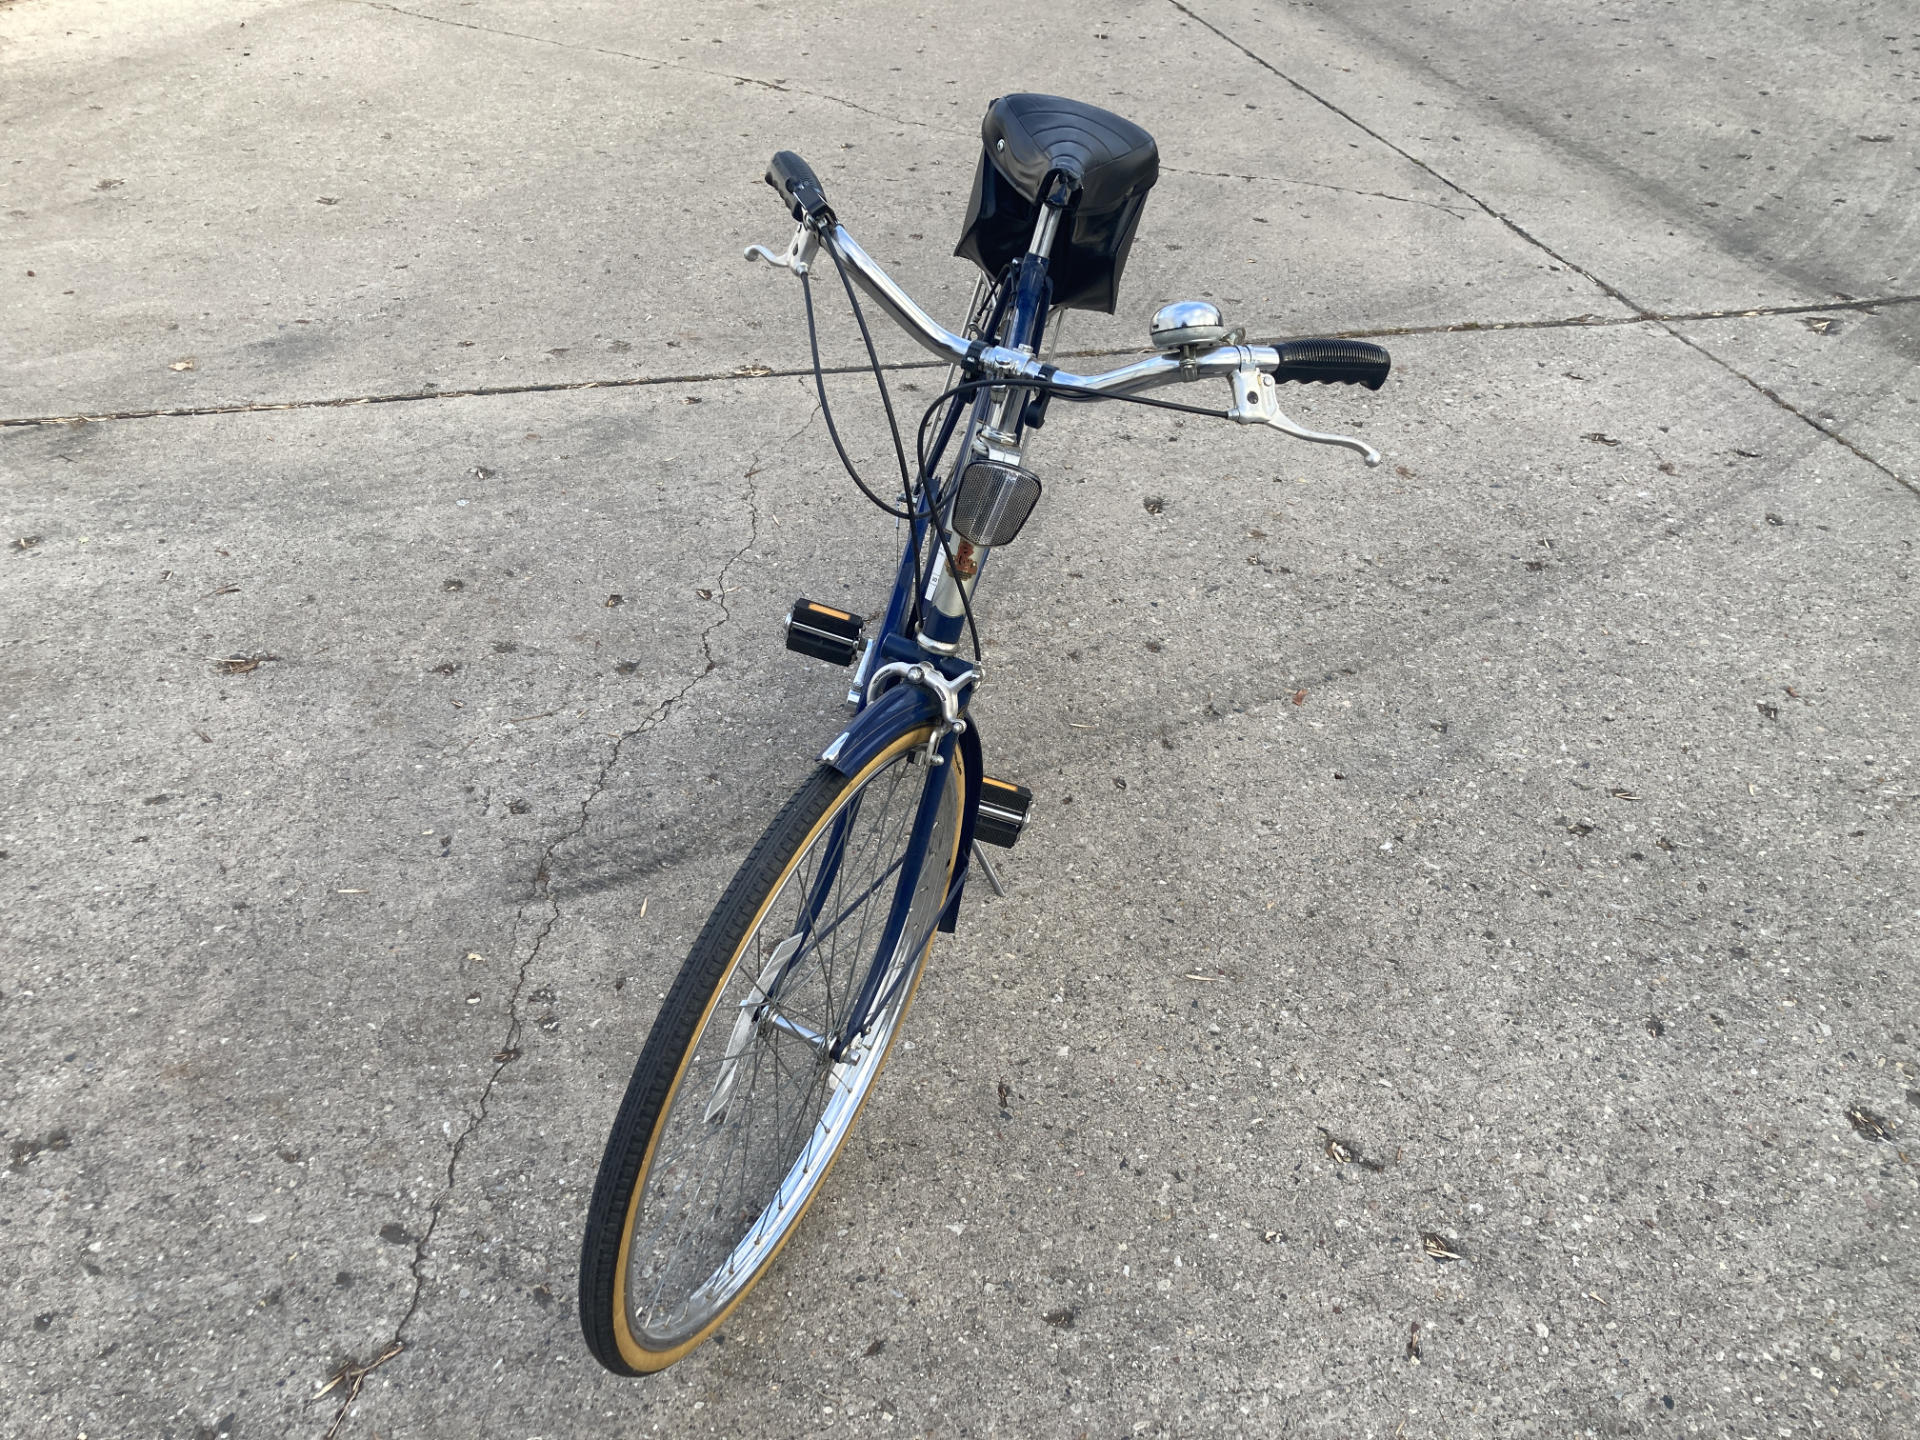
P.S. I put new tires on this bike in 2025!
Keep on pedaling!


