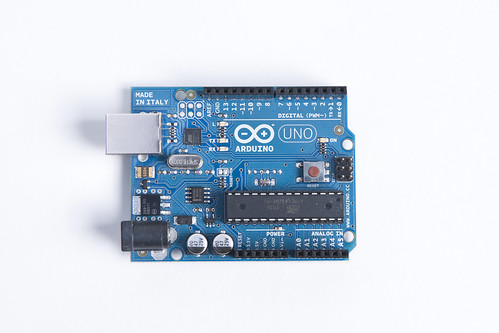
Here’s a terrible photo of an Arduino Uno…
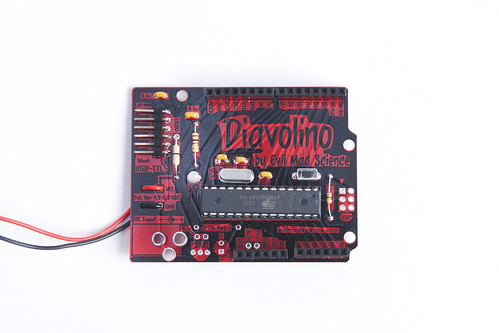
And here’s a terrible photo of a Diavolino…
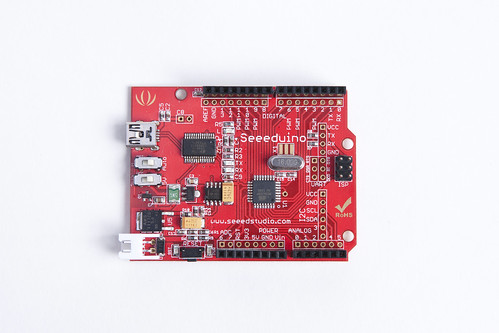
And here’s a terrible photo of a Seeeduino…
These are three terrible photos! I mean, they aren’t terrible terrible, but they’re not great. I could spend a few minutes with each one explaining what I don’t like about them.
We needed a good high resolution photo of an Arduino Uno for a project at the Milwaukee Makerspace, and I said I would quickly snap a photo and get it online, so I did.
I feel like 80% of the quality of these shots are due to the equipment. I used a Nikon D3x with a Nikon 28-70mm f2.8 lens. That’s a great combo. I also used our Elinchrom studio strobes, which are also very nice. I shot tethered to a 21″ Apple iMac, which showed the images on a large colorful screen as they were captured.
Honestly, with all of that stuff in place, anyone familiar with a DSLR and lighting could get a pretty decent shot.
When I use words like “terrible” and “decent” they are, of course, subjective. There’s a whole scale for applying those words. One photographer’s “terrible” is another photographer’s “awesome!”
Besides, these are more “technical” photos than “beautiful” photos. There’s not much style to them. But these also fall under the category of Product Photography, which is worth discussing…
Photography is an interesting thing, because there are so many different disciplines, and so many different subjects. I know some guys who only shoot beautiful women between the age of 18 and 25, outdoors, on sunny days. (Or so it seems.) Other people I know shoot landscapes and nothing but landscapes. Well, HDR landscapes actually. That’s all they do… and that’s all fine, but it’s not product photography.
None of the three photos above would be good examples of product photography, and I’ll explain why:
-
The items are used.
If you’re shooting a product, it should be brand new, fresh out of the box, never used. Used items are not the same as clean items. Do you know why? It’s because…
-
The items are dirty.
Once an item gets used, it gets dirty. It gets worn down. It gets fingerprints, and smudges, and dirt, and scrapes, and doesn’t look very nice. Yes, you can clean things, and we often joke about the fact that 75% of product photography involves cleaning things, while 15% involves taking pictures. The other 10%? That’s for cleaning it again.
There’s also a number of tricks when shooting products, as opposed to portraits, or landscapes, or beautiful women. Don’t get me wrong, each thing has its own tricks, but they are often different tricks. Actually, they mostly have to do with reflecting light, or blocking light, or basically controlling light, in different ways.
But if you aren’t shooting products for a client, but you are shooting things for your own purpose, like documenting projects, you might find it helpful to learn more about product photography.
And when I say learn, feel free to learn in your own way. If you can assist a product photographer, that would be good, but if you can’t, then study good photos, figure out what you like about them. Learn to control light. I’m not ashamed to say that some of the photos of things that I’ve taken that I really liked, I ended up shooting 30 different versions, all with slightly different lighting. That’s just how I do it. Take a shot, move a light. Take a shot, move a reflector. Take a shot, place a black board directly overhead instead of a white board. Take another shot. At some point after you think you have enough shots, stop. Review them later on a large colorful screen and pick the best one.
Trial and error is still an effective way of learning something… In fact, it may be the only way to learn something.


