Categories
Uncategorized

CheerLight Details

CheerLight

The CheerLights folks posted about my build, but at the time I hadn’t been able to provide many details, so I wrote up some details

CheerLights is a fun little project that is powered by ThingSpeak, a service which makes it easy to use Twitter as a control mechanism for the Internet of Things.

CheerLight Innards

Originally I just tossed a few notes up on the Milwaukee Makerspace wiki, but now I’ve got some code on GitHub and a detailed project page for my CheerLight.

CheerLight

Here’s my CheerLight connected to my MacBook Pro, ready to change colors at your command.

(And yes, my project is called "CheerLight" mainly because it consists of just one light. At least that’s the story I’m sticking with.)

Categories
Uncategorized

Arduino + ShiftBrite Light Organ

Arduino ShiftBrite

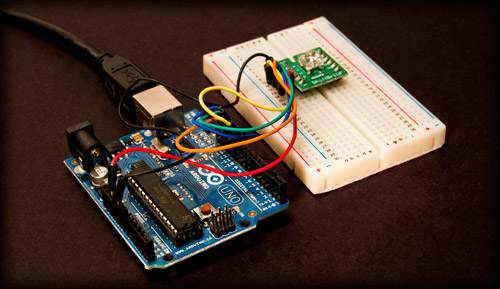
If you liked the last Arduino + ShiftBrite post, but don’t like Perl, here’s a Processing sketch for you… It’s a simple Light Organ that lights up the ShiftBrite in a specific color based on pressing a key.

(Once again we’re using the HughesyShiftBrite library.)

Here’s the code for the Arduino, which is pretty similar to our code from last time:

/*
 * LightOrgan.pde - Arduino
 */

#include "HughesyShiftBrite.h";

HughesyShiftBrite sb;

void setup()
  sb = HughesyShiftBrite(10,11,12,13);
  sb.sendColour(0,0,0);
  Serial.begin(9600);
}

void loop() {

  int input = Serial.read();

  switch (input)  {
  case 48:
    sb.sendColour(0,0,0);
    break;
  case 49:
    sb.sendColour(700,0,0);
    break;
  case 50:
    sb.sendColour(0,700,0);
    break;
  case 51:
    sb.sendColour(0,0,700);
    break;
  case 52:
    sb.sendColour(700,700,0);
    break;
  case 53:
    sb.sendColour(0,700,700);
    break;
  case 54:
    sb.sendColour(700,0,700);
    break;
  case 55:
    sb.sendColour(900,300,300);
    break;
  case 56:
    sb.sendColour(300,900,300);
    break;
  case 57:
    sb.sendColour(300,300,900);
    break;
  }
  delay(5);
}

The only real difference here is the colors we are using…

Once that’s loaded on the Arduino, create a new sketch in Processing with the following code:

/*
 * LightOrganController.pde - Processing
 */

import processing.serial.*;
Serial myPort;

void setup() {
  println(Serial.list());
  myPort = new Serial(this, Serial.list()[0], 9600);
  myPort.buffer(1);
  size(200, 200);
  background(0,0,0);
}

void draw() {
  // nothing needed here
}

void keyPressed() {
  if (int(key) == 48) {
    myPort.write(48);
    fill(0,0,0);
    rect(5,5,190,190);
  }
  else if (int(key) == 49) {
      myPort.write(49);
      fill(200,0,0);
      rect(5,5,190,190);
  }
  else if (int(key) == 50) {
      myPort.write(50);
      fill(0,200,0);
      rect(5,5,190,190);
  }
  else if (int(key) == 51) {
      myPort.write(51);
      fill(0,0,200);
      rect(5,5,190,190);
  }
  else if (int(key) == 52) {
    myPort.write(52);
    fill(200,200,0);
    rect(5,5,190,190);
  }
  else if (int(key) == 53) {
    myPort.write(53);
    fill(0,200,200);
    rect(5,5,190,190);
  }
  else if (int(key) == 54) {
    myPort.write(54);
    fill(200,0,200);
    rect(5,5,190,190);
  }
  else if (int(key) == 55) {
    myPort.write(55);
    fill(250,125,125);
    rect(5,5,190,190);
  }
  else if (int(key) == 56) {
    myPort.write(56);
    fill(125,250,125);
    rect(5,5,190,190);
  }
  else if (int(key) == 57) {
    myPort.write(57);
    fill(125,125,250);
    rect(5,5,190,190);
  }
  else {
    myPort.write(48);
    fill(0,0,0);
    rect(5,5,190,190);
  }
}

When you run the Processing code, it will draw a black box on the screen, and if you press any number between 0 and 9 it will change the color of the box, as well as changing the color of the ShiftBrite.

Colors

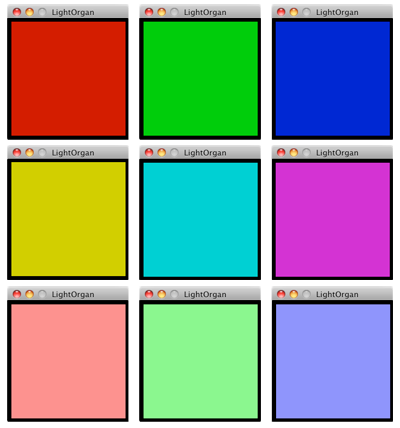
If you’re lucky enough to have a number keypad on your keyboard (I mean, since Apple stopped including that part of the keyboard) you can go nuts hitting all the keys from 1 through 9 (and zero for “off” or black) and put on a nice little light show.

If you don’t care about the on screen display and just want to control the ShiftBrite, here’s some simpler code:

import processing.serial.*;
Serial myPort;

void setup() {
  println(Serial.list());
  myPort = new Serial(this, Serial.list()[0], 9600);
  myPort.buffer(1);
}

void draw() {
  // nothing needed here
}

void keyPressed() {
  if ((int(key) > 47) & (int(key) < 58)) {
      myPort.write(int(key));
  }
  else {
    myPort.write(48);
  }
}

Since we don’t need to draw anything based on the key pressed, we just look for a key between 0 and 9 and send it over the serial port.

Disclaimer: This code is probably pretty damn basic, but I’m a fan of documenting the process, and I’m still learning (and having fun!) and I hope someone finds it useful. If you’ve got suggestions or improvements, let me know… thanks!

(Thanks for reading this. If you’re reading it on Facebook or Google Reader or somewhere else it got syndicated to, consider visiting the original post, especially if you’d like to leave a comment.)

Categories
Uncategorized

Perl + Arduino (+ ShiftBrite)

ShiftBrite

Back when I revealed the Twitter Monkey I had a dark secret… I got the Perl script to work, but just barely, and I really didn’t grok exactly how the code worked. I was just thankful MCQN Ltd. published the Alertuino code for me to get started.

I’m happy to say that I’ve made some good progress in getting Perl and the Arduino to talk to each other, and if you keep reading, you’ll see what I’ve got so far.

I’ll be using a ShiftBrite from macetech for this example. You can buy direct for $4.99, get them from Adafruit for $5.00 or use your #freeday money to get one from Sparkfun.

ShiftBrite

To connect the ShiftBrite, you just run it’s GND to the GND on the Arduino, the V+ to the 5V on the Arduino, and the run DI, LI, CI, EI to digital pins 10, 11, 12, 13 respectively, on the Arduino. Just 6 wires… pretty simple.

Once again, I stand on the shoulders of others… a hacker named Ashley Hughes wrote a post titled ShiftBrites and the Arduino and provided a library named shiftbritehughesyarduino. Grab it and drop it in your Arduino/libraries folder before we get started.

The library makes it pretty easy to send a color to the ShiftBrite using a command like this:

sb.sendColour(200,400,600);

Where the colors are in R,G,B value. Though the scale is not 0-255, or 0-100, but 0-1023. I’m not great at math, so I’m going to use the 0-100 scale and just multiply by 10. So for the line above we’d be sending a RED value of 200, a GREEN value of 400, and a BLUE value of 600.

Here’s the code for the Arduino:

/*
 * ShiftBrite.pde
 */

#include "HughesyShiftBrite.h";

HughesyShiftBrite sb;

void setup() {
  sb = HughesyShiftBrite(10,11,12,13);
  sb.sendColour(10,10,10);
  Serial.begin(9600);
}

void loop() {

  int input = Serial.read();

  switch (input) {
  case 48:
    sb.sendColour(0,0,100);
    break;
  case 49:
    sb.sendColour(0,0,200);
    break;
  case 50:
    sb.sendColour(0,0,400);
    break;
  case 51:
    sb.sendColour(0,0,600);
    break;
  case 52:
    sb.sendColour(0,400,0);
    break;
  case 53:
    sb.sendColour(0,600,0);
    break;
  case 54:
    sb.sendColour(0,800,0);
    break;
  case 55:
    sb.sendColour(600,0,0);
    break;
  case 56:
    sb.sendColour(800,0,0);
    break;
  case 57:
    sb.sendColour(1000,0,0);
    break;
  }
  delay(5);
}

See all those “case” commands followed by numbers? They are looking for the ASCII code being sent from the serial port. Don’t have an ASCII chart handy? Look at this simple one and you’ll see that the decimal value for 0 is 48, for 1 is 49, etc. So our case statements are looking for anything between 0 and 9, which is a nice scale to use.

OK, if you’ve uploaded the code, you should see the ShiftBrite lit up, since the initialization sent this:

  sb.sendColour(10,10,10);

The code on the Arduino is now listening to the serial port waiting for some input. The input should be a number between 0 and 9. We should probably send it some numbers… that’s where Perl comes in:

#!/usr/bin/perl
#
# sendserial.pl
#

use Device::SerialPort;

my $port = Device::SerialPort->new("/dev/tty.usbmodem1d21");
$port->databits(8);
$port->baudrate(9600);
$port->parity("none");
$port->stopbits(1);

sleep(3);

for ($i = 0; $i <= 9; $i++) {
	print $i . "\n";
	$port->write("$i");
	sleep(1);
}

exit;

This is the shortest, simplest example I’ve got. You’ll obviously need the Device::SerialPort module installed. If you’ve written anything in Perl (or other languages) this should make some sense. We’re connecting to the serial port (/dev/tty.usbmodem1d21) and sending characters (0 through 9) to it, as well as printing them to the console so you can see them.

When you run the Perl script you should see the ShiftBrite light up and change about once per second, cycling through various levels of blue, green, and red.

Note: We got the port /dev/tty.usbmodem1d21 from the Arduino IDE (though I’ll show you another way to get it) and the sleep command is in there to give things time to initialize. I’ve found that without it, the serial port communication may miss the first commands.

ShiftBrite: Red, Green, Blue

Gotchas: The serial port may change. Mine is ‘/dev/tty.usbmodem1d21′ but it will be different on different machines, and may even change after a reboot. We’ll have a fix for that next time. The other gotcha is that when the Perl script is running, it’s using the serial port, so if you try to upload a new sketch to the Arduino, you will get an error. Since this script only runs for about 13 seconds, you probably won’t hit that problem here… for scripts that loop, you probably will.

I hope that wasn’t too complex. In theory, you could write the Perl part using Ruby, Python, or any scripting language that can do serial communications. In the future I’d like to try to use seriality to see if I can do it via HTML/JavaScript.

In a future installment I’ll have a complete project using all the bits we just covered…. stay tuned!

See Also: Arduino + ShiftBrite Light Organ